
1F95W-80 specifications
The White Rodgers 1F95W-80 is a programmable thermostat designed to enhance home comfort while optimizing energy efficiency. This device stands out due to its user-friendly interface and advanced features, making it a popular choice for homeowners seeking reliable temperature control.One of the most notable features of the 1F95W-80 is its 7-day programmable schedule. Users can easily set different heating and cooling schedules for each day of the week, allowing for tailored climate control that aligns perfectly with their routines. This feature not only improves comfort but also helps in reducing energy consumption, as users can program the thermostat to lower temperatures when they are away from home or sleeping.
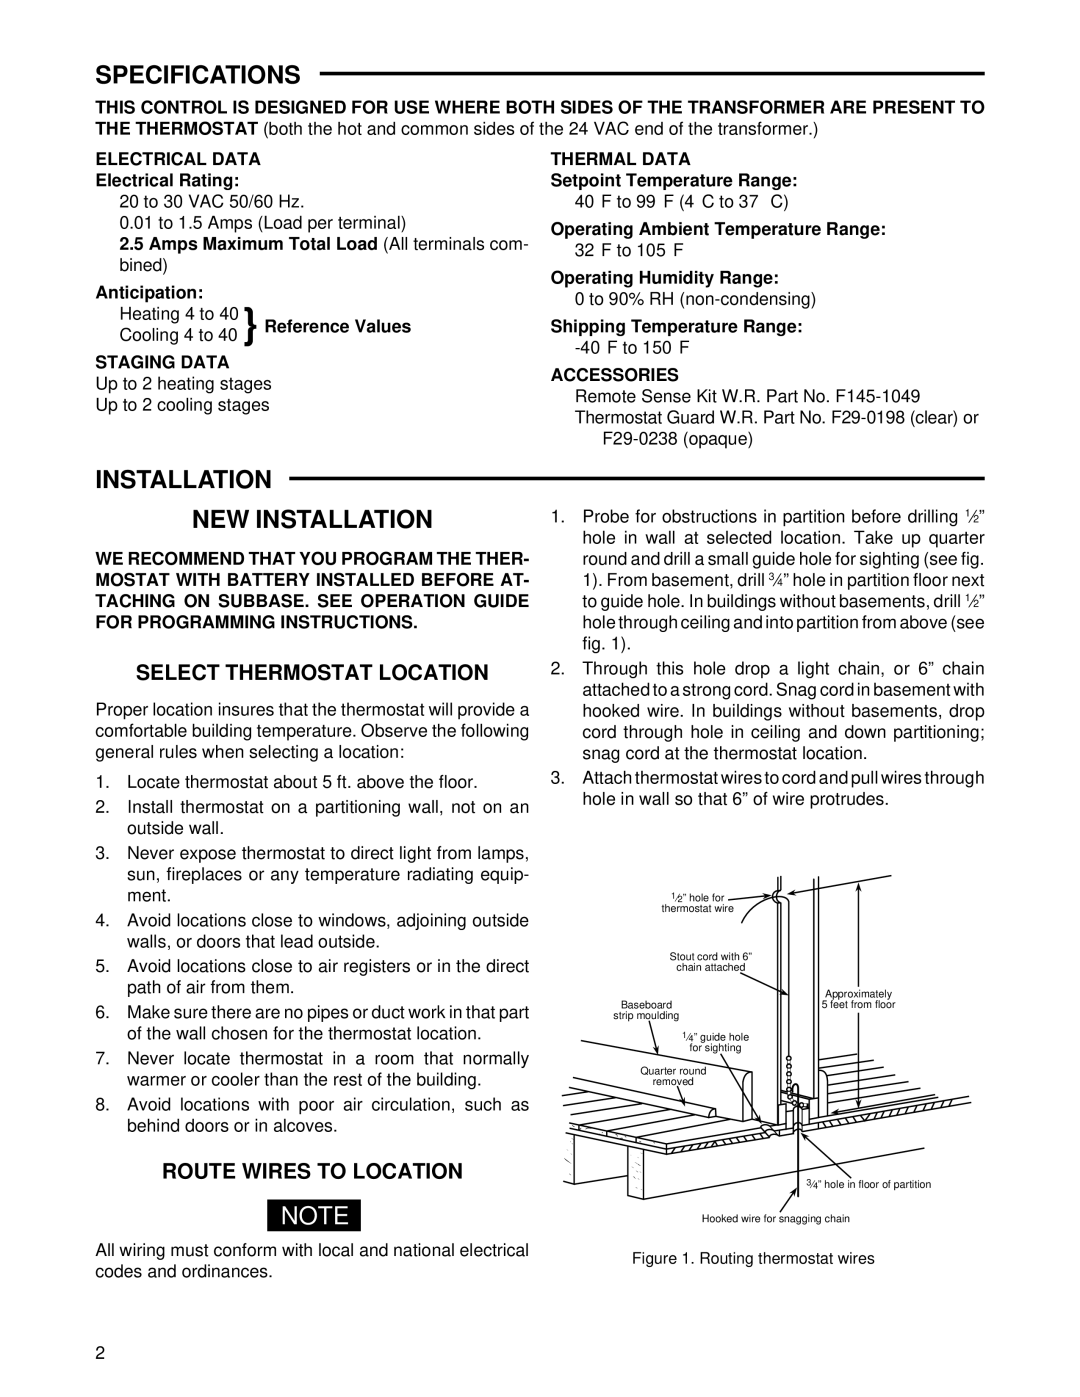
The thermostat uses a large, easy-to-read LCD display that provides clear information at a glance. The touchscreen interface simplifies navigation, allowing users to make adjustments quickly and efficiently. Additionally, the backlit display makes it easy to read in low light conditions, ensuring that temperature adjustments can be made regardless of the time of day.
In terms of technologies, the 1F95W-80 is equipped with Smart Recovery functionality. This innovative feature learns the time it takes to heat or cool a space and adjusts the temperature accordingly, ensuring that the desired comfort level is reached by the programmed time. This proactive approach helps to enhance energy savings while maintaining optimal comfort.
Another significant characteristic of the 1F95W-80 is its compatibility with a variety of HVAC systems. It is designed to work with multi-stage heating and cooling systems, including heat pumps, forced air systems, and even some electric baseboards. This versatility makes it an ideal choice for different types of homes and setups.
Furthermore, the thermostat includes features such as an adjustable temperature swing, which allows users to set their desired level of temperature variance before the system kicks in, as well as a filter change reminder that helps maintain HVAC system efficiency.
Overall, the White Rodgers 1F95W-80 combines practicality and innovation, making it a smart investment for those looking to enhance their home's heating and cooling experience while simultaneously managing energy costs. With its array of features and user-friendly design, it stands as a reliable option in the ever-evolving landscape of home climate control solutions.