
F145RF-1600 specifications
The White Rodgers F145RF-1600 is a premier thermostat designed primarily for residential heating, ventilation, and air conditioning (HVAC) systems. This model stands out due to its reliable performance, user-friendly interface, and advanced features that cater to modern households.One of the key characteristics of the F145RF-1600 is its versatility. It is compatible with a wide range of HVAC systems, including single-stage and multi-stage heating and cooling units. This flexibility allows homeowners to easily integrate the thermostat into their existing systems without the need for extensive modifications. Additionally, it supports both gas and electric applications, further enhancing its adaptability.
The F145RF-1600 also features a user-friendly digital display that provides clear and concise information at a glance. The backlit screen ensures visibility in various lighting conditions, making it easy for users to set and monitor their desired temperatures, even in dimly lit rooms. The intuitive interface allows for straightforward programming, minimizing the learning curve for those who may not be tech-savvy.
Energy efficiency is another hallmark of the F145RF-1600. With its advanced programming capabilities, users can set different temperatures for various times of the day, optimizing energy consumption and reducing utility bills. The thermostat includes a hold feature that maintains a set temperature for an extended period, ideal for when homeowners are away for extended periods.
Additionally, the F145RF-1600 incorporates advanced technology to enhance comfort and convenience. It often includes a Smart Recovery feature that learns how long it takes to reach a desired temperature, allowing it to start heating or cooling early for optimal comfort. Some models may also include Wi-Fi capability, enabling remote access and control through a smartphone app.
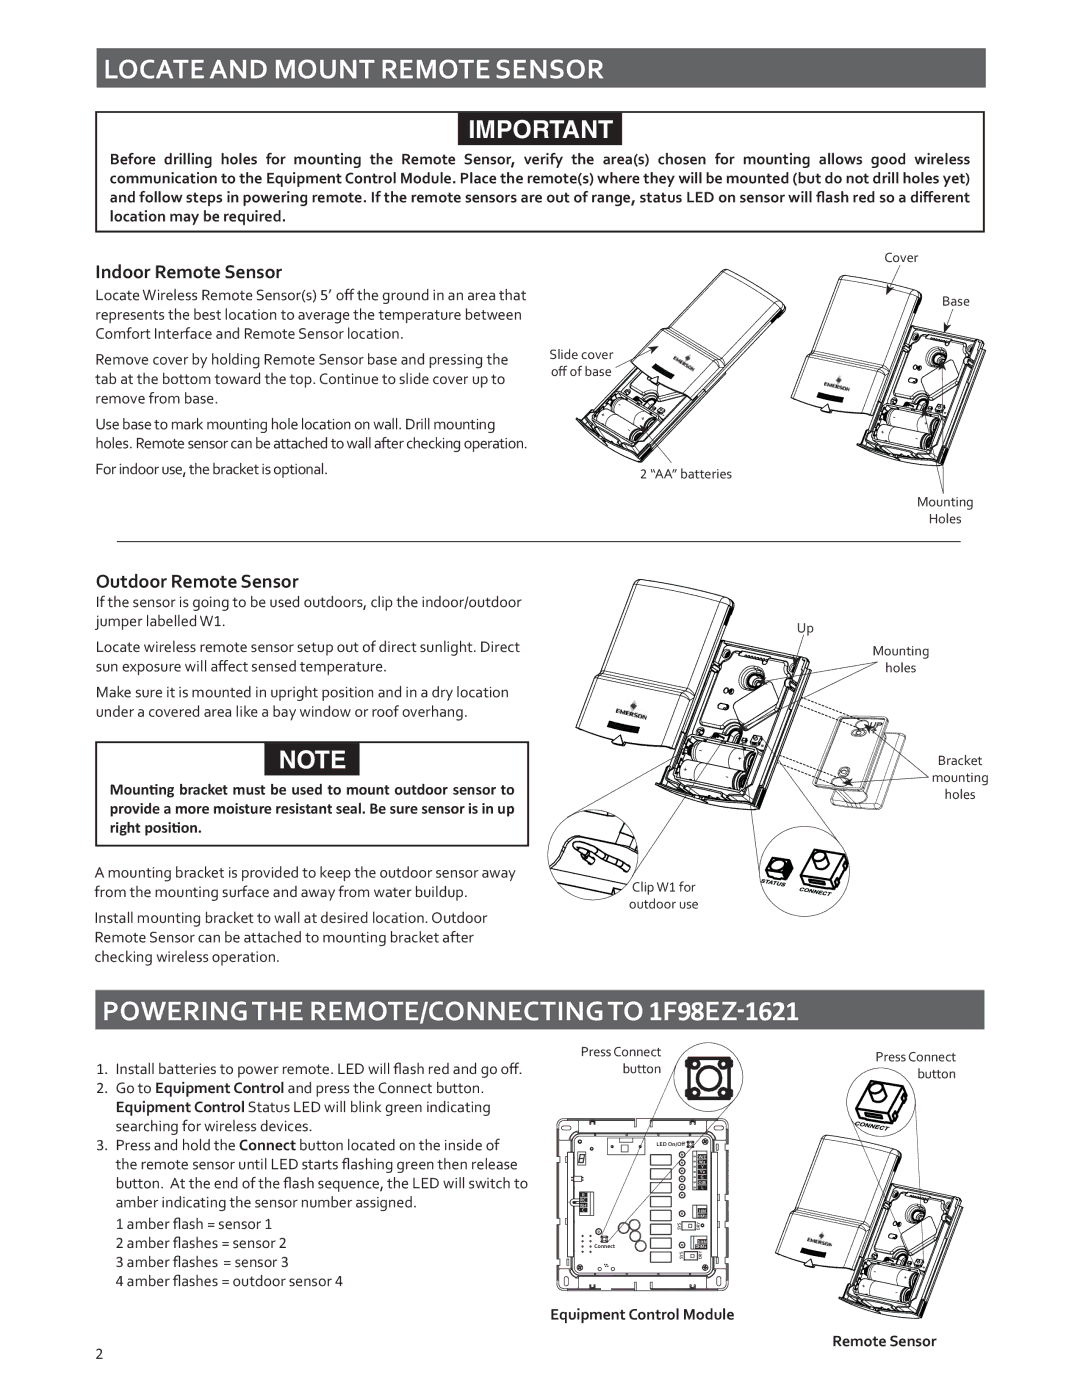
In terms of installation, the White Rodgers F145RF-1600 is designed for simple setup, complete with clear instructions. This allows homeowners to take control of their indoor climate without needing to hire a professional, although professional installation is always an option for those who prefer it.
Overall, the White Rodgers F145RF-1600 combines practical features with innovative technology, making it a valuable addition to any residential HVAC system. Its focus on ease of use, energy efficiency, and adaptability continues to make it a popular choice among homeowners seeking to enhance their home’s comfort and efficiency.