
Type 1E56, 1.00E+56 specifications
White Rodgers 1.00E+56, Type 1E56, is a state-of-the-art thermostat designed for residential and light commercial use. This advanced device brings together user-friendly controls with intelligent features aimed at enhancing energy efficiency and comfort in indoor environments. The White Rodgers brand, a trusted name in HVAC controls and thermostatic technologies, has developed the 1.00E+56 thermostat to meet the needs of modern homes.One of the standout features of the Type 1E56 is its easy-to-use interface. The unit is equipped with a large, backlit display that clearly shows the current temperature and settings, making it easy for users to read and adjust at any time of day or night. The intuitive buttons allow for convenient navigation through different modes, from heating to cooling, with just a few simple clicks.
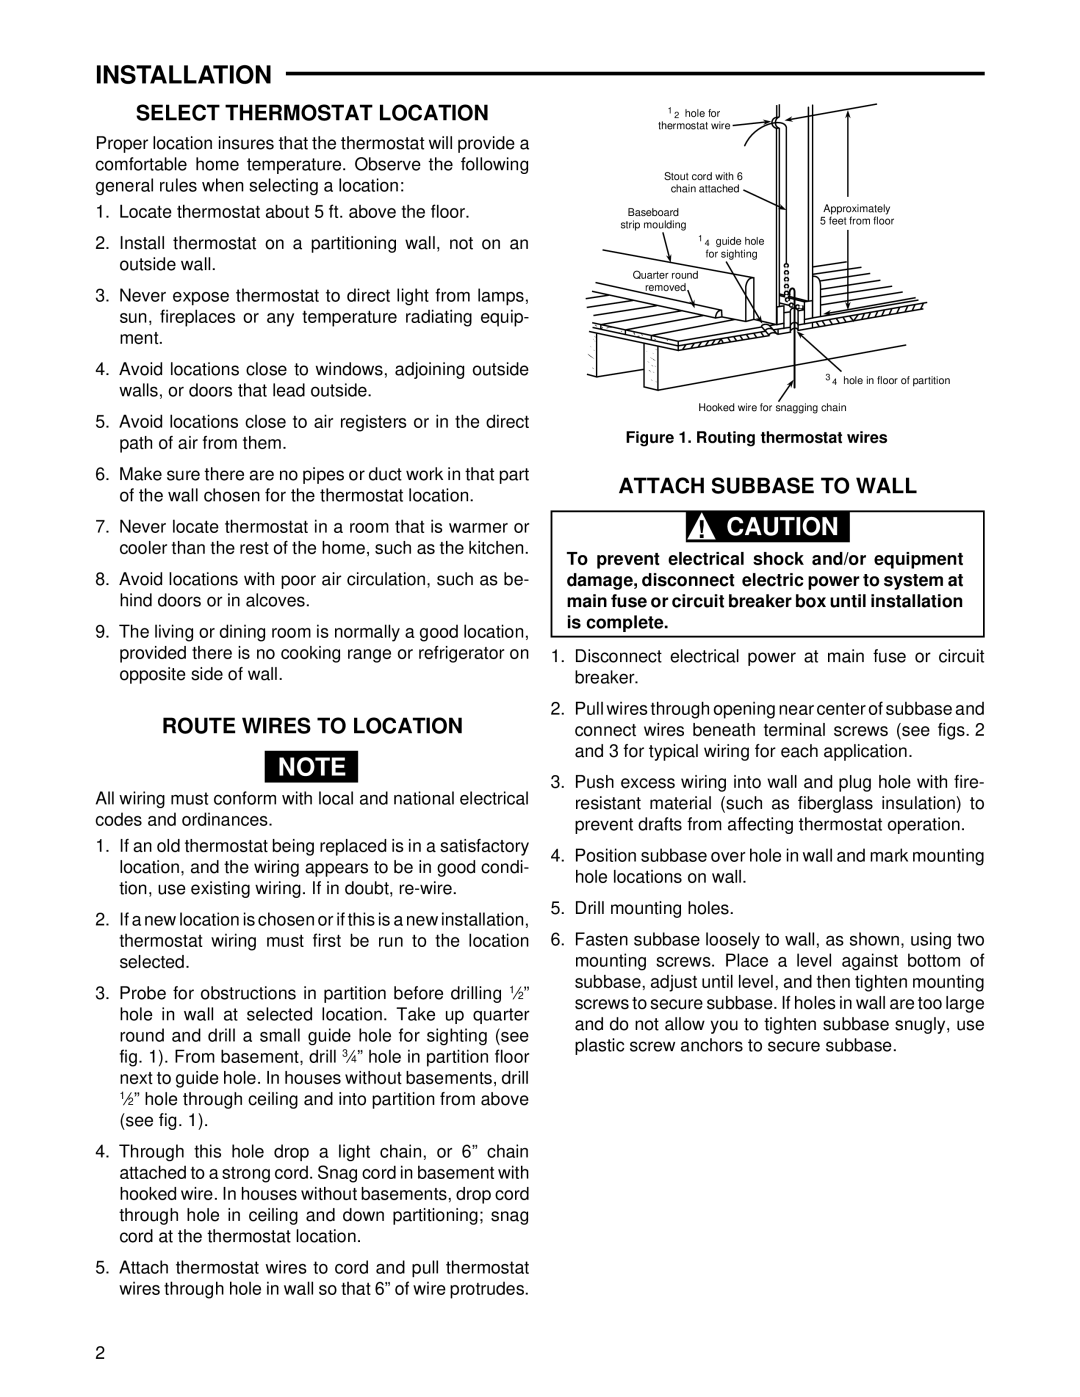
The thermostat incorporates advanced programming capabilities, enabling homeowners to set customized schedules that align with their daily routines. With the ability to program multiple time periods throughout the day and week, users can ensure optimal comfort while also minimizing energy consumption. Moreover, the 1E56 supports both 5-2 day programming, which allows different settings for weekdays and weekends, making it a versatile choice for those with varied schedules.
In terms of technology, the White Rodgers 1.00E+56 utilizes precise digital sensing and control, delivering consistent temperature regulation. The unit is compatible with a range of heating and cooling systems, including gas, electric, and heat pump systems, providing flexibility for various HVAC setups. Additionally, features such as adjustable temperature differentials help maintain desired comfort levels while avoiding energy waste.
Compatibility with smart home systems is another advantage of the Type 1E56. While it is primarily a standalone unit, its ease of integration with existing smart technology adds to its appeal for tech-savvy users seeking to enhance their home automation setup.
Durability is another hallmark of the 1.00E+56. Engineered with high-quality materials, this thermostat not only ensures long-lasting performance but also incorporates safety features to prevent overheating and electrical issues.
In conclusion, the White Rodgers 1.00E+56, Type 1E56, combines ease of use, customizable programming, advanced technology, and compatibility with various HVAC systems to deliver an efficient and user-friendly temperature control solution. Its robust features make it an excellent choice for homeowners looking to optimize their indoor climate while maintaining energy efficiency.