D4088 Lathe Attachment Instructions
Operations
Follow all safety precautions in your drill press Owner's Manual and these instructions.
To use the drill press lathe attachment, do these steps:
1.Put on safety glasses, a face shield, and tie back loose clothing and hair.
2.DISCONNECT DRILL PRESS FROM POWER!
3.Install the required driving center into the upper end of the workpiece:
—If the workpiece diameter is 3⁄4" or less, thread in the screw center.
—If the workpiece diameter is
—If the workpiece diameter is
4.Place the workpiece pilot hole onto the live center tip, and hold the workpiece in place.
5.Without losing spindle alignment, crank the table up so the drive center shank enters the chuck and the live center seats in the pilot hole.
6.Clamp the drive center shank with the chuck, lock the table into position and make sure all fasteners are tight.
Feeding the tip of the chisel into the workpiece at too sharp of an angle will cause the chisel to dig into the workpiece, which may eject the chisel or workpiece and cause severe injury. Always keep the chisel perpendicular to the workpiece so it drags across the workpiece rather than digging in.
9.Tightly hold the chisel, and position the chisel against the tool rest (see Figure 6).
Hand and Chisel
Position for
Cutting Control
and Safety
Figure 6. Hand and chisel positioning.
10.Hold the chisel tightly so it is perpendicular to the workpiece, and slowly feed it into the workpiece.
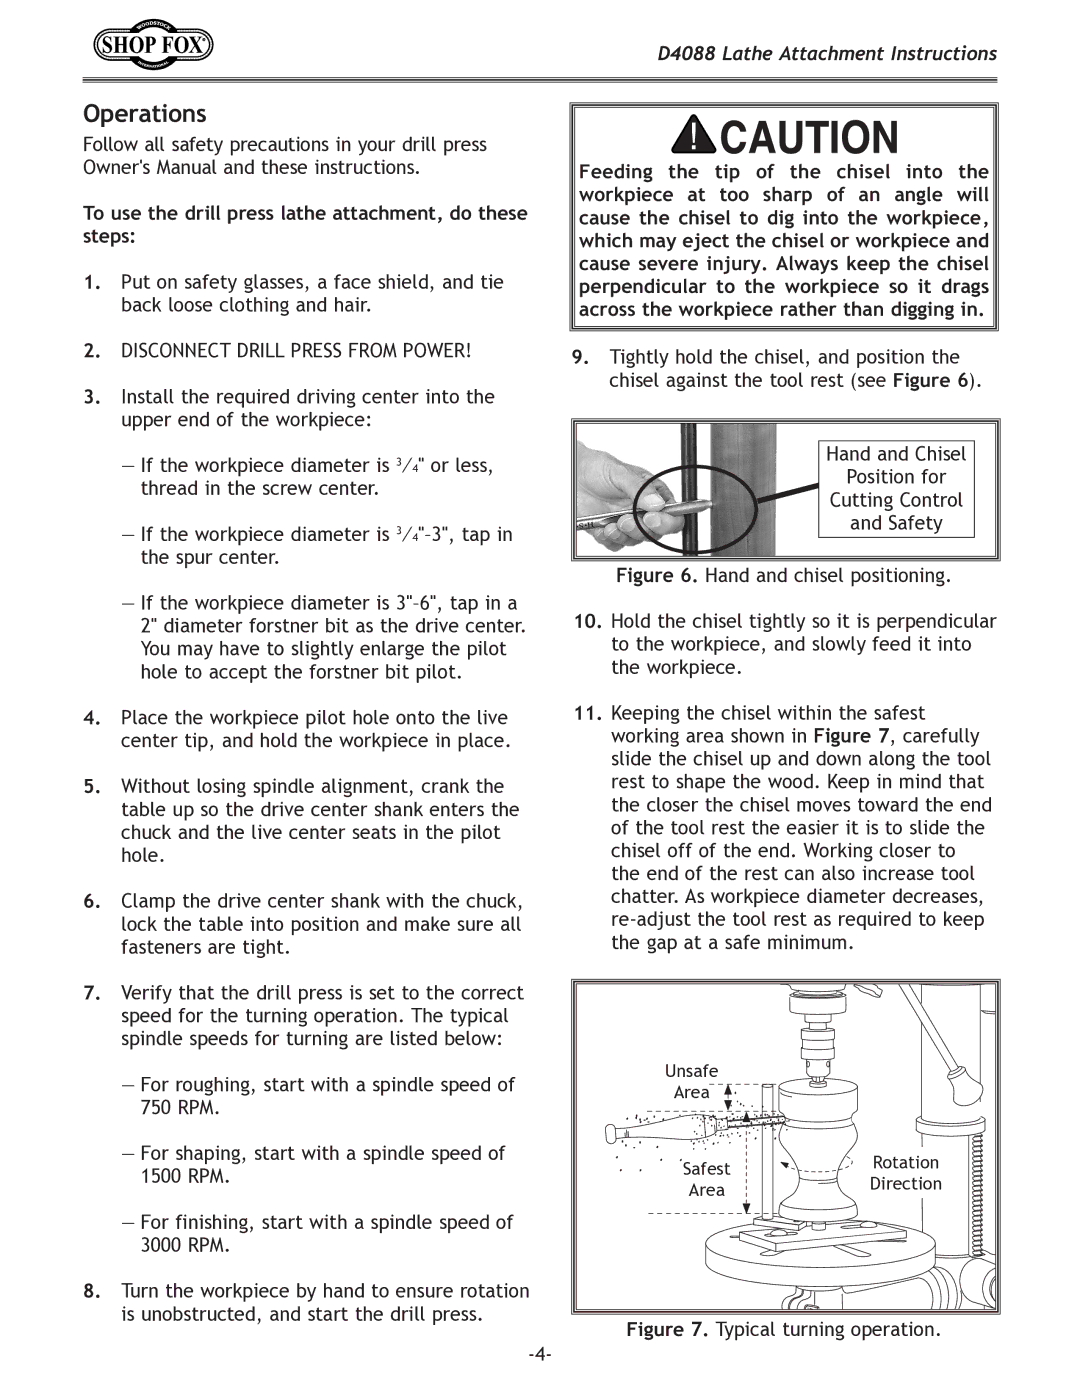
11.Keeping the chisel within the safest working area shown in Figure 7, carefully slide the chisel up and down along the tool rest to shape the wood. Keep in mind that the closer the chisel moves toward the end of the tool rest the easier it is to slide the chisel off of the end. Working closer to the end of the rest can also increase tool chatter. As workpiece diameter decreases, re-adjust the tool rest as required to keep the gap at a safe minimum.
7.Verify that the drill press is set to the correct speed for the turning operation. The typical spindle speeds for turning are listed below:
—For roughing, start with a spindle speed of 750 RPM.
—For shaping, start with a spindle speed of 1500 RPM.
—For finishing, start with a spindle speed of 3000 RPM.
8.Turn the workpiece by hand to ensure rotation is unobstructed, and start the drill press.
Unsafe |
| |
Area |
| |
Safest | Rotation | |
Direction | ||
Area | ||
|