-14-
M1014 7" x 12" Metal Cutting Bandsaw
SET UP
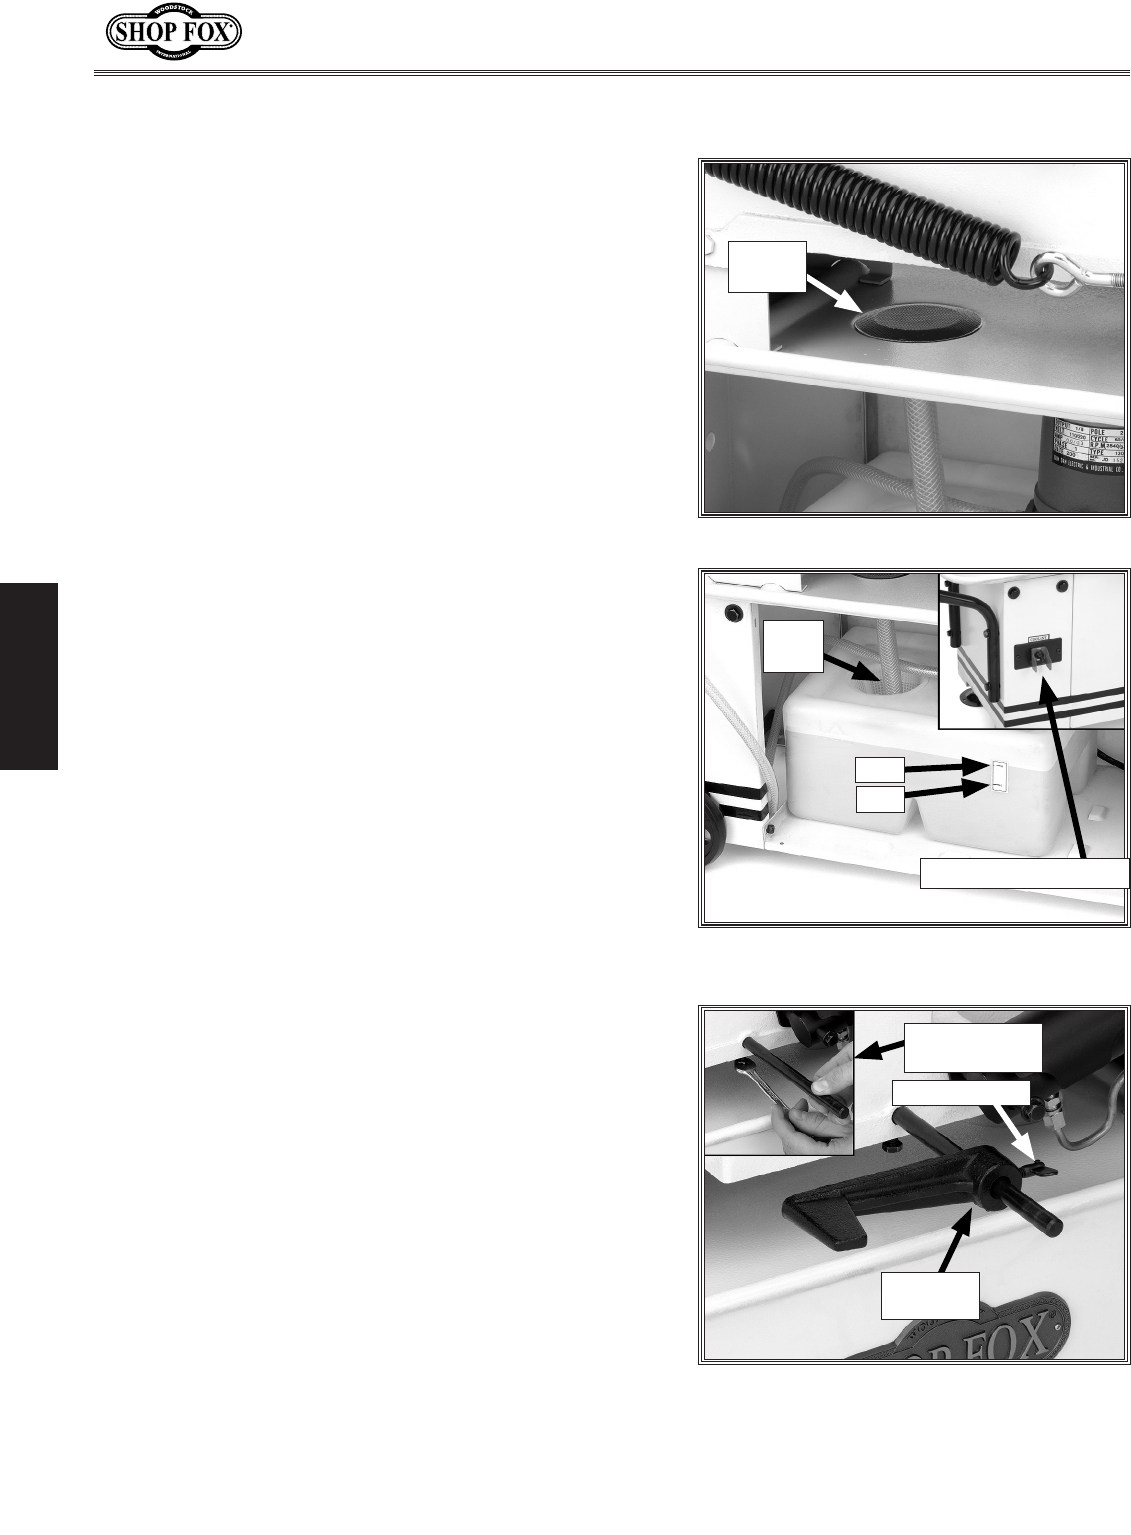
Cutting Fluid SystemFigure 15. Installed drain screen.
Figure 16. Correctly filled tank ready to
be pumped.
Figure 17. Installing the cast iron stop.
This bandsaw has a built-in cutting fluid system that
prolongs the life of your bandsaw blades and produces
smoother cuts at a lower temperature. Refer to Cutting
Fluid on Page 26 for fluid choice and safety precautions.
To set up the cutting fluid system, do these steps:
1. Place the filter screen dome-side up as shown in
Figure 15 in the bandsaw catch pan.
2. Inspect and remove any foreign material that may
have fallen inside the reservoir during shipping.
3. Make sure the drain tube points toward the reservoir
intake screen, and that all tube connections are
tight and will not leak (see Figure 16).
4. Make sure the waterproof rubber switch boot is
installed on the pump ON/OFF toggle switch (Figure
16), and that the toggle switch is in the down
position.
Note: DO NOT plug in the bandsaw at this time
to prime the pump. Priming will be done in the
Operations section.
5. Fill the reservoir with 2-1/2 gallons of your chosen
cutting fluid solution.
NOTICE: NEVER operate the pump with the reservoir
below the low mark (Figure 16), or the pump
can be destroyed!
Cast Iron StopThe cast iron stop allows you to repeat many cuts at the
same length.
To install the cast iron stop, do these steps:
1. Insert the stop rod approximately 3/4" into the saw
until the end of the rod is just flush with the inside
casting surface (see Figure 17).
2. Use a 12mm wrench, and tighten the hex bolt (see
Figure 17).
3. Slide the cast iron stop onto the stop rod and
tighten the thumb screw.
Filter
Screen
Pump Toggle Switch
Drain
Tube
High
Low
Stop Rod
and Hex Bolt
Cast Iron
Stop
Thumbscrew