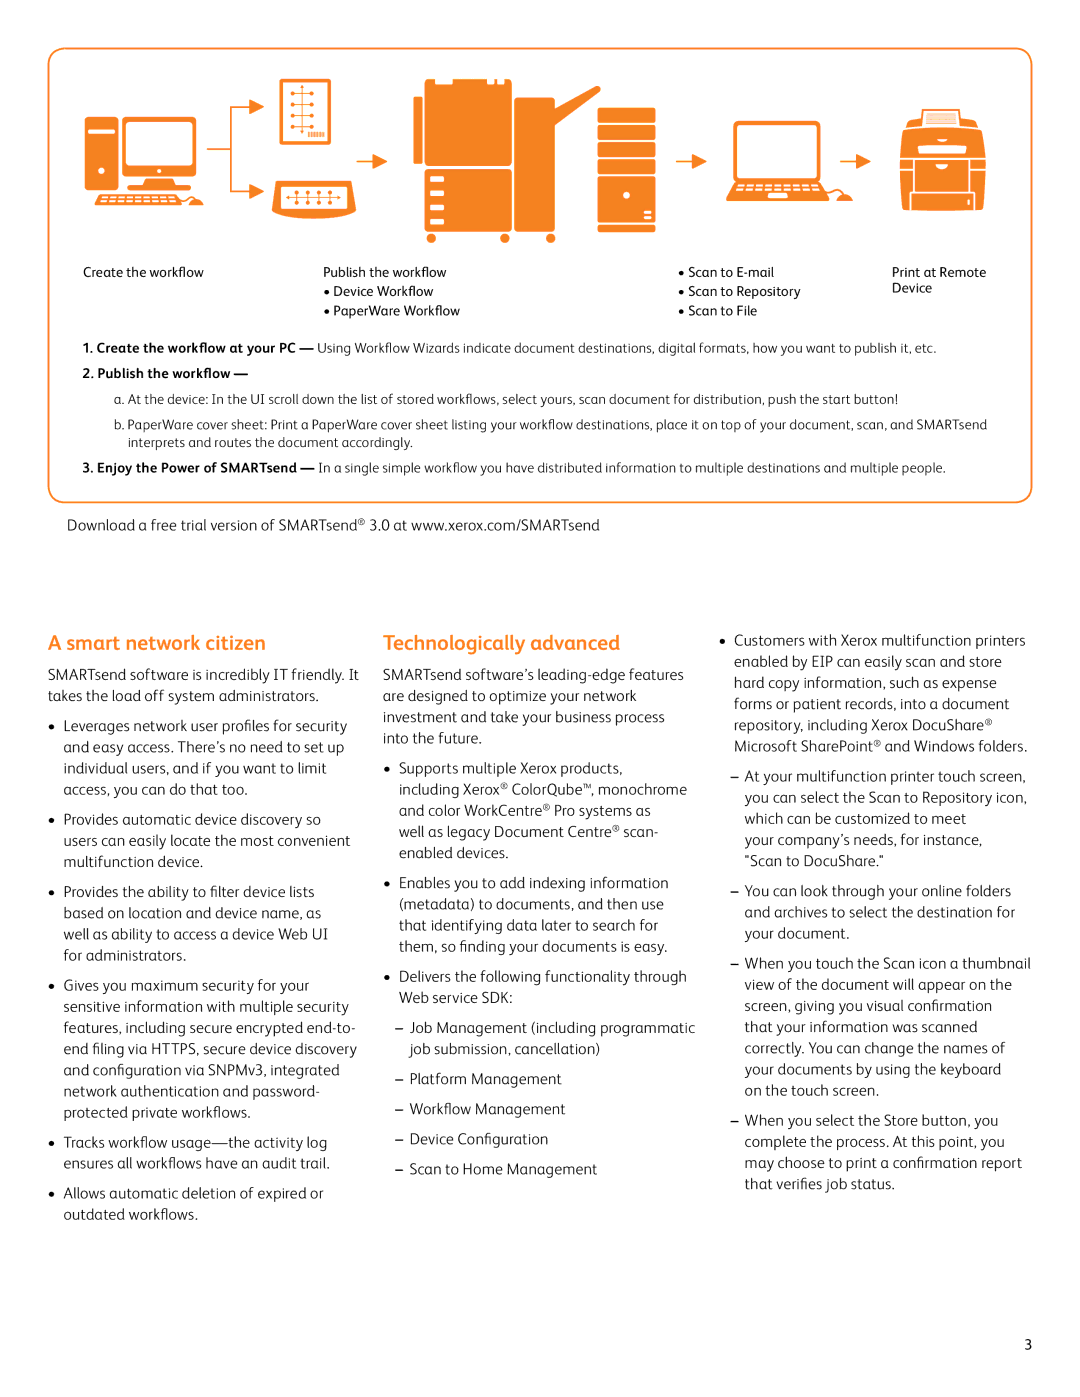
Create the workflow | Publish the workflow | • Scan to | Print at Remote |
| • Device Workflow | • Scan to Repository | Device |
| • PaperWare Workflow | • Scan to File |
|
1.Create the workflow at your PC — Using Workflow Wizards indicate document destinations, digital formats, how you want to publish it, etc.
2.Publish the workflow —
a.At the device: In the UI scroll down the list of stored workflows, select yours, scan document for distribution, push the start button!
b.PaperWare cover sheet: Print a PaperWare cover sheet listing your workflow destinations, place it on top of your document, scan, and SMARTsend interprets and routes the document accordingly.
3.Enjoy the Power of SMARTsend — In a single simple workflow you have distributed information to multiple destinations and multiple people.
Download a free trial version of SMARTsend® 3.0 at www.xerox.com/SMARTsend
A smart network citizen
SMARTsend software is incredibly IT friendly. It takes the load off system administrators.
•Leverages network user profiles for security and easy access. There’s no need to set up individual users, and if you want to limit access, you can do that too.
•Provides automatic device discovery so users can easily locate the most convenient multifunction device.
•Provides the ability to filter device lists based on location and device name, as well as ability to access a device Web UI for administrators.
•Gives you maximum security for your sensitive information with multiple security features, including secure encrypted
•Tracks workflow
•Allows automatic deletion of expired or outdated workflows.
Technologically advanced
SMARTsend software’s
•Supports multiple Xerox products, including Xerox® ColorQube™, monochrome and color WorkCentre® Pro systems as well as legacy Document Centre® scan- enabled devices.
•Enables you to add indexing information (metadata) to documents, and then use that identifying data later to search for them, so finding your documents is easy.
•Delivers the following functionality through Web service SDK:
•Customers with Xerox multifunction printers enabled by EIP can easily scan and store hard copy information, such as expense forms or patient records, into a document repository, including Xerox DocuShare®
Microsoft SharePoint® and Windows folders.
your company’s needs, for instance, "Scan to DocuShare."
3
