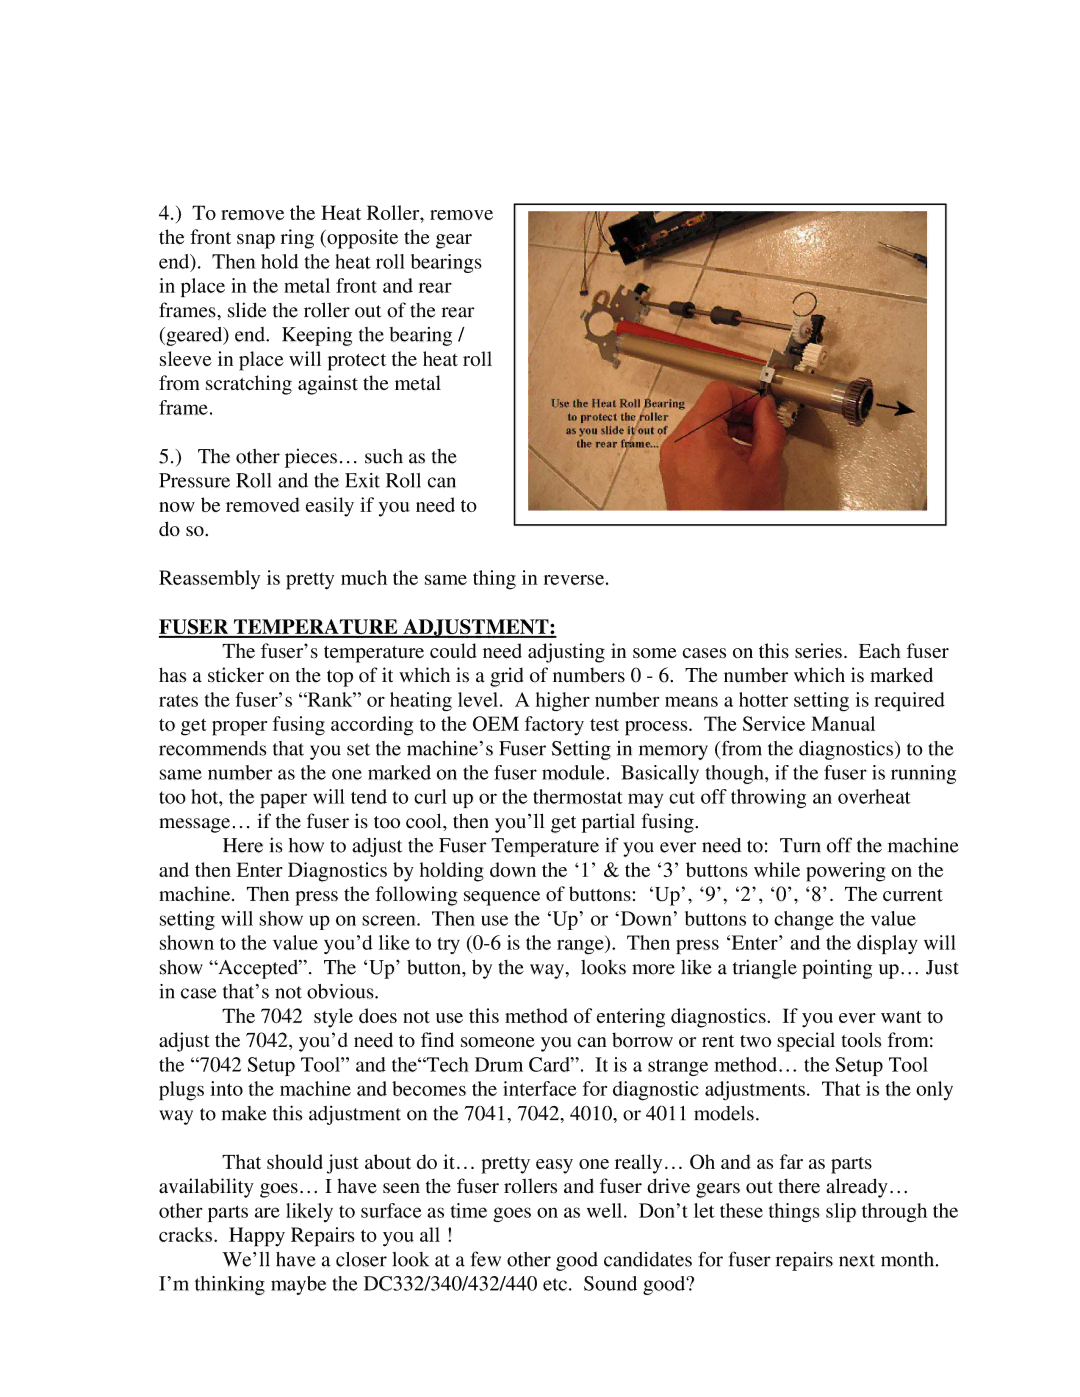
4.) To remove the Heat Roller, remove the front snap ring (opposite the gear end). Then hold the heat roll bearings in place in the metal front and rear frames, slide the roller out of the rear (geared) end. Keeping the bearing / sleeve in place will protect the heat roll from scratching against the metal frame.
5.) The other pieces… such as the Pressure Roll and the Exit Roll can now be removed easily if you need to do so.
Reassembly is pretty much the same thing in reverse.
FUSER TEMPERATURE ADJUSTMENT:
The fuser’s temperature could need adjusting in some cases on this series. Each fuser has a sticker on the top of it which is a grid of numbers 0 - 6. The number which is marked rates the fuser’s “Rank” or heating level. A higher number means a hotter setting is required to get proper fusing according to the OEM factory test process. The Service Manual recommends that you set the machine’s Fuser Setting in memory (from the diagnostics) to the same number as the one marked on the fuser module. Basically though, if the fuser is running too hot, the paper will tend to curl up or the thermostat may cut off throwing an overheat message… if the fuser is too cool, then you’ll get partial fusing.
Here is how to adjust the Fuser Temperature if you ever need to: Turn off the machine and then Enter Diagnostics by holding down the ‘1’ & the ‘3’ buttons while powering on the machine. Then press the following sequence of buttons: ‘Up’, ‘9’, ‘2’, ‘0’, ‘8’. The current setting will show up on screen. Then use the ‘Up’ or ‘Down’ buttons to change the value shown to the value you’d like to try
The 7042 style does not use this method of entering diagnostics. If you ever want to adjust the 7042, you’d need to find someone you can borrow or rent two special tools from: the “7042 Setup Tool” and the“Tech Drum Card”. It is a strange method… the Setup Tool plugs into the machine and becomes the interface for diagnostic adjustments. That is the only way to make this adjustment on the 7041, 7042, 4010, or 4011 models.
That should just about do it… pretty easy one really… Oh and as far as parts availability goes… I have seen the fuser rollers and fuser drive gears out there already… other parts are likely to surface as time goes on as well. Don’t let these things slip through the cracks. Happy Repairs to you all !
We’ll have a closer look at a few other good candidates for fuser repairs next month. I’m thinking maybe the DC332/340/432/440 etc. Sound good?