⬛Mounting the rear speakers
1
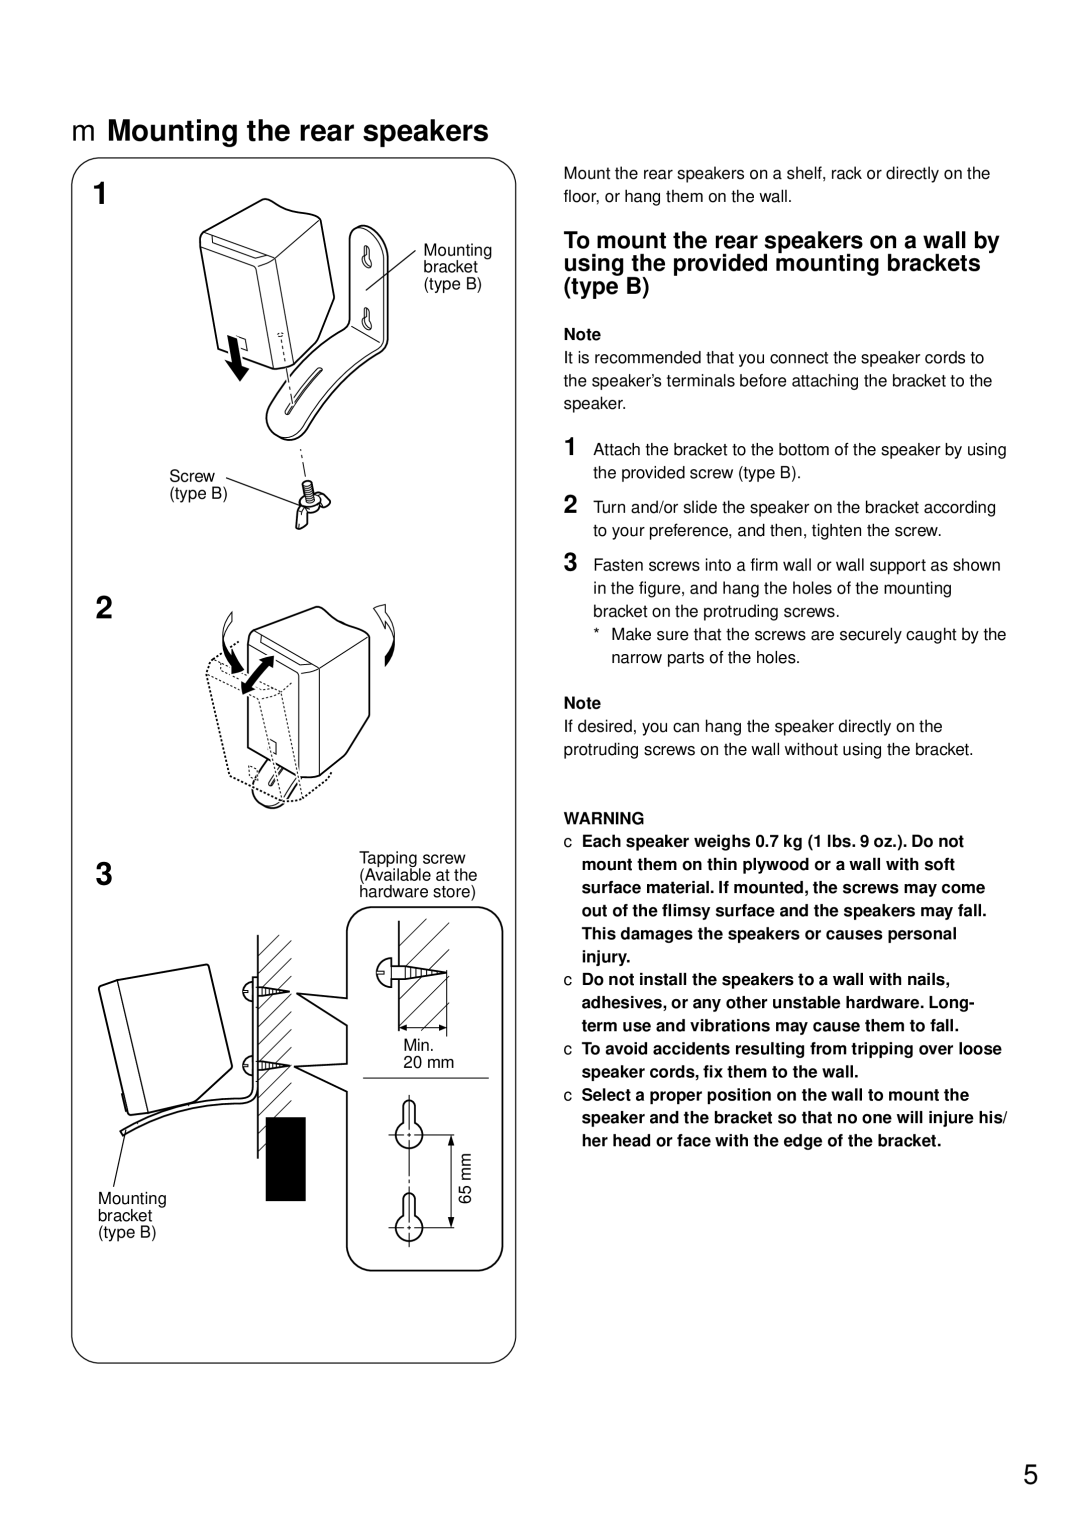
Mounting bracket (type B)
Screw
(type B)
2
Tapping screw
3(Available at the hardware store)
|
| Min. |
|
| 20 mm |
Mounting | Wall/ wall support | 65 mm |
bracket |
|
|
(type B) |
|
|
Mount the rear speakers on a shelf, rack or directly on the floor, or hang them on the wall.
To mount the rear speakers on a wall by using the provided mounting brackets (type B)
Note
It is recommended that you connect the speaker cords to the speaker’s terminals before attaching the bracket to the speaker.
1 Attach the bracket to the bottom of the speaker by using the provided screw (type B).
2 Turn and/or slide the speaker on the bracket according to your preference, and then, tighten the screw.
3 Fasten screws into a firm wall or wall support as shown in the figure, and hang the holes of the mounting bracket on the protruding screws.
*Make sure that the screws are securely caught by the narrow parts of the holes.
Note
If desired, you can hang the speaker directly on the protruding screws on the wall without using the bracket.
WARNING
●Each speaker weighs 0.7 kg (1 lbs. 9 oz.). Do not mount them on thin plywood or a wall with soft surface material. If mounted, the screws may come out of the flimsy surface and the speakers may fall. This damages the speakers or causes personal injury.
●Do not install the speakers to a wall with nails, adhesives, or any other unstable hardware. Long- term use and vibrations may cause them to fall.
●To avoid accidents resulting from tripping over loose speaker cords, fix them to the wall.
●Select a proper position on the wall to mount the speaker and the bracket so that no one will injure his/ her head or face with the edge of the bracket.
5