Drive Belt

1.Drain the gasoline from the snow thrower, or place a piece of plastic under the gas cap.

2.Remove the plastic belt cover on the front of the engine by removing the two self-tapping screws.

3.Tip the snow thrower up and forward, so that it rests on the housing.

4.Remove six self-tapping screws from the frame cover underneath the snow thrower.

5.Pull the idler pulley away from the drive belt and remove the belt from the engine pulley. You will find the idler pulley in front of the engine and under the belt cover that you removed earlier. See Figure 19.

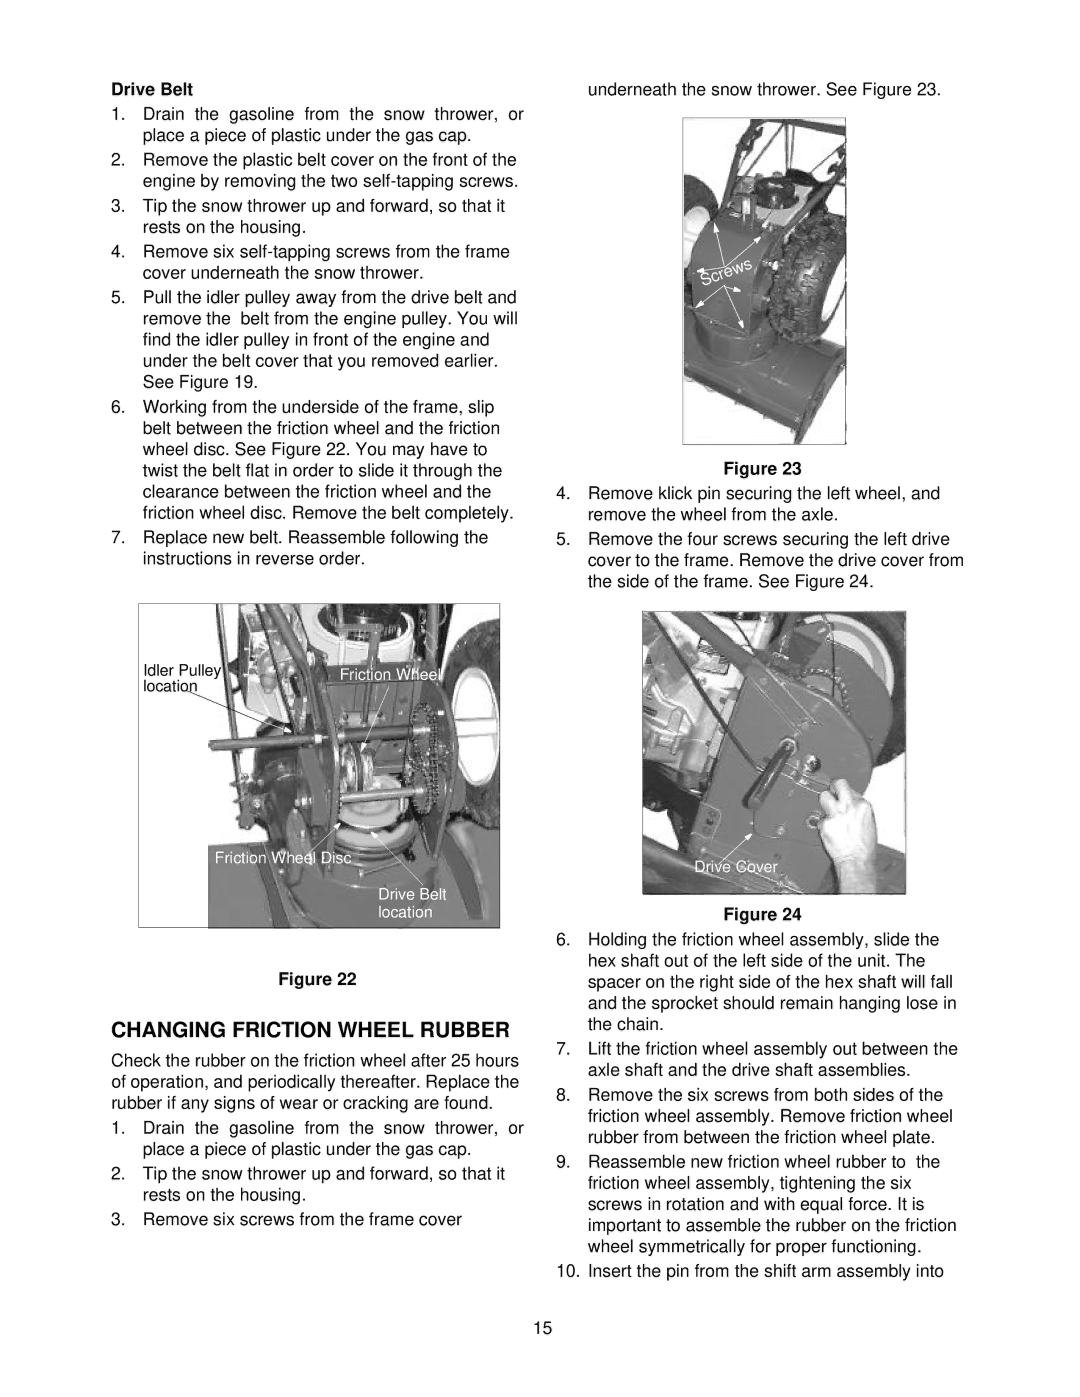
6.Working from the underside of the frame, slip belt between the friction wheel and the friction wheel disc. See Figure 22. You may have to twist the belt flat in order to slide it through the clearance between the friction wheel and the friction wheel disc. Remove the belt completely.

7.Replace new belt. Reassemble following the instructions in reverse order.

underneath the snow thrower. See Figure 23.


s


w


e


r


c


S


Figure 23

4.Remove klick pin securing the left wheel, and remove the wheel from the axle.

5.Remove the four screws securing the left drive cover to the frame. Remove the drive cover from

the side of the frame. See Figure 24.

Idler Pulley

Friction Wheel

location


Friction Wheel Disc

Drive Belt location

Figure 22

CHANGING FRICTION WHEEL RUBBER

Check the rubber on the friction wheel after 25 hours of operation, and periodically thereafter. Replace the rubber if any signs of wear or cracking are found.

1.Drain the gasoline from the snow thrower, or place a piece of plastic under the gas cap.

2.Tip the snow thrower up and forward, so that it rests on the housing.

3.Remove six screws from the frame cover

Drive Cover

Figure 24

6.Holding the friction wheel assembly, slide the hex shaft out of the left side of the unit. The spacer on the right side of the hex shaft will fall and the sprocket should remain hanging lose in the chain.

7.Lift the friction wheel assembly out between the axle shaft and the drive shaft assemblies.

8.Remove the six screws from both sides of the friction wheel assembly. Remove friction wheel rubber from between the friction wheel plate.

9.Reassemble new friction wheel rubber to the friction wheel assembly, tightening the six screws in rotation and with equal force. It is important to assemble the rubber on the friction wheel symmetrically for proper functioning.

10.Insert the pin from the shift arm assembly into

15

Page 15
Image 15
Yard-Man 31AE553F401, 31AE573H401 manual Changing Friction Wheel Rubber, Drive Belt

31AE553F401, 31AE573H401 specifications

The Yard-Man 31AE573H401 and 31AE553F401 are two exceptional garden tractors designed to cater to the needs of homeowners and gardening enthusiasts alike. These machines combine powerful performance with innovative features to make lawn care and maintenance a breeze.

One of the standout characteristics of both models is their robust engine performance. The Yard-Man 31AE573H401 is equipped with a reliable 500cc engine, while the 31AE553F401 comes with a slightly smaller yet powerful engine. This ensures that users have the horsepower necessary to tackle tough mowing tasks and maintain even large properties efficiently. With electric start options available, both models ensure a hassle-free start-up, eliminating the stress of manual pulls.

A defining feature of these tractors is their versatile cutting systems. Both the 31AE573H401 and the 31AE553F401 feature a durable 42-inch cutting deck, designed to deliver clean and precise cuts with different height adjustments, allowing users to customize their lawn's appearance. The cutting deck design enhances maneuverability, enabling users to navigate around obstacles such as trees and flower beds while maintaining an even cut.

User comfort is a significant consideration in both models. They come with a comfortable, high-back seat that provides ample support during longer mowing sessions, reducing fatigue. The ergonomic controls are conveniently placed, ensuring that operators can easily adjust speed and cutting height without taking their hands off the steering wheel.

Equipped with advanced technologies, these tractors offer exceptional durability and ease of maintenance. The reinforced frame construction enhances stability and longevity, while easily accessible maintenance points simplify routine care. The onboard diagnostics notify users of potential issues before they become major problems, which enhances the overall reliability of the machines.

Additionally, both models feature a hydrostatic transmission that allows for smooth acceleration and effortless operation. This technology provides seamless control, enabling users to navigate various terrains without the need for shifting gears manually.

In summary, the Yard-Man 31AE573H401 and 31AE553F401 are top-tier garden tractors that embody reliability, comfort, and innovative features. Whether it's mowing a vast lawn or maneuvering through tight spaces, these machines make the task efficient and enjoyable. Ideal for homeowners seeking a dependable solution for lawn maintenance, these tractors are a valuable addition to any gardening equipment arsenal.