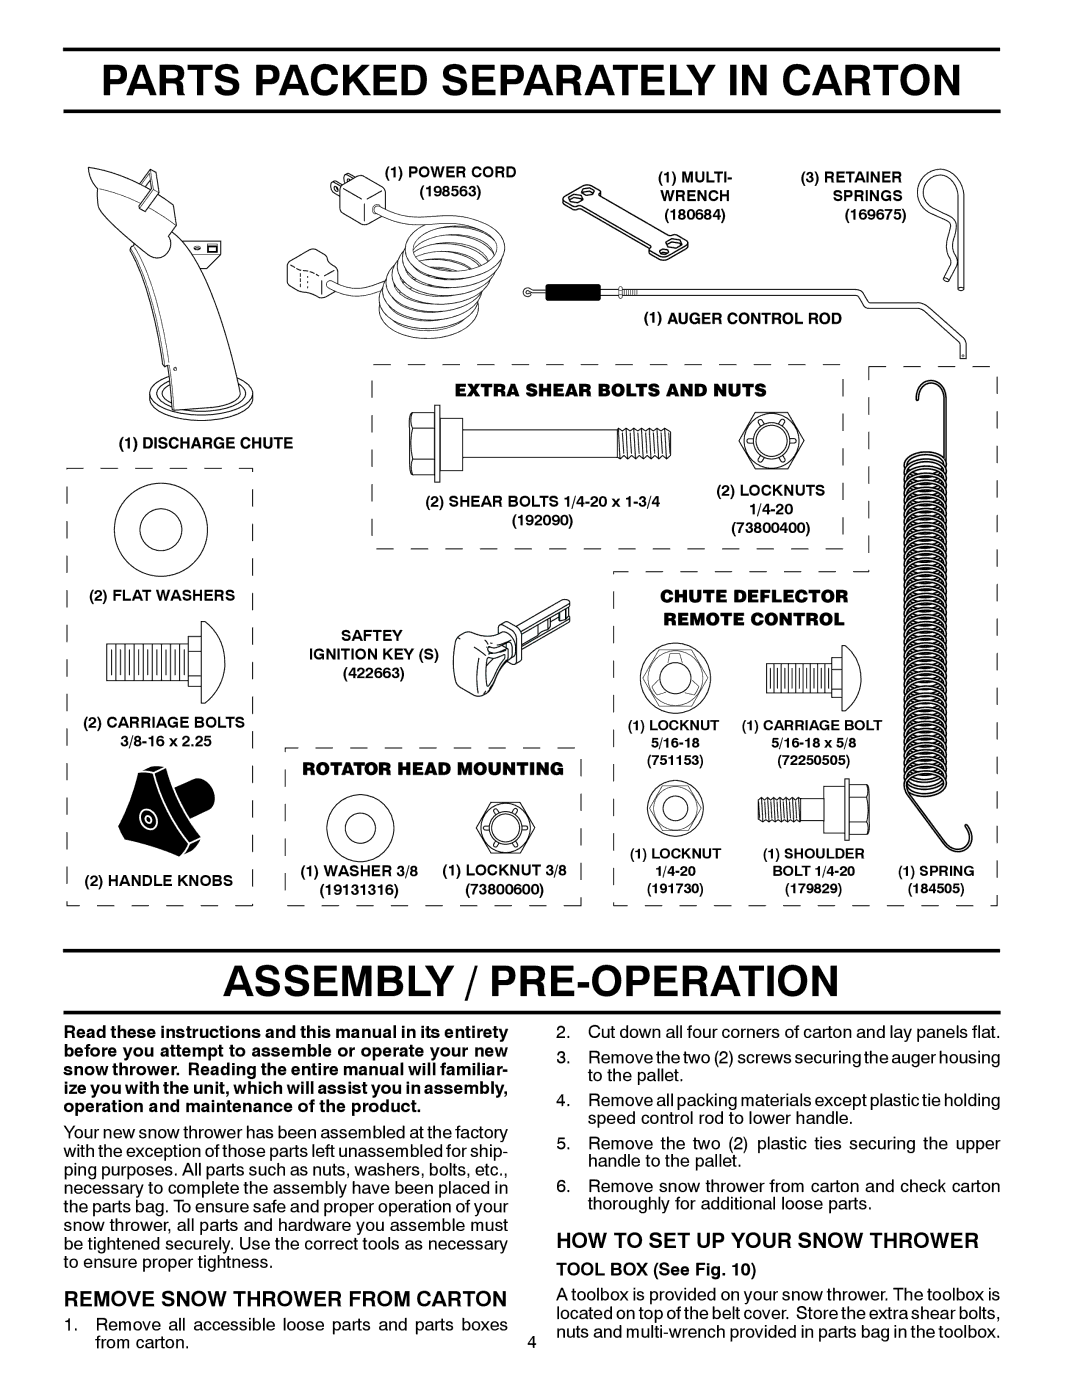
PARTS PACKED SEPARATELY IN CARTON
(1) POWER CORD | (1) MULTI- | (3) RETAINER | |
(198563) | |||
WRENCH | SPRINGS | ||
| |||
| (180684) | (169675) |
| (2) SHEAR BOLTS | (2) LOCKNUTS | |
|
| ||
| (192090) |
| |
|
| (73800400) | |
|
|
| |
(2) FLAT WASHERS |
|
|
|
| SAFTEY |
|
|
| IGNITION KEY (S) |
|
|
| (422663) |
|
|
(2) CARRIAGE BOLTS | (1) LOCKNUT | (1) CARRIAGE BOLT | |
| |||
| (751153) |
| (72250505) |
| (1) WASHER 3/8 | (1) LOCKNUT 3/8 | (1) LOCKNUT | (1) SHOULDER |
| |
(2) HANDLE KNOBS | BOLT | (1) SPRING | ||||
(19131316) | (73800600) | (191730) | (179829) | (184505) | ||
|
ASSEMBLY / PRE-OPERATION
Read these instructions and this manual in its entirety |
| 2. | Cut down all four corners of carton and lay panels flat. | |
before you attempt to assemble or operate your new |
| 3. | Remove the two (2) screws securing the auger housing | |
snow thrower. Reading the entire manual will familiar- |
| |||
|
| to the pallet. | ||
ize you with the unit, which will assist you in assembly, |
|
| ||
| 4. | Remove all packing materials except plastic tie holding | ||
operation and maintenance of the product. |
| |||
|
| speed control rod to lower handle. | ||
Your new snow thrower has been assembled at the factory |
|
| ||
| 5. Remove the two (2) plastic ties securing the upper | |||
with the exception of those parts left unassembled for ship- |
| |||
|
| handle to the pallet. | ||
ping purposes. All parts such as nuts, washers, bolts, etc., |
|
| ||
| 6. Remove snow thrower from carton and check carton | |||
necessary to complete the assembly have been placed in |
| |||
the parts bag. To ensure safe and proper operation of your |
|
| thoroughly for additional loose parts. | |
snow thrower, all parts and hardware you assemble must |
| HOW TO SET UP YOUR SNOW THROWER | ||
be tightened securely. Use the correct tools as necessary |
| |||
to ensure proper tightness. |
| TOOL BOX (See Fig. 10) | ||
|
| |||
REMOVE SNOW THROWER FROM CARTON |
| A toolbox is provided on your snow thrower. The toolbox is | ||
1. Remove all accessible loose parts and parts boxes |
| located on top of the belt cover. Store the extra shear bolts, | ||
4 | nuts and | |||
from carton. | ||||
|
| |||