540 specifications
The Yard Machines 540 is a versatile and efficient lawn mower designed for homeowners who seek a reliable solution for maintaining their lawns. With its robust build and user-friendly features, the Yard Machines 540 stands out in the competitive market of outdoor power equipment.At the heart of the Yard Machines 540 is a powerful engine that delivers dependable performance. The mower is equipped with a reliable four-stroke engine, which ensures robust cutting power and can handle thick grass with ease. This engine technology not only increases efficiency but also minimizes fuel consumption, making it an environmentally friendly choice for garden maintenance.
One of the main features of the Yard Machines 540 is its adjustable cutting height. The mower offers multiple height settings, allowing users to customize the mowing experience according to their lawn's specific needs. Whether you need a close cut for a tidy finish or a higher cut for longer grass, the Yard Machines 540 can effortlessly accommodate your requirements.
The 21-inch cutting deck is another highlight of this mower, providing a wide cutting path that helps reduce the time spent mowing. This size is optimal for medium-sized yards and allows for easy maneuverability around obstacles such as flower beds and trees. The durable steel construction of the deck ensures long-lasting performance, capable of withstanding the rigors of regular use.
Beyond performance, the Yard Machines 540 is designed with user comfort in mind. It features a comfortable grip handle, which reduces fatigue during prolonged use. Additionally, the mower’s lightweight design allows for easy handling and transport, making it accessible for users of all ages.
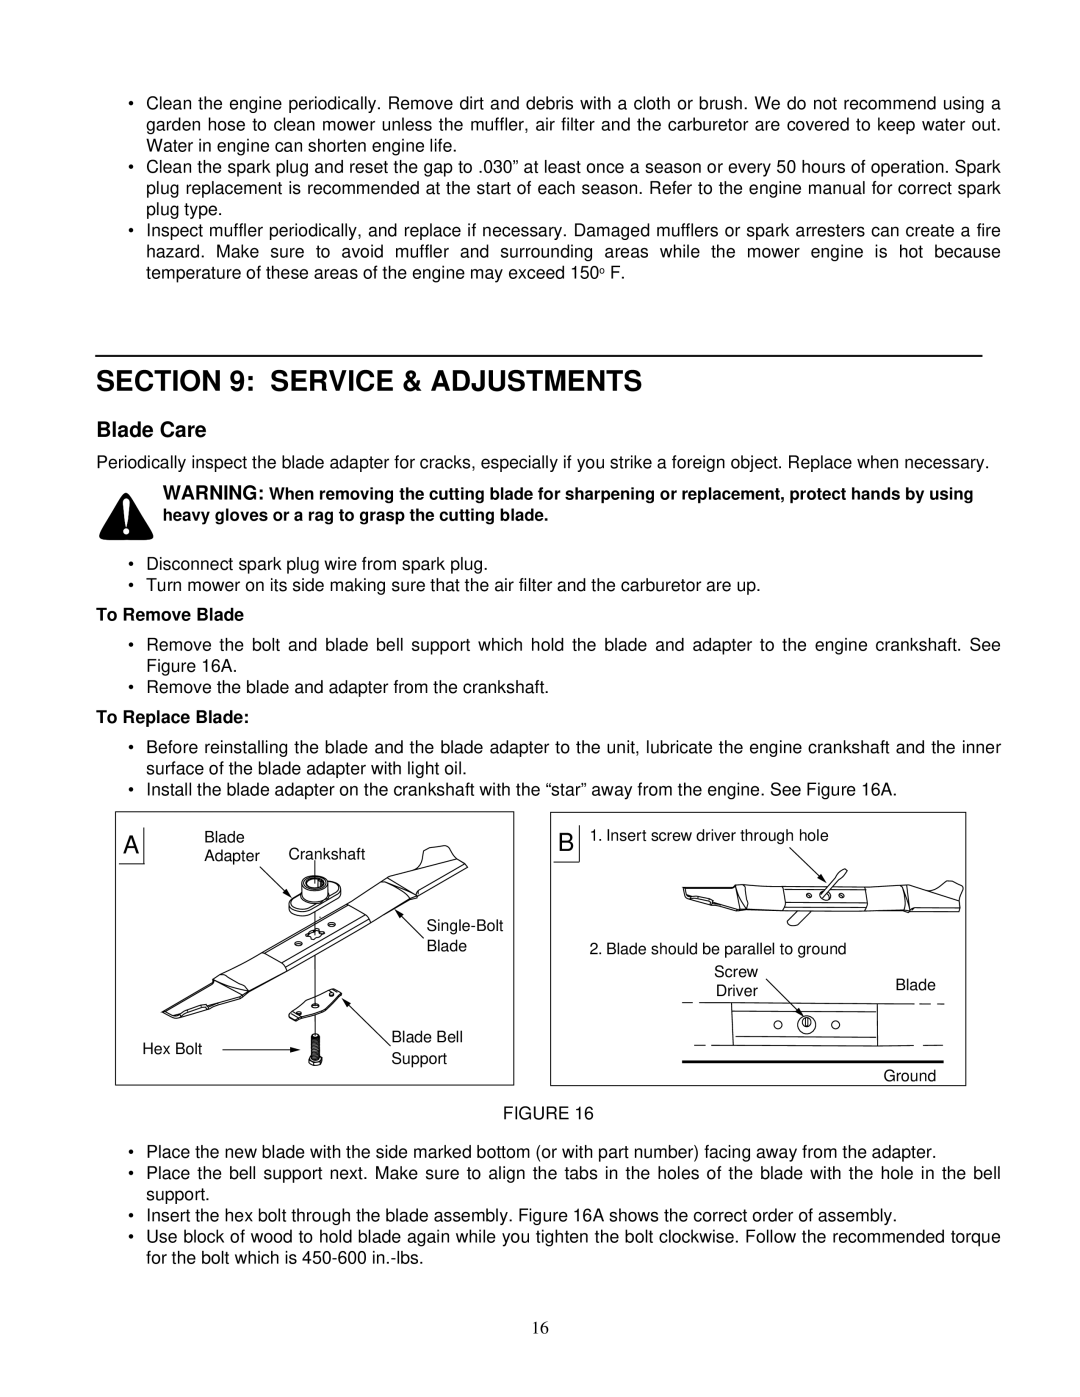
Another noteworthy characteristic of the Yard Machines 540 is its ease of maintenance. The engine and deck designs facilitate straightforward maintenance procedures, such as oil changes and blade replacements, ensuring that owners can keep their equipment in top shape without the need for extensive technical knowledge.
In summary, the Yard Machines 540 is an excellent choice for homeowners looking for a reliable, efficient, and user-friendly lawn mower. With its powerful engine, adjustable cutting heights, and durable construction, it provides an exceptional mowing experience that meets the demands of various lawn conditions. Whether you are a seasoned gardener or a novice, the Yard Machines 540 is built to deliver performance and comfort in every mow.

