
ZFCA 62/26 specifications
The Zanussi ZFCA 62/26 is a standout appliance in the world of refrigeration, providing an exceptional combination of practicality, efficiency, and modern design. With its sleek appearance and user-friendly features, this refrigerator-freezer duo is designed to meet the needs of contemporary kitchens while ensuring optimal food storage.One of the notable features of the ZFCA 62/26 is its impressive capacity. Boasting a spacious 263 liters total volume, it offers ample storage space for families and individuals alike. The refrigerator compartment, designed for easy organization, comes with adjustable shelves made of durable glass, allowing users to customize storage as needed. The shelves can accommodate larger items such as tall bottles and bulky food items with ease.
The ZFCA 62/26 also incorporates innovative cooling technology. The frost-free freezer ensures that users will never need to deal with the hassle of manual defrosting. The no-frost system maintains optimal air circulation, preventing frost buildup and helping to keep food fresher for longer periods. This feature saves time and effort, allowing users to focus on meal prep rather than appliance maintenance.
Energy efficiency is a key priority for Zanussi, and the ZFCA 62/26 reflects this commitment with an excellent energy rating. Operating quietly and efficiently, it contributes to lower electricity bills while being environmentally friendly. The appliance’s smart design includes LED lighting, which illuminates the interior of the fridge while consuming minimal energy.
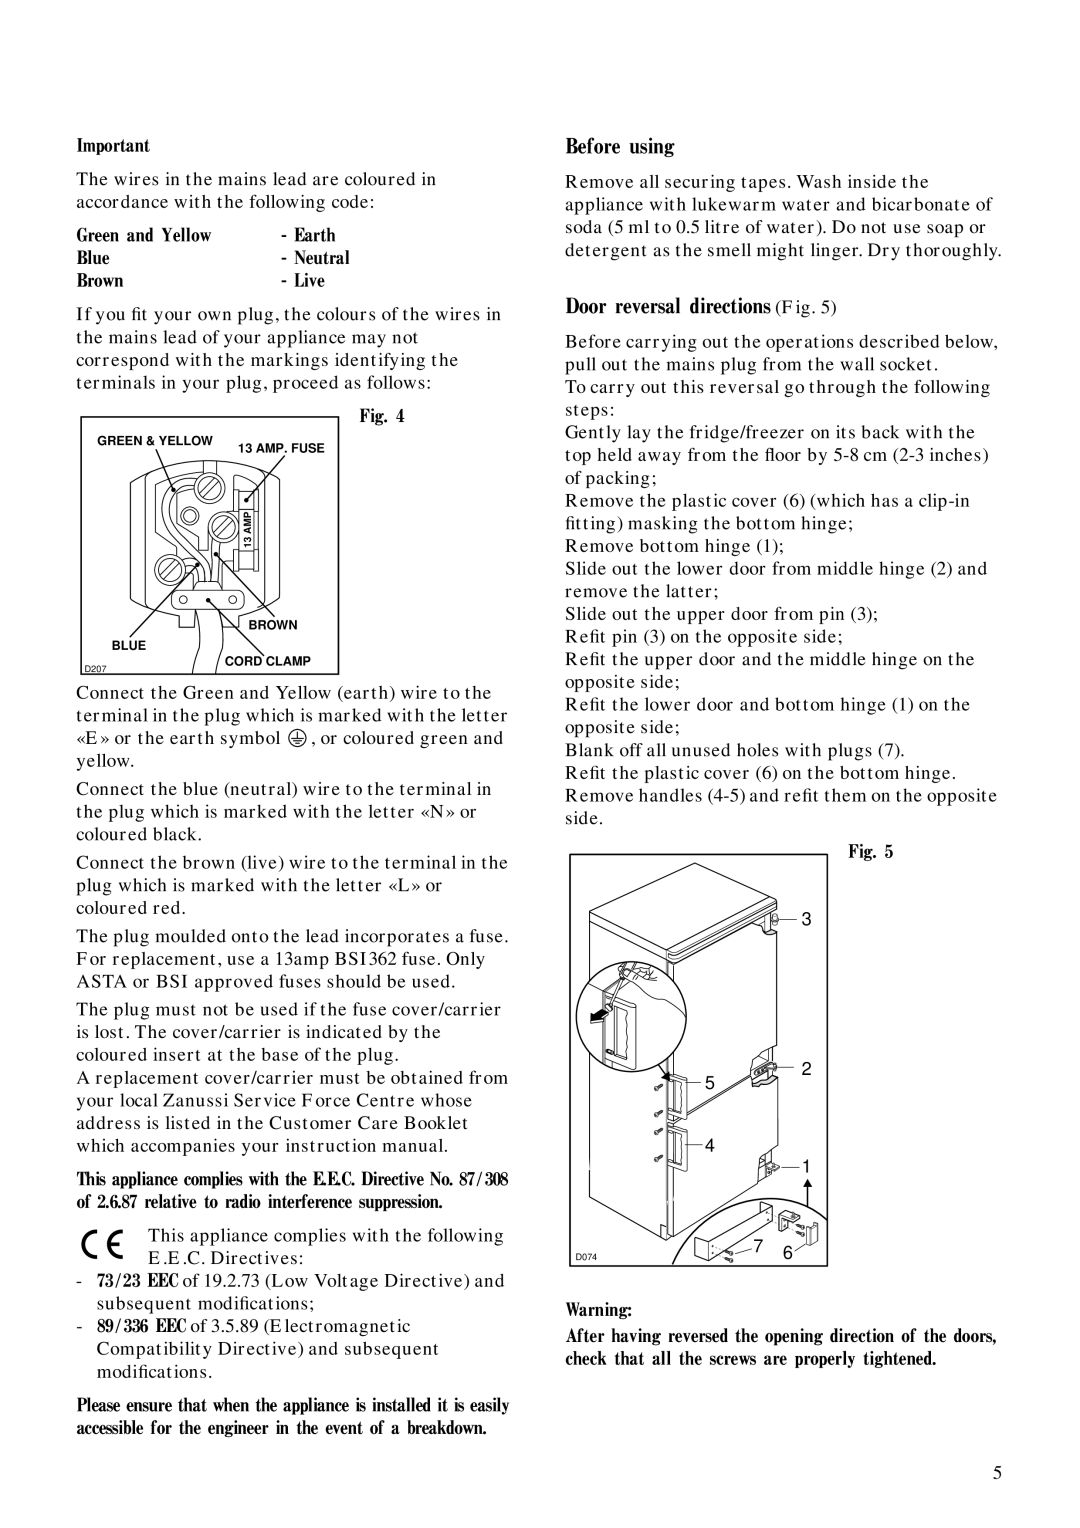
In terms of user convenience, the ZFCA 62/26 is equipped with a reversible door. This allows for installation flexibility, enabling users to choose whether the door swings left or right based on kitchen layout. Additionally, the intuitive control system makes it easy to regulate temperatures in both the fridge and freezer compartments.
Lastly, the Zanussi ZFCA 62/26 emphasizes durability and design. It is built with high-quality materials that withstand daily use. The modern finish adds a touch of elegance, making it an attractive addition to any kitchen decor.
In summary, the Zanussi ZFCA 62/26 combines ample storage capacity, advanced cooling technologies, energy efficiency, and thoughtful design features, making it an ideal choice for anyone seeking a reliable and stylish refrigeration solution.