
ZRT318W specifications
The Zanussi ZRT318W is a modern freestanding refrigerator designed to meet the needs of households looking for efficiency and style. This model incorporates a blend of aesthetic appeal and practicality, making it a popular choice among consumers.One of the main features of the ZRT318W is its spacious interior, offering a generous capacity of approximately 318 liters. This includes ample space for your groceries, with adjustable shelves that allow you to customize the storage area based on your preferences. The refrigerator compartment is complemented by a large salad crisper drawer, designed to keep your fruits and vegetables fresh for longer periods.
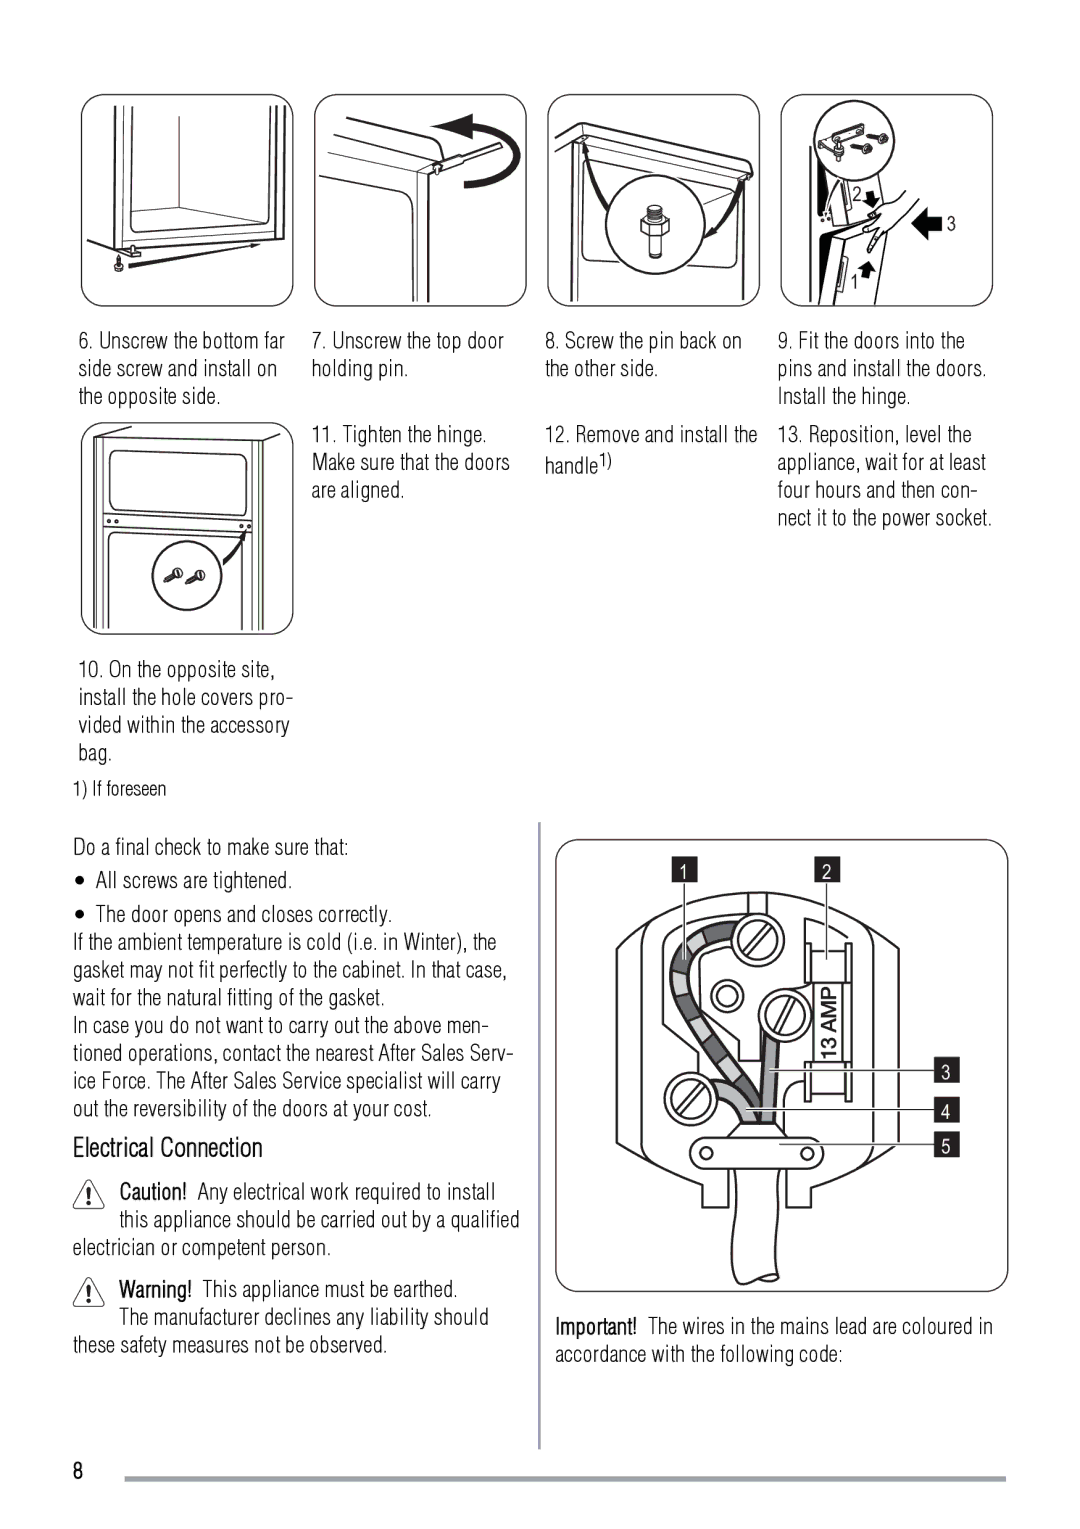
The design of the Zanussi ZRT318W is sleek and contemporary, featuring a glossy white finish that seamlessly fits into any kitchen décor. Its reversible door feature allows for flexible installation, accommodating various kitchen layouts. This model stands out not only for its functionality but also for its simplicity and elegance.
In terms of performance, the ZRT318W comes equipped with advanced cooling technology that ensures efficient temperature regulation throughout the refrigerator. This helps to maintain the freshness of your food, while also minimizing energy consumption. The appliance boasts an impressive energy rating, making it a cost-effective choice for budget-conscious consumers.
Another significant aspect of the Zanussi ZRT318W is its user-friendly features. The interior lighting is bright and energy-efficient, ensuring that you can easily locate your items even in low light. The appliance also includes an intuitive control system that allows you to adjust the temperature settings with ease.
For added convenience, the refrigerator is designed with removable shelves and door bins, simplifying the cleaning process. Additionally, it operates quietly, allowing you to maintain a peaceful home environment.
Overall, the Zanussi ZRT318W combines functionality, energy efficiency, and modern design, making it an excellent choice for users looking to enhance their kitchen experience without sacrificing space or style. With its reliable performance and thoughtful features, it continues to be a standout option in the world of household refrigeration.