9. Maintenance
Maintenance, replacement, or repair of the emission control device and systems may be performed by any
■MAINTENANCE CHART
|
|
|
| every | every | every |
|
|
|
|
| 25 | 50 | 100 |
|
| system/compornent | procedure | before | hours | hours | hours | note |
|
|
| use | after | after | after |
|
| fuel leaks, fuel spillage | wipe out | ✔ |
|
|
|
|
|
|
|
|
|
|
|
|
| fuel tank, air filter, fuel filter | inspect/clean | ✔ | ✔ |
|
| replace, if necessary |
ENGINE | idle adjusting screw | see ■ADJUSTING | ✔ |
|
|
| replace carburetor |
IDLING SPEED (p.18) |
|
|
| if necessary | |||
|
|
|
|
| |||
|
|
|
|
|
|
| |
spark plug | clean and readjust |
|
| ✔ |
| GAP: .025in(0.6~0.7mm) | |
plug gap |
|
|
| replace, if necessary | |||
|
|
|
|
|
| ||
| cylinder fins, intake air cooling vent | clean |
| ✔ |
|
|
|
|
|
|
|
|
|
|
|
| muffler, spark arrester, cylinder exhaust port | clean |
|
| ✔ |
|
|
| throttle lever, ignition switch | check operation | ✔ |
|
|
|
|
SHAFT | cutting parts | replace if | ✔ |
|
|
|
|
something's wrong |
|
|
|
| |||
|
|
|
|
|
| ||
|
|
|
|
|
|
| |
gear case | grease |
| ✔ |
|
|
| |
|
|
|
|
| |||
|
|
|
|
|
|
|
|
| screws/nuts/bolts | tighten/replace | ✔ |
|
| ✔ | not adjusting screws |
|
|
|
|
|
|
|
|
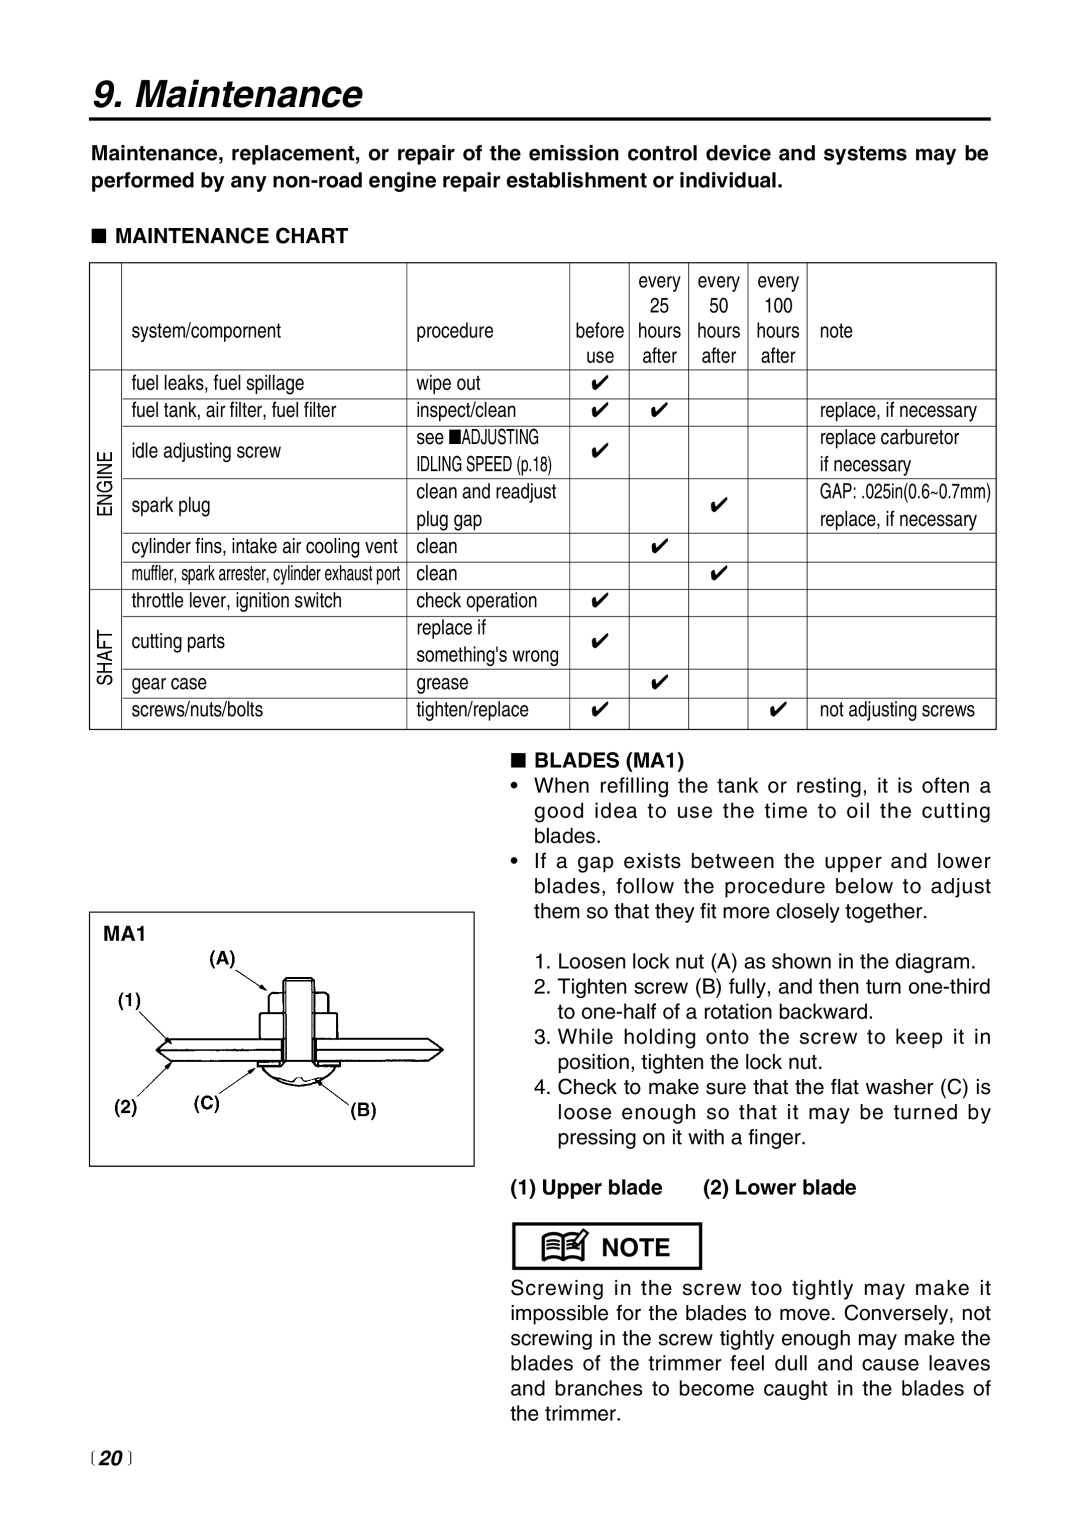
MA1
■BLADES (MA1)
•When refilling the tank or resting, it is often a good idea to use the time to oil the cutting blades.
•If a gap exists between the upper and lower blades, follow the procedure below to adjust them so that they fit more closely together.
1.Loosen lock nut (A) as shown in the diagram.
2.Tighten screw (B) fully, and then turn
3.While holding onto the screw to keep it in position, tighten the lock nut.
4.Check to make sure that the flat washer (C) is loose enough so that it may be turned by pressing on it with a finger.
(1) Upper blade | (2) Lower blade |
![]() NOTE
NOTE
Screwing in the screw too tightly may make it impossible for the blades to move. Conversely, not screwing in the screw tightly enough may make the blades of the trimmer feel dull and cause leaves and branches to become caught in the blades of the trimmer.