Adjust Front Roller Angle
1.Position tractor and renovator on a level surface.
2.Raise renovator slightly off the ground.
3.Stop engine and set parking brake.
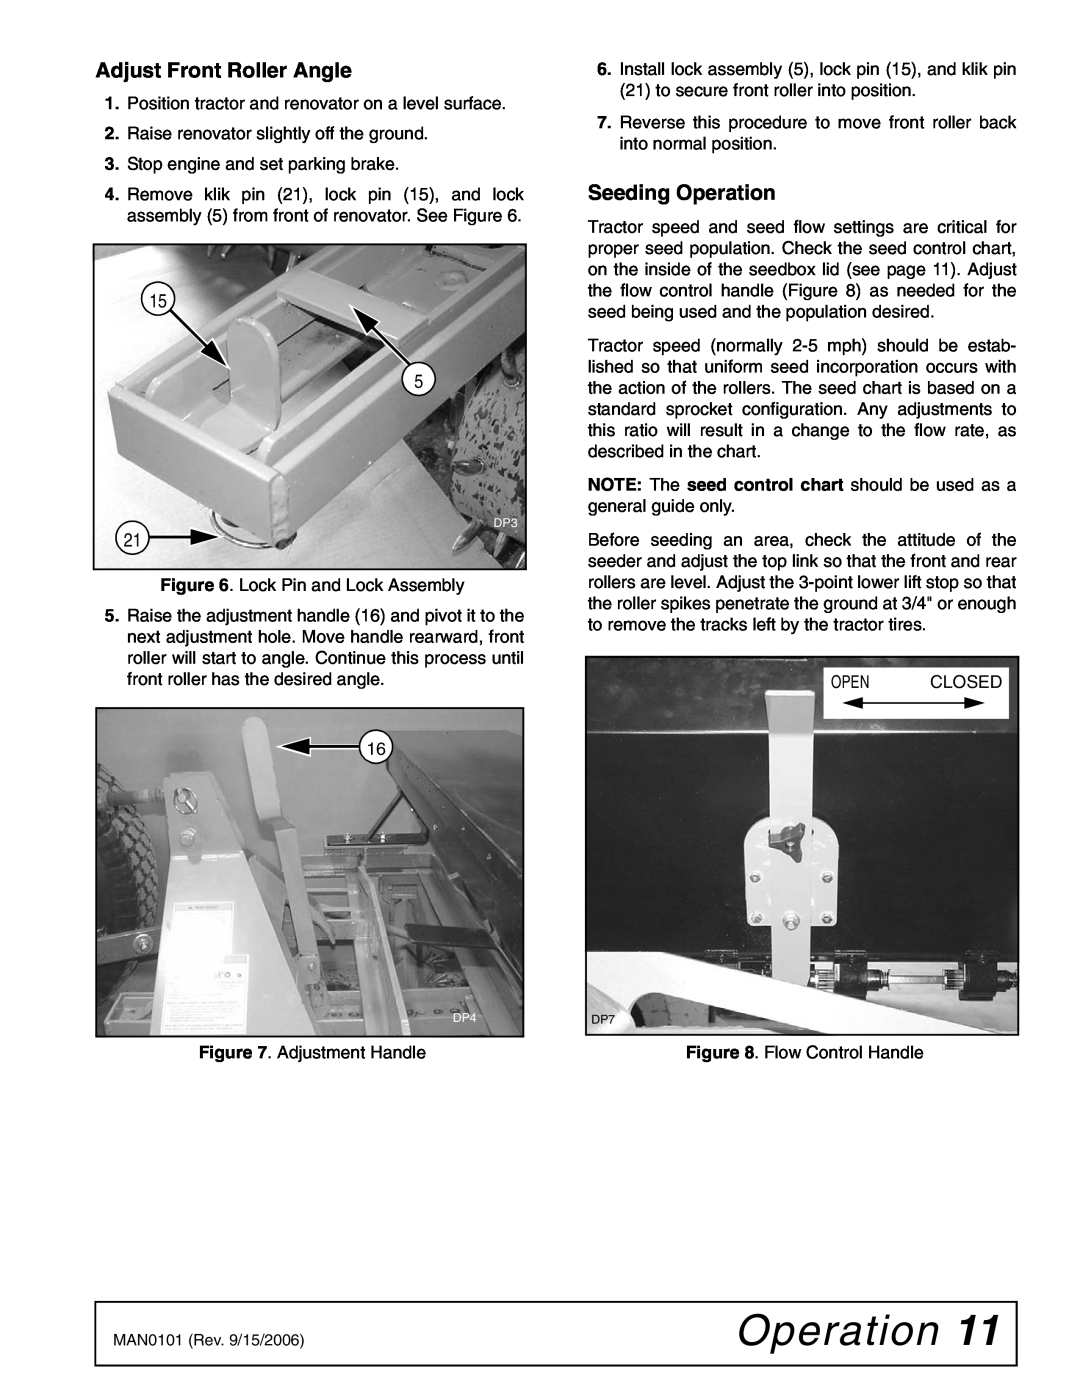
4.Remove klik pin (21), lock pin (15), and lock assembly (5) from front of renovator. See Figure 6.
15
5![]()
![]()
DP3
21
Figure 6. Lock Pin and Lock Assembly
5.Raise the adjustment handle (16) and pivot it to the next adjustment hole. Move handle rearward, front roller will start to angle. Continue this process until front roller has the desired angle.
16
DP4
Figure 7. Adjustment Handle
6.Install lock assembly (5), lock pin (15), and klik pin (21) to secure front roller into position.
7.Reverse this procedure to move front roller back into normal position.
Seeding Operation
Tractor speed and seed flow settings are critical for proper seed population. Check the seed control chart, on the inside of the seedbox lid (see page 11). Adjust the flow control handle (Figure 8) as needed for the seed being used and the population desired.
Tractor speed (normally
NOTE: The seed control chart should be used as a general guide only.
Before seeding an area, check the attitude of the seeder and adjust the top link so that the front and rear rollers are level. Adjust the
OPEN | CLOSED |
DP7
Figure 8. Flow Control Handle
MAN0101 (Rev. 9/15/2006) | Operation 11 |
|
|
