ASSEMBLY
DEALER SET-UP INSTRUCTIONS
Assembly of this equipment is the responsibility of the Woods dealer. It should be delivered to the owner com- pletely assembled, lubricated, and adjusted for normal operating conditions.
In most cases the Super Turf Renovator is shipped completely assembled from the factory. The seed box is an option that can be added to the Super Turf Reno- vator at a later time if desired.
Install Seedbox
1.Place seedbox on top of renovator mounting saddles.
2.Install four carriage bolts (18) from underneath saddles and secure with flanged lock nuts (19). See Figure 11.
3.Do not tighten until all adjustments are completed.
18
19 DP11
18.5/8 NC x
19.5/8 NC Flange lock nut
Figure 11. Seedbox Hardware Installed
Install Drive Sprocket
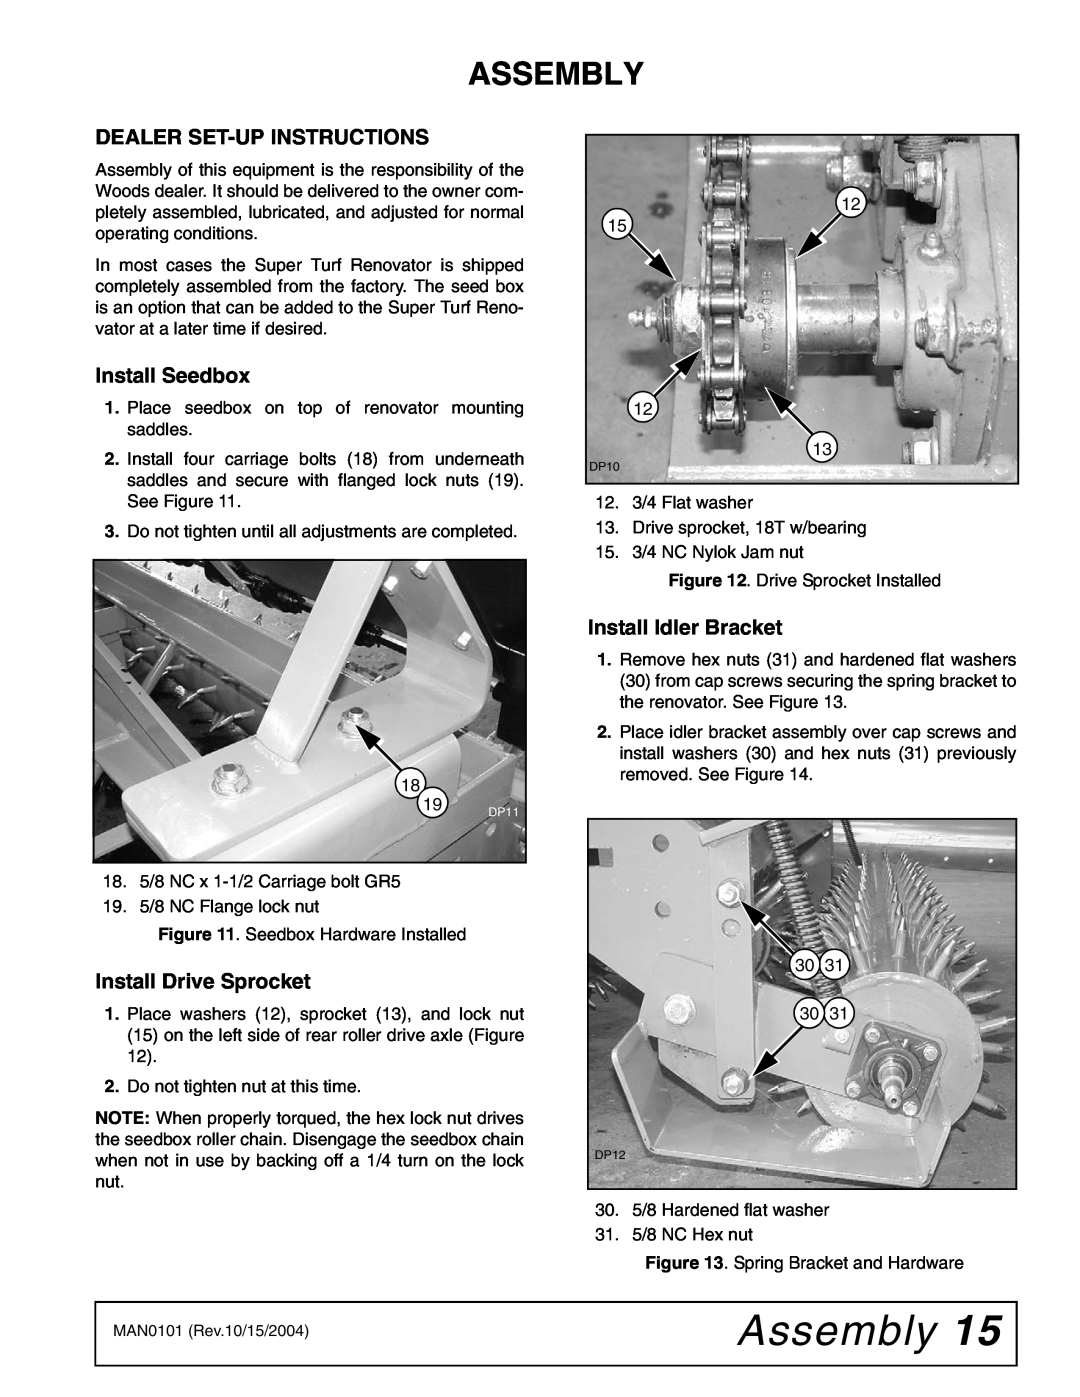
1.Place washers (12), sprocket (13), and lock nut (15) on the left side of rear roller drive axle (Figure 12).
2.Do not tighten nut at this time.
NOTE: When properly torqued, the hex lock nut drives the seedbox roller chain. Disengage the seedbox chain when not in use by backing off a 1/4 turn on the lock nut.
12
15
12
13
DP10
12.3/4 Flat washer
13.Drive sprocket, 18T w/bearing
15. 3/4 NC Nylok Jam nut
Figure 12. Drive Sprocket Installed
Install Idler Bracket
1.Remove hex nuts (31) and hardened flat washers (30) from cap screws securing the spring bracket to the renovator. See Figure 13.
2.Place idler bracket assembly over cap screws and install washers (30) and hex nuts (31) previously removed. See Figure 14.
30 31
30 31
DP12
30.5/8 Hardened flat washer
31.5/8 NC Hex nut
Figure 13. Spring Bracket and Hardware
MAN0101 (Rev.10/15/2004) | Assembly 15 |
| |
|
|