S e c t i o n 2 : I m a g e M o d e A d j u s t m e n t
Key to be pressed |
| Menu Display | Magnitude Range | |||||
Step 1 |
|
|
| Example: | ||||
|
| |||||||
|
|
|
|
|
|
|
| |
|
|
|
|
|
|
|
| |
| Menu Key |
|
|
| Sharpness: 1/2/3/4/5 | |||
|
|
|
|
|
|
|
| Phase: 0~31 |
|
|
|
|
|
|
|
| |
|
|
|
|
| Clock: 0~127 | |||
|
|
|
|
|
|
|
|
|
|
|
| or |
|
|
| ||
|
|
|
|
| ||||
| Sharpness/ |
|
|
|
| |||
| Phase/Clock |
| 3. | “ Image icon” keeps flashing. |
| |||
| by “ + key” |
|
| |||||
|
|
|
|
|
| 4. | “ |
|
|
|
|
|
|
|
| ||
Step 2 |
|
| Example: |
| ||||
|
|
|
|
|
|
|
|
|
Menu Key
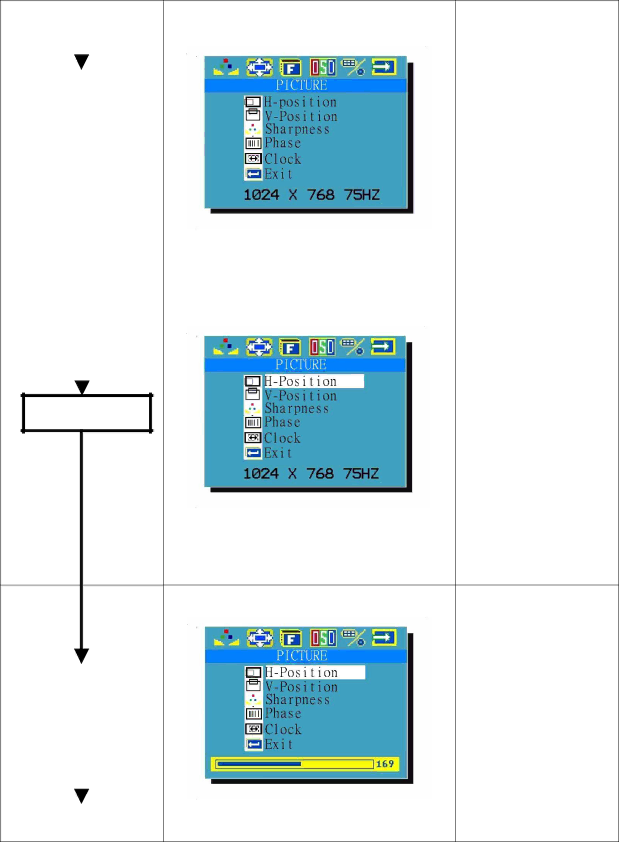
4.“ Image icon” keeps flashing.
5.“
6.Adjusting scale of 0~146 shows up.
Step 3 | Example: | * Keeps press | |||
|
|
|
|
| the “ + key” : |
|
|
|
|
| Value in the Scale is |
|
|
|
|
| increasing until 146 |
|
|
|
|
| * Keeps press |
| +/- key |
|
| ||
|
|
| the “ - key” : | ||
|
|
|
|
| |
|
|
|
|
| Value in the Scale is |
|
|
|
|
| decreasing until 0 |
|
|
|
|
| Release the key, the |
|
|
|
|
| |
3. | “ Image icon” keeps flashing. | value will stop at the | |||
4.“
11