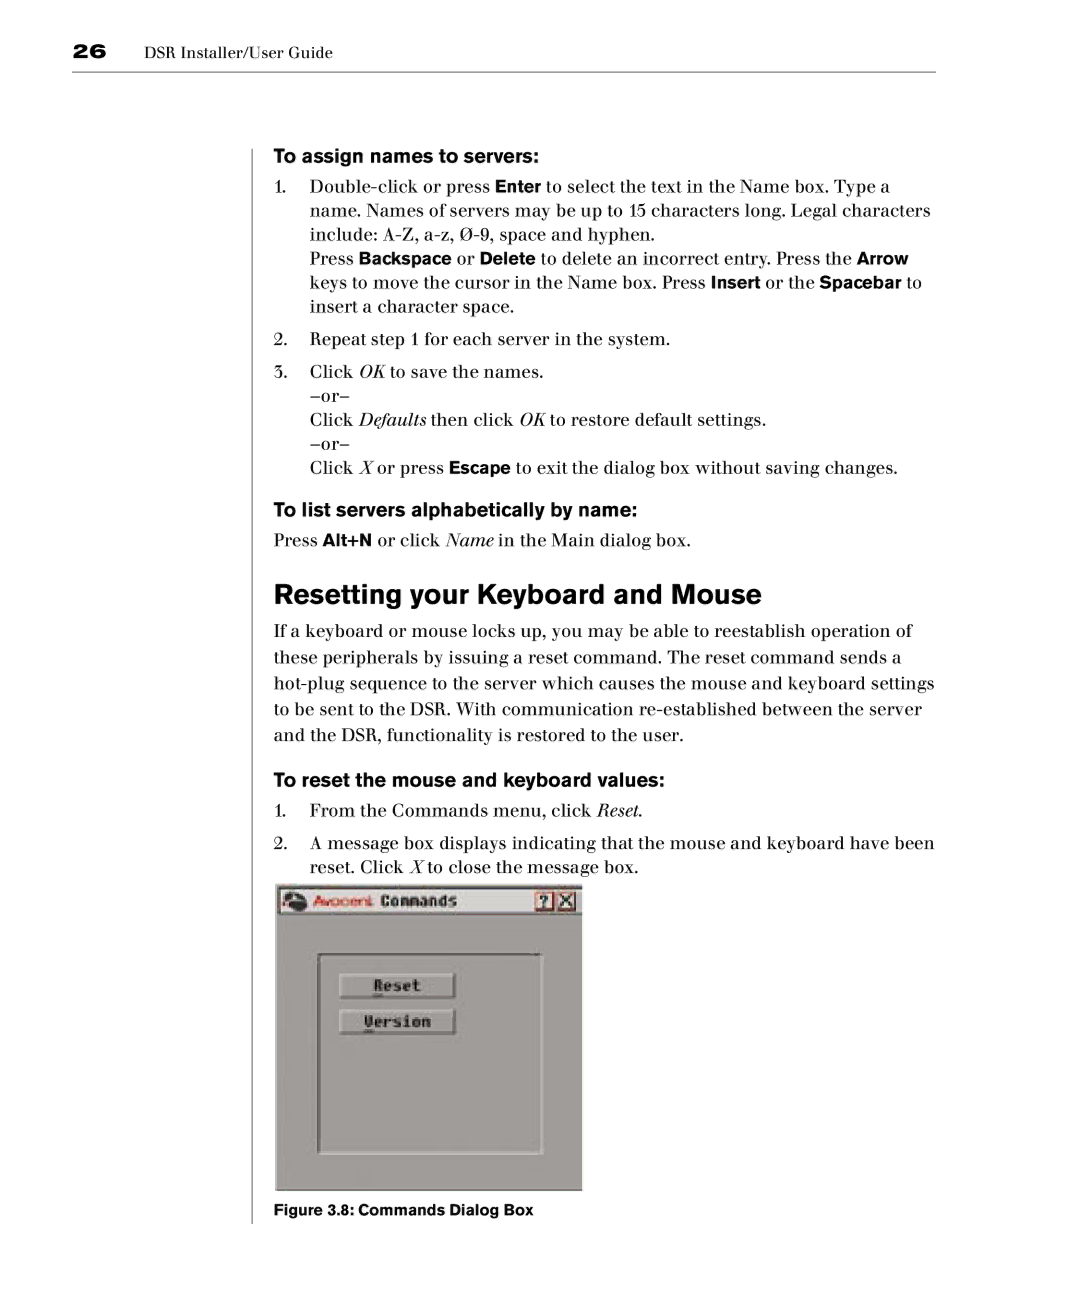
Avocent DSR800, DSR1161, DSR4160 manual To install the DSR hardware, To configure the DSR hardware

Page 18

12DSR Installer/User Guide

To install the DSR hardware:

1.Remove the DSR unit from the packing material.

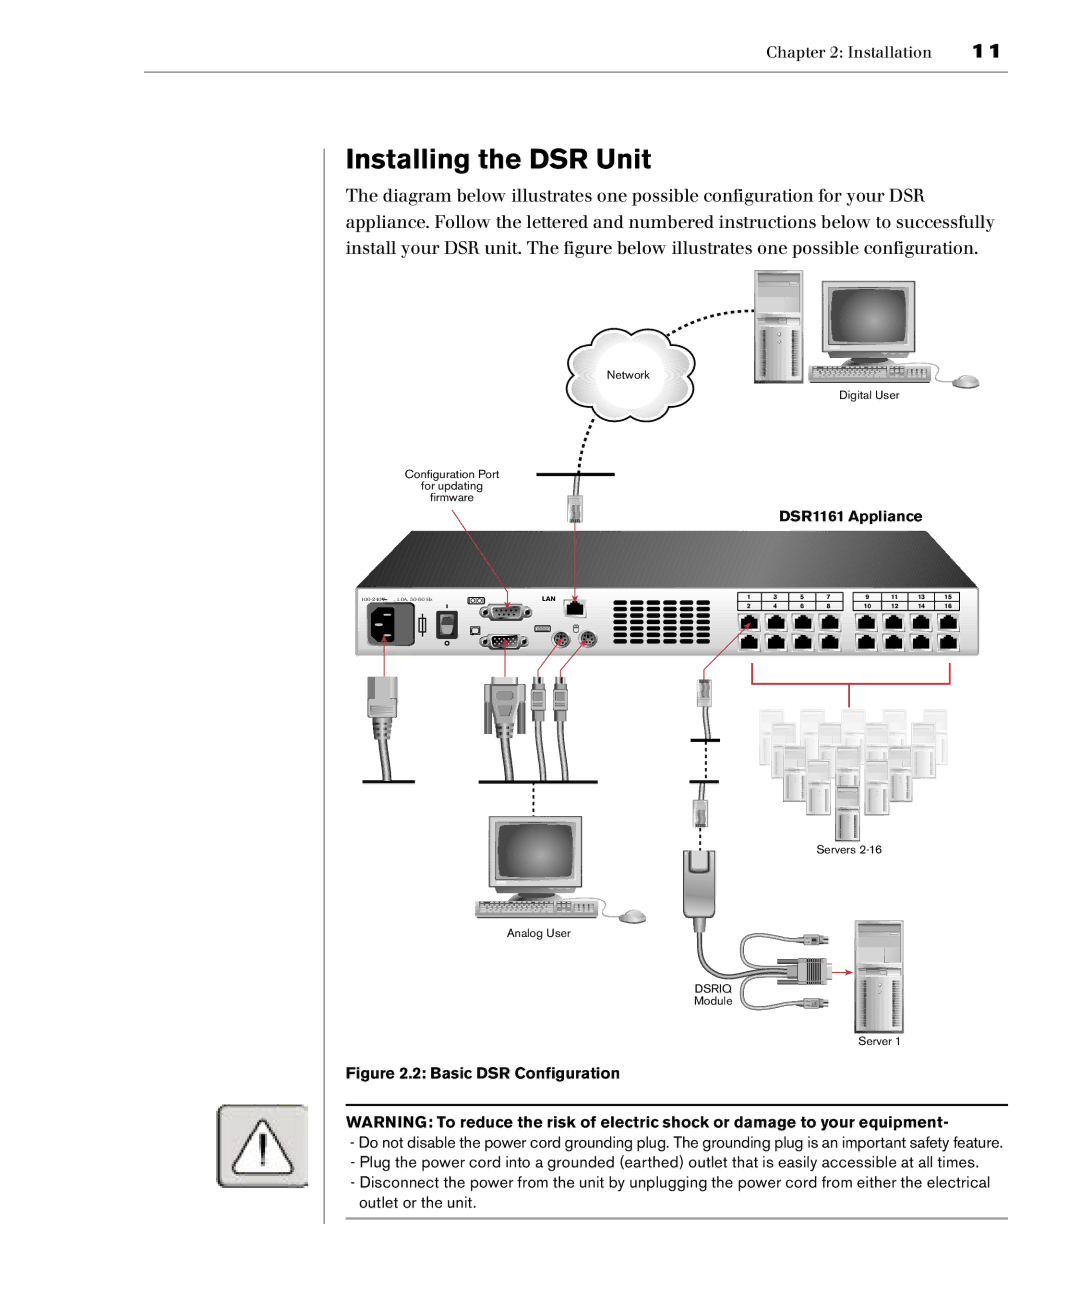
2.Connect a terminal or PC running terminal emulation software (such as HyperTerminal) to the Configuration Port on the back panel of the DSR using the supplied null-modem cable. The terminal should be set to 9600 baud, 8 bits, 1 stop bit, no parity, no flow control.

3.Plug the supplied power cord into the back of the DSR unit and then into an appropriate power source.

4.When the power is switched on, the Power indicator on the front of the unit will blink for approximately 30 seconds while performing a self-test. Approximately 10 seconds after it stops blinking, press the Enter key to access the main menu.

NOTE: The DSR unit may be rack mounted in a 1U configuration. The DSR does not support a 0U configuration.

To configure the DSR hardware:

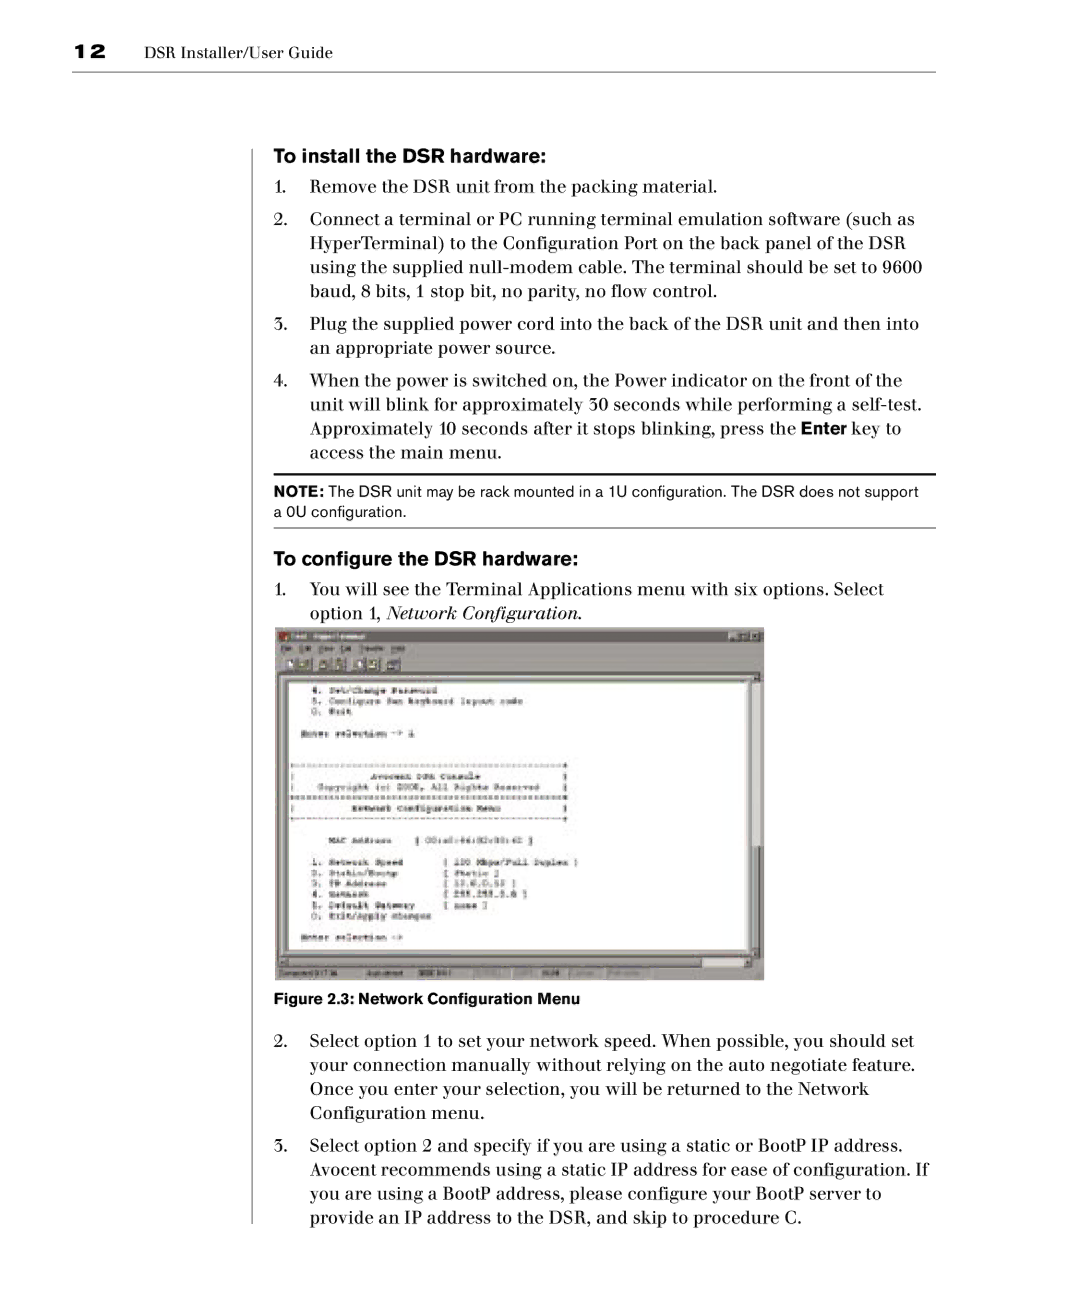
1.You will see the Terminal Applications menu with six options. Select option 1, Network Configuration.

Figure 2.3: Network Configuration Menu

2.Select option 1 to set your network speed. When possible, you should set your connection manually without relying on the auto negotiate feature. Once you enter your selection, you will be returned to the Network Configuration menu.

3.Select option 2 and specify if you are using a static or BootP IP address. Avocent recommends using a static IP address for ease of configuration. If you are using a BootP address, please configure your BootP server to provide an IP address to the DSR, and skip to procedure C.

Image 18
Contents DSR Power on DSR USA Notification Canadian Notification Table of Contents Page Product Overview Page DSView provides simple point and click access to any server Features and BenefitsAccess the DSR via network connection Reduce cable bulkTCP/IP Safety Precautions DSR Model ComparisonRack mount safety considerations Installation Page Additional items needed Getting StartedSupplied with the DSR Verification of Ethernet/computer connectionsSetting up your network DSR in a Network ConfigurationInstalling the DSR Unit Basic DSR ConfigurationTo install the DSR hardware To configure the DSR hardwareTo adjust the mouse acceleration To connect a Dsriq module to each serverTo connect and power up your DSR To install your DS softwareLocal Port Operation Page Controlling your System at the Local Port To access the Main dialog boxOscar Status Symbols Viewing and Selecting Ports and ServersSoft switching Selecting serversOscar navigation basics Oscar GUISetup Features to Manage Routine Tasks for your Servers Configuring OscarTo access the Setup menu Changing the display behaviorTo access the Menu dialog box To set a delay time for Oscar GUITo set the Switch Mode Oscar Status Flags To access the Flag dialog boxControlling the status flag To determine how the status flag is displayedSetting console security To access the Security dialog boxTo set or change the password To enable the screen saver mode with no password protection To password protect your consoleTo remove password protection from your console To log in to your consoleAssigning server names To exit the screen saver modeTo access the Names dialog box To turn off the screen saverTo assign names to servers Resetting your Keyboard and MouseTo reset the mouse and keyboard values To list servers alphabetically by nameDisplaying Version Information To display version informationDSR Installer/User Guide Terminal Operations Page Network Configuration menu Accessing the Terminal MenuTerminal applications menu commands Security Configuration menuFirmware Management menu Enable Debug Messages menuSet/Change Password menu To activate securityTo change the password Exit menuDSR Installer/User Guide Appendices Page Appendix a Flash Upgrades To upload a new Flash fileAppendix B Technical Specifications Server PortsAppendix C Technical Support DSR Installer/User Guide Limited Warranty For Technical Support