Acer T100 manual Install and upgrade CPU

Page 23

17

2 Disjoin the connectors attached to the fan and the heat sink.

English

3Remove the fan and the heat sink.

4Unlock the socket lever to release the CPU.

5Gently pull the CPU from the socket.

6Install and upgrade CPU.

Install and upgrade CPU

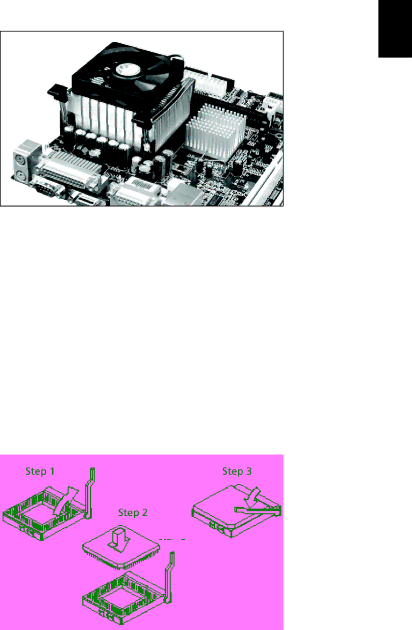
To install or upgrade the CPU, complete the following steps:

1Unlock the socket lever.

2Install the CPU chip into socket.

3Return the lever to locked position.

Image 23
Contents Aspire T100 Page Use conditions FCC noticeRemarque à l’intention des utilisateurs canadiens Contents Troubleshooting Taking Care of your computer Front panel System TourRear panel English Connectivity System FeaturesPerformance MultimediaKeyboard System peripheralsMouse Speakers Open the computer System upgradeSet up new components English Open package Setting up your computerNecessary to know before Setup Select locationConnecting the peripherals Shutting down your computer Starting your computerEnglish Reminder for guarding against static electricity Installation PrecautionsPre-installation Instructions Upgrading your computerReplacing the HDD Opening your ComputerInstall DDR Dimm Installing PCI cardsInstalling additional memory Install PCI cardRemove CPU To reconfigure your computerUpgrading CPU Remove DDR DimmInstall and upgrade CPU English Pressed the power switch but the system did not boot up TroubleshootingPrinter does not work English English Important tips Cleaning and servicingTo clean your computer and keyboard Taking Care of your computerTo clean your monitor When to contact a service technicianTo clean your pointing device To clean your optical mouse