TIME
When viewing a TV programme, press this button to
Press this button again to exit this function.
ENG
External Control Device Setup
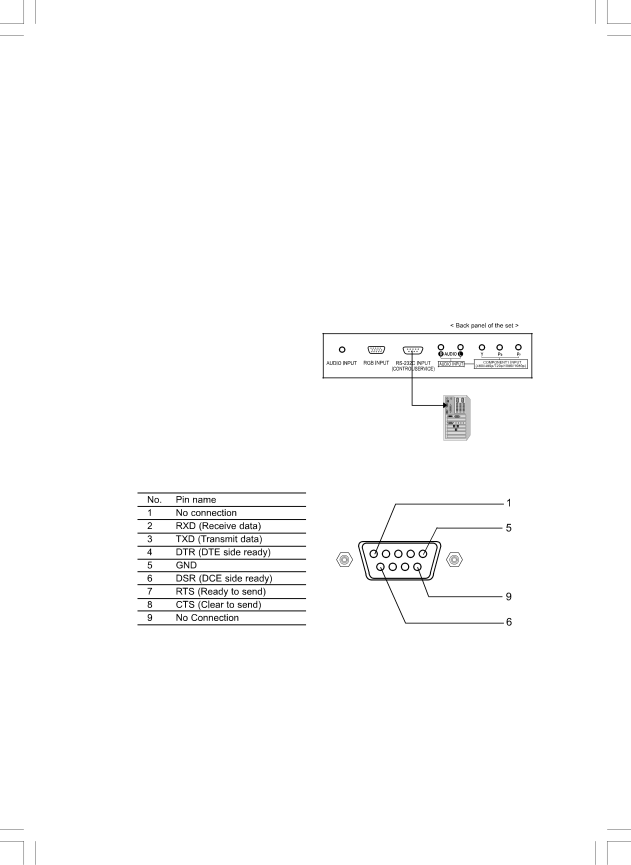
How to connect external control equipment
Connect the serial port of the control device to the
RS-232C connection cables are not supplied with the Monitor.
The Monitor remote control and front panel controls (except main power) will not be functional if the set is
Type of connector; D-Sub 9-pin male
Communication Parameters
•Baud rate : 4800bps (UART)
•Data length : 8bits
•Parity : None
•Stop bit : 1bit
•Communication code : HEX code
PRESTIGIO P400MW / P460MW | 35 |