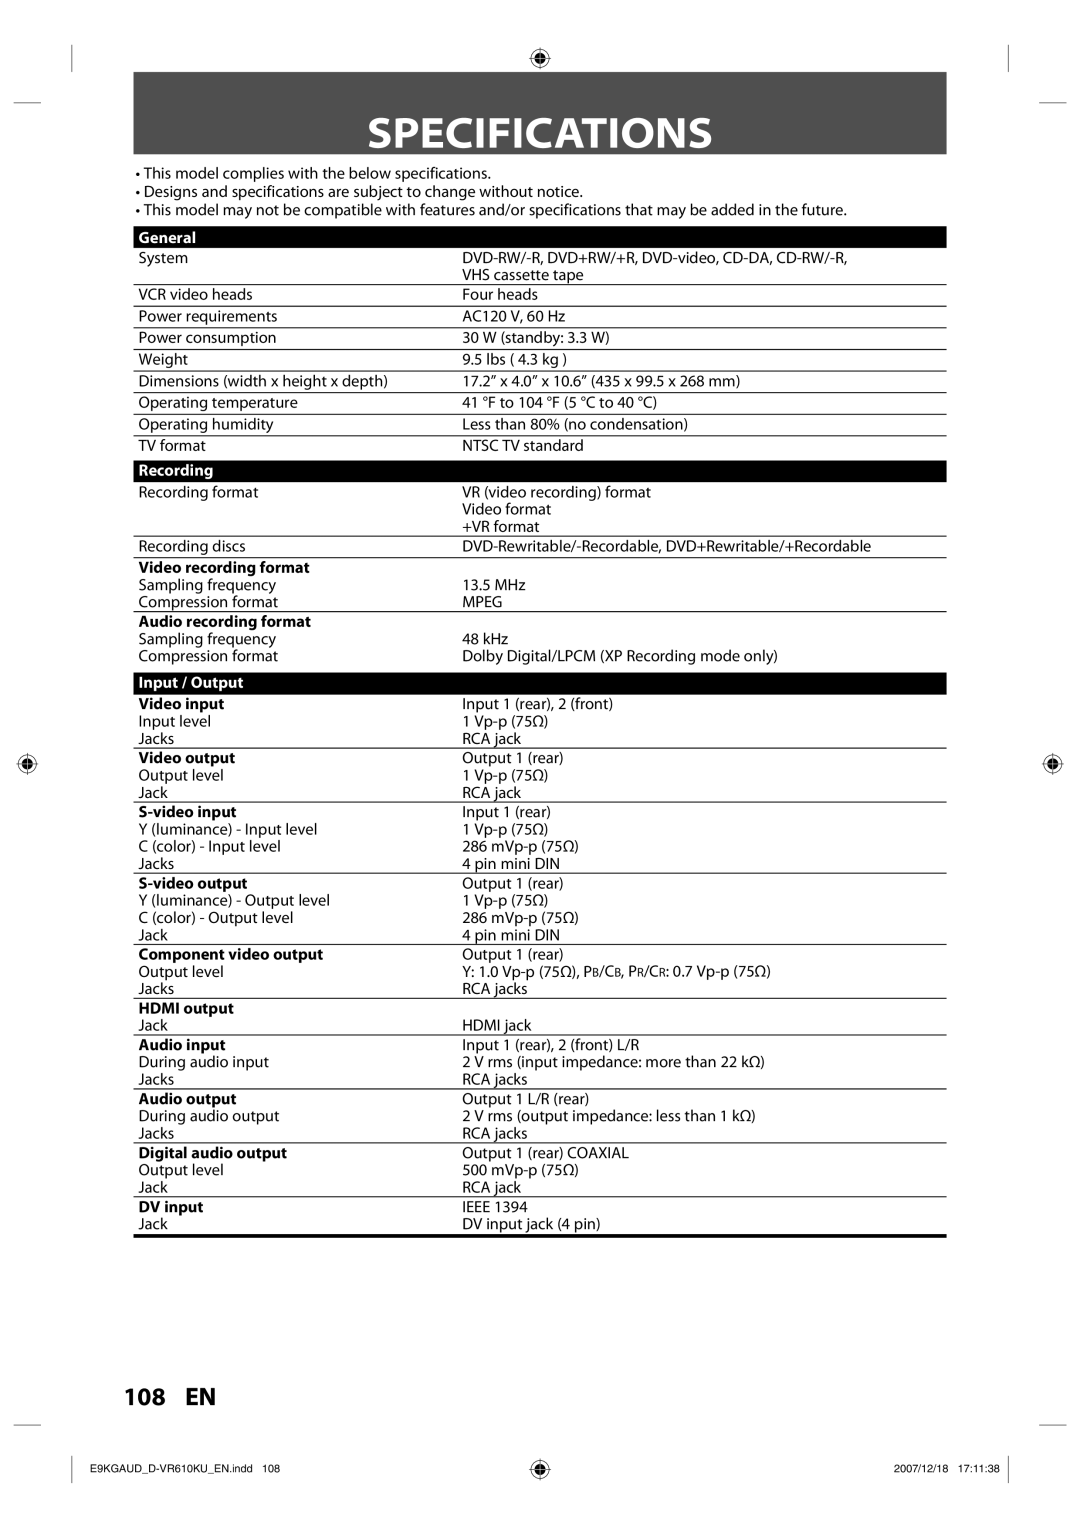
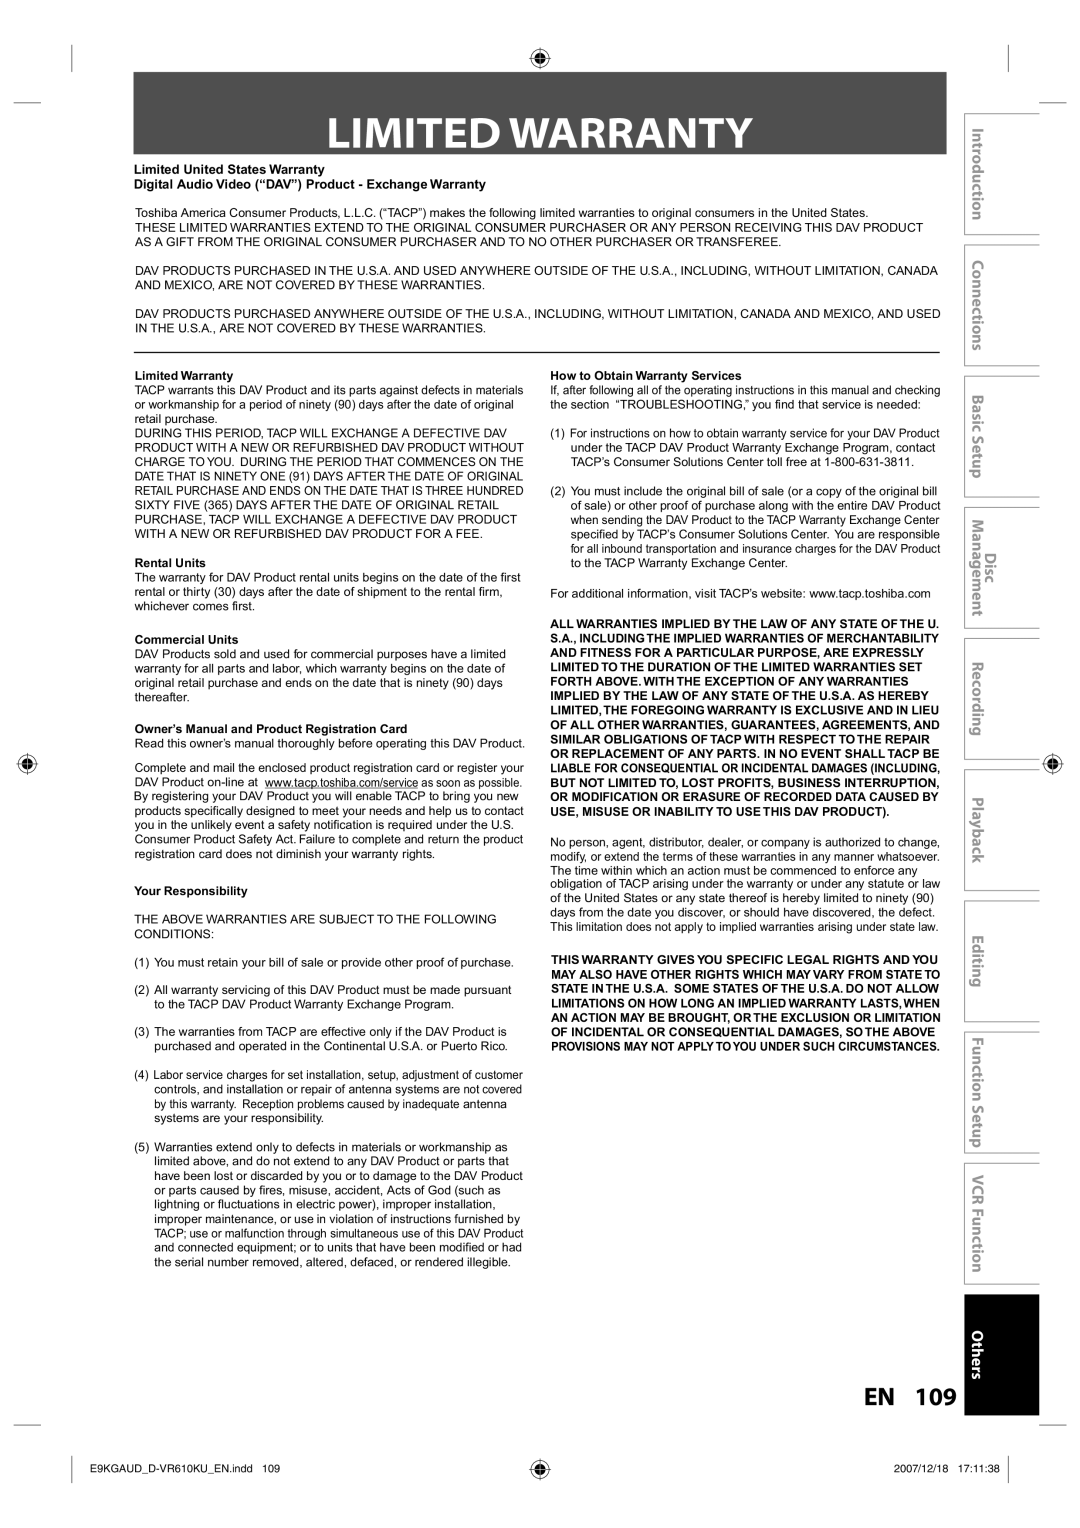
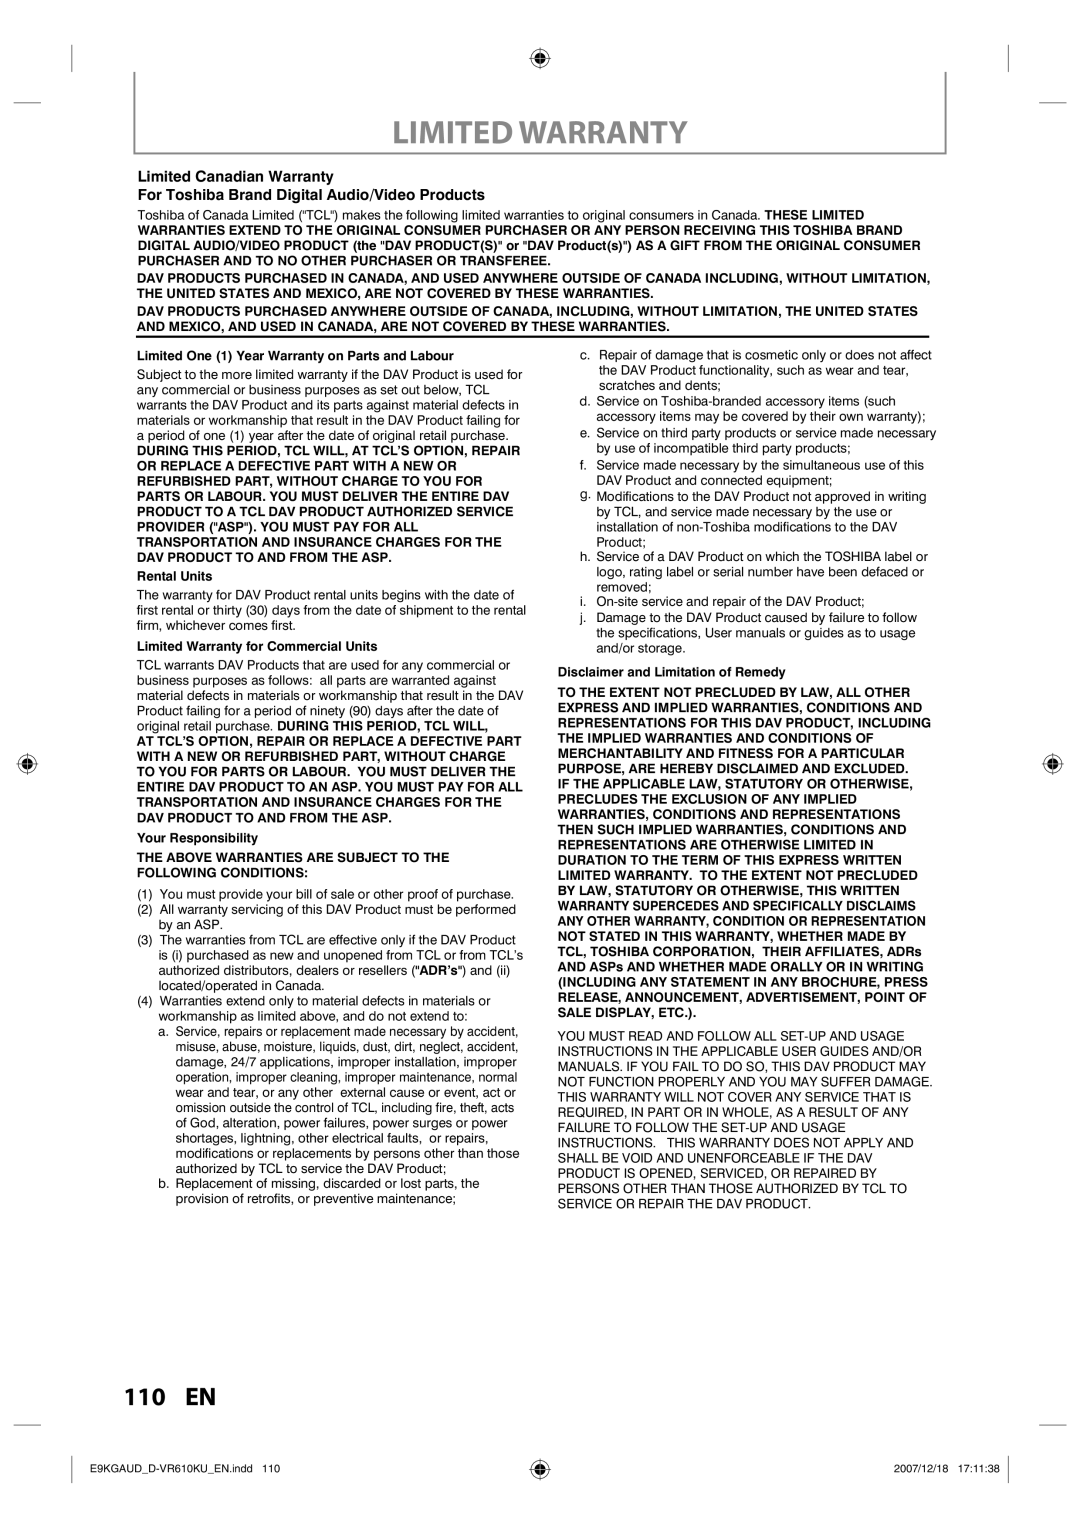
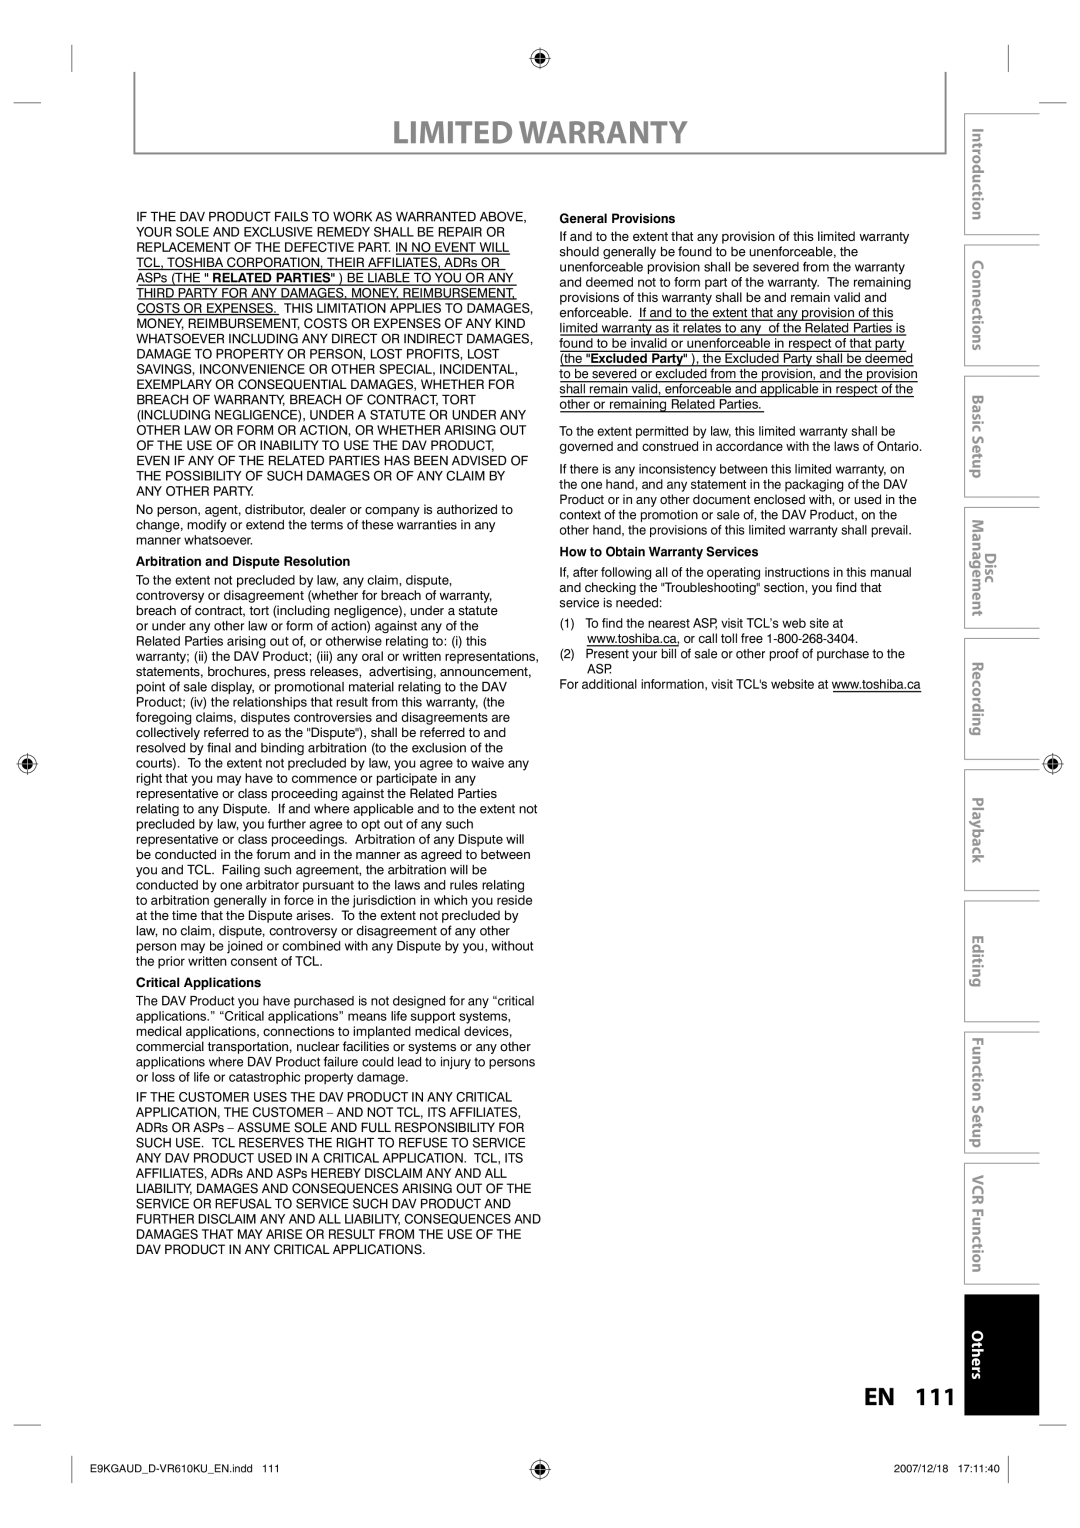
Toshiba D-VR610KU owner manual Limited Warranty

Page 109

LIMITED WARRANTY

Limited United States Warranty

Digital Audio Video (“DAV”) Product - Exchange Warranty

Toshiba America Consumer Products, L.L.C. (“TACP”) makes the following limited warranties to original consumers in the United States.

THESE LIMITED WARRANTIES EXTEND TO THE ORIGINAL CONSUMER PURCHASER OR ANY PERSON RECEIVING THIS DAV PRODUCT AS A GIFT FROM THE ORIGINAL CONSUMER PURCHASER AND TO NO OTHER PURCHASER OR TRANSFEREE.

DAV PRODUCTS PURCHASED IN THE U.S.A. AND USED ANYWHERE OUTSIDE OF THE U.S.A., INCLUDING, WITHOUT LIMITATION, CANADA AND MEXICO, ARE NOT COVERED BY THESE WARRANTIES.

DAV PRODUCTS PURCHASED ANYWHERE OUTSIDE OF THE U.S.A., INCLUDING, WITHOUT LIMITATION, CANADA AND MEXICO, AND USED IN THE U.S.A., ARE NOT COVERED BY THESE WARRANTIES.

Introduction Connections

Limited Warranty

TACP warrants this DAV Product and its parts against defects in materials or workmanship for a period of ninety (90) days after the date of original retail purchase.

DURING THIS PERIOD, TACP WILL EXCHANGE A DEFECTIVE DAV PRODUCT WITH A NEW OR REFURBISHED DAV PRODUCT WITHOUT CHARGE TO YOU. DURING THE PERIOD THAT COMMENCES ON THE DATE THAT IS NINETY ONE (91) DAYS AFTER THE DATE OF ORIGINAL RETAIL PURCHASE AND ENDS ON THE DATE THAT IS THREE HUNDRED SIXTY FIVE (365) DAYS AFTER THE DATE OF ORIGINAL RETAIL PURCHASE, TACP WILL EXCHANGE A DEFECTIVE DAV PRODUCT WITH A NEW OR REFURBISHED DAV PRODUCT FOR A FEE.

Rental Units

The warranty for DAV Product rental units begins on the date of the first rental or thirty (30) days after the date of shipment to the rental firm, whichever comes first.

Commercial Units

DAV Products sold and used for commercial purposes have a limited warranty for all parts and labor, which warranty begins on the date of original retail purchase and ends on the date that is ninety (90) days thereafter.

Owner’s Manual and Product Registration Card

Read this owner’s manual thoroughly before operating this DAV Product.

Complete and mail the enclosed product registration card or register your DAV Product on-line at www.tacp.toshiba.com/service as soon as possible. By registering your DAV Product you will enable TACP to bring you new products specifically designed to meet your needs and help us to contact you in the unlikely event a safety notification is required under the U.S.

Consumer Product Safety Act. Failure to complete and return the product registration card does not diminish your warranty rights.

Your Responsibility

THE ABOVE WARRANTIES ARE SUBJECT TO THE FOLLOWING CONDITIONS:

(1)You must retain your bill of sale or provide other proof of purchase.

(2)All warranty servicing of this DAV Product must be made pursuant to the TACP DAV Product Warranty Exchange Program.

(3)The warranties from TACP are effective only if the DAV Product is purchased and operated in the Continental U.S.A. or Puerto Rico.

(4)Labor service charges for set installation, setup, adjustment of customer controls, and installation or repair of antenna systems are not covered by this warranty. Reception problems caused by inadequate antenna systems are your responsibility.

(5)Warranties extend only to defects in materials or workmanship as limited above, and do not extend to any DAV Product or parts that have been lost or discarded by you or to damage to the DAV Product or parts caused by fires, misuse, accident, Acts of God (such as lightning or fluctuations in electric power), improper installation, improper maintenance, or use in violation of instructions furnished by

TACP; use or malfunction through simultaneous use of this DAV Product and connected equipment; or to units that have been modified or had the serial number removed, altered, defaced, or rendered illegible.

How to Obtain Warranty Services

If, after following all of the operating instructions in this manual and checking the section “TROUBLESHOOTING,” you find that service is needed:

(1)For instructions on how to obtain warranty service for your DAV Product under the TACP DAV Product Warranty Exchange Program, contact TACP’s Consumer Solutions Center toll free at 1-800-631-3811.

(2)You must include the original bill of sale (or a copy of the original bill of sale) or other proof of purchase along with the entire DAV Product when sending the DAV Product to the TACP Warranty Exchange Center specified by TACP’s Consumer Solutions Center. You are responsible for all inbound transportation and insurance charges for the DAV Product to the TACP Warranty Exchange Center.

For additional information, visit TACP’s website: www.tacp.toshiba.com

ALL WARRANTIES IMPLIED BY THE LAW OF ANY STATE OF THE U. S.A., INCLUDING THE IMPLIED WARRANTIES OF MERCHANTABILITY AND FITNESS FOR A PARTICULAR PURPOSE, ARE EXPRESSLY LIMITED TO THE DURATION OF THE LIMITED WARRANTIES SET FORTH ABOVE. WITH THE EXCEPTION OF ANY WARRANTIES IMPLIED BY THE LAW OF ANY STATE OF THE U.S.A. AS HEREBY LIMITED, THE FOREGOING WARRANTY IS EXCLUSIVE AND IN LIEU OF ALL OTHER WARRANTIES, GUARANTEES, AGREEMENTS, AND SIMILAR OBLIGATIONS OF TACP WITH RESPECT TO THE REPAIR OR REPLACEMENT OF ANY PARTS. IN NO EVENT SHALL TACP BE LIABLE FOR CONSEQUENTIAL OR INCIDENTAL DAMAGES (INCLUDING, BUT NOT LIMITED TO, LOST PROFITS, BUSINESS INTERRUPTION, OR MODIFICATION OR ERASURE OF RECORDED DATA CAUSED BY USE, MISUSE OR INABILITY TO USE THIS DAV PRODUCT).

No person, agent, distributor, dealer, or company is authorized to change, modify, or extend the terms of these warranties in any manner whatsoever. The time within which an action must be commenced to enforce any obligation of TACP arising under the warranty or under any statute or law of the United States or any state thereof is hereby limited to ninety (90) days from the date you discover, or should have discovered, the defect. This limitation does not apply to implied warranties arising under state law.

THIS WARRANTY GIVES YOU SPECIFIC LEGAL RIGHTS AND YOU MAY ALSO HAVE OTHER RIGHTS WHICH MAY VARY FROM STATE TO STATE IN THE U.S.A. SOME STATES OF THE U.S.A. DO NOT ALLOW LIMITATIONS ON HOW LONG AN IMPLIED WARRANTY LASTS, WHEN AN ACTION MAY BE BROUGHT, OR THE EXCLUSION OR LIMITATION OF INCIDENTAL OR CONSEQUENTIAL DAMAGES, SO THE ABOVE PROVISIONS MAY NOT APPLY TO YOU UNDER SUCH CIRCUMSTANCES.

Disc Basic Setup Management Recording Playback Editing Function Setup VCR Function Others

EN 109

E9KGAUD_D-VR610KU_EN.indd 109

2007/12/18 17:11:38
Image 109
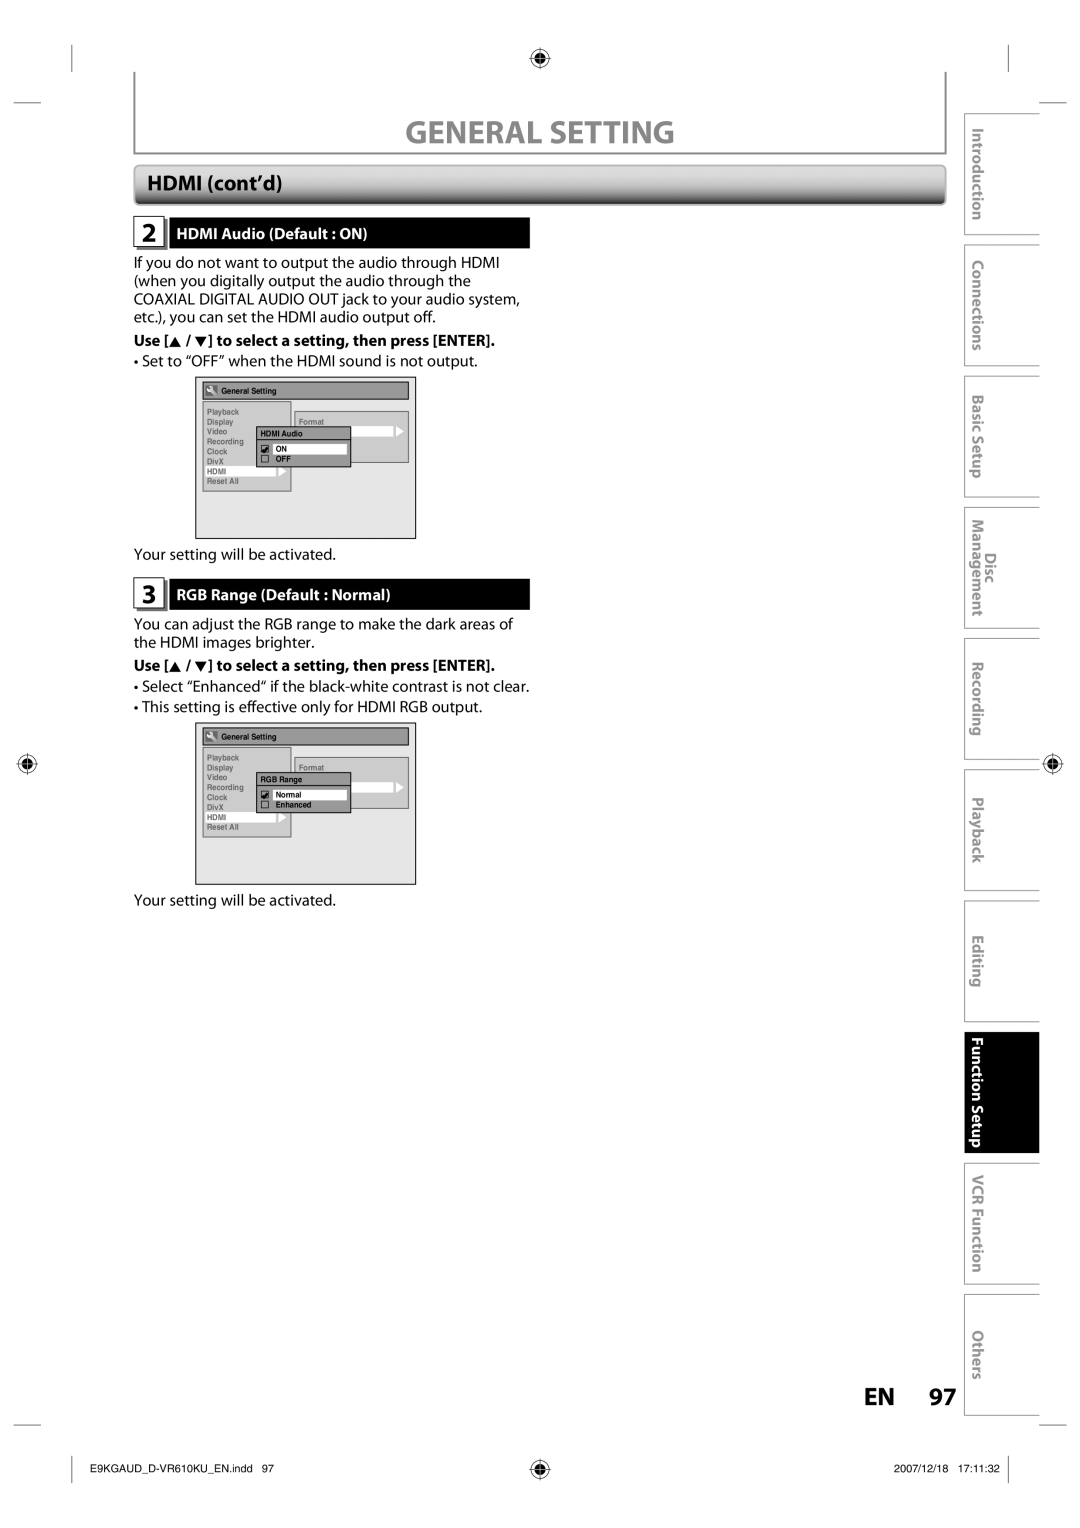
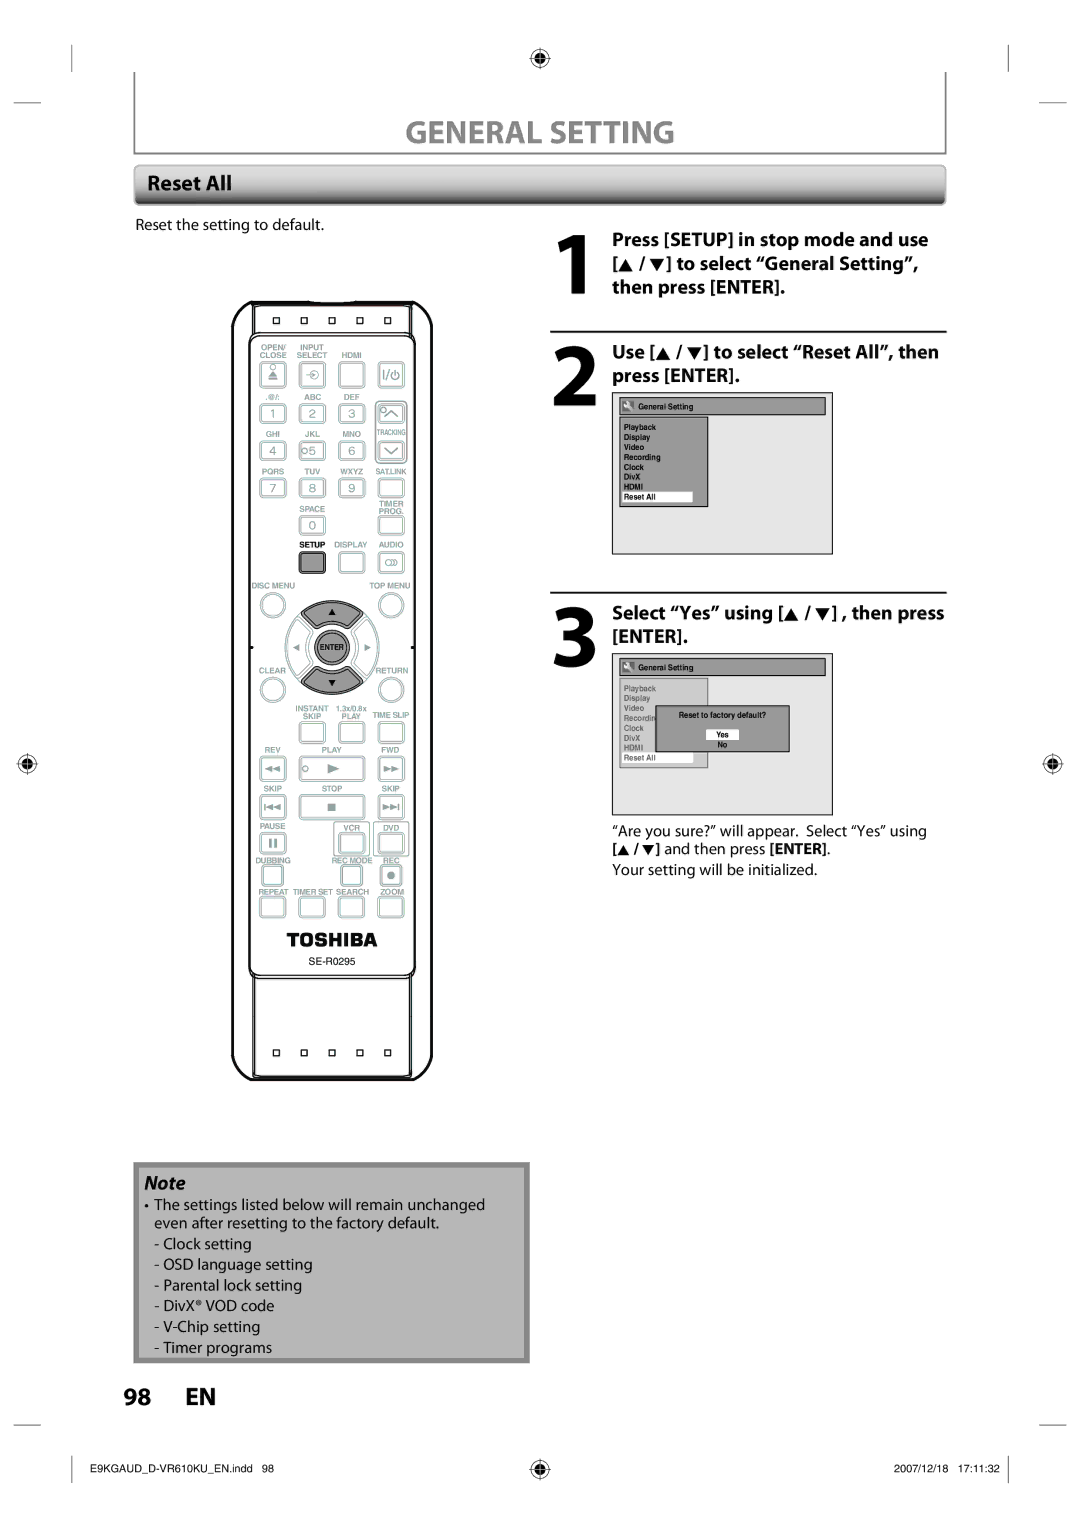
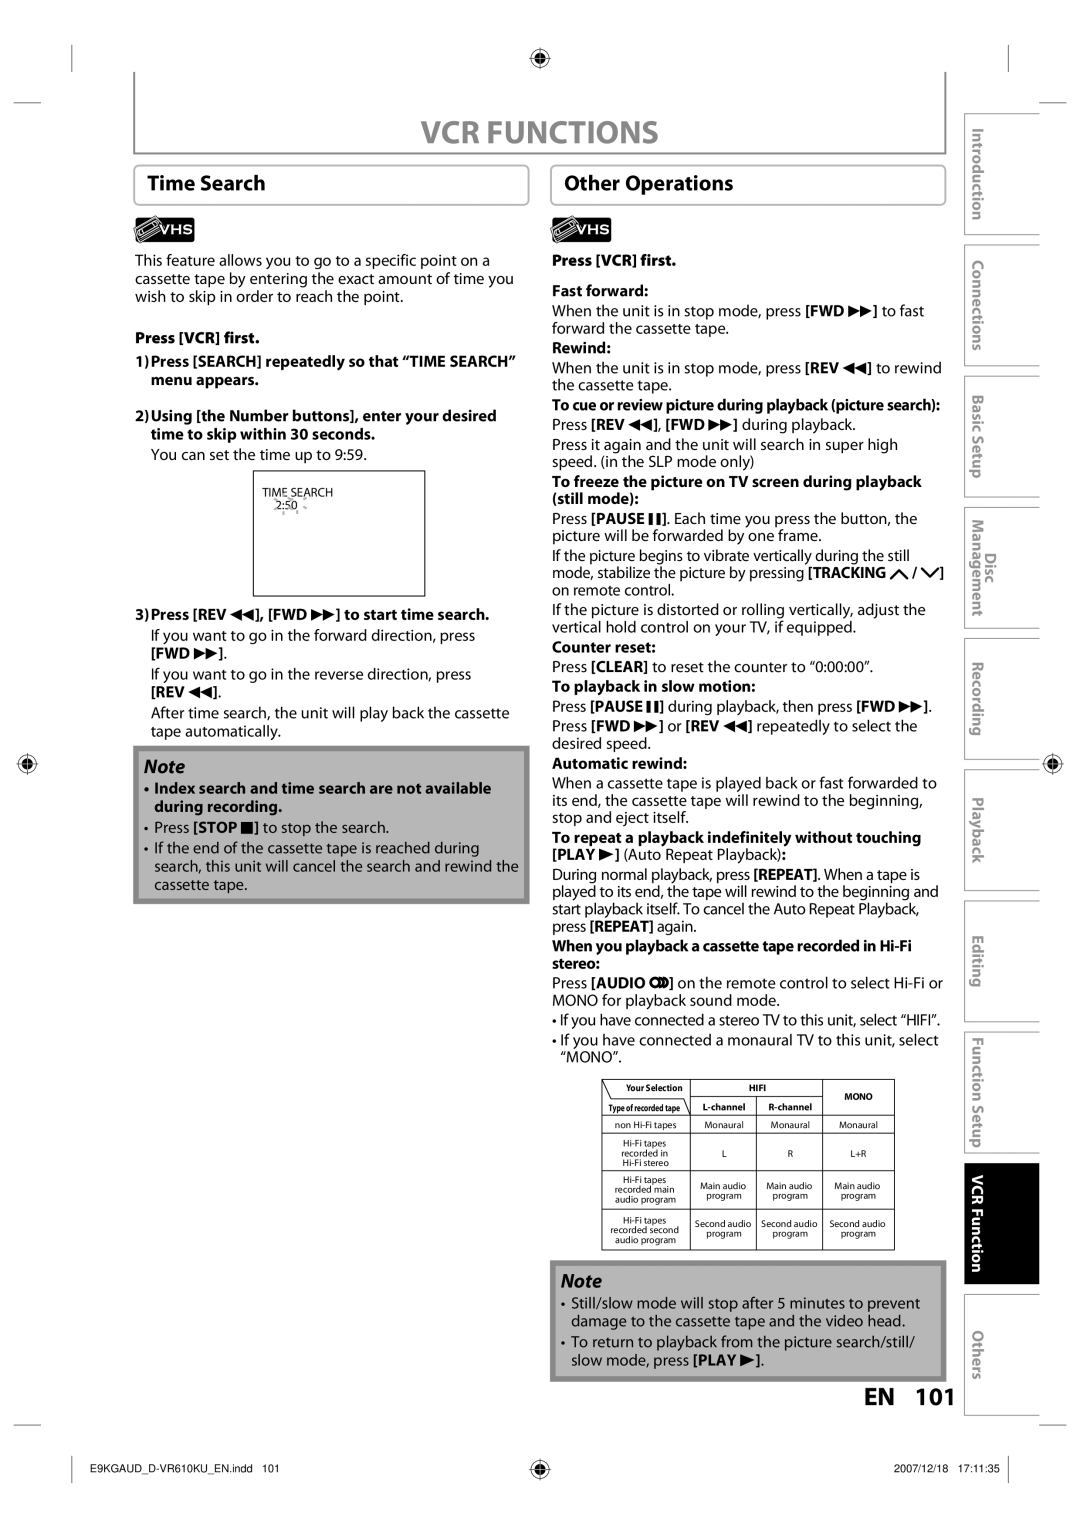
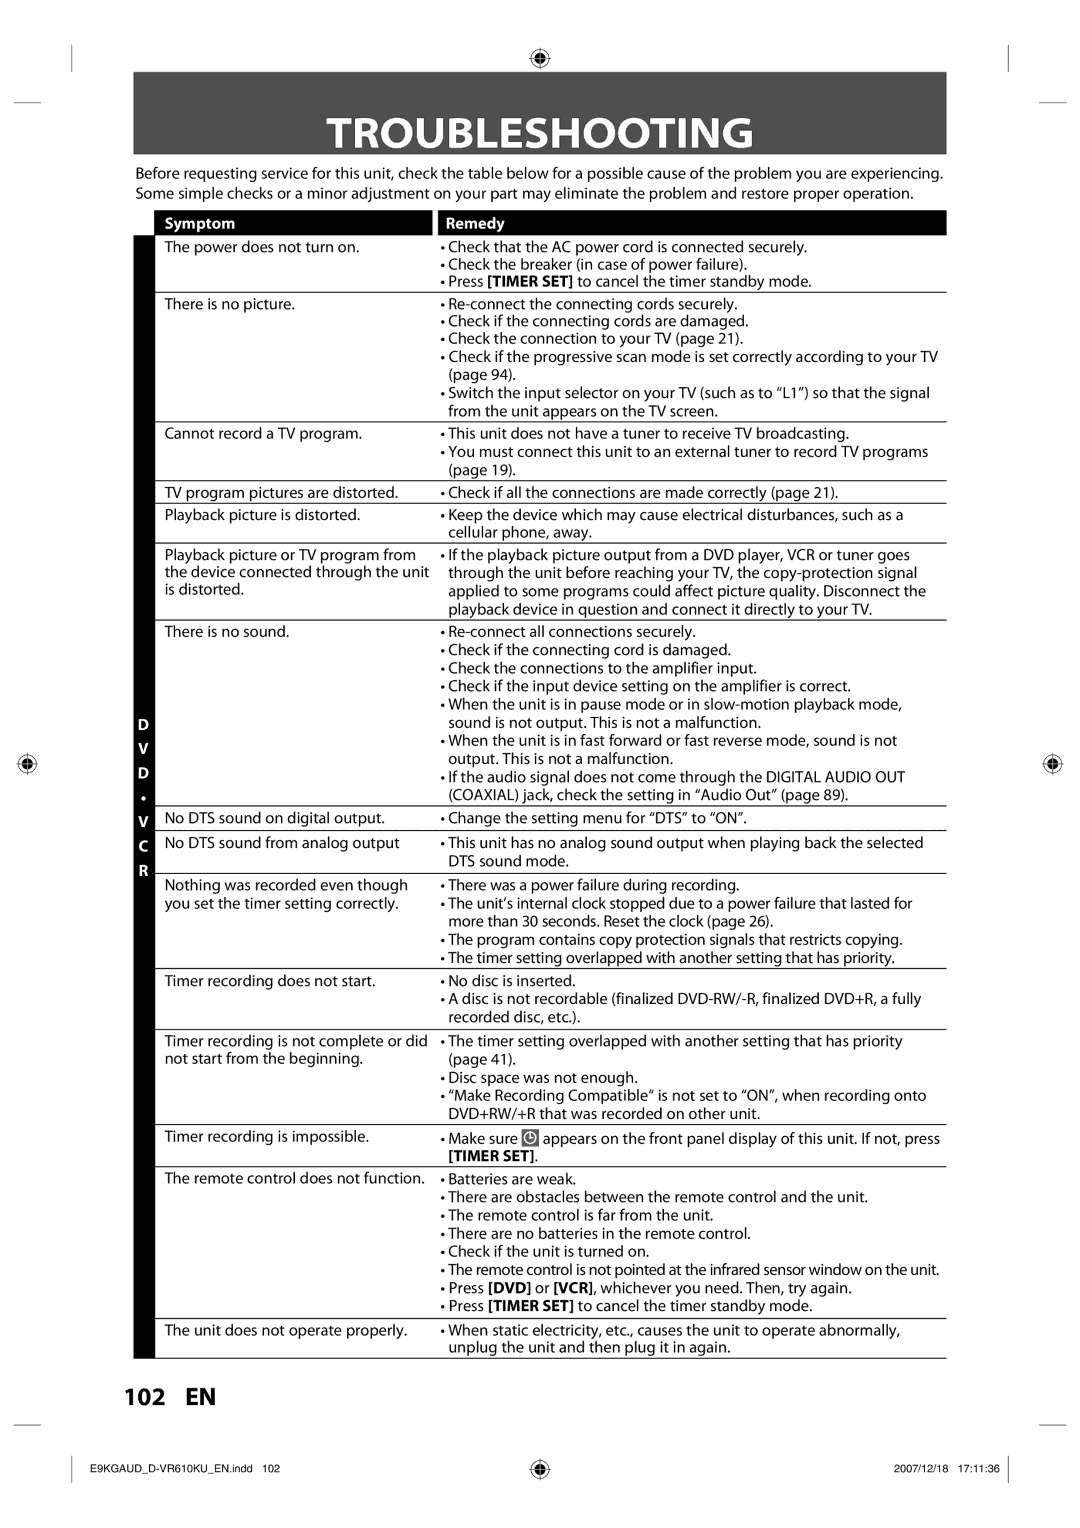
Contents Editing Owner’s RecordLaser Safety PrecautionsMake your contribution to the environment RADIO-TV InterferencePrecautions Important Safety InstructionsSupplied Accessories Installation LocationAvoid the Hazards of Electrical Shock and Fire Moisture Condensation WarningCleaning the Cabinet Maintenance ServicingCleaning Discs Cleaning the Disc Lens Disc HandlingContents Contents Features DVD-RW DVD+RW FeaturesColor Systems Unplayable DiscsRegion Codes CD-DA CD-RWFront Panel Functional OverviewRear Panel Introduction ConnectionsUsing a Remote Control Installing the Batteries in the Remote ControlFunctional Overview Open the cover Insert batteriesVCR mode OPEN/CLOSE a button DVD modeSetup button Clear button DVD modeVCR mode Thevcr / DVD Recorder SwitchingOFF On-Screen Display / MenuTitle name information Guide to ON-SCREEN Displays and MenusFile name information First, track name will be displayedMain Menu Display Message Front Panel Display GuideDB HDD Following the steps in Settings for the Video Input Plug in the power cords of the devices to the AC outletWith this setup Make the connection as illustrated belowPress Setup to exit Settings for the Video InputIf you want to use S-VIDEO in jack, select S-Video This unit Connection to a TVAudio OUT DVD Video OUT Component Video OutputAvailable for DVD only Hdmi Mode and Actual Output SignalsHdmi cable Cables not included2channel PCM Actual Output Modes by MediaDVD-video Stream Dolby Digital DivX Stream Dolby Digital MP3 / MP2Audio Connection to AN Audio SystemAudio OUT Digital Audio OUTProceed to in Clock Setting on Initial SettingPress Enter to activate Clock Clock Setting Setting the ClockSet the clock before you try the timer programming Use K / L to select calendar or time, then press EnterChoosing the Recording Format of a Brand-New DVD-RW Formatting a DiscUse K / L to select Format, then press Enter Use K / L to select Format Mode, then press EnterFormatting a Disc If you want to cancel formatting, select NoReformatting a Disc Manually Formatting is completed.100% is indicatedPress Setup Use K / L to select DVD Menu, then press Enter Setting a Disc to ProtectTo cancel the disc protect Use K / L to select Disc ProtectYour setting will be activated General Setting menu will appearAuto Finalizing Finalizing a Disc Playing the Discs in Other DVD PlayersFinalizing is completed 32 EN Information on DVD Recording Recording ModeRestrictions on Recording VideoSetting for Auto Chapter Settings for a RecordingPress Setup to exit Make Recording CompatibleSetting Aspect Ratio for Video Mode Settings for a RecordingRecording Audio Select XP RecordingPress I/y ON/STANDBY Press REC Mode to select a recording modePress OPEN/CLOSE a to close the disc tray It may take awhile to load Disc completelyPress Stop C to stop recording Press REC I to start recordingWill be displayed for 5 seconds Guide to Timer Programming Display Timer RecordingBefore recording, make sure If you have not set the clock yetPress Enter when all items are entered Timer RecordingPress Timer SET to set a timer programming Use K / L to enter the date, then press BTo stop the timer recording in progress Priority of Overlapped Settings Hints for Timer RecordingRecording Satellite Link Use K / L to select the recording modePreparation on this unit Press Timer SET to turn on the unit To Standby Mode is highlightedSatellite Link Press EnterConnection to an External Device External deviceRecording from an External Device Settings for AN External DeviceGuide to DV and On-Screen Display DV DubbingDVC to DVD Dubbing DV DubbingPress DVD first Press DisplayPress VCR first DVC to VCR DubbingRepeat the steps 1 and 2 on To stop recording, press Stop CUse K / L to select Dubbing Mode, then press Enter DVD/VCR DubbingUse K / L to select Recording, then press Enter Make surePress DVD DVD/VCR DubbingPress Dubbing Press Stop C to stop the recordingInformation on Playback Structure of Disc ContentsDirect Playback Basic PlaybackPress Stop C once to stop playback temporarily Playback from the Title List Basic PlaybackUse K / L / / B to select a desired title, then press Enter When selecting folder When selecting track/fileHints for audio CD tracks and MP3 / WMA / Jpeg files MP3 / WMAPlaying Back a DivX When selecting fileFollow steps 1 to 2 in Direct Playback on DivX3.x, DivX4.x Official DivX Certified productDivX5.x, DivX6.0 Maximum size of imagePause Using the Title/Disc MenuPress DVD first During playback, press Pause F Playback will be paused and sound will be mutedResume Playback Special PlaybackFast Forward / Fast Reverse Playback 40x REVRapid Playback Special PlaybackStep by Step Playback Slow Forward / Slow Reverse PlaybackZoom Marker SettingPress DVD first During playback, press Display or Zoom During recording, press Play B Chasing Playback during RecordingWhile viewing a TV broadcast via this unit, press Time Slip This unit start to record the TV broadcastSelected title playback will start Simultaneous Playback and RecordingChapter To move to for chapter, press BUsing Display Using Skip j / SkipSearch Title/Chapter SearchTime Search SearchRandom Playback Repeat PlaybackProgram Playback REPEAT/RANDOM/PROGRAM PLAYBACK/SLIDE ShowSlide Show 5Press Play BSwitching Audio Soundtrack Switching SubtitlesSelecting the Format of Audio and Video Switching Virtual Surround System Switching Camera AnglesReducing Block Noise Use K / L to select Black Level, then press Enter Adjusting Black LevelGuide to a Title List Information on Disc EditingAfter the disc is fully recorded Deleting TitlesDeleting Titles Adding Titles to a Playlist CREATING/DELETING PlaylistUse K / L to select Yes, then press Title is added to playlistErasing All Playlist CREATING/DELETING PlaylistUse K / L to select Yes, then press ENTER.DVD Menu Playlist can be deleted if it is no longer neededPutting Names on Titles Editing DiscsPutting Names on Titles cont’d Editing DiscsGuide to Edit Title Name Use Skip H / G Setting Chapter MarksPress Return Press Return again and then Return or Stop C to exitUse K / L to select Edit, then Hiding ChaptersUse Skip H or Skip G to decide the chapter to be hidden Use K / L to select Hidden, thenDeleting a Part of a Title VR mode DVD-RW playlistUse K / L to select Delete then press Enter Deleting a Part of a Title cont’dPress Return and then Return or Stop C to exit Press DVD Stop mode, press TOP Menu Dividing a TitleUse K / L/s / B to select a desired title, then press Enter You can combine two titles into a single title Combining TitlesTwo titles will combine into a single title To protect a whole disc VR mode DVD-RW, DVD+RW/+R only Setting or Releasing the Title ProtectionConfirm the indication OFF ON. Press Enter again Use K / L to select Protect, thenThen press Enter Setting or Clearing All Chapter Marks at OnceUse K / L to select Chapter Mark Use K / L to select the desired interval, then press EnterSetup Items highlight is the default Contents List of the Default SettingsItems highlight is the default Contents List of the Default SettingsPlayback General SettingUse K / L to select a desired item Then press EnterParental Lock Default OFF General SettingUse the Number buttons to enter the current password Playback cont’dAudio Out Audio Language Default Original Disc Menu Language Default EnglishSubtitle Language Default OFF Angle Icon Default onScreen Saver Default 10 minutes OSD Language Default EnglishFL Dimmer Default Bright DisplayDisplay cont’d Use the Number buttons to enter the access passwordChip Use K / L to select a desired item, then press EnterCanadian English Rating Use the Number Buttons to enter new access passwordTV Aspect Default 43 Letter Box Progressive Default OFFVideo Selected itemDivX DivX Subtitle Default OFFDivX VOD Set the DivX subtitleUse K / L to select HDMI, then press Enter Format Default RGBSet to OFF when the Hdmi sound is not output Hdmi Audio Default onRGB Range Default Normal Hdmi cont’dSelect Yes using K / L , then press Enter Reset AllReset the setting to default Tracking VCR FunctionsPress VCR first Before recording, make sure Recording speedYou cannot pause the one-touch timer recording One-touch Timer Recording OTRUsing REC I or Stop C VCR FunctionsOther Operations Symptom Remedy TroubleshootingTroubleshooting REC There is no picture Picture noise appearsCan I record to CD-RW/-R? No, this unit records only DVD Frequently Asked QuestionsLanguage Code Language CodeGlossary General SpecificationsInput / Output Limited Warranty Limited WarrantyLPLWHG2QH  HDUDUUDQW\RQ3DUWVDQG/DERXU Limited Warranty$UELWUDWLRQDQGLVSXWH5HVROXWLRQ General Setting 98 EN VCR Functions VCR Functions Time Search Troubleshooting Troubleshooting 104 EN Frequently Asked Questions Language Code Glossary Specifications Limited Warranty Limited Warranty $UELWUDWLRQDQGLVSXWH5HVROXWLRQ
Related manuals
Manual 117 pages 19.72 Kb