SAMSUNG Video Wall Kit Setup Guide | 3. Fixing |
3. Fixing
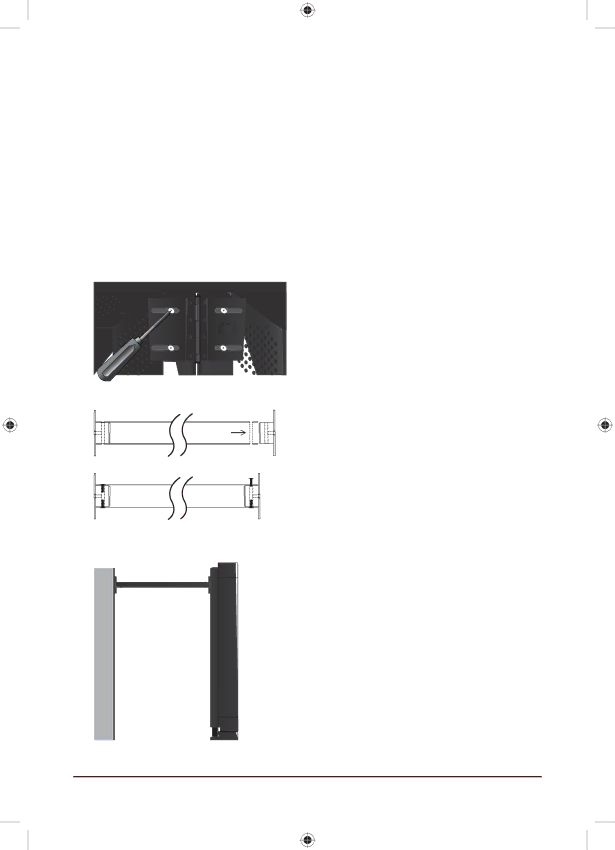
Fixing the monitor to the wall
If the monitor is not fixed to the wall, movement of up to ±1degrees at the front and back may occur. Therefore, make sure to fix the monitor to the wall using the
NCreate a fixing pipe referring to the specifications of the
[Required Parts]
●A
●Fixing Screws
1. After installing the product, connect the
2. Insert the prepared fixing pipe into the
3.Check the position of the wall and fix the
Note: Maintain a distance of at least 50cm from the wall.
11