U s i n g | t h e | P r o j e c t o r |
|
|
|
NOTE: If you have turned Auto Source off (page 45), you may need to press the source button more than once to display an active source. The sources switch in this order: PC
HDTV, Video 3-Component, Video
1
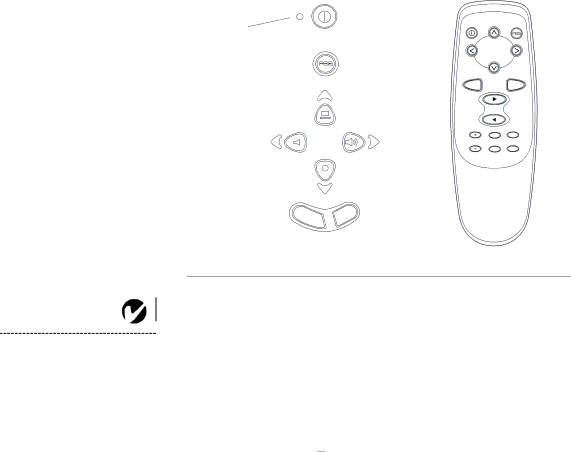
Using the Keypad and Remote Buttons
While the menus are displayed, the volume, source, and standby buttons on the keypad act as menu navigation buttons. See “Using the
power
LED | power | menu/select | |
menu |
|
|
|
| zoom - |
| zoom + |
source | - |
| + |
|
|
| forward |
| backward |
|
|
volume - | volume + | zoom mode | data |
|
| ||
| keystone | standby | video |
standby
- keystone +
FIGURE 24
Keypad and remote buttons
Menu/select 
Press the menu/select button to open the
Source (keypad only) 


 or Data and Video (remote only)
When you have more than one source (computer and video) con- nected to the projector, select between them by pressing the source button on the keypad or the data or video button on the remote.
30