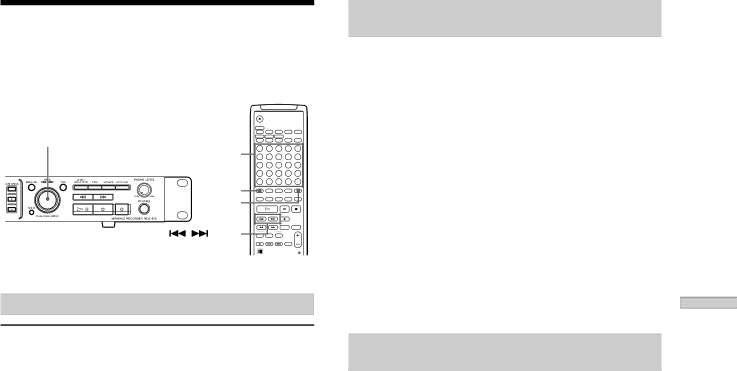
Playing a Specific Track
While the recorder is playing, pause or stopped, use the procedure below to quickly play any track.
|
| M.ACCESS |
|
|
|
| |
AMS |
| CONTINUE | SHUFFLE PROGRAM |
|
| ||
| 1 | 2 | 3 | 4 | 5 | ||
NUMBER BUTTONS | |||||||
6 | 7 | 8 | 9 | 10 | |||
|
| 11 | 12 | 13 | 14 | 15 | |
|
| 16 | 17 | 18 | 19 | 20 | |
| >25 | 21 | 22 | 23 | 24 | 25 | |
| >25 |
|
|
|
| ||
| M.SCAN | NAME | CHAR | NUM |
|
| |
|
|
|
|
|
| ||
/ | (AMS) |
|
|
|
|
| |
|
|
|
|
| |||
Locating a track with AMS*
To go to | Do the following: |
The next or a succeeding | Turn AMS clockwise (or press |
track during play | > repeatedly). |
A preceding track | Turn AMS counterclockwise |
during play | (or press . repeatedly). |
The beginning of the | Turn AMS counterclockwise |
current track during play | (or press . once). |
A specific track while the | 1 Turn AMS (or press ./ |
recorder is stopped | > repeatedly) until the |
| track number appears in the |
| display. |
| 2 Press AMS or 7. |
* Automatic Music Sensor |
|
zTo locate the last track of the MD quickly
While the recorder is stopped, turn AMS counterclockwise (or press . once).
zIf you locate a track while the recorder is stopped or paused
The recorder will still be stopped or paused at the beginning of the located track.
Playing a track by entering the track
number Z
Press the number button(s) to enter the track number of the track you want to play.
To enter a track number over 26
1Press >25.
See the examples below for the number of presses.
2Enter the corresponding digits. To enter 0, press 10 instead.
Examples:
•To play track number 30, press >25, then 3 and 10.
•To play track number 108, press >25 twice, then 1, 10, and 8.
zIf you enter a track number while the recorder is paused
The recorder will be paused at the beginning of the track.
Locating a point by monitoring the beginning of each track Z (Music Scan)
If M.SCAN is pressed during stop, the beginning of each track is played sequentially only at the set fix time. Press H for the track you want to monitor.
zYou can adjust the play time for the beginning of a track by
MUSIC SCAN
1Press MENU/NO twice.
“Setup Menu” appears in the display.
2Turn AMS (or press ./> repeatedly) to select “Music Scan,” then press AMS or YES.
3Turn AMS until the desired time of 6 to 20 seconds appears in the display, then press AMS or YES.
4Press MENU/NO.
Playing MDs
29