Safety 1st TR233BKL manual Rear Wheels

Page 6

Assembly / Armado

4


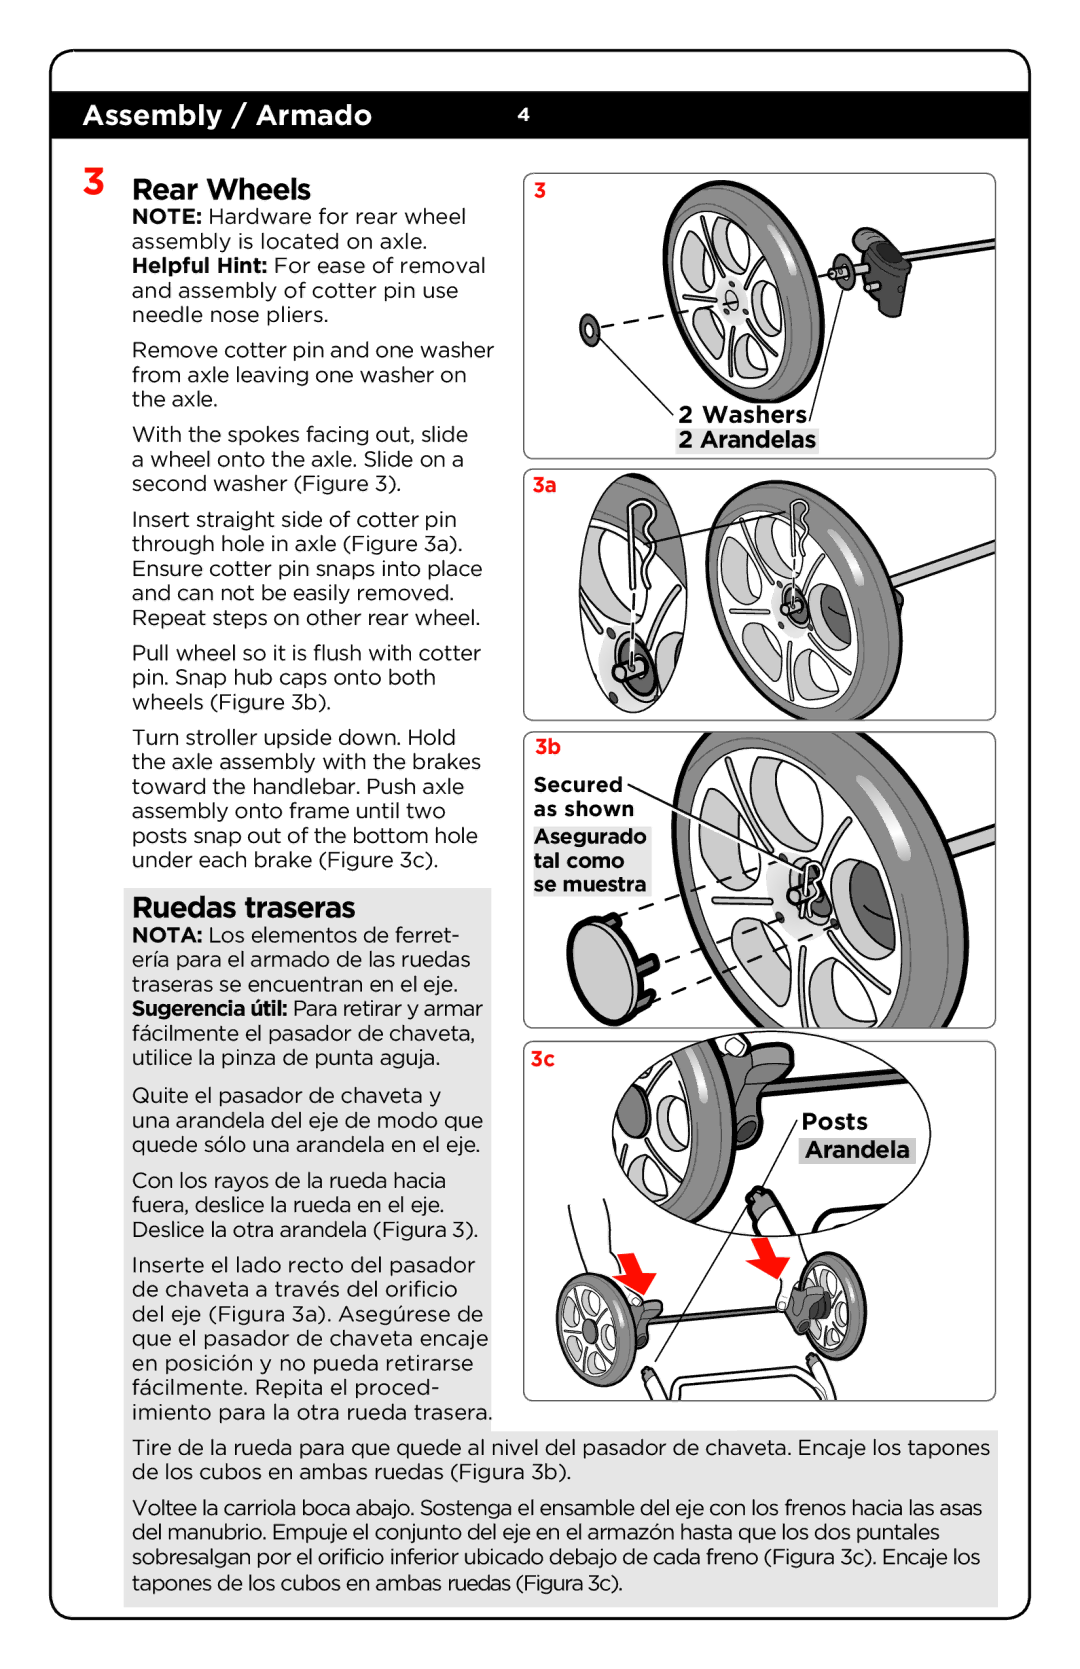
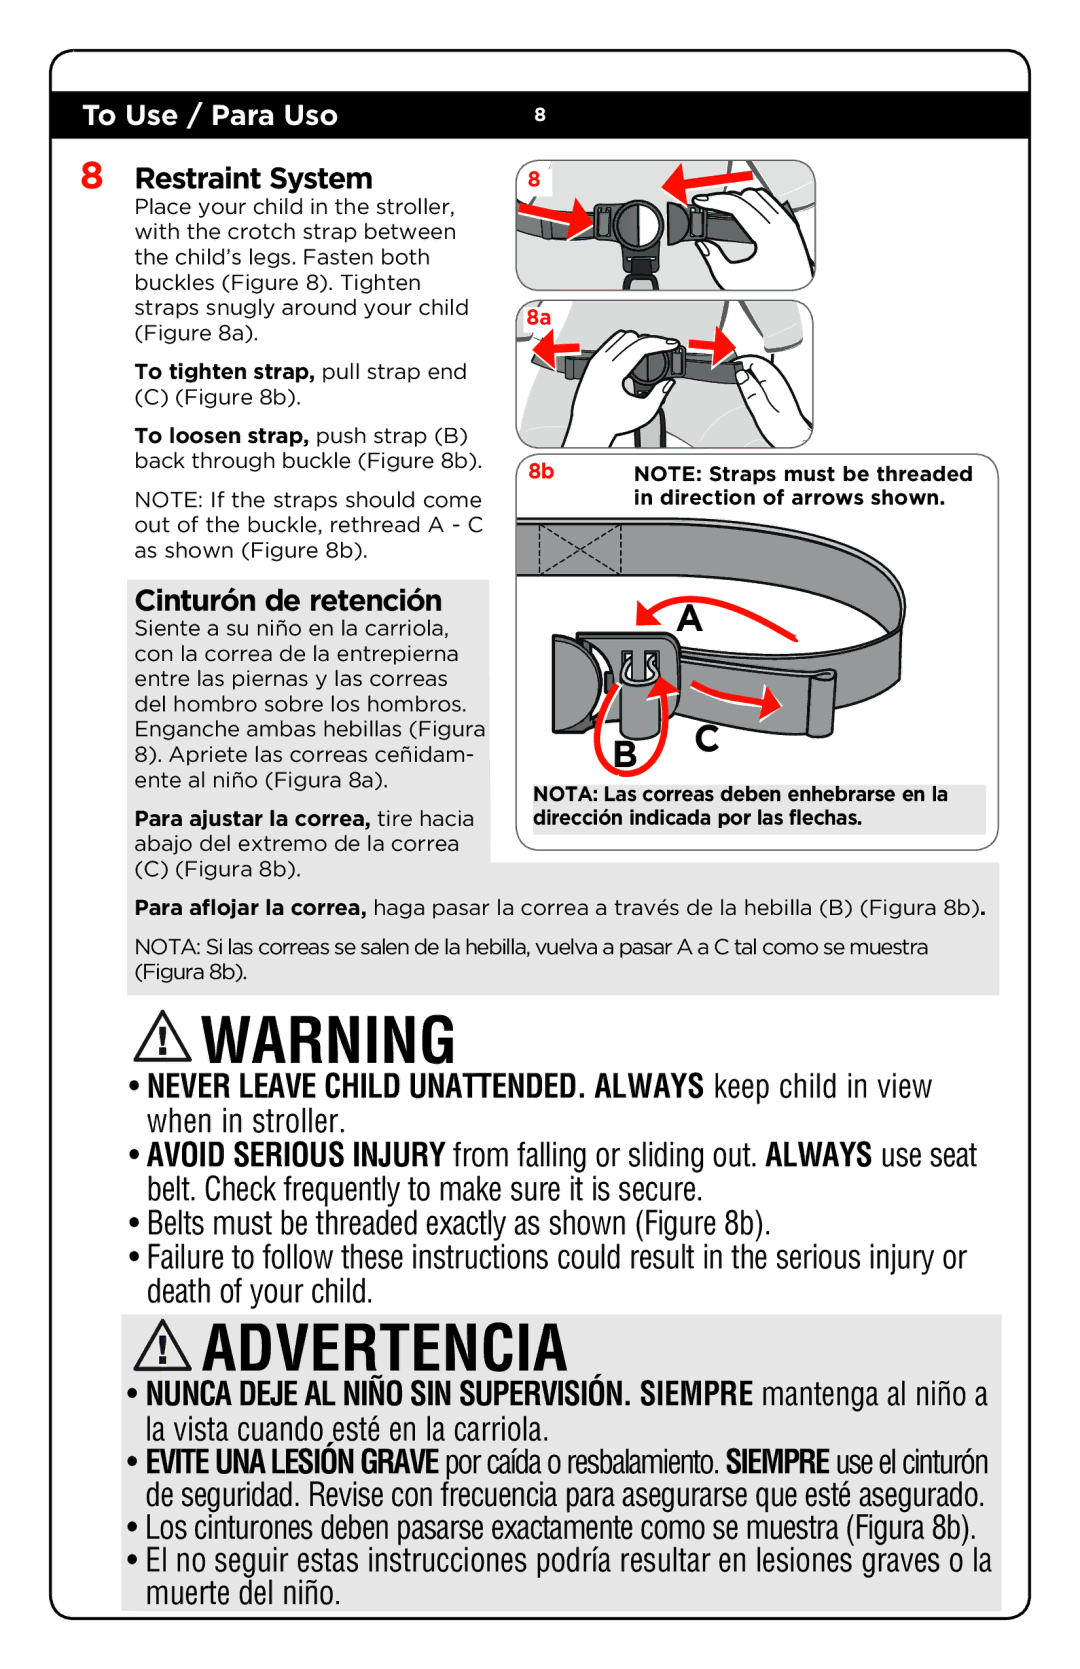
3 Rear Wheels

3

NOTE: Hardware for rear wheel


assembly is located on axle.


Helpful Hint: For ease of removal


and assembly of cotter pin use


needle nose pliers.


Remove cotter pin and one washer


from axle leaving one washer on


the axle.

2 Washers

With the spokes facing out, slide

2 Arandelas

a wheel onto the axle. Slide on a


second washer (Figure 3).

3a

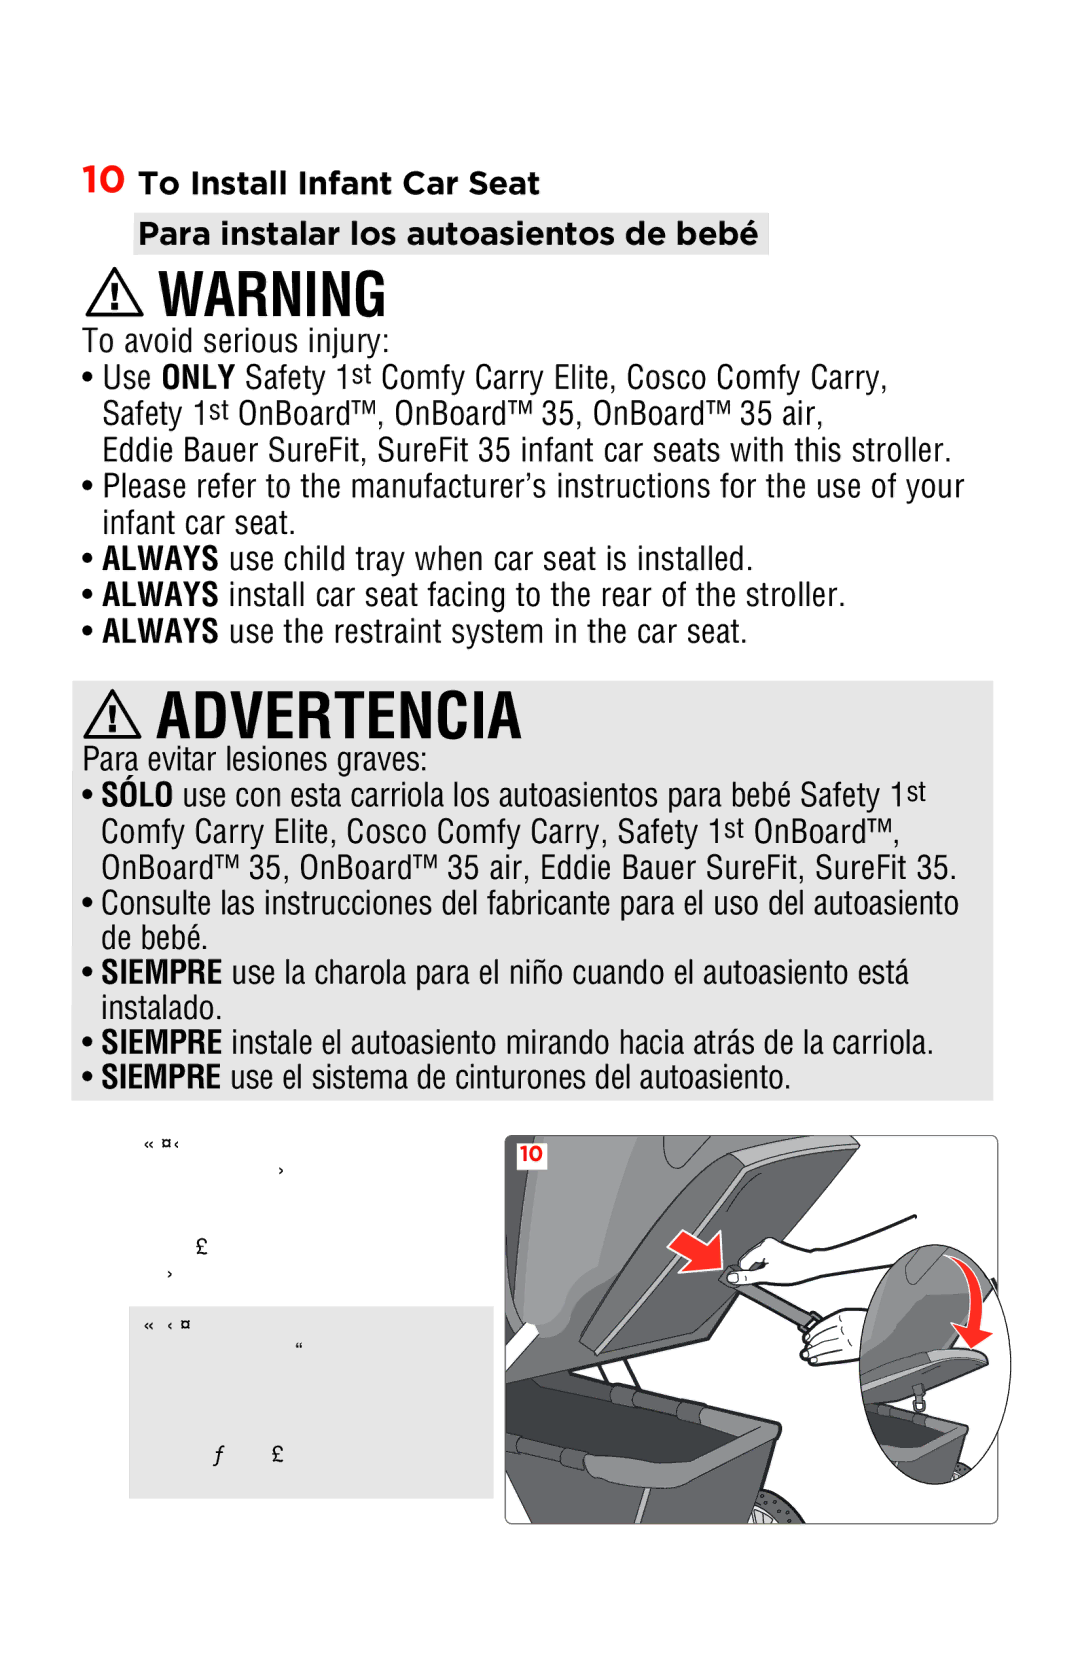
Insert straight side of cotter pin


through hole in axle (Figure 3a).


Ensure cotter pin snaps into place


and can not be easily removed.


Repeat steps on other rear wheel.


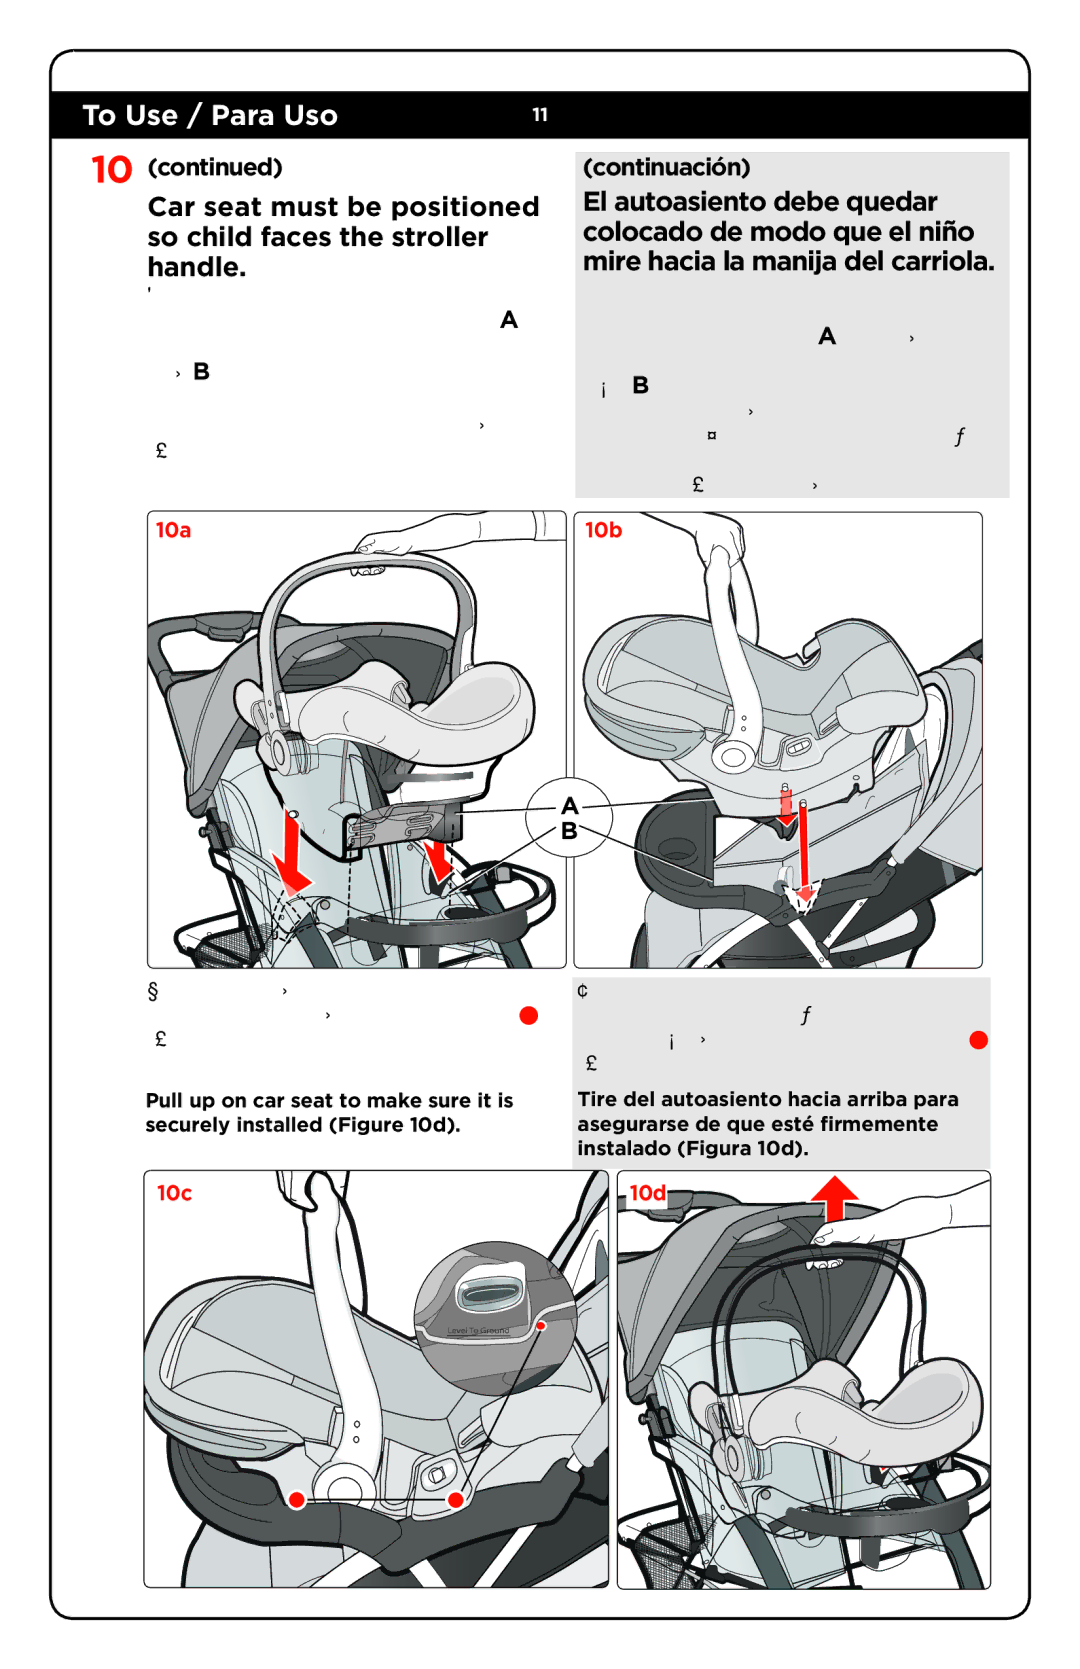
Pull wheel so it is flush with cotter


pin. Snap hub caps onto both


wheels (Figure 3b).


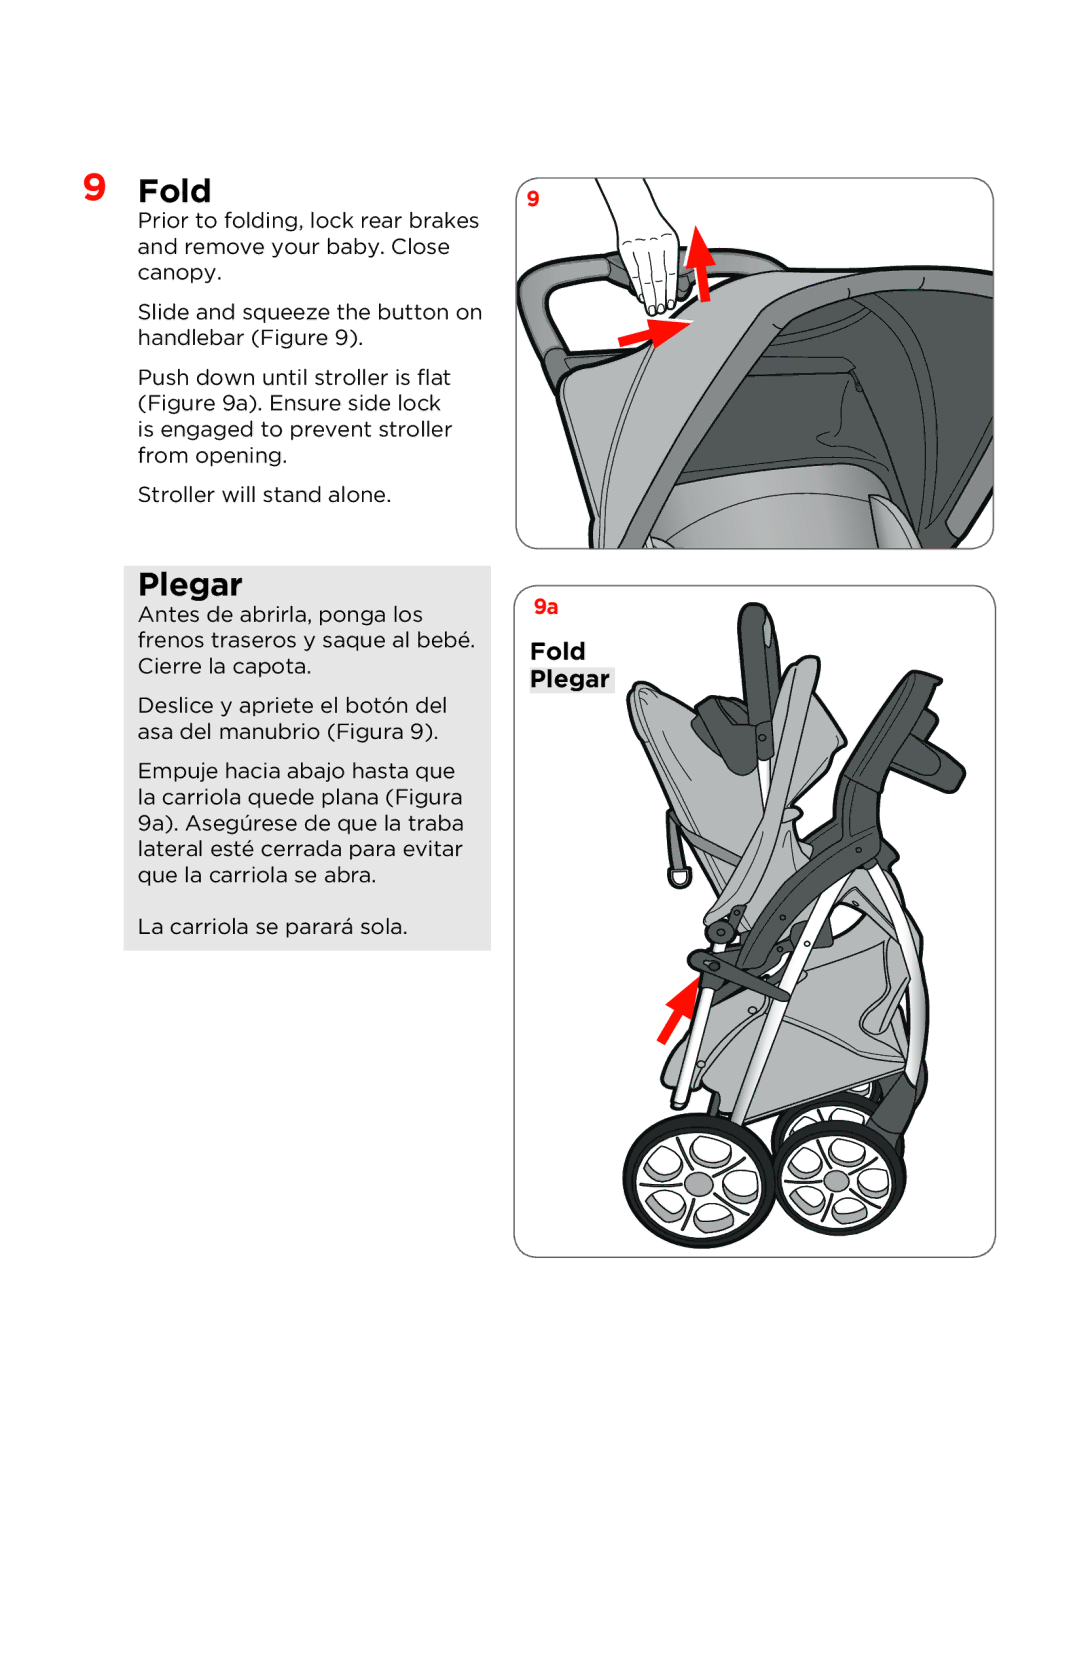
Turn stroller upside down. Hold

3b

the axle assembly with the brakes

Secured

toward the handlebar. Push axle

assembly onto frame until two

as shown

posts snap out of the bottom hole

Asegurado

under each brake (Figure 3c).

tal como

Ruedas traseras

se muestra


NOTA: Los elementos de ferret-


ería para el armado de las ruedas


traseras se encuentran en el eje.


Sugerencia útil: Para retirar y armar


fácilmente el pasador de chaveta,


utilice la pinza de punta aguja.

3c

Quite el pasador de chaveta y

Posts

una arandela del eje de modo que

quede sólo una arandela en el eje.

Arandela

Con los rayos de la rueda hacia


fuera, deslice la rueda en el eje.


Deslice la otra arandela (Figura 3).


Inserte el lado recto del pasador


de chaveta a través del orificio


del eje (Figura 3a). Asegúrese de


que el pasador de chaveta encaje


en posición y no pueda retirarse


fácilmente. Repita el proced-


imiento para la otra rueda trasera.


Tire de la rueda para que quede al nivel del pasador de chaveta. Encaje los tapones de los cubos en ambas ruedas (Figura 3b).

Voltee la carriola boca abajo. Sostenga el ensamble del eje con los frenos hacia las asas del manubrio. Empuje el conjunto del eje en el armazón hasta que los dos puntales sobresalgan por el orificio inferior ubicado debajo de cada freno (Figura 3c). Encaje los tapones de los cubos en ambas ruedas (Figura 3c).

Image 6
Contents Rendezvous Travel System/ Sistema de Viaje Rendezvous Adult assembly required Nunca debe llevar más de UN niño en está carriola Parts / Lista de piezas Front Wheels Unfold StrollerAbra la carriola Ruedas delanterasRear Wheels Parent Tray Charola para los padresChild Tray Charola para el niñoFrenos BrakesEngage Swivel Locks Seguros de giroAdvertencia Fold PlegarTo avoid serious injury 10c To Remove Infant Car Piezas de repuesto Stroller Care and MaintenanceReplaceable Parts Cuidado y mantenimiento de la carriolaOne-Year Limited Warranty Garantía limitada de un año

TR233BKL, TR233 specifications

The Safety 1st TR233 and TR233BKL are innovative booster seats designed with the safety and comfort of children in mind. These models prioritize secure travel for young passengers, incorporating a range of features and technologies that make them stand out in the market.

One of the key features of the TR233 and TR233BKL is their adjustable height. This flexibility allows the booster seat to grow with your child, ensuring it remains suitable as they progress from toddlerhood to pre-adolescence. The height adjustment mechanism is user-friendly, making it easy for parents to modify the seat according to their child's needs without any hassle.

Safety is paramount in these booster seats. They are equipped with a robust safety harness system that secures the child effectively, providing peace of mind for parents during travel. The TR233 and TR233BKL also boast side impact protection, which is fundamental in safeguarding children against potential collisions. This feature absorbs impact energy and helps minimize the risk of injury in the event of an accident.

Comfort is another essential aspect of the TR233 and TR233BKL. They feature plush padding and support for longer journeys, ensuring that children remain comfortable during trips. The fabric is designed to be breathable and easy to clean, addressing the inevitable spills and messes that come with young children.

The design of both models is sleek and modern, making them an attractive addition to any vehicle's interior. They come in a variety of colors, allowing parents to choose an option that best suits their style.

Additionally, installation is straightforward. The TR233 and TR233BKL use a combination of ISOFIX connectors and a seat belt system, ensuring a secure and stable fit in most vehicles. This ease of installation minimizes the risk of improper setup, which can be a concern with safety seats.

In summary, the Safety 1st TR233 and TR233BKL booster seats combine flexible height adjustment, robust safety features, and comfortable design. Their user-friendly installation and modern aesthetics make them a valuable choice for parents seeking both practicality and style in child transportation. With these booster seats, families can feel secure while ensuring their children travel comfortably.