English
Using the Microphone
|
|
| NTSC/PAL |
| |
|
|
| COMPATIBILITY | PLAY & EXCHANGE | |
| |||||
|
| ||||
1 | 2 | 3 | STANDBY/ON |
| |
|
|
| COMPACT COMPONENT SYSTEM | 1 BIT DUAL D/A | |
|
|
|
|
| |
|
|
|
|
| CONVERTER |
4 | 5 | 6 | SLEEP |
| ACTIVE |
| BASS EX. | ||||
7 | 8 | 9 |
|
| AUX |
|
|
|
|
|
|
|
|
|
|
| NEXT |
|
|
|
|
|
|
|
|
|
|
|
|
|
|
|
|
| PRESET |
| K |
|
|
| |||||
|
|
|
|
|
|
|
|
|
|
|
|
|
|
|
|
|
|
|
|
| O | |
|
|
|
|
|
|
|
|
|
|
|
|
|
|
|
|
|
| C |
|
|
| P |
|
|
|
|
|
|
|
|
|
|
|
|
|
|
| PREV |
| R | O |
|
|
|
|
10 | +10 | FM MODE | FM /AM |
|
| STANDBY/ON |
|
|
|
|
|
|
|
|
|
|
| SOUND |
| |||
|
|
| CANCEL | SET |
|
|
| ME |
|
|
| MODE |
| |||||||||
| STANDBY |
|
|
|
|
|
|
|
|
|
| |||||||||||
|
|
|
|
|
|
|
|
|
|
|
|
|
|
|
|
| LU |
|
|
|
|
|
|
|
|
|
|
|
|
|
|
|
|
|
|
|
|
| V | O |
|
|
|
|
|
CD1 | CD2 | CD3 | CD | SELECT |
|
|
|
|
|
|
|
|
|
|
|
|
|
|
| CLA SSIC |
| |
VOLUME |
|
|
|
|
|
|
|
|
|
|
|
|
|
|
|
| ||||||
/RANDOM | REPEAT | TAPE A/B TAPE | PHONES | AUX | FM/AM |
| CD | T A P | E | TUNING |
|
|
|
|
|
| DISC SKIP |
| ||||
PROGRAM |
|
|
|
|
|
|
|
|
|
|
|
|
|
|
|
|
|
|
|
|
|
|
|
|
|
|
|
|
|
|
| SELECT |
| REC START | CD |
|
|
|
|
|
| CD CONTROL | |||
PREV. | NEXT | V.INTRO | HIGHLIGHT |
|
| REPEAT | PROGRAM | RANDOM | /STOP | REC START DUBBING |
|
|
|
|
|
|
| |||||
|
|
|
|
|
|
|
|
|
|
|
|
|
|
|
|
| ||||||
|
|
|
|
|
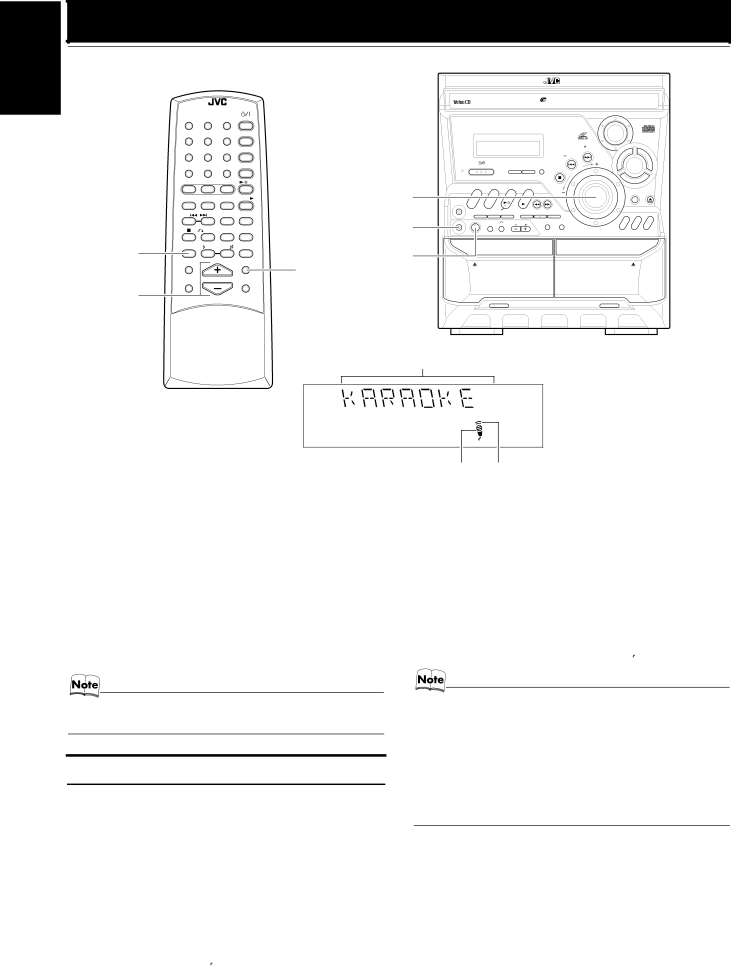
| MIC jack | MIC | MIC LEVEL |
| KEY CONTROL | CLOCK | TAPE |
|
|
|
| 1 | 2 | 3 | |||
|
|
|
|
|
|
|
| PBC |
| /TIMER | A/B |
|
|
| D | |||||||
|
|
|
|
|
|
|
|
| RETURN |
|
|
|
|
|
|
|
| D | D | |||
|
|
|
|
|
|
|
|
|
|
|
|
|
|
|
|
|
|
| C |
| C | C |
|
| RETURN STILL ON SCREEN | MIN | MAX |
| |
KARAOKE | KARAOKE | KEY CONTROL | MPX | MIC VOL |
|
|
SOUND |
|
|
|
| ||
| MODE |
| ECHO | ECHO | EJECT | EJECT |
|
|
|
|
|
| |
| ACTIVE | VOLUME | FADE |
|
|
|
| BASS EX. |
| MUTING |
|
|
|
VOLUME +, – |
|
|
|
| A PLAY | FULL - LOGIC CONTROL CD SYNCHRO RECORDING REC/PLAY B |
|
|
|
|
|
| |
Volume level, etc.
1
kHz
ST
Karaoke indicator Echo indicator
*When the System is in use, the display shows other items as well. For simplicity, we show here only the items described in this section.
By attaching a microphone (not supplied) to the MIC jack, you can use the System for Karaoke or microphone mixing. You can also add an echo to the microphone's sound.
![]() CAUTION:
CAUTION:
•Always set the MIC VOL control on the Unit to MIN when connecting or disconnecting the mi- crophone.
•When you will not be using the microphone, keep the MIC VOL control set to MIN, and disconnect the microphone.
Singing Along with Karaoke
The Vocal Masking function lets you use regular tapes, CDs, or records as sources for Karaoke. When you select Karaoke mode, the lead vocal volume of the source is reduced, and you can replace it by singing into the microphones as the music plays.
1 Turn the MIC VOL control on the Unit to MIN. 2 Connect a microphone by plugging it into the
MIC jack.
3 Press the KARAOKE button on the Remote Control.
The Karaoke indicator ( ![]() ) comes on.
) comes on.
4 Start a source CD, tape, or other equipment.
5 Adjust the volume, as you sing into the microphone.
To adjust the volume, use the MIC VOL control and VOL- UME control on the Unit or the VOLUME +, – button on the Remote Control.
To exit Karaoke mode, press the KARAOKE button on the Re- mote Control again. The Karaoke indicator ( ![]() ) will go off.
) will go off.
•Avoid using the following source as the playing source for Vocal Masking, since you cannot get the satisfactory re- sults.
•Radio programs — a radio signal is not as reliable as the signals coming from a tape or CD.
•Monaural sources.
•Poorly dubbed tapes.
•Sources recorded with duets, strong echo, a chorus, or only a few instruments.
29