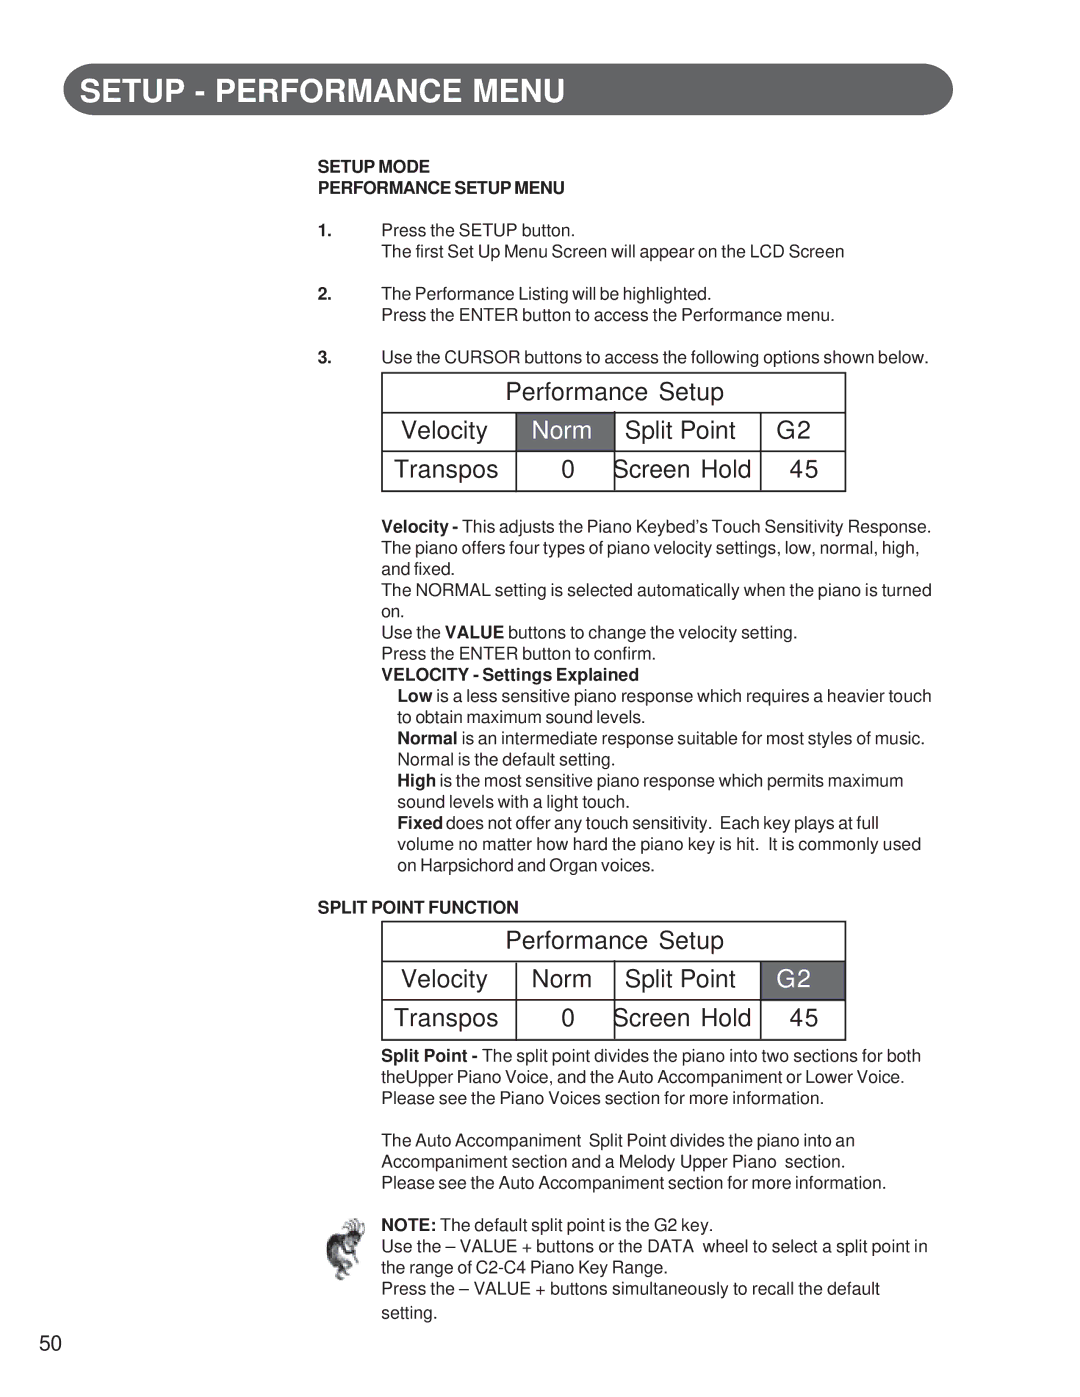
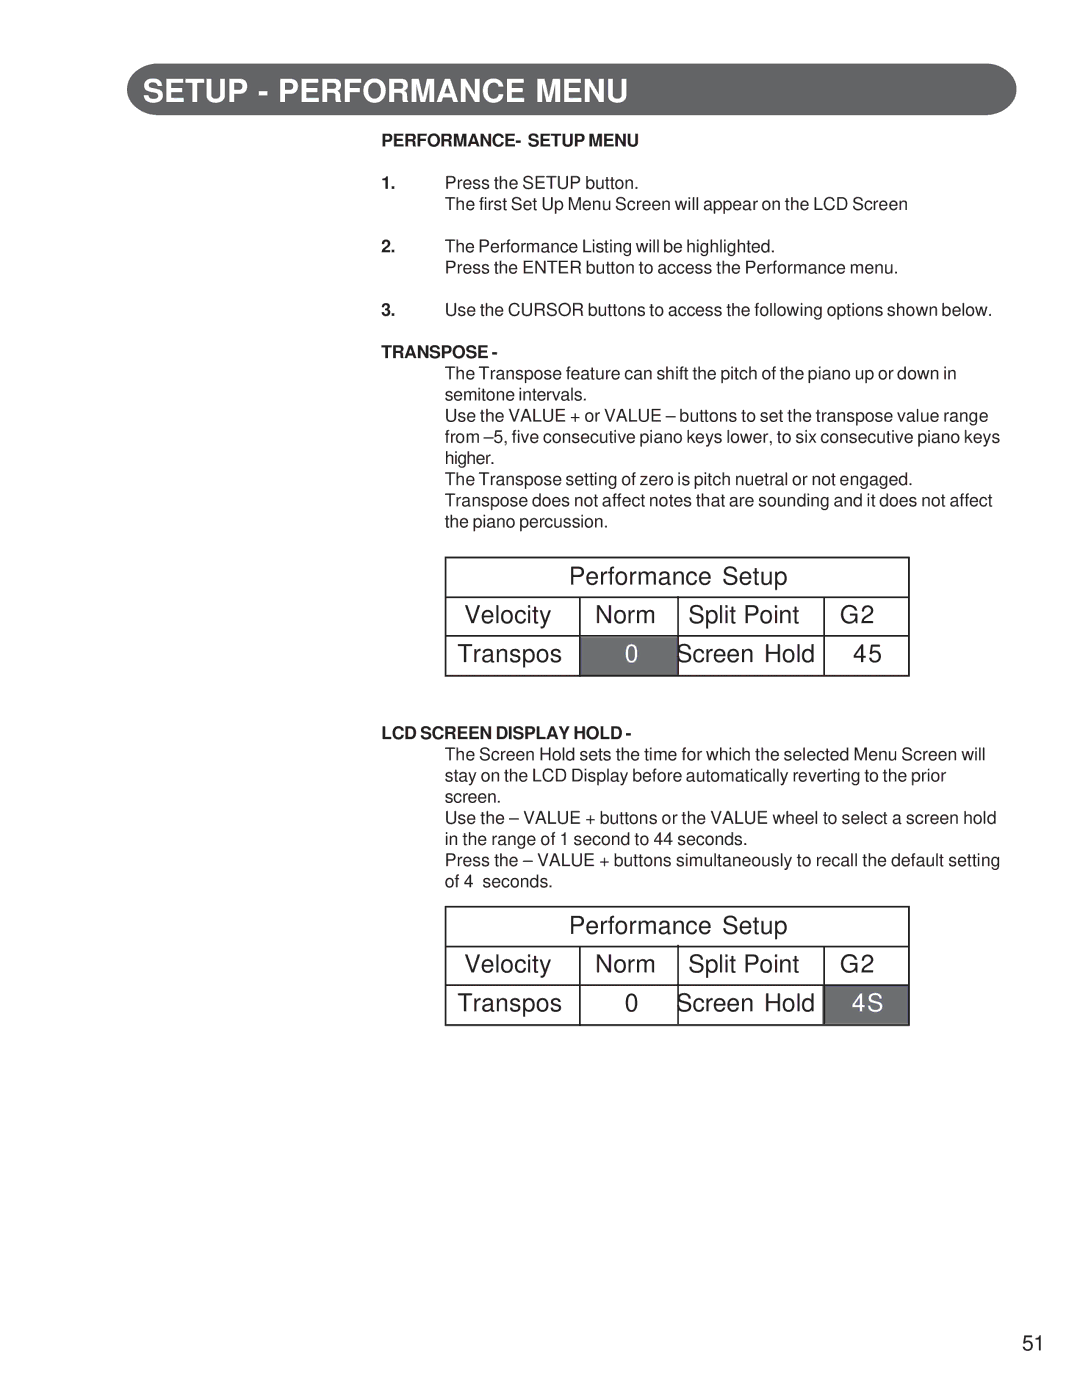
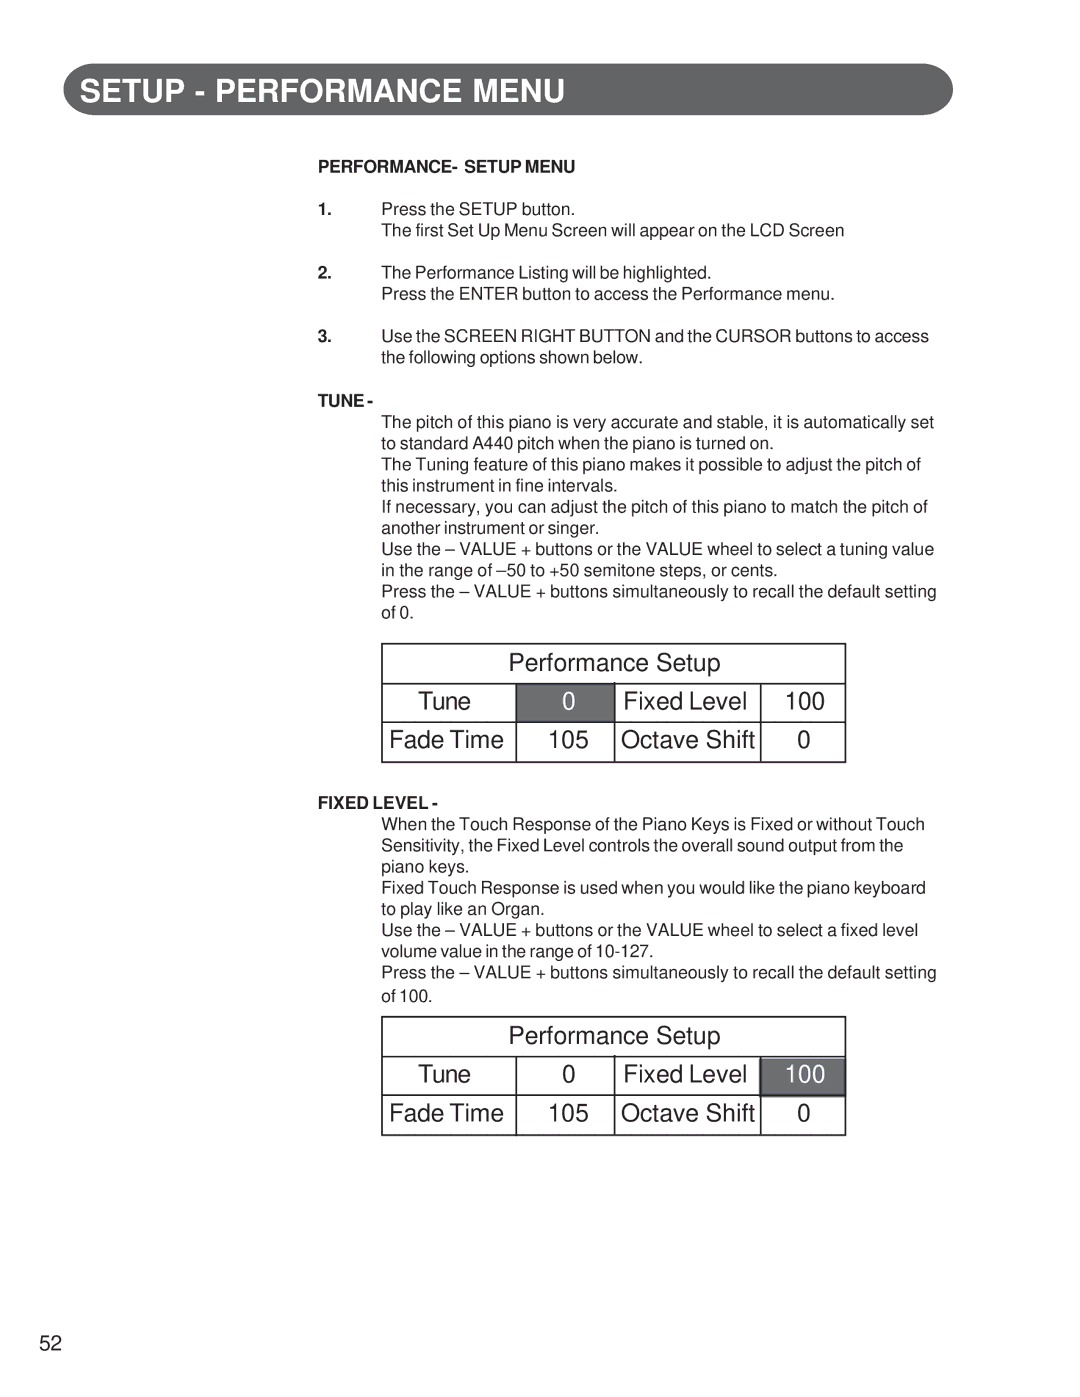
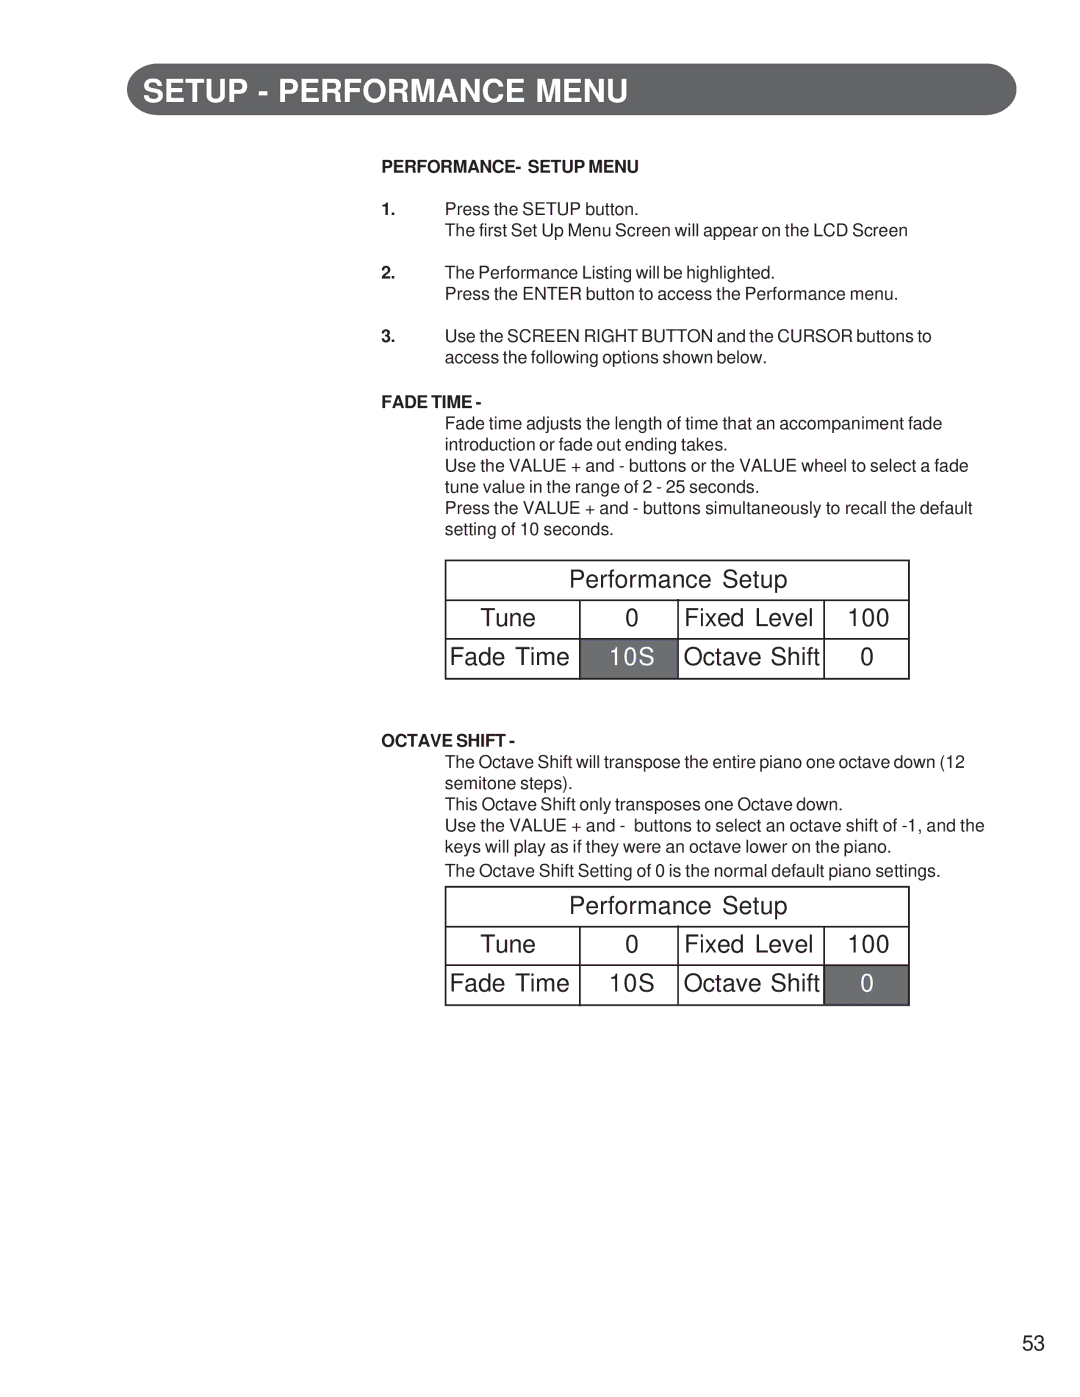
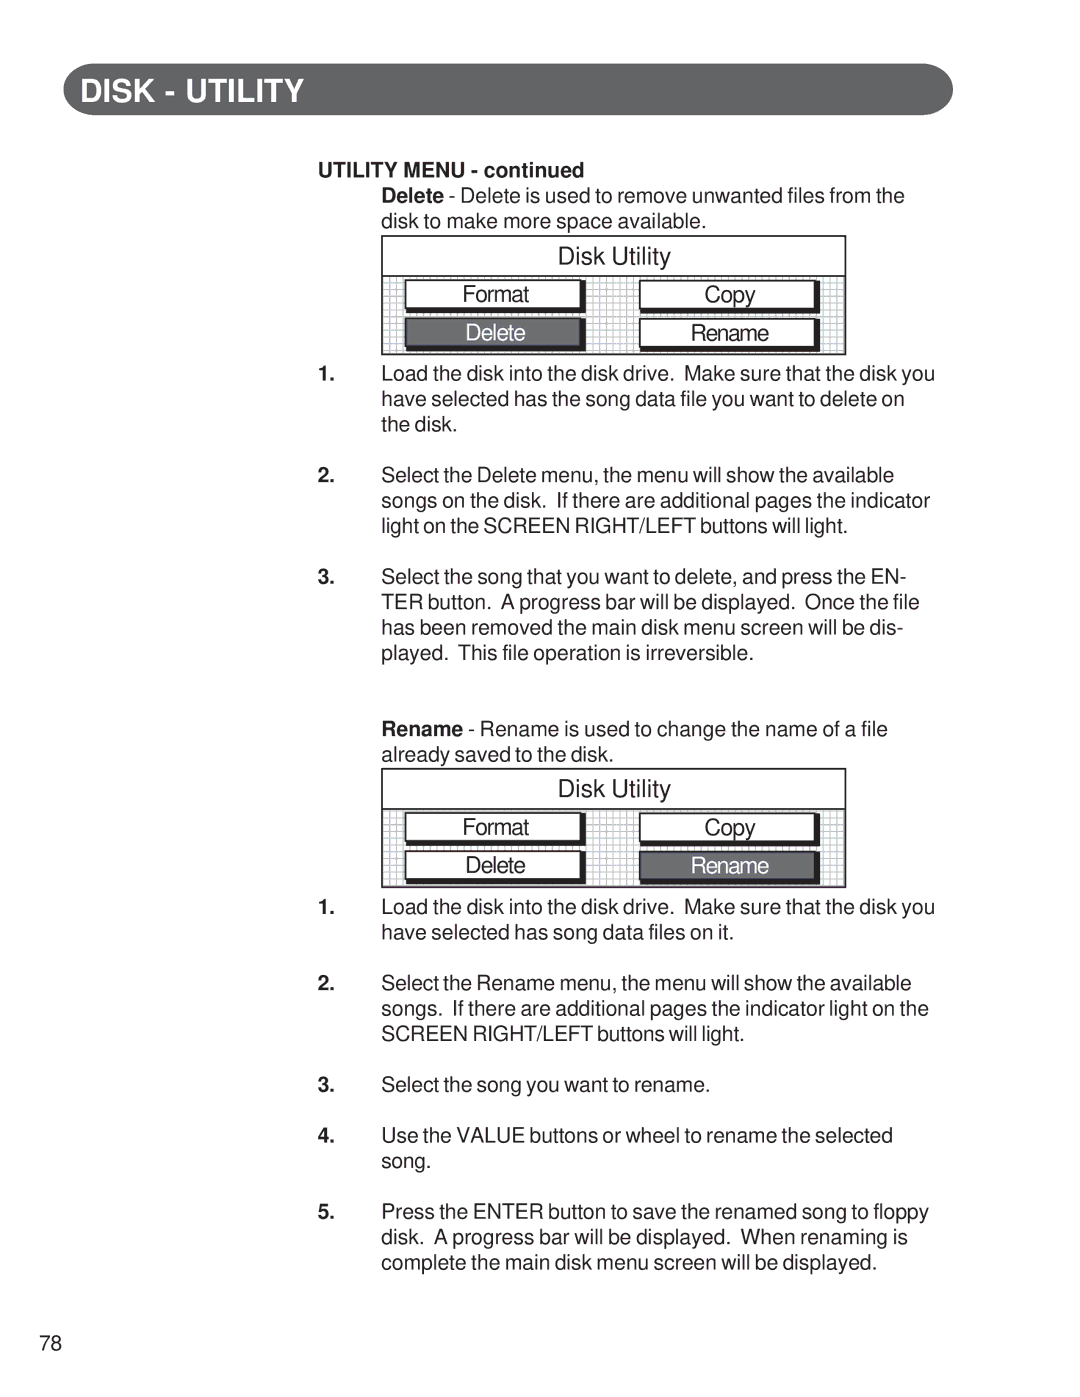
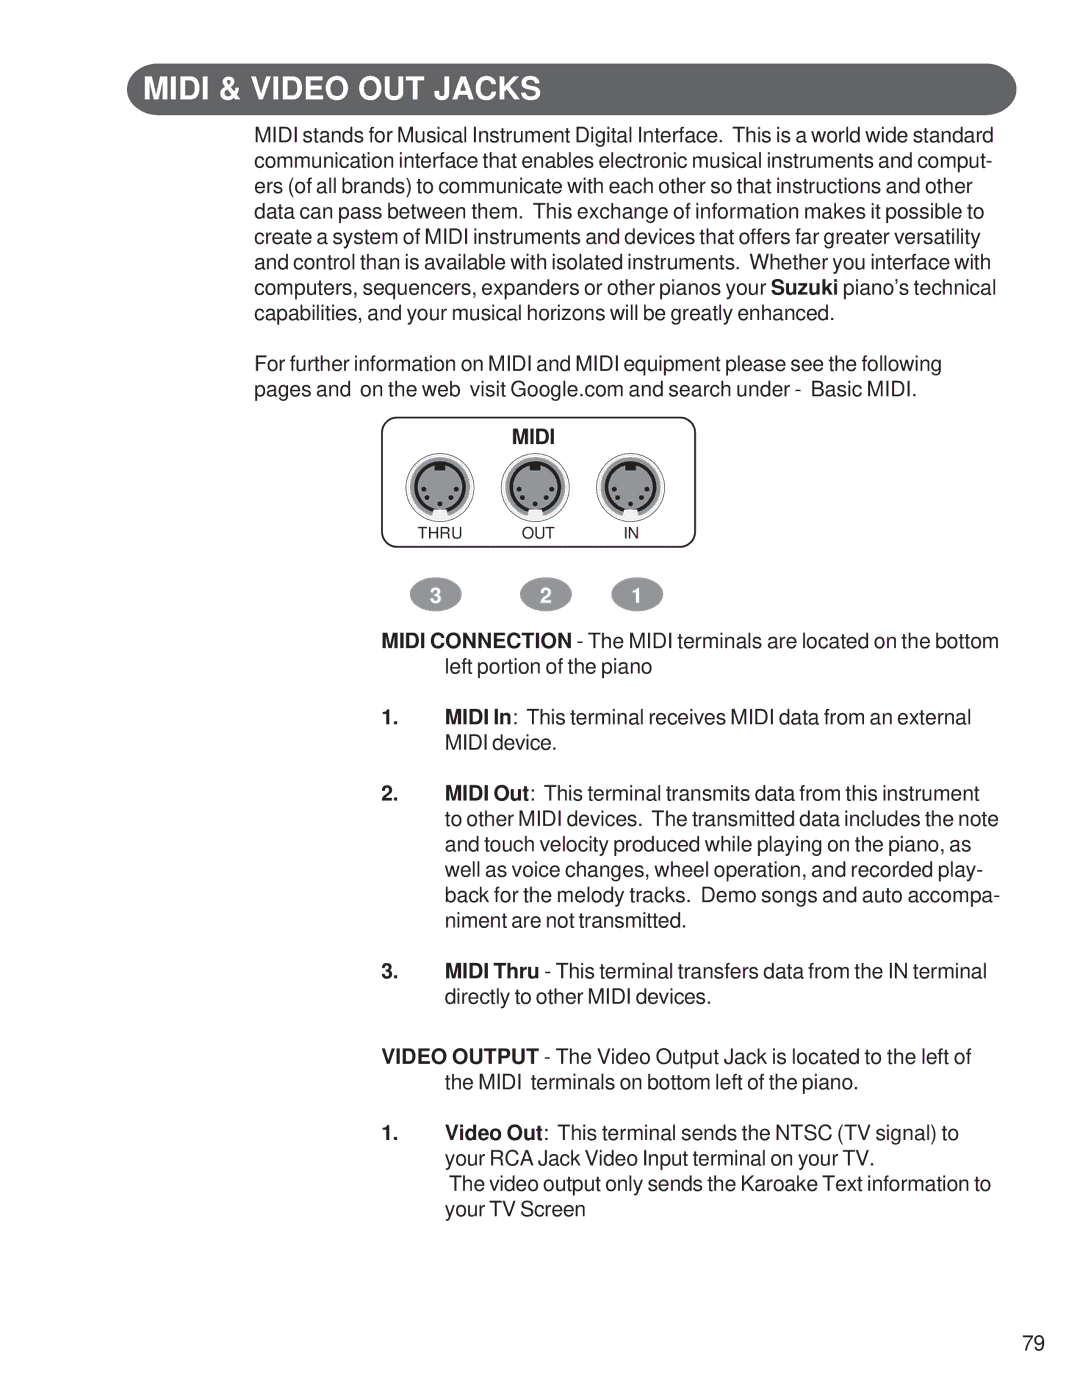
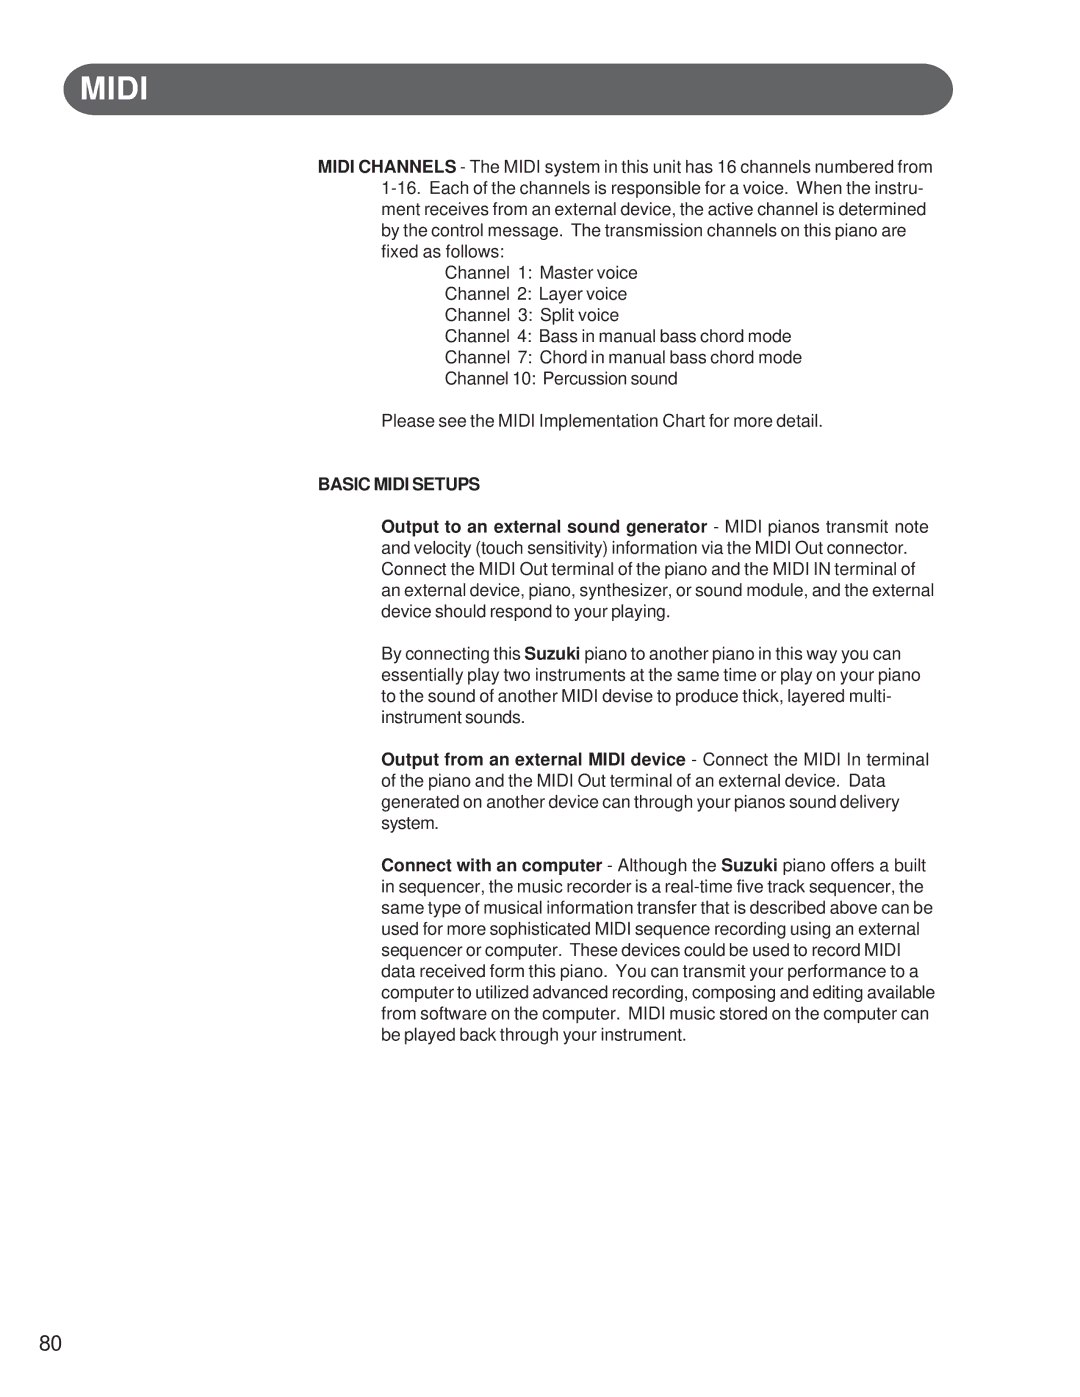
Suzuki Musical Instrument Corp HP-275E manual Setup Reverb Menu, Reverb Setting, Room

Page 57

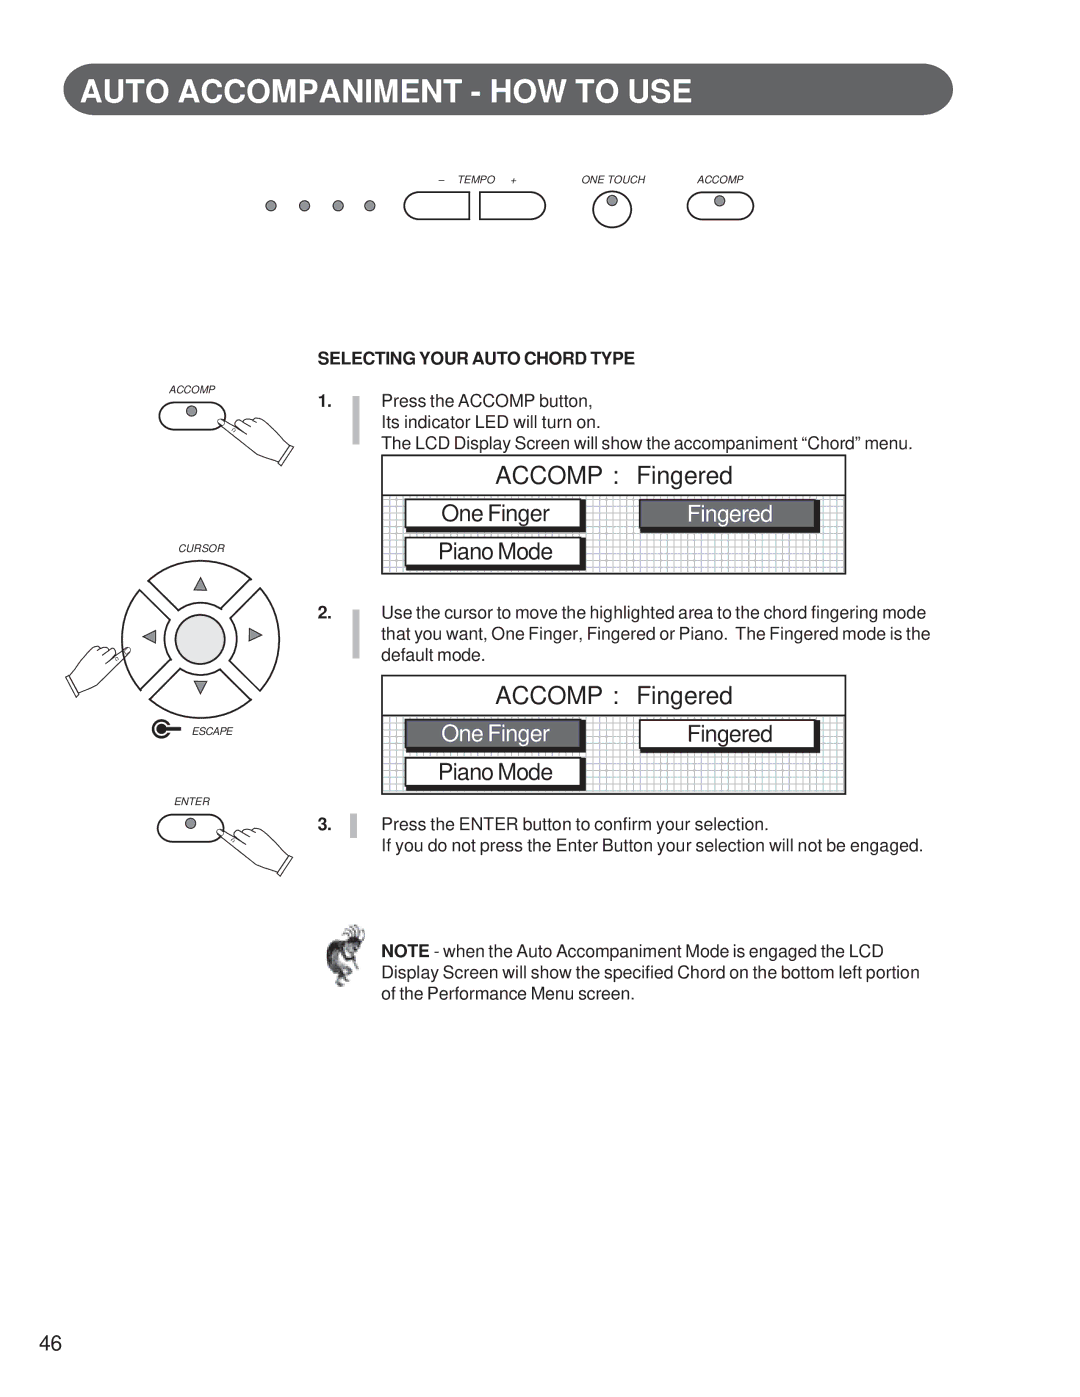
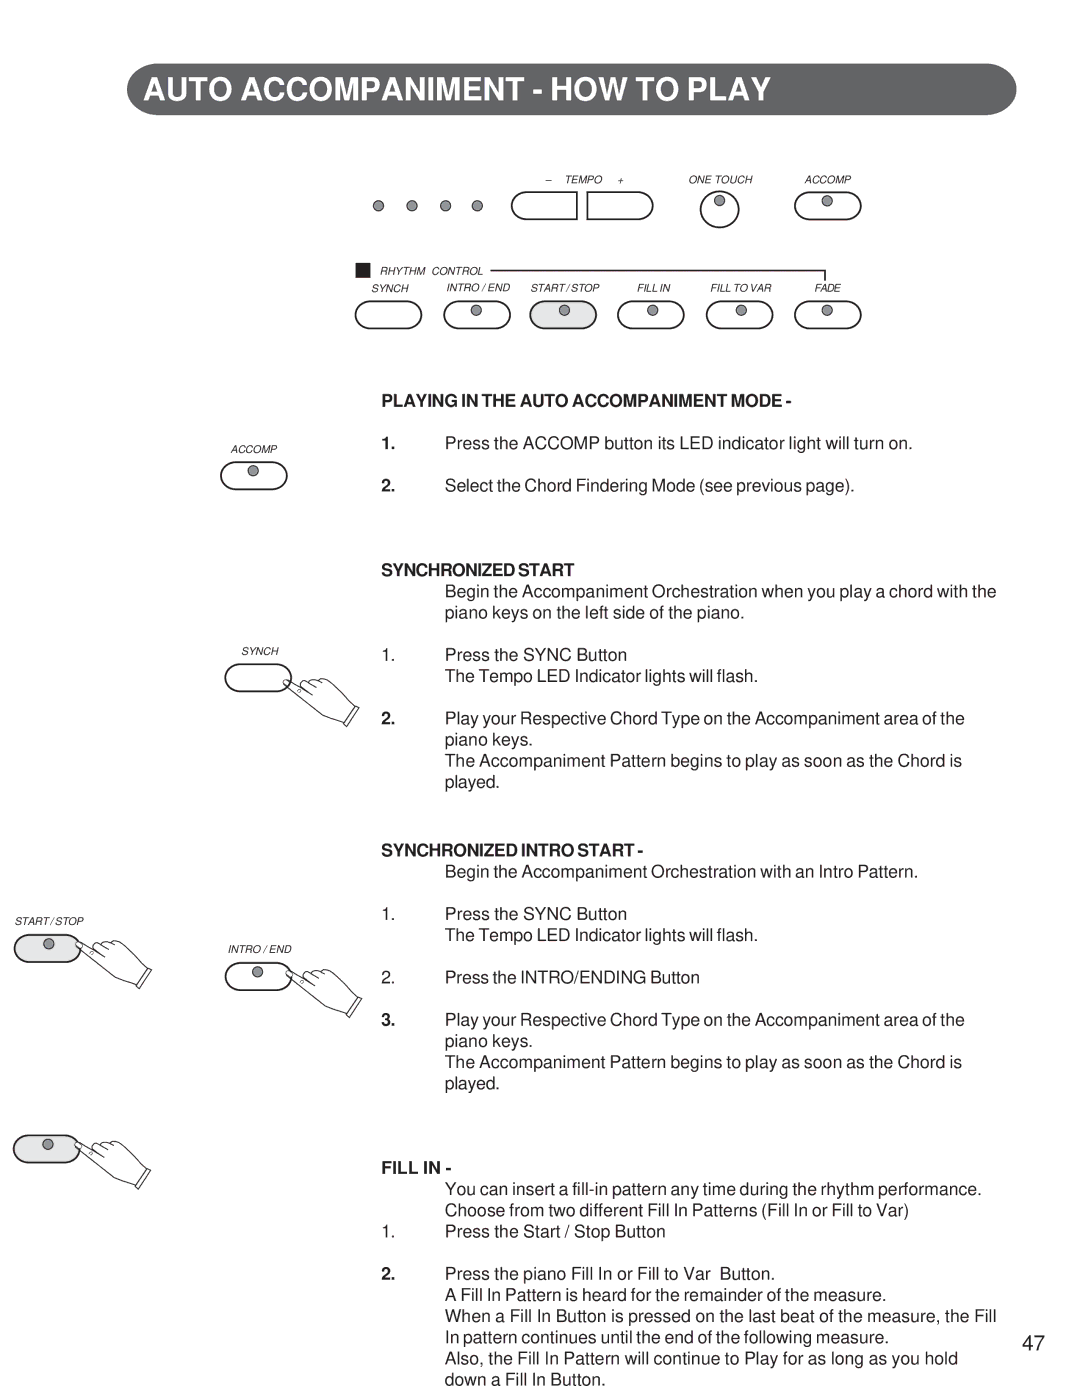
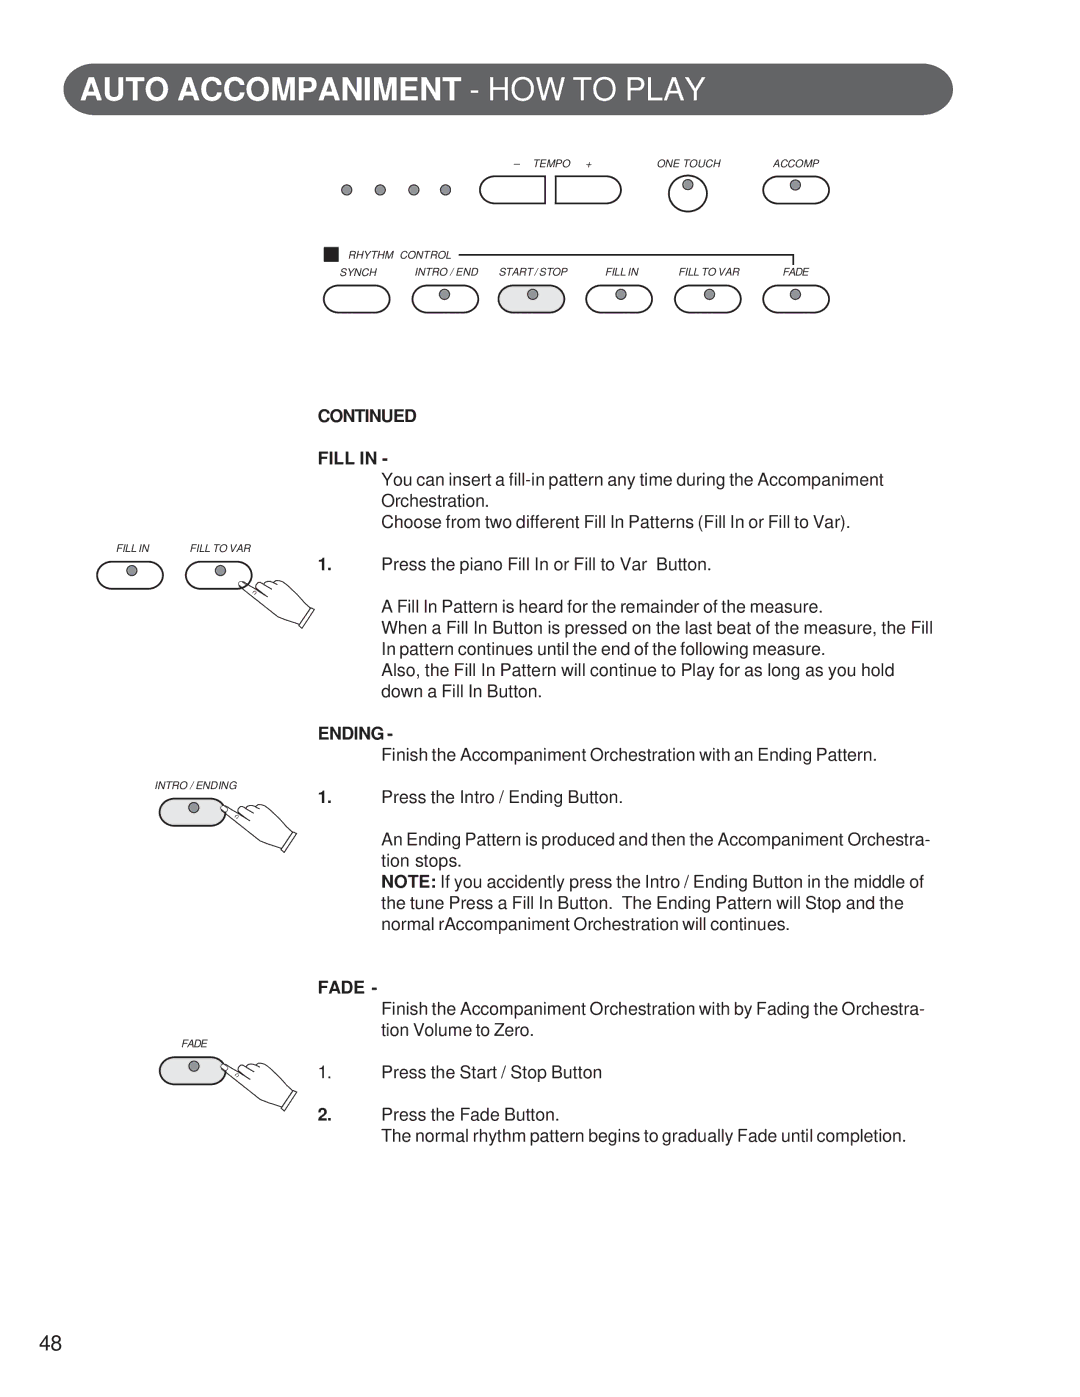
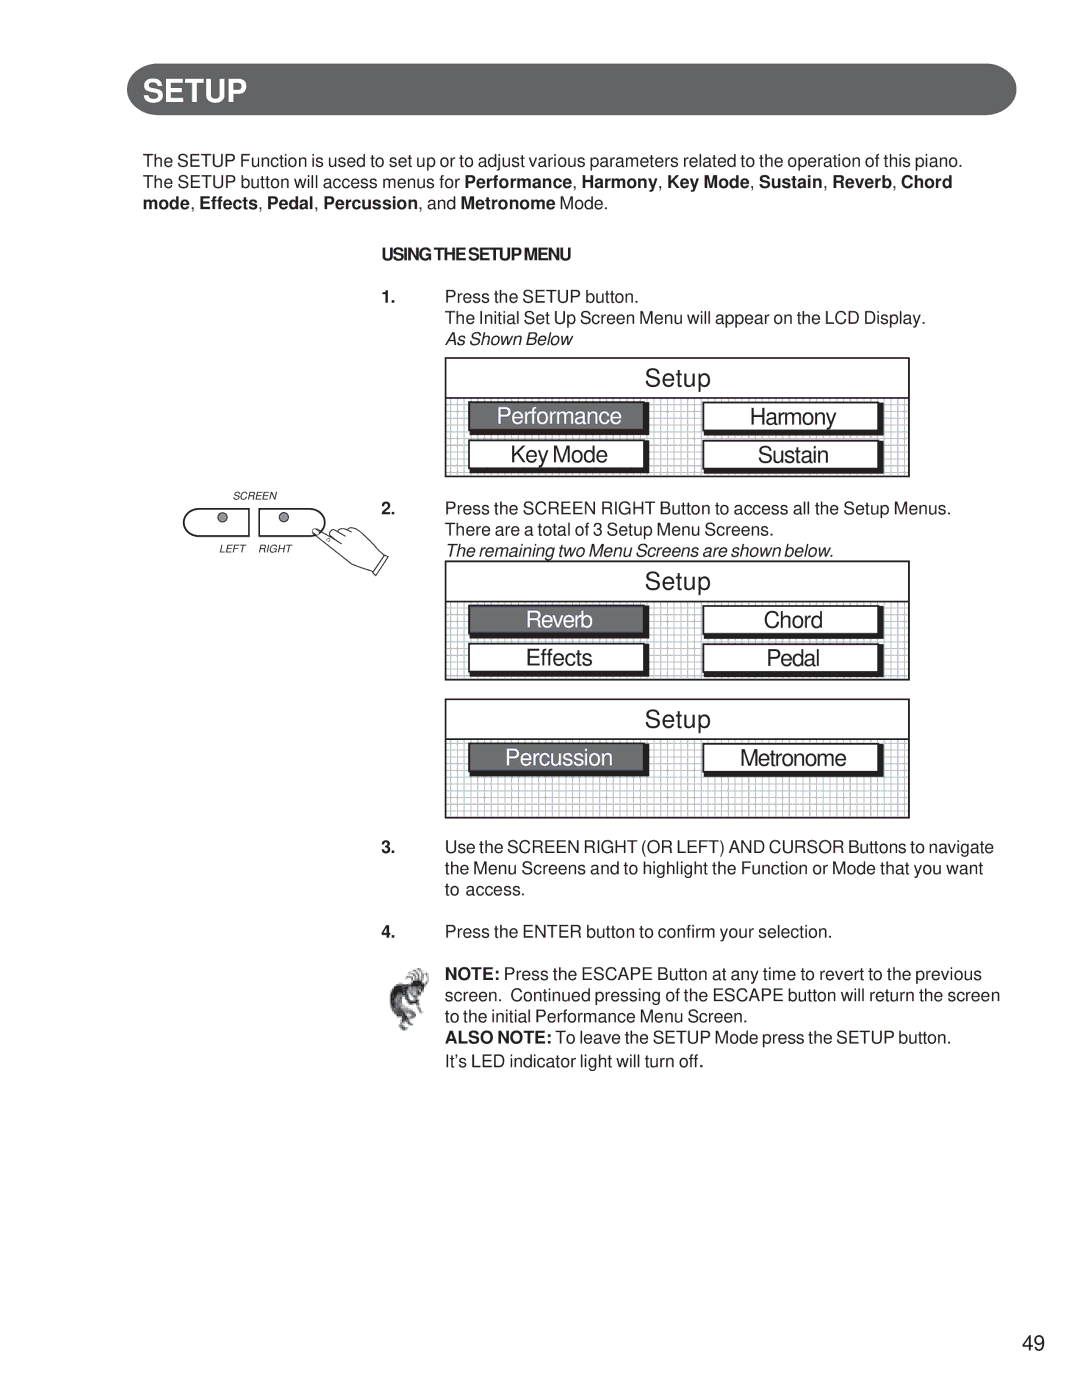
SETUP - REVERB MENU

REVERB - SETUP MENU

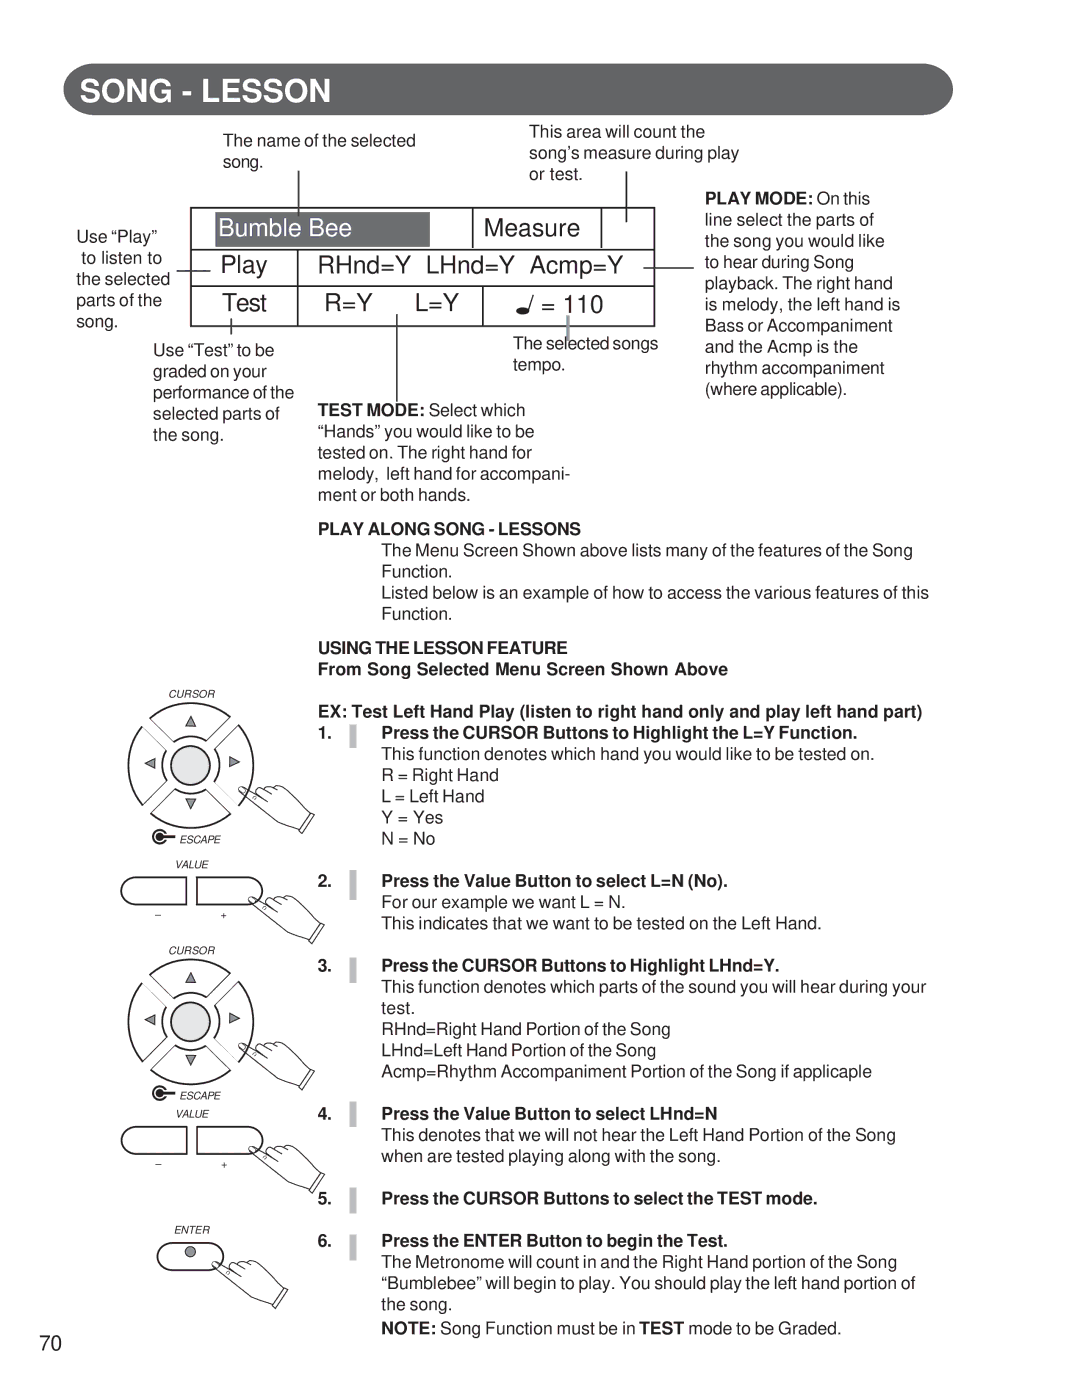
1.Press the SETUP button.

2.Use the SCREEN RIGHT button to access the second page of the setup menu options.

3.Press the ENTER button to access the Reverb menu.

4.Use the CURSOR button to access the following options:

REVERB

Reverb simulates the effect of playing in a big room or hall where the sound reverberates off the walls and ceiling.

Pressing the REVERB button will toggle this effect on or off. When reverb is engaged the indicator light will be lit.

The reverb effect is engaged automatically when the power is turned on.

To select a type of reverb and to adjust the reverb levels use the Reverb setup menu.

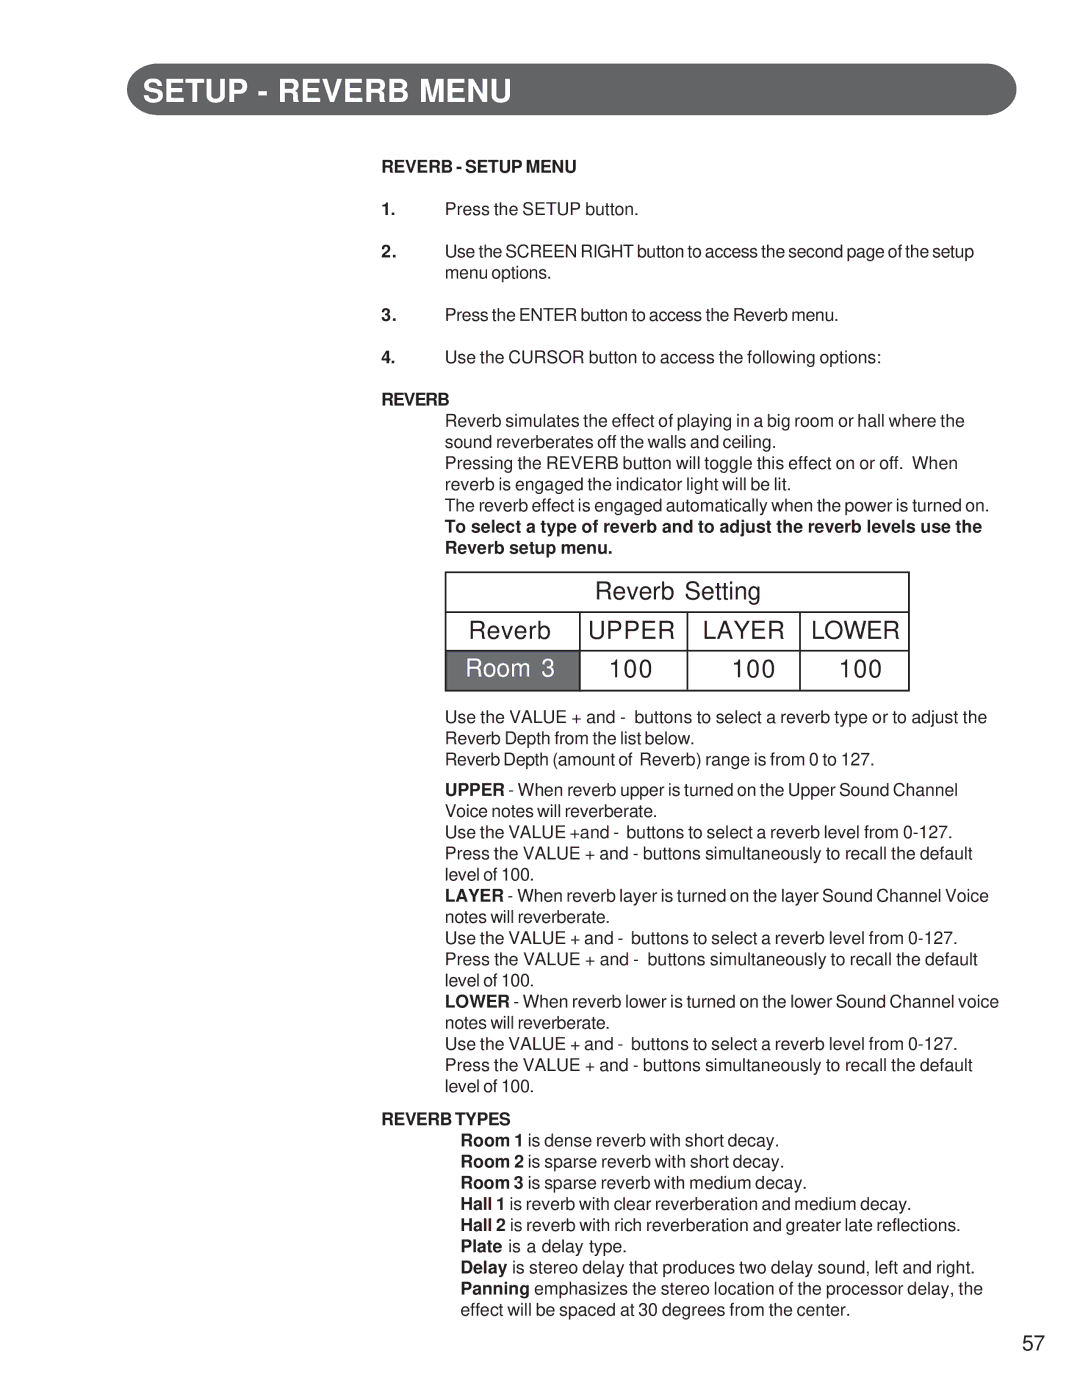
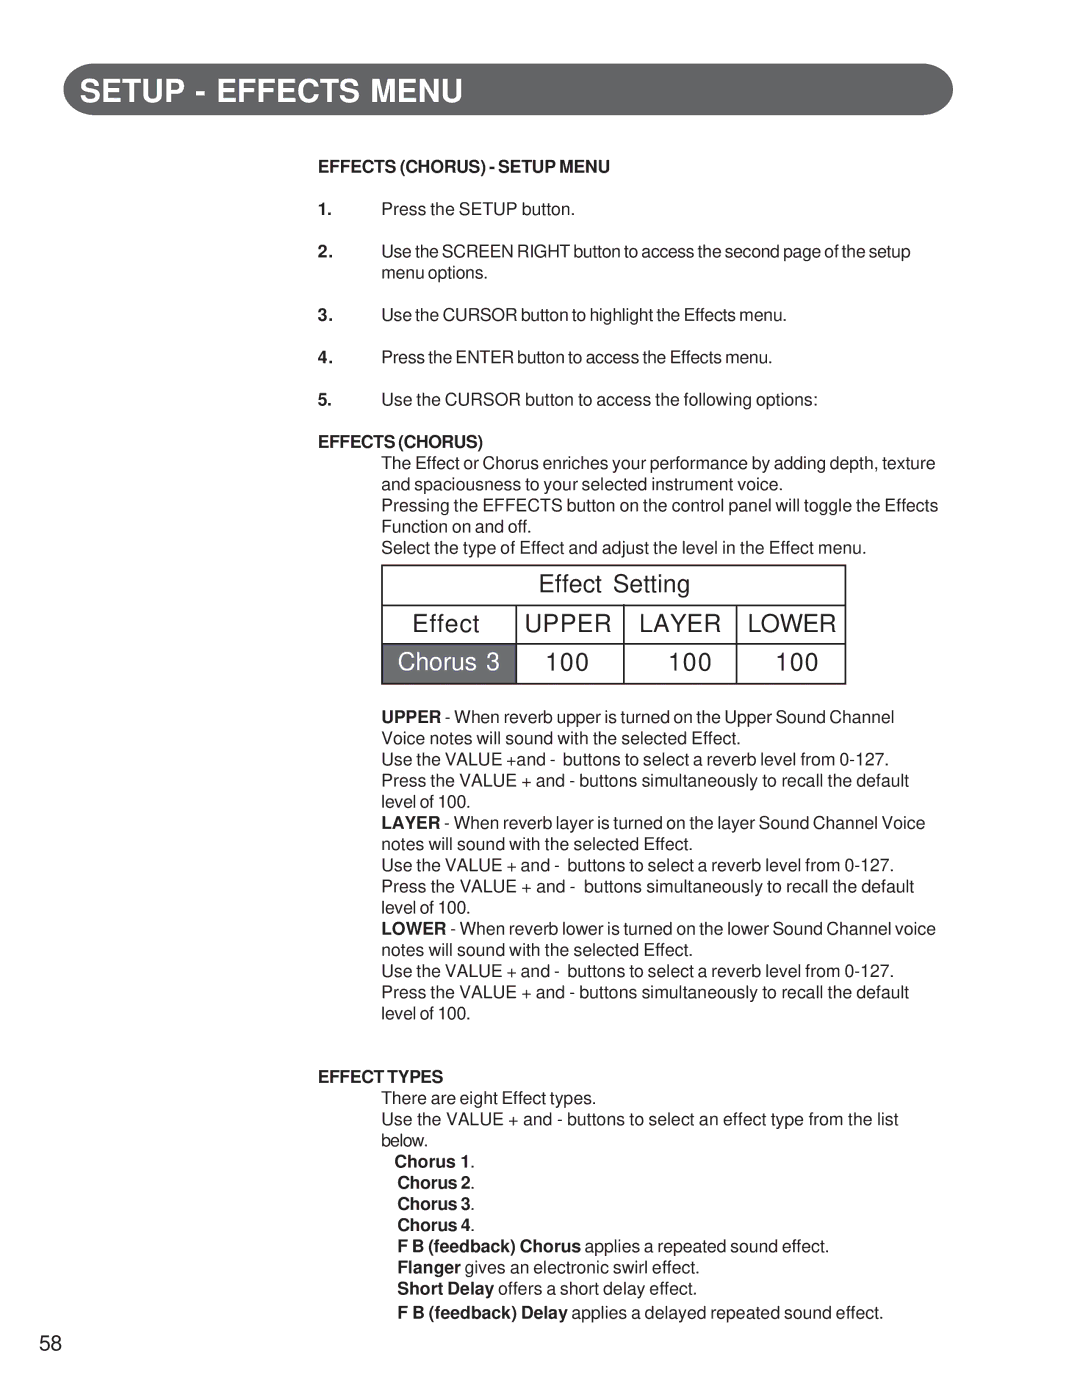
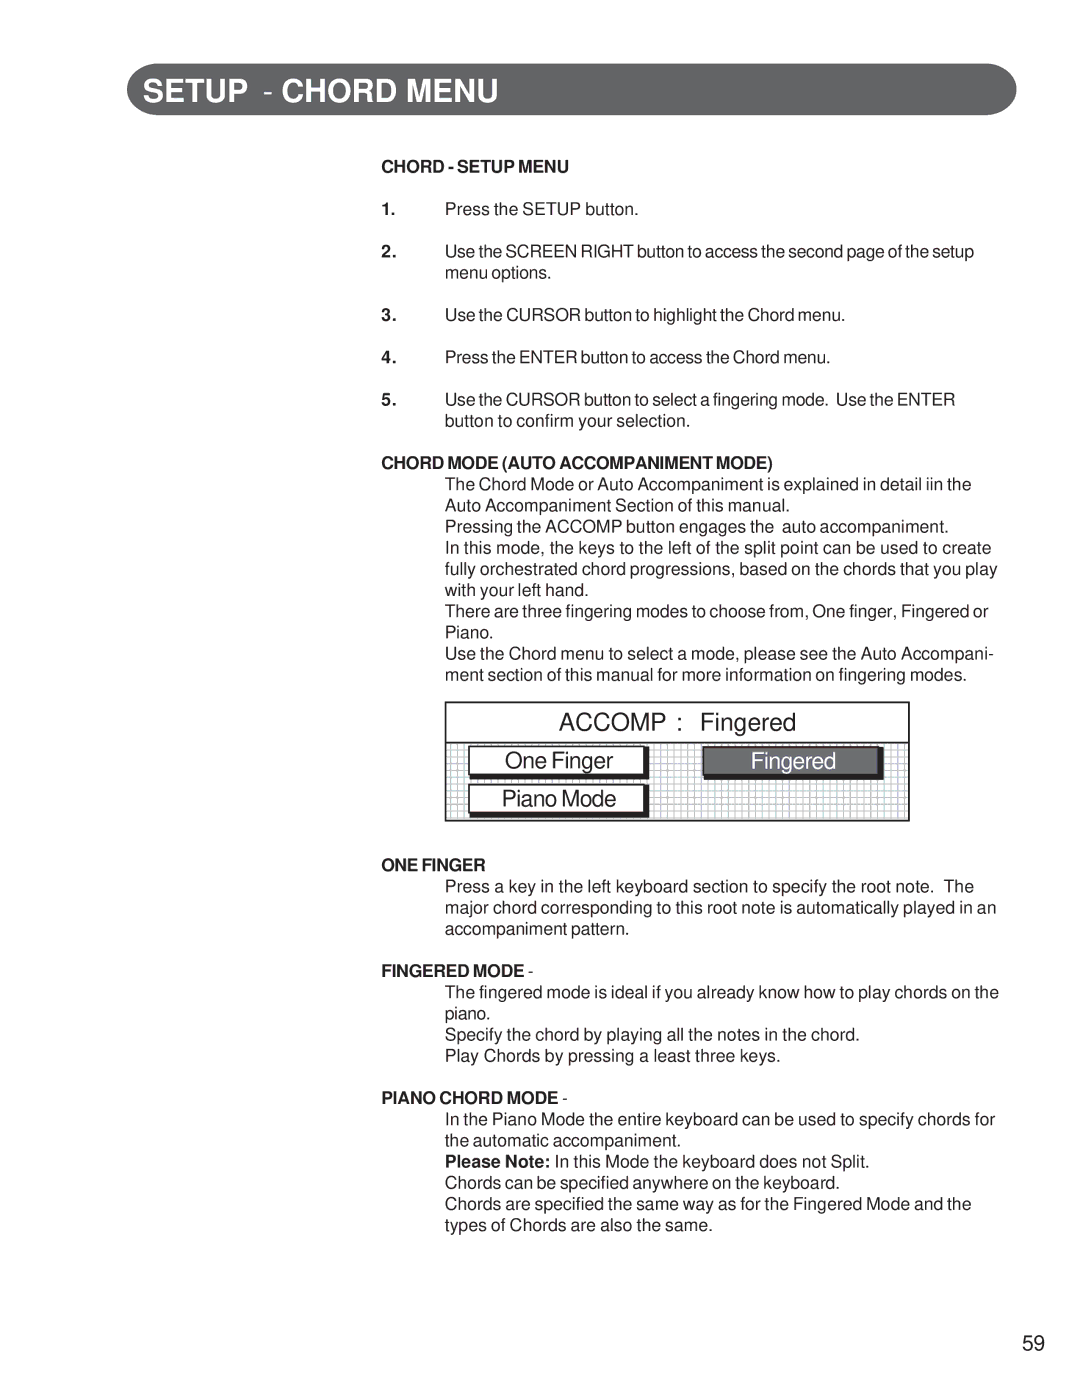
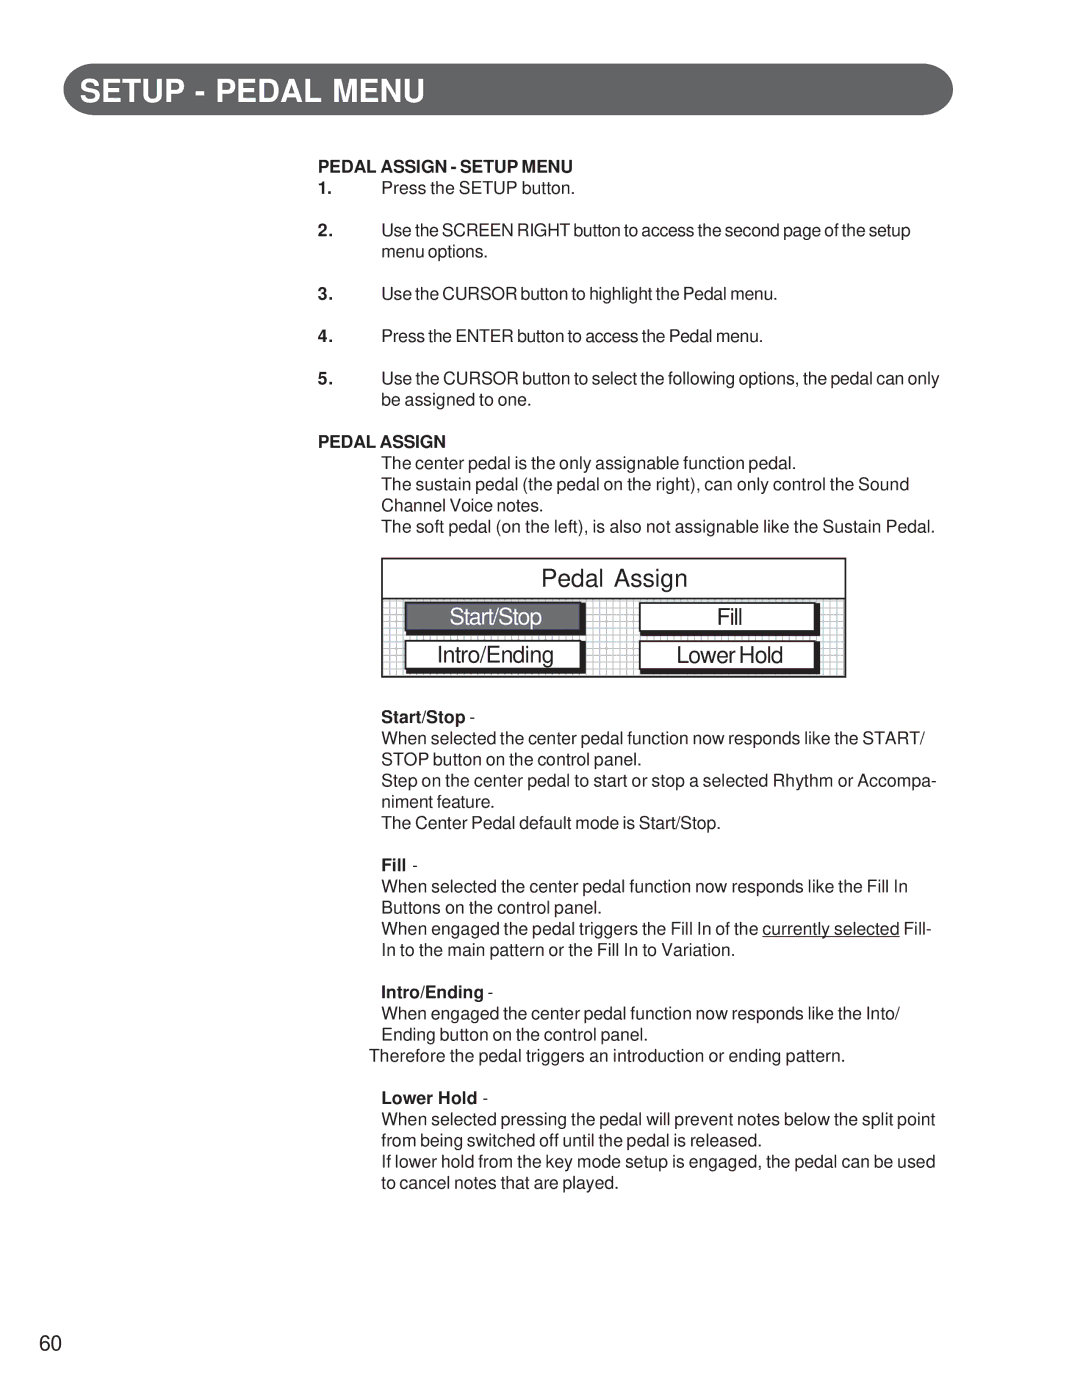
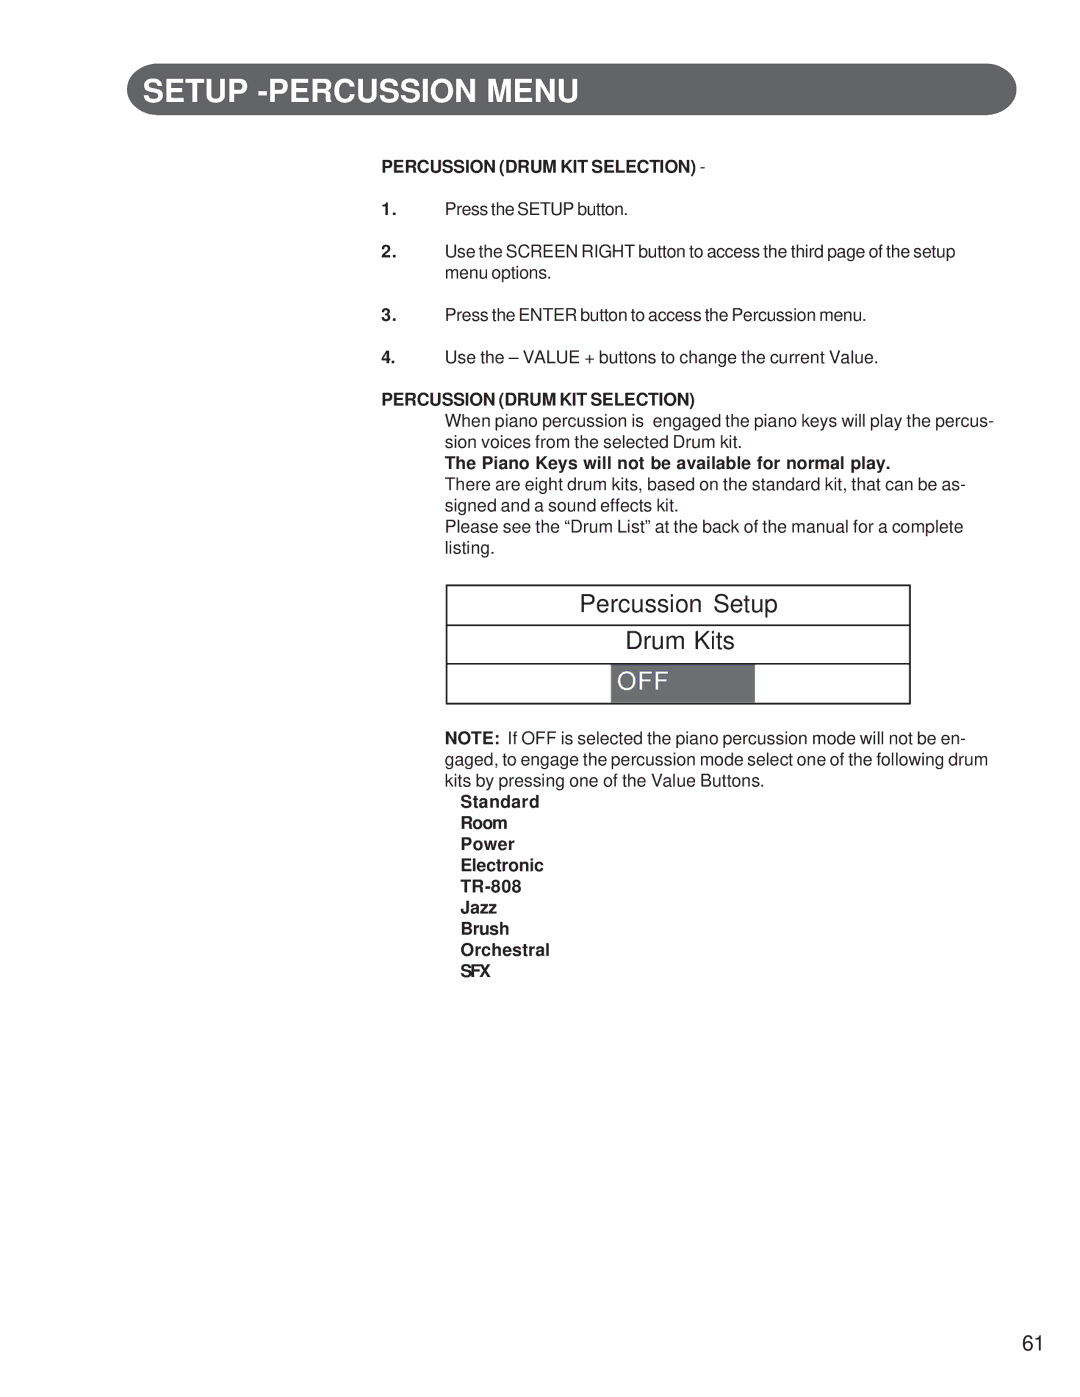
Reverb Setting

Reverb

UPPER

LAYER

LOWER


Room 3

100

100

100


Use the VALUE + and - buttons to select a reverb type or to adjust the Reverb Depth from the list below.

Reverb Depth (amount of Reverb) range is from 0 to 127.

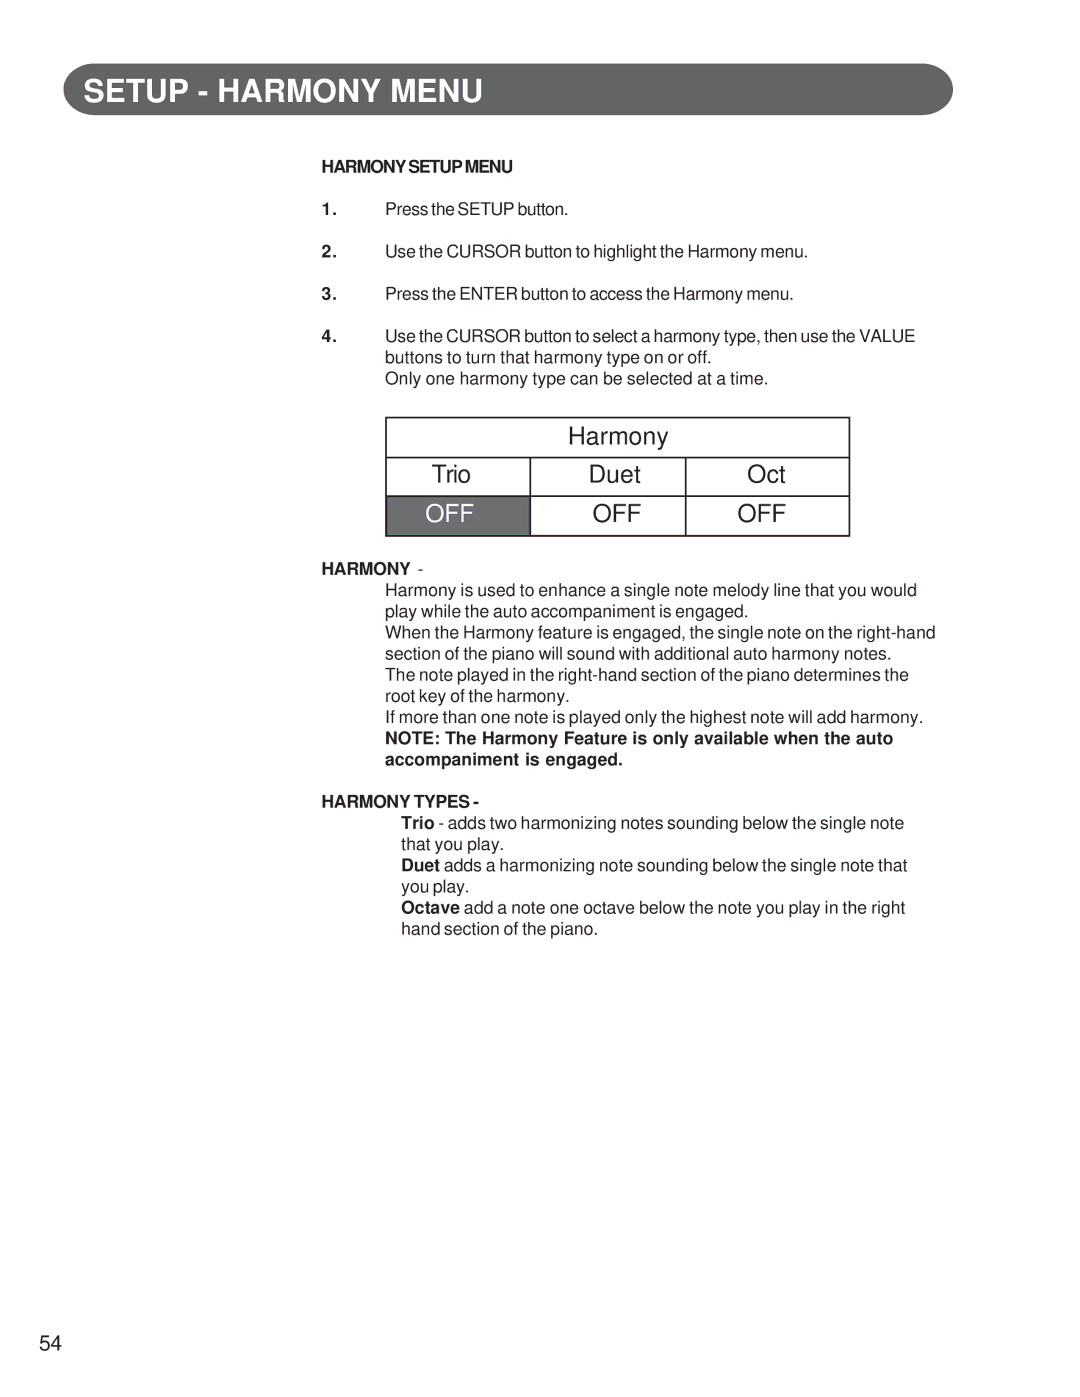
UPPER - When reverb upper is turned on the Upper Sound Channel Voice notes will reverberate.

Use the VALUE +and - buttons to select a reverb level from 0-127. Press the VALUE + and - buttons simultaneously to recall the default level of 100.

LAYER - When reverb layer is turned on the layer Sound Channel Voice notes will reverberate.

Use the VALUE + and - buttons to select a reverb level from 0-127. Press the VALUE + and - buttons simultaneously to recall the default level of 100.

LOWER - When reverb lower is turned on the lower Sound Channel voice notes will reverberate.

Use the VALUE + and - buttons to select a reverb level from 0-127. Press the VALUE + and - buttons simultaneously to recall the default level of 100.

REVERB TYPES

Room 1 is dense reverb with short decay. Room 2 is sparse reverb with short decay. Room 3 is sparse reverb with medium decay.

Hall 1 is reverb with clear reverberation and medium decay.

Hall 2 is reverb with rich reverberation and greater late reflections. Plate is a delay type.

Delay is stereo delay that produces two delay sound, left and right. Panning emphasizes the stereo location of the processor delay, the effect will be spaced at 30 degrees from the center.

57
Image 57
Contents Suzuki HP-275ePage Welcome General Precautions Taking Care of Your Digital Piano Table of Contents Unpacking Assembly Assembly Assembly Assembly Assembly Page Page Page Audio OUT L Connector PanelsPanel Controls Demo Panel Controls 13 14 15 16 Panel Controls Cursor 26 2 Sound Group Grand Piano Vibes Organ Composer Disk 37 38 39 40 Reset Disk Metronome Record BEG. Mark Midi Song Disk Drive Piano Pedals PedalsDisplay Screen Grand PianoBig Band Demo Song Select Demomonstration SongsBossa Nueva Samba TimeAssigning Different Piano Sound Channel Modes Piano Voices Sound Channel ModesUpper 20 Church Organ Piano Voices Voice SelectionThere are TWO Ways to Select AN Instrument Voice Scroll Through the Instrument VoicesFor the Layer and Lower Sound Mode Sections of the Piano For all 88 Key voice selections Upper ModePiano Voices Quick Selection Layer 1 Grand PianoReed Group a Piano Voices Selecting ALL VoicesReed Group B Upper 70 English HornPiano Voices Effects and Reset Style Rhythm Section Selecting a RhythmSwing Group B Swing Group aGrand Piano JazzStyle 1 Grand Piano Big BandSwing Trio Rhythm Section Playing the Rhythm Fade Adjust the Tempo ControlsHOW Auto Accompaniment Works Auto AccompanimentBasic Mode One Finger HOW to Play ChordsAuto Accompaniment Types ONE FingerFingered Mode One Finger Piano ModeAccomp Fingered FingeredAccomp Piano Piano ModeOne Finger FingeredFingered Piano Mode Auto Accompaniment HOW to USEFingered One FingerAuto Accompaniment HOW to Play Playing in the Auto Accompaniment ModeSynchronized Intro Start Fill Fill to VAR Intro / Ending Fade Setup SetupPerformance ReverbNorm Setup Performance MenuPERFORMANCE- Setup Menu TransposeLCD Screen Display Hold Performance Setup Tune Fixed Level Performance Setup Tune Fixed Level 100105 Octave Shift 10010S Octave Shift 10SFade Time Octave Shift Harmonysetupmenu Setup Harmony Menu Harmony Trio Duet Oct HarmonyKey Mode Manual Bass Setup KEY Mode MenuKeymodesetupmenu Lower HoldSustain Setup Menu Setup Sustain MenuSustain SustainSetup Reverb Menu Reverb SettingRoom Setup Effects Menu Effect SettingChorus Setup Chord Menu Chord Setup MenuChord Mode Auto Accompaniment Mode Pedal Assign Setup Pedal MenuStart/Stop Intro/Ending Fill Lower HoldPercussion Setup Drum Kits Setup -PERCUSSION MenuPercussion Drum KIT Selection SFXMetronome Setup Time Signature Tempo 120 Sound Volume 100 Setup Metronome MenuMetronome Setup Menu MetronomeRecall Contents in the Registration Memory Save Your Settings in the Registration MemoryRegistration Memory RegistrationRecord Functions Record FeaturesOutline of a Music Recorder or Sequencer Record Melody OnlyRecord Features Auto Accompaniment Track Accomp Button Recording HOW to Record RecordingRecord Melody Rec Record AccompPlayback Recording PlaybackTo Playback Your Recorded Music To Pause the PlaybackHOW to USE BEG. Mark and END Mark Buttons Recording MarkMark Song Select Song Play Along SongBumble Bee Measure Play RHnd=Y LHnd=Y Acmp=Y TestSong Lesson Using the Lesson FeatureMeasure Play RHnd=Y LHnd=Y Acmp=YStop the Song Mode Lesson FeaturesTest Modes Right and Left hand exercise Select R=Y L=YDisk Disk FeaturesLoad Song Utility Save Song Play DiskLoad Song Disk Load SongLoad Song Disk Save SongSave Song Utility Play DiskLoad Song Utility Save Song Disk Play DiskPlay Disk Play DiskDisk Play Disk Menus File DataLyrics Mute Channel Solo Channel Disk Utility Disk UtilityUtility FormatDelete FormatCopy Rename Format Delete CopyMidi Midi & Video OUT JacksMidi Basic Midi SetupsMidi RPNL, Rpnh Midi Implementation ChartGrand Piano Voice ListHollywood Style ListDrum KIT List Drum KIT ListDrum KIT List Specifications SpecificationsQuestions Questions AND/OR ProblemsPage Warranty WarrantyPage Suzuki