14.Mute Button – In DirectLink mode, this button will mute and
15.Track Buttons – These buttons function based on the type of operation, as follows:
•DirectLink Operation: Refer to the separate DirectLink documentation applicable to your DAW at
•Default Operation: The Track buttons (< and >) are used for activating and deactivating Zones 2 (<) and 3 (>) as described below in section 17 "Zone Buttons (1,2,3, & 4)" of this chapter.
16.Shift Button – This button functions based on the type of operation, as follows:
•DirectLink (Default) Operation: Holding down the Shift button allows you to access additional functions and mapping options performed by the Encoder knobs, Fader buttons, Track buttons, and Mute buttons, in qualified DAW applications.
•Default Operation: This button is used for activating and deactivating Zone 1 as described below in Section 17, "Zone Buttons (1, 2, 3, & 4)" of this chapter.
17.Zone Buttons (1,2,3, & 4) – These buttons activate and
18.Zone Button – This button is used for accessing the individual Zone buttons described above. Holding down the this button for at least one second, in both Performance and DirectLink Modes, will put Axiom into Zone Edit Mode. For more information, see Chapter 6, "Keyboard Zones."
19.Patch Buttons – These buttons function based on the type of operation, as follows:
•DirectLink Operation: Refer to the separate DirectLink documentation applicable to your DAW at
•Default Operation: These buttons allow you to scroll the 20 Axiom Patch presets. In Edit Mode, the Patch buttons are used to increment/decrement the selected parameter value.
20.Keyboard – The
•Aftertouch: Axiom features a fully assignable Aftertouch Strip under the keybed. When additional pressure is applied to a key that has been pressed, the Aftertouch Strip will transmit MIDI data based on the assigned MIDI CC. When pressure is applied to the Strip the LCD screen will display the assigned message type ("CH AT"), the active keyboard Zone (for example "z1"), and the value sent (for example "0").
A unique MIDI CC can be assigned to the Aftertouch Strip for each active keyboard Zone, so that the messages sent are defined by the active Zones.
For more information on reassigning the Strip see Chapter 5, "Advanced Programming Functions."
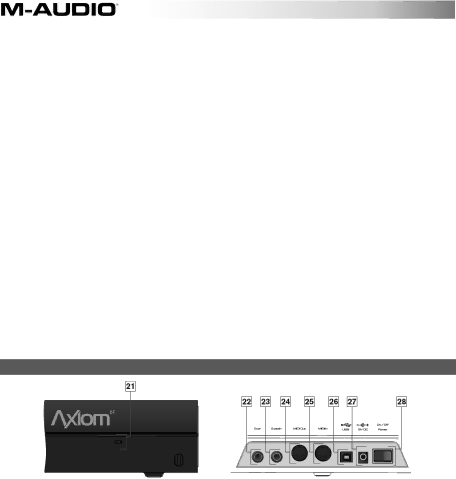
Rear Panel
21.Kensington® Lock Connector – This connector is compatible with standard
22.Expression Pedal Input – This socket accepts both "switch type" and standard expression pedals (not included) such as
23.Sustain Pedal Input – This socket accepts
The polarity of the Sustain Pedal is determined by Axiom upon startup. When powering up, it assumes the Pedal is in the "up" (off) position. It is important that the Sustain Pedal is not pressed down during startup, otherwise its operation will be reversed.
24.MIDI In Port – This standard
This port also allows you to use Axiom as a MIDI interface to send MIDI data from external hardware to your DAW. In this instance, the 3rd USB MIDI input should be selected from those available in the DAW preferences. Please refer to the documentation provided with your DAW for further information on MIDI configuration.
25.MIDI Out Port – This standard
26.USB Port – The USB 2.0 port (backward compatible with USB 1.1) delivers power to Axiom and transmits MIDI data to and from the host computer.
27.Power Supply Jack – Connect an optional 9VDC power supply here when using the keyboard as a standalone MIDI controller without a USB connection to a computer. The power supply cannot be used when Axiom is connected to a computer via USB.
28.On/Off Switch – Use this switch to power the device on or off whether Axiom is connected via USB or using an external power supply.
8