RIDGID R2740 Emptying the Dust BAg, To install/remove dust bag, Opening, To empty the dust bag

Page 14

OPERATION

WARNING:

Do not use the dust collection bag when sanding metal. Using the dust collection bag when sanding metal creates a fire hazard, which could damage the tool and lead to serious personal injury.
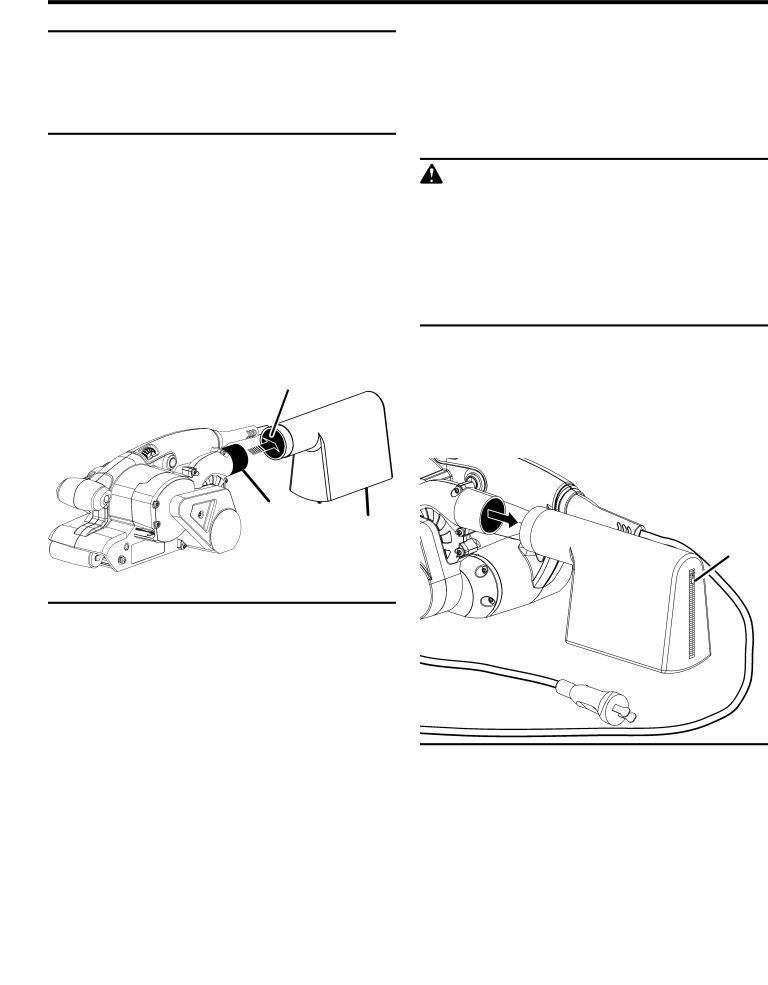
DUST BAG

See Figure 9.

The dust bag provides a dust collection system for the sander. It should be installed over the exhaust hole located on the side of the sander. For more efficient operation, empty dust bag when half full.

Do not connect sander to power supply before installing dust bag.

To install/remove dust bag:

nUnplug the sander.

nPlace the opening of dust bag over dust exhaust of the sander.

DUST BAG

Opening

DUST

DUST BAG

EXHAUST


Fig. 9

emptying the DUST BAg

See Figure 10.

For more efficient operation, empty dust bag when no more than half full. This will permit the air to flow through the bag better. Always empty and clean the dust bag thoroughly upon completion of a sanding operation and before placing the sander in storage.

WARNING:

Collected sanding dust from sanding surface coatings such as polyurethanes, linseed oil, etc., can self-ignite in the sander dust bag or elsewhere and cause fire. To reduce the risk of fire, always empty the dust bag frequently while sanding. Never store or leave a sander without totally emptying its dust bag. Also follow the recommendations of the coatings manufacturers.

To empty the dust bag:

Unplug the sander.

Remove dust bag from sander.

Open zipper.

Shake out dust.

Replace dust bag on sander.

zipper

DUST BAG

Fig. 10

14

Image 14
Contents OPERAToR’S Manual Table of Contents IntroductionElectrical Safety General Safety RulesWork Area Safety Personal SafetySpecific Safety Rules ServiceSymbols Symbol Name DESIGNATION/EXPLANATIONService Symbol Signal MeaningDouble Insulation Cord Length Wire Size A.W.GElectrical Electrical ConnectionLighted plug FeaturesProduct Specifications Assembly Applications Setting the Belt Sander SpeedOperation Selecting Sanding BeltsSwitch Proper Hand PlacementSoft sTaRt feature Turning ON/OFF the SanderTo INSTALL/CHANGE Sanding Belt Lift Belt tension release lever To remove sanding belt ArrowTo lock-on the sander Locking on the SanderOperating the Sander Excessive pressure will result in the followingOpening To install/remove dust bagEmptying the Dust BAg To empty the dust bagTurn Tracking screw to Adjust Sanding Belt Manually adjusting Sanding Belt TrackingTo manually adjust belt position PlatenGeneral Maintenance MaintenanceBrush Replacement LubricationTiming Belt Replacement Sander shown with dust bag Sanding belt removedPage What is Covered Under the 3 Year Limited Service Warranty WarrantyDAY Satisfaction Guarantee Policy HOW to Obtain Service What is not CoveredCustomer Service Information Model No R2740 Serial No