Downrod (continued)
www.HunterFan.com
1.888.830.1326
|
|
|
| E |
| |
|
|
|
|
| ||
|
|
|
|
| ||
|
|
|
|
| ||
|
|
|
|
| ||
|
|
|
| K | E |
|
|
|
|
| P | ||
|
|
|
|
|
| ! |
|
|
|
|
|
|
|
|
|
|
|
|
|
|
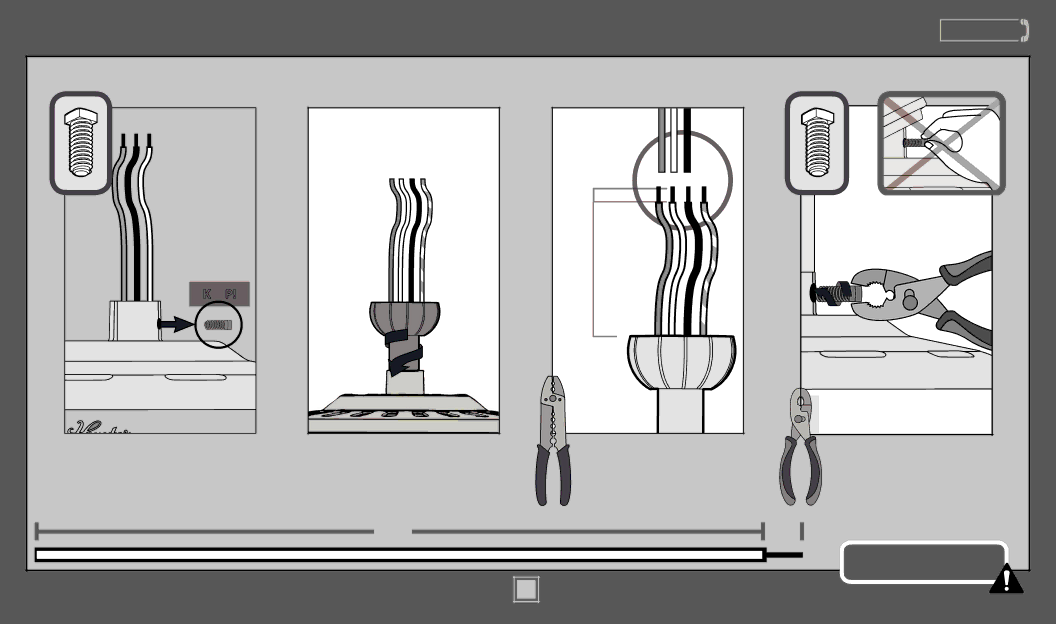
Remove the
setscrew so that the downrod
can be inserted.
Hand tighten the downrod (at least
8”
The wires can be cut, but leave at least 8” extending from the top of the downrod.
Tighten the setscrew with pliers. DO NOT
HAND TIGHTEN.
3/8”
If the setscrew is not tightened securely, the fan may fall.
7