Contents
Please register your product at
1CH Blu-ray
Important Notice
Safety Information
Wiring the Main Power Supply Plug UK Only
By the Earth Symbol , or Coloured Green or Green and Yellow
Handling Cautions
Using the 3D Function
English Safety Information
Disc Storage & Management
Licence
This product does not convert 2D content into 3D
Copyright
Safety Information English
Contents
Disc types your product cannot play
Disc types and contents your product can play
Getting Started
Disk and Format Compatibility
Music File Support
Region Code
Logos of Discs the product can play
Supported Formats
Mpeg
Video File Support
AAC
MPEG4 SP, ASP
Advanced Video Codec High Definition
Video Cable
Accessories
Check for the supplied accessories below
For Power cord FM Antenna
Rear Panel
Front Panel
AUX, BD/DVD, etc
Use to adjust the level
Press to search contents
3D mode
Remote control will work with Samsung TVs by default
Installing batteries in the Remote Control
Setting the Remote Control
If the TV turns off, the setting is complete
HT-E4200 HT-ES4200
Connecting the Speakers
Connections
Speaker Components
Form and put it on the table to use
Installing the Speakers HT-ES4200 Only
You can install to use 4 types that described on
Right side
Assembling the Front Speaker HT-ES4200 Only
Installing on the Partition
Installing on the Table Stand
Red
Connecting The Speakers HT-ES4200 Only
Case of HT-E4200
Subwoofer
FM Antenna supplied
Connecting the FM Antenna
Connecting to an iPod/iPhone
Cable not supplied
Connecting to a TV
White
Connecting to External Devices
Cable not supplied. Method
Cable not supplied. Method Red
Wireless IP sharer Broadband Service
Connecting to a Network Router
Wired Network
Broadband modem With integrated router Service Router
Incase of Network Cable connected
Settings
Initial Settings Procedure
Access steps may differ depending on the menu you selected
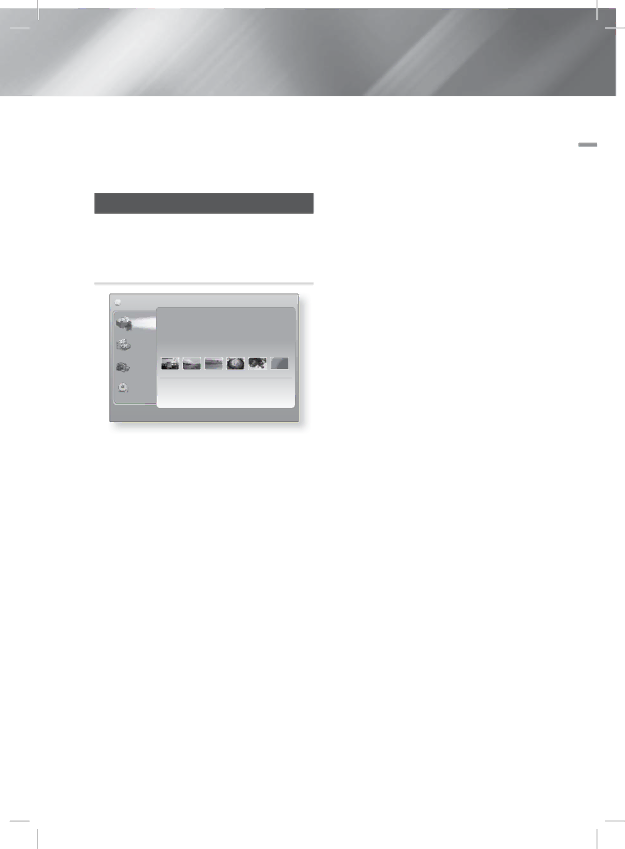
Selecting an Option on the Home Screen
Home Screen
Button You have four choices
An item
Accessing the Settings Screen
Buttons on the Remote Control Used for the Settings Menu
Enter / Direction Button
Display
Settings Menu Functions
Network
Audio
HDMI-CEC
System
Support
Networks and the Internet
Configuring Your Network Connection
Wired Network
Wired Manual
Wpspbc
Wireless Network
Getting the Network Settings Values
Wireless General Manual
AllShare Settings
· Click Support on the top right
Upgrading Software
Online
By USB
By downloaded
Standby Mode Upgrade
By Disc
Playing My List Items
Using the AllShare Play Screen
Media Play
AllShare Play Screen
Photos, Videos menu does not support iPods or iPhones
Playing Files on a USB Storage Device or iPod/iPhone
IPod/iPhone Models You Can Use With This Product
Playing Commercial Video Discs
Function Screen
Options on the Function Screen
Playing Commercial Audio Discs
To Download the AllShare Software
Playing a Disc with User Recorded Content
Using the AllShare Network Function
Smart Phone
Title Menu
Buttons on the Remote Control used for Video Playback
Controlling Video Playback
Disc Menu
Bonusview
Using the Tools Menu
Menu that appears only when BD/DVD disc Plays
Menu that appears only when a file plays
Shuffling Tracks on an Audio CD
Buttons on the Remote Control used for Music Playback
Controlling Music Playback
Repeating Tracks on an Audio CD
Playing Photo Contents
Using the Tools Menu when a File Is Highlighted
Want to upload
Login / Out
Drive, or Family Story
Send
Listening to Radio
Using Buttons on the Remote Control
Setting Mono/Stereo
Presetting Stations
PTY Program Type indication PTY-SEARCH function
To show the RDS signals
To search for a program using the PTY Codes
About characters shown in the display
DSP
Using the Special Effects Remote Control Buttons
· On the Download Centre page, click the Manuals tab
Network Services
Using Smart Hub
Smart Hub at a Glance
Web Browser at a Glance
Using the Web Browser
BD-LIVE
Network Services English
Additional Information
Appendix
Appendix
Settings
Hdmi audio
Audio Return Channel
IPod
Playback
AllShare Play
Video
Resolution according to the output mode
AV receiver
Digital Output Selection
Bitstream
Troubleshooting
Features or action cannot be completed at this time because
Symptom Check/Remedy Product is not
Rating level password
Then, press the Power button
Results in such a phenomenon
Service, an error occurs
Check the connection
AllShare Play
Hdmi
Specifications
Output sound pressure
Front Subwoofer Weights
Front Subwoofer 90 x 1050 x 168 x 350 x
Unit kg
Area Contact Centre Web Site
Correct disposal of batteries in this product
Area Contact Centre Web Site ` Europe
Blu-ray 2,1 canaux
Plus Large
Ce symbole indique les directives
Consignes de Sécurité
Avertissement
Comment tenir le disque
Rangement et gestion des disques
Précautions de manipulation
Utilisation de la fonction 3D
Copyright
Français Consignes de Sécurité
Utilisation de Smart Hub
Sommaire
35 Écran AllShare Play
Support
Mise en Route
Compatibilité des disques et des formats
Types de disques ne pouvant pas être lus sur cet appareil
Prise en charge des fichiers musicaux
Code régional
Logos des disques pouvant être lus Sur cet appareil
Formats pris en charge
WMA
Prise en charge des fichiers vidéo
Lpcm
Prend en charge les formats WMA 7, 8, 9 et STD
Remarques sur la connexion USB
Codec vidéo avancé haute définition
Lappareil ne prend pas en charge le protocole PTP
Pour le cordon d’alimentation Antenne FM
Accessoires
Vérifiez que les accessoires ci-dessous sont fournis
Câble vidéo
Panneau arrière
Panneau avant
Boîtier de la télécommande
Télécommande
Si le téléviseur séteint, le réglage est terminé
Insertion des piles dans la télécommande
Réglage de la télécommande
Dans le cas dun téléviseur Samsung
Connexion des enceintes
Accessoires des enceintes
Branchements
Branchements
Enceinte Socle
Installation sur la cloison
Installation sur le socle
Branchements
Rouge
Connexion des enceintes uniquement pour le modèle HT-ES4200
Pour le modèle HT-E4200
Caisson de Graves Enceinte avant G
Cet appareil ne reçoit pas les émissions AM.à l’iPod/iPhone
Connexion de l’antenne FM
Connexion à l’iPod/iPhone
Antenne FM fournie
Câble non fourni
Connexion de lappareil à un téléviseur
Sélectionnez la méthode 1 ou la méthode
Blanc
Connexion de périphériques externes
Réseau câblé
Connexion à un routeur réseau
En cas de câble réseau connecté
Paramètres
Procédure de réglage des Paramètres initiaux
Lécran Accueil
Français Paramètres
Accéder à lécran Paramètres
Affichage
Fonctions du menu Paramètres
Réseau
Système
Jusquà la saisie du code PIN
’écran, le menu du disque, les sous-titres, etc
Si elle est prise en charge sur le disque
Créé votre propre mot de passe
Réseau câblé
Configuration de votre connexion réseau
Réseaux et Internet
Windows XP
Réseau sans fil
Obtenir les valeurs des paramètres réseau
Paramètres AllShare
Dézippez le dossier compressé sur lordinateur
Mise à niveau du logiciel
En ligne
USB
Par téléch
Mise à niveau en mode veille
Via disque
Media
Écran AllShare Play
Utilisation de l’écran AllShare Play
Selon comment et quand vous liez une source de contenu
Modèles diPod/iPhone pouvant Être utilisés avec cet appareil
Lecture des disques audio du Commerce
Commandes de l’écran Musique
’écran Fonction
Options de l’écran Fonction
Pour télécharger le logiciel AllShare
Utilisation de la fonction Réseau AllShare
Français Media Play
Ordinateur Appareil
De l’ordinateur
Smartphone
Contrôle de la lecture Vidéo
Touches de la télécommande servant à la lecture vidéo
Utilisation du menu Outils
Lecture aléatoire des pistes d’un CD Audio
Touches de la télécommande servant à lécoute de musique
Contrôle de la lecture de Musique
Répétition des pistes d’un CD Audio
Visionnage des photos
Extraction
Titre
Afficher
Stockage et du support
De stockage
Envoyer
Family Story
Connecter
Sur le bouton E
Propos de la radiodiffusion RDS
Ecouter la radio
Réglage Mono/Stéréo
Préréglage des stations
Pour rechercher un programme à laid e Des codes PTY
Pour afficher les signaux RDS
Utilisation des touches de contrôle
Smart Hub dun coup dœil
Services Réseau
Utilisation de Smart Hub
Samsung Apps ouvrez Samsung Apps pour
Télécharger des services dapplications payants ou gratuits
Utilisation de Navigateur Web
Navigateur Web d’un coup d’œil
Services Réseau Français
Sortie Hdmi
Annexes
Informations complémentaires
Remarque
Lecture
Disponible sur tous les disques Blu-ray/DVD
Afficher en mode plein écran
Sélection de la langue des sous-titres
Du disque. Appuyez sur la touche Menu DU Disque
Lecture DVD Sortie HDMI/connecté Mode Vidéo
Résolution selon le mode de sortie
Sortie HDMI/connecté Mode Vidéo
Mode Hdmi Configuration
DVD
Sélections des sorties numériques
PCM
Dépannage
Radio impossible
Normalement
Passe du niveau de
’antenne est-elle correctement branchée ?
Vérifiez si vous avez un pare-feu activé
Exigences du service BD-LIVE
Vérifiez la connexion
IP peut résulter de ce phénomène
Caractéristiques techniques
Unité kg
Avant Caisson de graves Enceinte
90 x 139 x 168 x 350 x
Avant Caisson de graves 90 x 1050 x 168 x 350 x
Mise au rebut appropriée de la batterie de ce produit
1CH Blu-ray Heimkino-System
Produkt hin
Sicherheitsinformationen
Warnung
Dieser CD-Player ist ein Laserprodukt DER Klasse
Deutsch Sicherheitsinformationen
Verwendung der 3 D Funktion
Halten der Disks
Lizenz
Deutsch Sicherheitsinformationen
Anschließen der Lautsprecher Lautsprecherkomponenten
Inhalt
Disk und Format Kompatibilität
Zubehör Beschreibung 12 Rückseite Fernbedienung
DVD-VIDEO, DVD-RW, DVD-R, DVD+RW, DVD+R
Erste Schritte
Disk und Format Kompatibilität
Medium Disktyp Details
Unterstützte Musikdatei
Regionalcode
Logos von Disks, die vom Gerät Wiedergegeben werden können
Unterstützte Formate
Auflösung
Unterstützte Videodatei
264
Einschränkungen
Advanced Video Codec Höchauflösung
Hinweise zum USB-Anschluss
Für Netzkabel
Zubehör
Rückseite
Beschreibung
Übersicht der Fernbedienung
Fernbedienung
Wenn Sie das Fernsehgerät mit der Fernbedienung steuern
Batterien in die Fernbedienung einsetzen
Fernbedienung einrichten
Bediencodes für Fernsehgeräte
Auswahl der Hörposition
Anschlüsse
Anschließen der Lautsprecher
Lautsprecherkomponenten
Die Lautsprecher können, wie rechts dargestellt
Auf 4 Arten installiert werden
Aufstellen der Lautsprecher nur HT-ES4200
Montage auf dem Standfuß
Lautsprecher nach der Installation
Aufstellen der Frontlautsprecher nur HT-ES4200
Montage mit Verbindungselement
Subwoofer Front-Lautsprecher L
Anschließen der Lautsprecher nur HT-ES4200
Bei HT-E4200
Drücken Sie die rote Anschlussklemme auf der Rückseite des
UKW-Antenne mitgeliefert
Zum Anschließen der UKW-Antenne
Anschließen eines iPods/iPhones
Anbringen des Ferrit Ringkerns am Netzkabel des Hauptgeräts
Wählen Sie entweder die Methode 1 oder Methode
Anschluss an ein Fernsehgerät
Enthalten
Externe Geräte anschließen
BD/DVD D. in AUX R. Ipod FM
Kabelnetzwerk
Deutsch Einstellungen
Einstellungen
Ersteinstellungen konfigurieren
Bei Anschluss über ein Netzwerkkabel
Der Home Bildschirm
Im Einstellungen Menü verwendete Fernbedienungstasten
Anzeige
Einstellungen Menü Funktionen
Netzwerk
Audio-Opt
Konfigurieren. Siehe Seite 23 für weitere Informationen
AllShare Hier können Sie einstellen, ob externe Geräte, wie
Einstellungen
Einstell Erlauben, einschränken oder untersagen
Die voreingestellte PIN lautet 0000. Geben Sei die
Update Siehe Aktualisieren der Software auf Seite
Menü, Disk Menü, usw. angezeigt werden soll
Disk unterstützt wird
Kabelnetzwerk
Netzwerke und das Internet
Konfigurieren Ihrer Netzwerkverbindung
Wlan Allgemein Automatisch
Wireless-Netzwerk
AllShare-Einstellungen
Support
Aktualisieren der Software
PER USB
Mit Hilfe der Über Download Funktion durchführen
Klicken Sie am oberen Rand der Seite auf
Update im Standby
Über Disk
Über Download
Wiedergabe von Video, Foto oder Musik Inhalten
Der AllShare Wiedergabebildschirm
Zugriff auf den AllShare Play Bildschirm
Positionen aus Liste wiedergeben
Das Menü Fotos, Videos unterstützt keine iPads oder iPhones
Wiedergabe von Dateien auf einem
Oder
Musik Bildschirm Steuerelemente
Der Funktion Bildschirm
Optionen des Funktion Bildschirms
Wiedergabe von kommerziellen Audio Disks
Herunterladen der AllShare Software
Wiedergabe von selbst Aufgenommenen Disks
Verwenden der AllShare Netzwerkfunktion
Wiedergabe der PC- Dateien
Produkt
PC-Dateien
An das Gerät
Tasten auf der Fernbedienung für die Videowiedergabe
Steuern der Videowiedergabe
Extras Menü verwenden
Wiederholen von Titeln auf einer Audio CD
Steuern der Musikwiedergabe
Tasten auf der Fernbedienung für die Wiedergabe
Eine Wiedergabeliste erstellen
Anzeigen von Fotos
Rippen
Verwenden des Extras Menü Wenn eine Datei markiert ist
Möchten und drücken Sie
Senden
Möchten
Anschließend die E Taste
Einstellen des Mono/Stereo-Modus
Radio hören
Sender voreinstellen
Über RDS-Sender
Programmsuche mithilfe der PTY-Codes
Anzeigen der RDS-Signale
PTY Program-Typ Anzeige und PTY-SUCH-Funktion
Verwenden der Spezialeffekt Tasten auf der Fernbedienung
Smart Hub Übersicht
Netzwerkdienste
Smart Hub verwendenb
Ermöglicht es
Verwenden des Webbrowsers
Der Webbrowser im Überblick
Verschiedenen gebührenpflichtigen oder Freeware Diensten
BD-LIVE
Hinweis
Anhang
Zusätzliche Informationen
Einstell
Wiedergabe
DVD-Wiedergabe Ausgang Hdmi / angeschlossen
Auflösung nach Wiedergabemodus
Ausgang
HDMI-Modus Einstellung Video Modus
Verbindung
Auswahl des Digitalausgangs
Fehlerbehebung
Normal
Sekunden lang gedrückt
Sich aus oder es sind
Hören Verwenden Sie diese Funktion nur wenn notwendig
Überprüfen Sie, ob ein Firewall aktiv ist
Service Siehe Seite
Verbindung überprüfen
Adresskonflikte ein solches Phänomen verursachen
Technische Daten
Front Subwoofer
Kanal Lautsprechersystem
87dB/W/M 88dB/W/M
165W 170W Maximale 330W 340W Eingangsleistung Maßeinheit mm
Korrekte Entsorgung der Akkus in diesem Produkt
Registrare il prodotto allindirizzo
Blu-ray 2.1 canali
Laser DI Classe
Informazioni sulla Sicurezza
Avvertenza
Questo lettore CD è classificato come prodotto
Manutenzione della custodia
Conservazione e gestione dei dischi
Precauzioni per la manipolazione
Utilizzo della funzione 3D
Licenza
Informazioni sulla Sicurezza Italiano
Collegamento a dispositivi esterni
Informazioni aggiuntive Risoluzione dei problemi Specifiche
Indice
Montaggio dei diffusori anteriori solo HT-ES4200
Tipi di dischi non riproducibili
Guida Introduttiva
Compatibilità dei dischi e dei formati
Tipi di dischi e contenuti riproducibili
File musicali supportati
Codice regionale
Loghi dei dischi riproducibili
Formati supportati
Bit rate Mbps Codec audio
File video supportati
Codec video Risoluzione Frequenza
Contenitore
Colour è un marchio di Sony Corporation
Per cavo di
Accessori
Controllare di seguito gli accessori forniti
Manuale utente
Pannello posteriore
Pannello anteriore
Telecomando
Codice
Inserimento delle batterie nel telecomando
Impostazione del telecomando
Codici di comando del televisore
Componenti degli altoparlanti
Connessioni
Collegamento degli altoparlanti
Appenderli alla parete
Installazione dei diffusori solo HT-ES4200
Vi sono 4 tipi di installazione possibili, descritti a
Destra
Montaggio dei diffusori anteriori solo HT-ES4200
Installazione sul supporto doppio
Installazione sul supporto da tavolo
Rosso
Collegamento dei diffusori solo HT-ES4200
Per il modello HT-E4200
Questo prodotto non riceve le trasmissioni AM
Collegamento dellantenna FM
Collegamento di un iPod/iPhone
Antenna FM fornita
Cavo non fornito
Collegamento a un televisore
Selezionare il metodo 1 o il metodo
Bianco
Collegamento a dispositivi esterni
Servizio a Banda larga Router
IP sharer wireless Servizio a Banda larga
Collegamento a un router di rete
Rete via cavo
Italiano Impostazioni
Impostazioni
Procedura di impostazione iniziale
Con cavo di rete collegato
La schermata iniziale
Unimpostazione
Tasti del telecomando utilizzati per il menu Impostazioni
Tasto E Invio / Direzione
Selezionare una voce
Funzioni del menu Impostazioni
Rete
Sistema
Supporto
Quando si collega questo prodotto a una rete
Configurazione del collegamento alla rete
Le reti e Internet
Rete via cavo
Rete wireless
Impostazioni AllShare
Destra nella pagina
Aggiornamento del software
Linea
Tramite USB
Aggiornamento mod Standby
Tramite disco
Con file scaric
Riproduzione degli elementi in El. pers
Riproduzione Multimediale
La schermata AllShare Play
Utilizzo della schermata AllShare Play
Oppure
Modelli iPod/iPhone utilizzabili con Questo prodotto
Riproduzione di DVD commerciali
La schermata Funzione
Opzioni nella schermata Funzione
Riproduzione di CD commerciali
Fare clic su Support in alto nella pagina
Utilizzo della funzione di rete AllShare
Come scaricare il software AllShare
Sul telefono, avviare la riproduzione
Producto
PC en el producto
Tasti del telecomando utilizzati per la riproduzione video
Controllo della riproduzione video
Tools
Utilizzo del menu Strumenti
Menu visualizzati solo durante la Riproduzione di un file
Utilizzare i tasti per selezionare una traccia
Ripetizione delle tracce di un CD audio
Riproduzione casuale delle tracce di un CD audio
Creazione di una playlist
Riproduzione di contenuti fotografici
Utilizzo del menu Strumenti Quando un file è selezionato
Tutte le tracce o tutti i file
Accesso
Il tasto E
Invia Traccia o file da caricare
Memorizzazione delle stazioni
Ascolto della radio
Utilizzo dei tasti del telecomando
Impostazione mono/stereo
Per ricercare un programma usando Codici PTY
Per visualizzare i segnali RDS
Caratteri utilizzati sul display
Indicazione PTY Tipo programma e Funzione PTY-SEARCH
Utilizzo dei tasti degli effetti Speciali sul telecomando
Contenuti familiari
Servizi di Rete
Utilizzo di Smart Hub
Panoramica di Smart Hub
Passa alla pagina iniziale del browser Web
Utilizzo del browser Web
Panoramica del browser Web
Scaricare vari servizi applicativi a pagamento o gratuiti
Servizi di Rete Italiano
Nota
Appendice
Informazioni aggiuntive
Italiano Appendice
Impostazioni Riproduzione
Riproduzione di file video
Modo Bonusview principale
Selezione della lingua dei sottotitoli
Premere il tasto Disc Menu
Essere disponibile su tutti i dischi Blu-ray/DVD
Riproduzione di DVD Uscita HDMI/collegata Modo Video
Risoluzione in base al modo di uscita
Modo Hdmi Modo Video
Conf
Bitstream Dolby D
Selezione delluscita digitale
Bitstream non Bitstream DTS
Supporto Hdmi
Risoluzione dei problemi
Modo normale
Sintomo Controlli/Rimedi
Utilizzarla solo se strettamente necessario
Rumori
Sovraccarica
BD-LIVE, si verifica un Servizio BD-LIVE Errore
Verificare che la rete sia stabile
Modo intermittente
Disco Blu-ray 576i/480i
Specifiche
Peso
Video composito
Parte anteriore Subwoofer 90 x 1050 x 168 x 350 x
Sistema di altoparlanti a 2.1 canali
Parte anteriore Subwoofer Impedenza
Parte anteriore Subwoofer
Corretto smaltimento delle batterie del prodotto