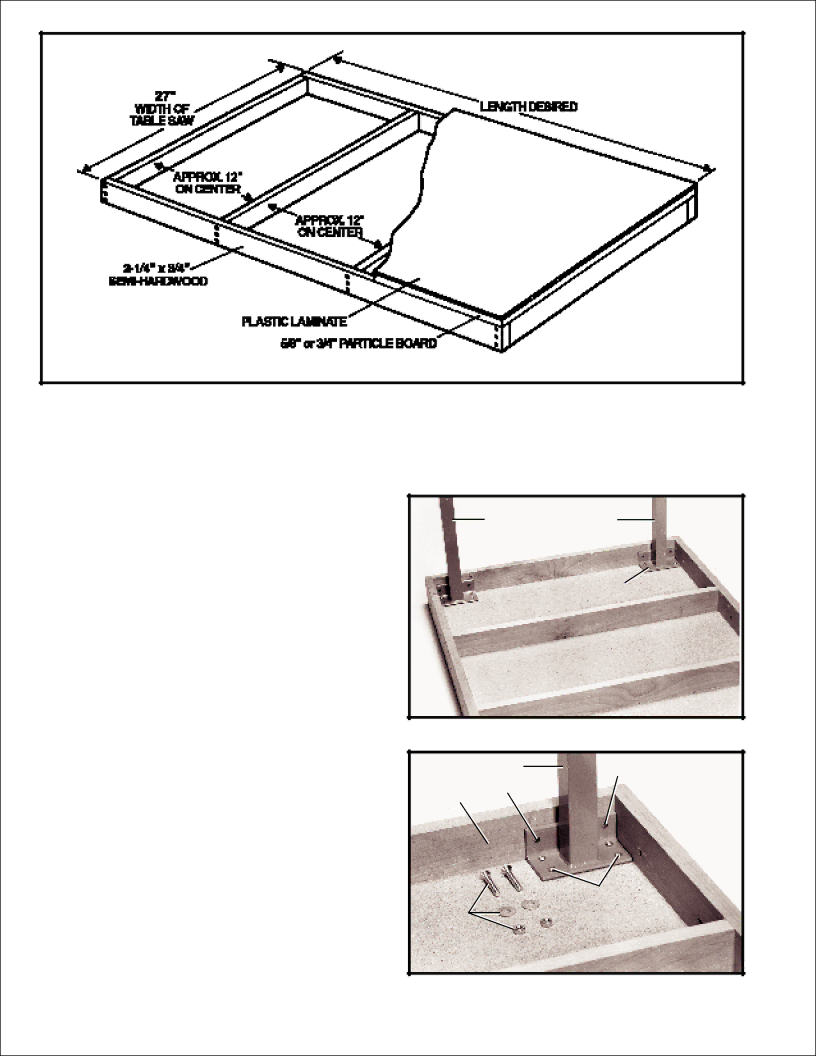
Fig. 9
7.If you did not purchase the accessory right extension table for use with your
8.Position the two legs (H) Fig. 10, at the two far corners of the inside of one end of the extension table, as shown, and mark the position of the eight holes to be drilled into the bottom of the table. IMPORTANT:If your saw and fence system will be used with a mobile base under- neath the saw base and table legs, the position of the legs may have to be changed to fit onto the mobile
base. Remove the two legs (H) and using a 1/16 drill bit, drill the eight holes 1/2 deep. Replace the two legs and fasten to the bottom of the table using the eight 3/4 long wood screws (I) supplied.
9.Figure 11 illustrates one of the legs (H) fastened to the bottom of the extension table with the four wood screws (I). Using a 1/4 drill bit, drill two through holes through the end piece (J) ofthetable using the two holes
(K) as a template.
HH
I
![]() I
I
Fig. 10
HK
K
J
I
M
Fig. 11
6