Singer H74 instruction manual Important Safety Instructions

Page 3

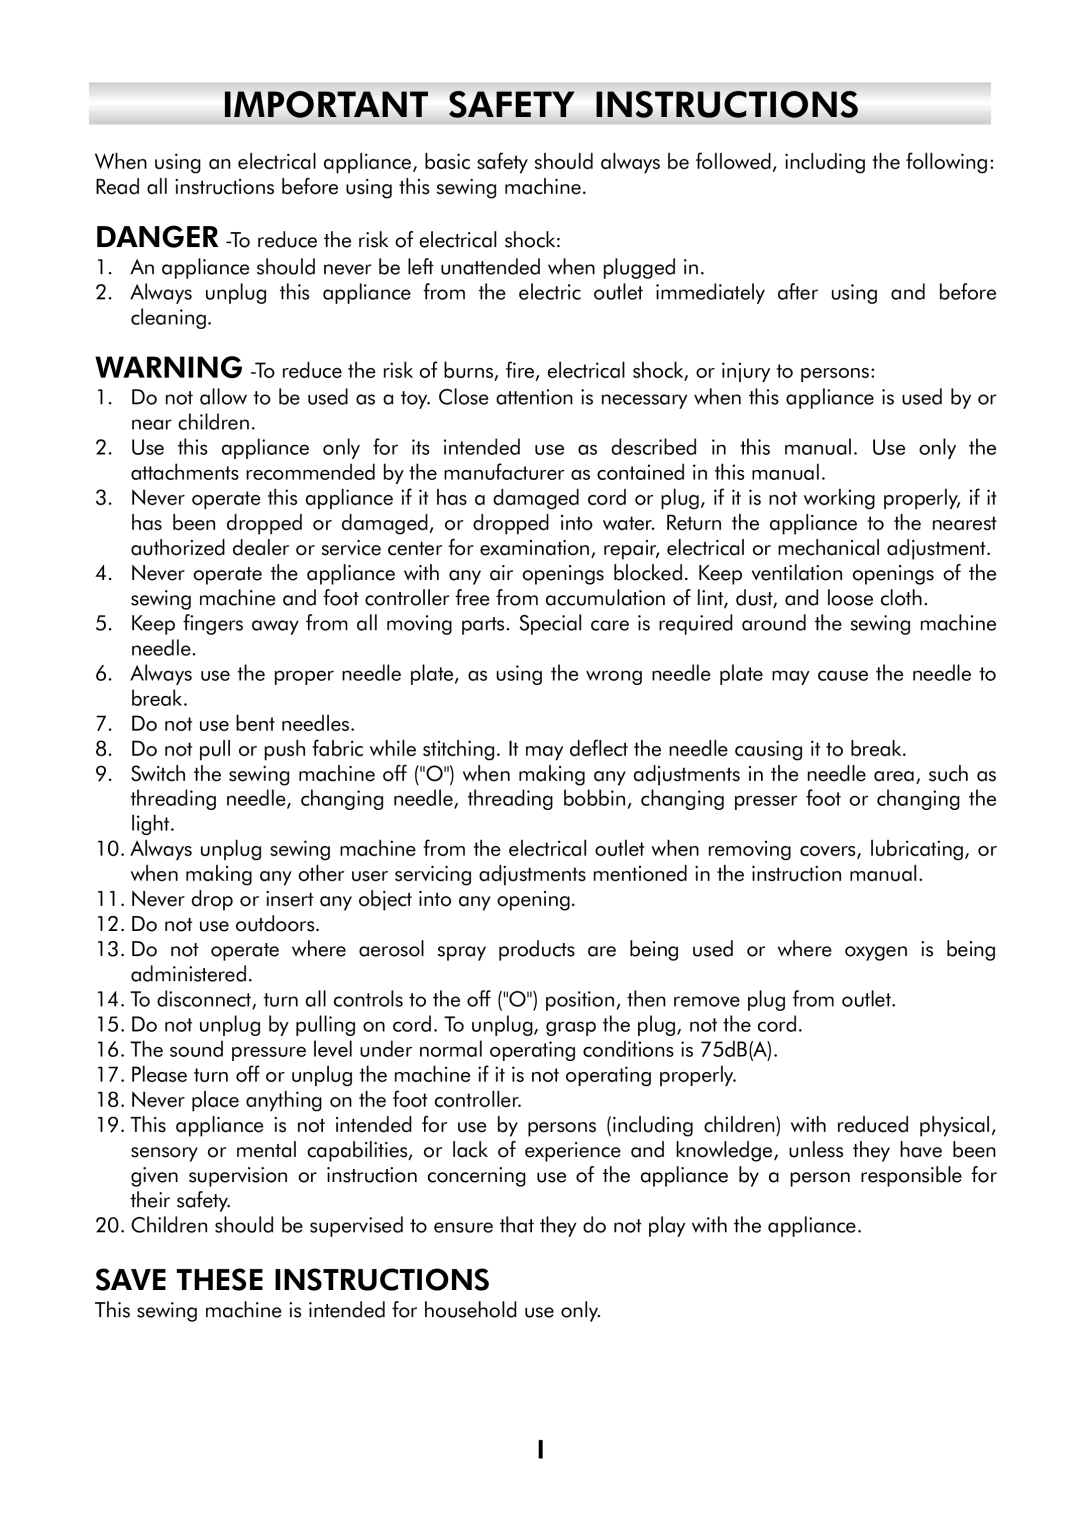
IMPORTANT SAFETY INSTRUCTIONS

When using an electrical appliance, basic safety should always be followed, including the following: Read all instructions before using this sewing machine.

DANGER -To reduce the risk of electrical shock:

1.An appliance should never be left unattended when plugged in.

2.Always unplug this appliance from the electric outlet immediately after using and before cleaning.

WARNING -To reduce the risk of burns, fire, electrical shock, or injury to persons:

1.Do not allow to be used as a toy. Close attention is necessary when this appliance is used by or near children.

2.Use this appliance only for its intended use as described in this manual. Use only the attachments recommended by the manufacturer as contained in this manual.

3.Never operate this appliance if it has a damaged cord or plug, if it is not working properly, if it has been dropped or damaged, or dropped into water. Return the appliance to the nearest authorized dealer or service center for examination, repair, electrical or mechanical adjustment.

4.Never operate the appliance with any air openings blocked. Keep ventilation openings of the sewing machine and foot controller free from accumulation of lint, dust, and loose cloth.

5.Keep fingers away from all moving parts. Special care is required around the sewing machine needle.

6.Always use the proper needle plate, as using the wrong needle plate may cause the needle to break.

7.Do not use bent needles.

8.Do not pull or push fabric while stitching. It may deflect the needle causing it to break.

9.Switch the sewing machine off ("O") when making any adjustments in the needle area, such as threading needle, changing needle, threading bobbin, changing presser foot or changing the light.

10.Always unplug sewing machine from the electrical outlet when removing covers, lubricating, or when making any other user servicing adjustments mentioned in the instruction manual.

11.Never drop or insert any object into any opening.

12.Do not use outdoors.

13.Do not operate where aerosol spray products are being used or where oxygen is being administered.

14.To disconnect, turn all controls to the off ("O") position, then remove plug from outlet.

15.Do not unplug by pulling on cord. To unplug, grasp the plug, not the cord.

16.The sound pressure level under normal operating conditions is 75dB(A).

17.Please turn off or unplug the machine if it is not operating properly.

18.Never place anything on the foot controller.

19.This appliance is not intended for use by persons (including children) with reduced physical, sensory or mental capabilities, or lack of experience and knowledge, unless they have been given supervision or instruction concerning use of the appliance by a person responsible for their safety.

20.Children should be supervised to ensure that they do not play with the appliance.

SAVE THESE INSTRUCTIONS

This sewing machine is intended for household use only.
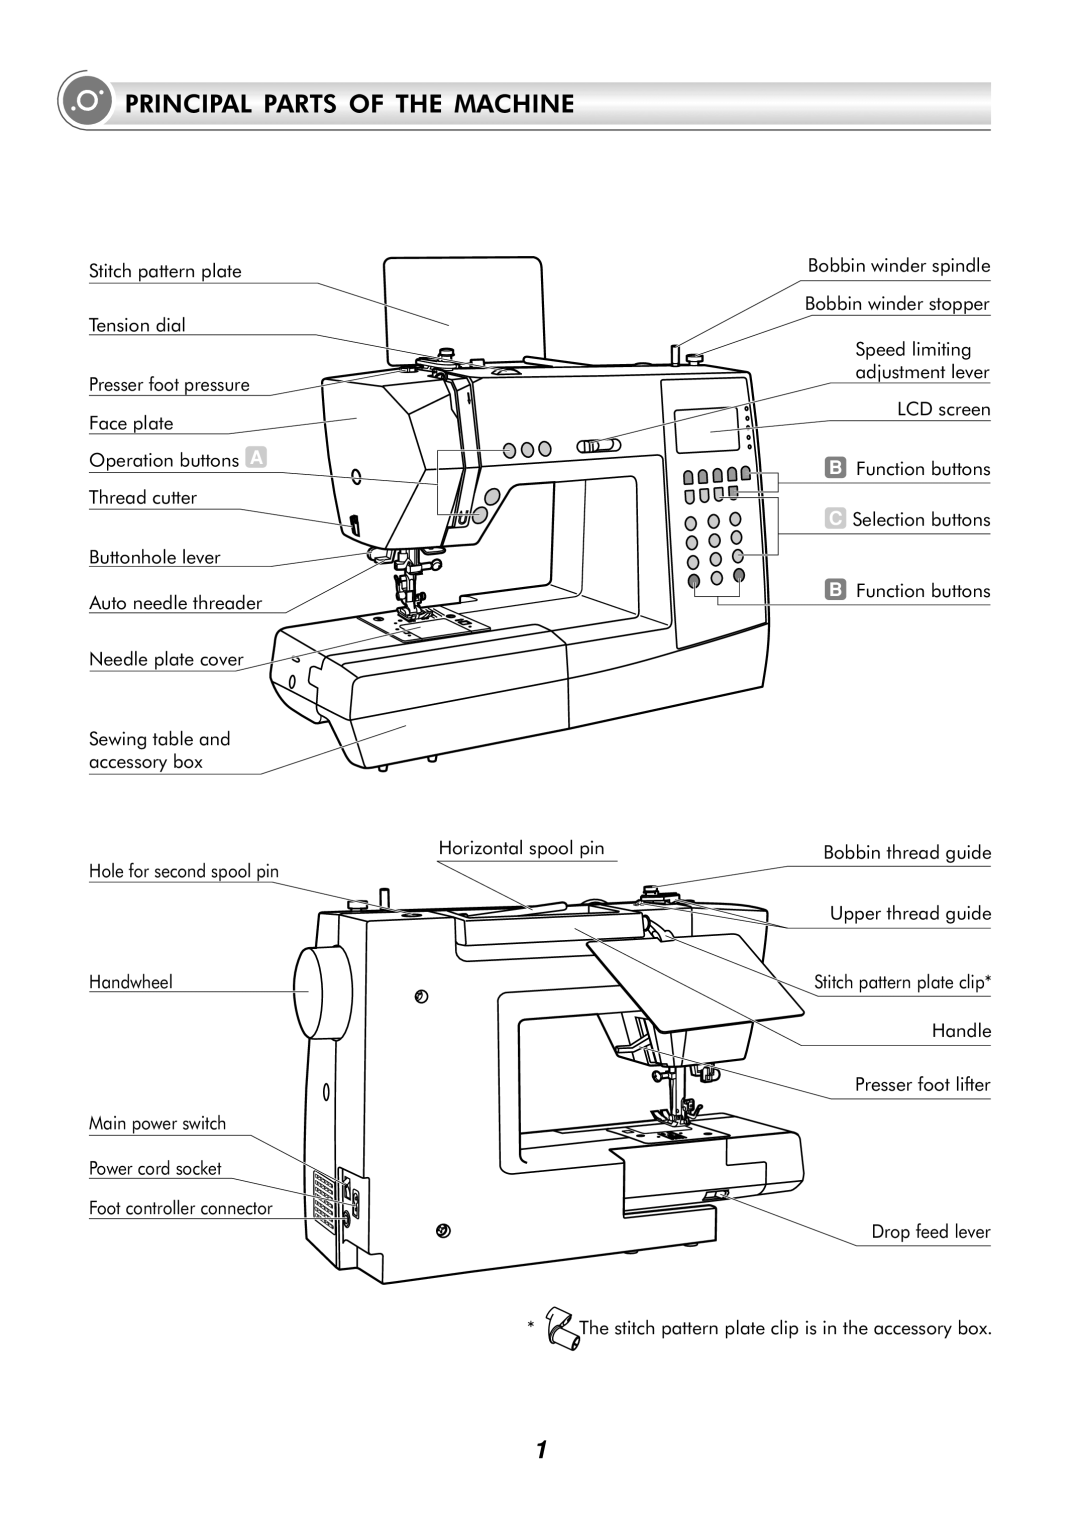
Image 3
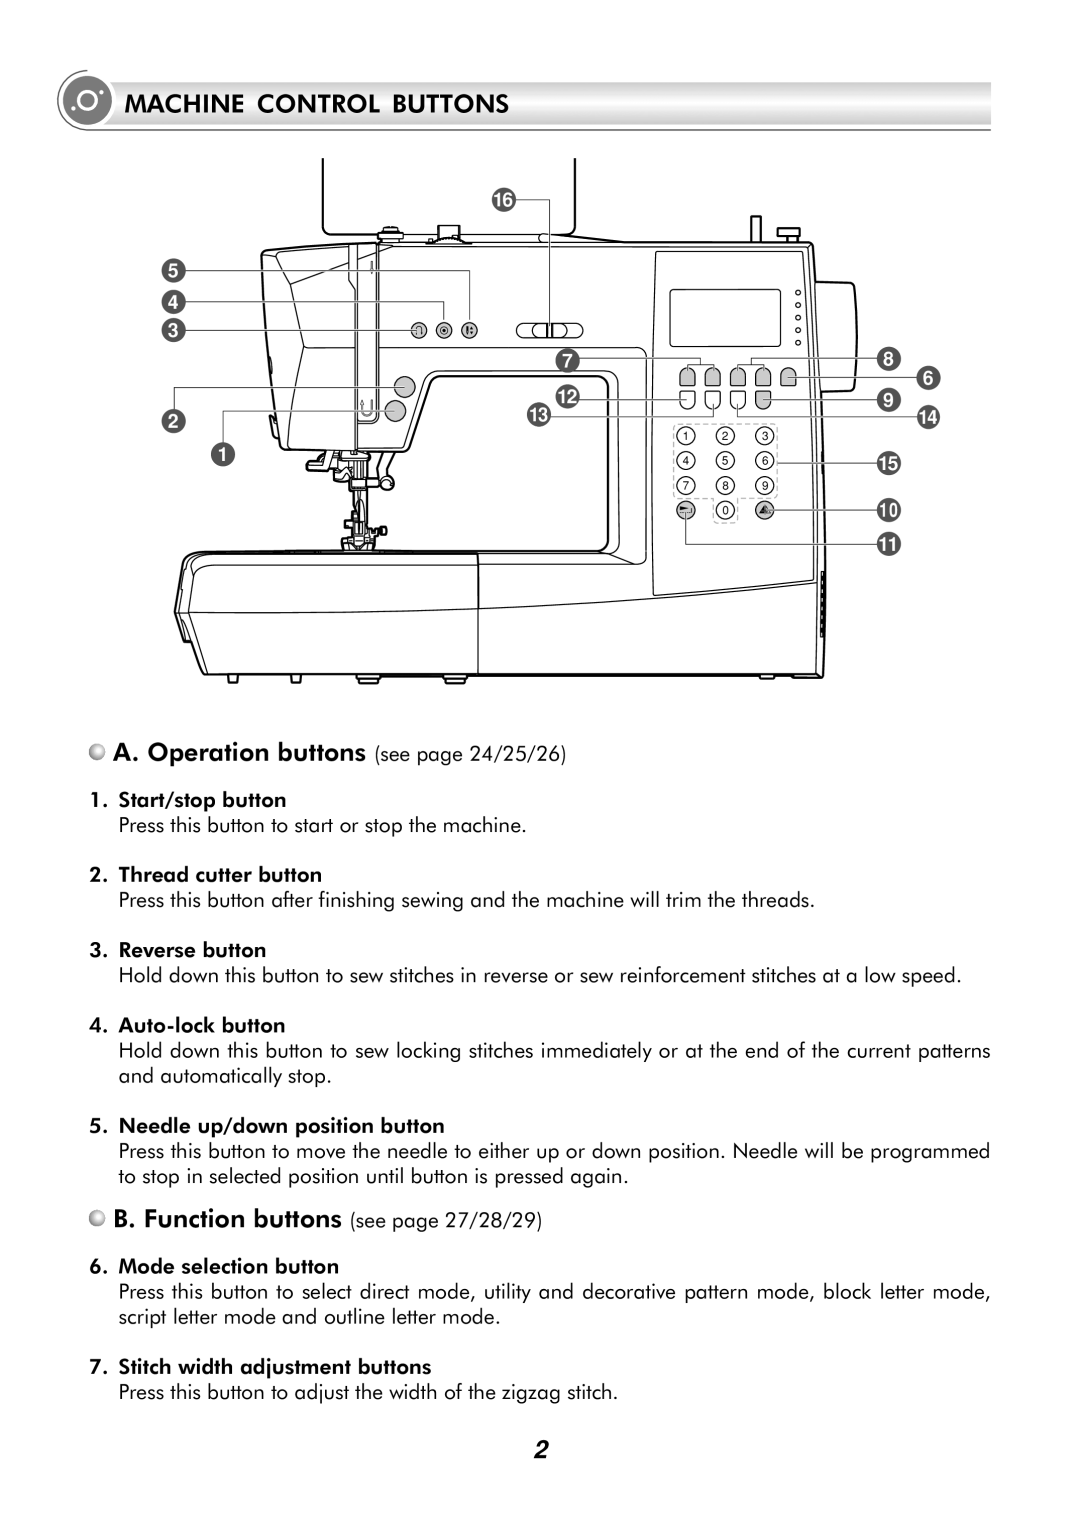
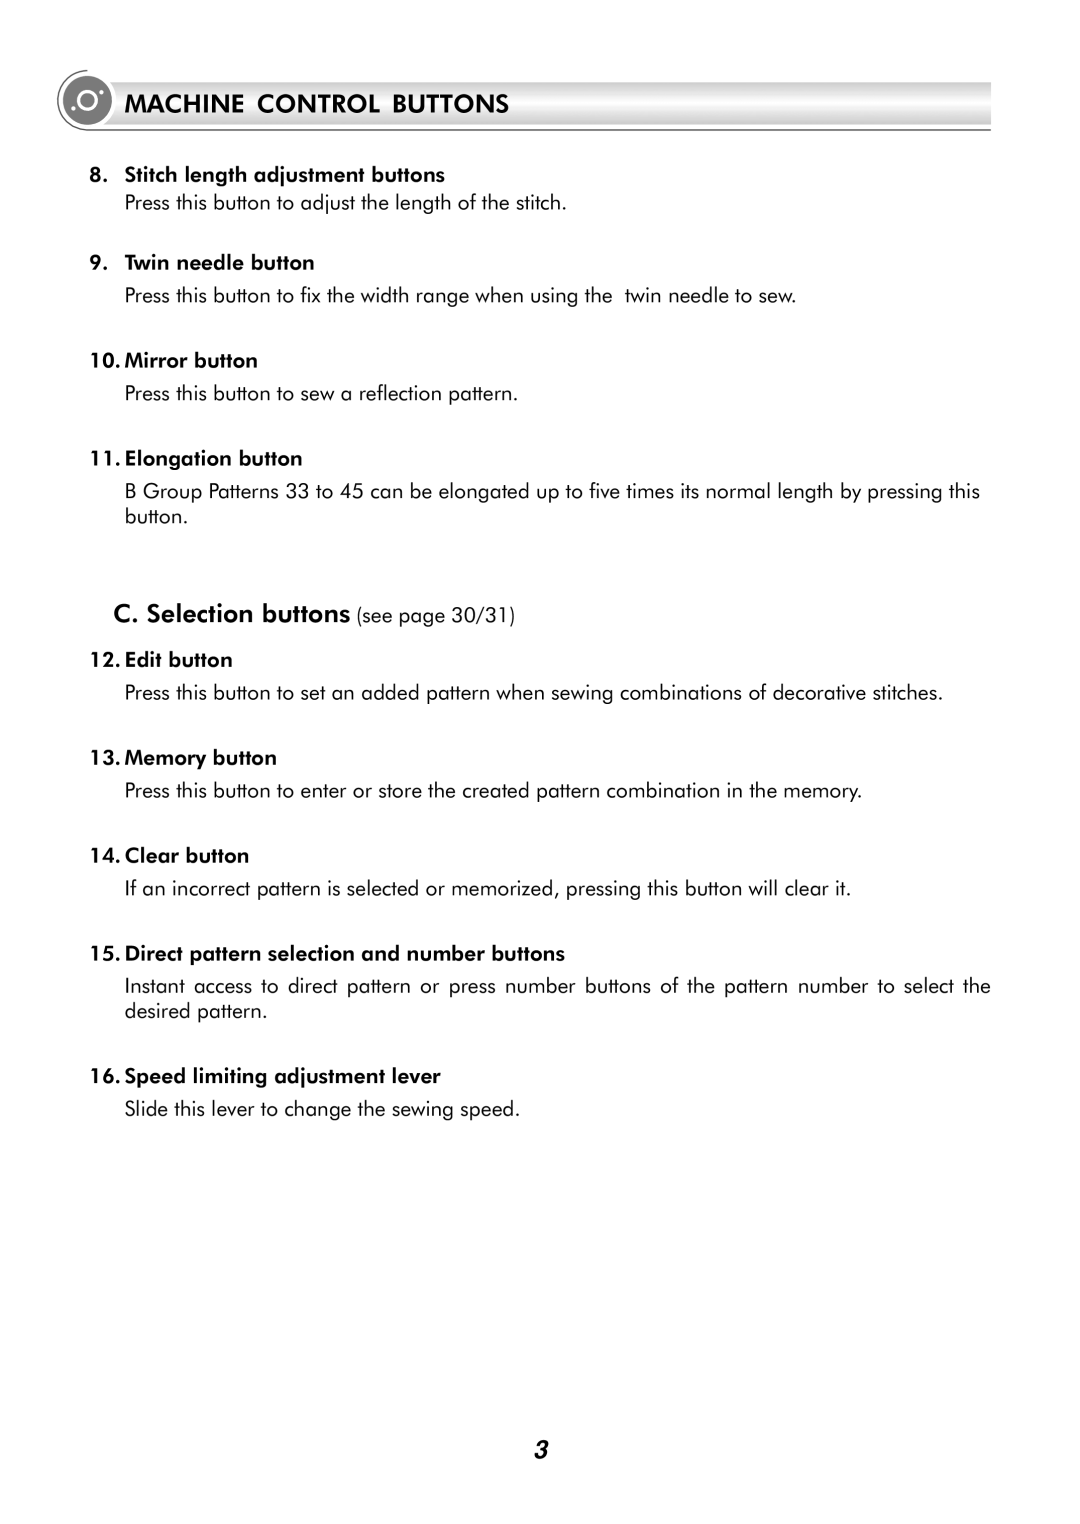
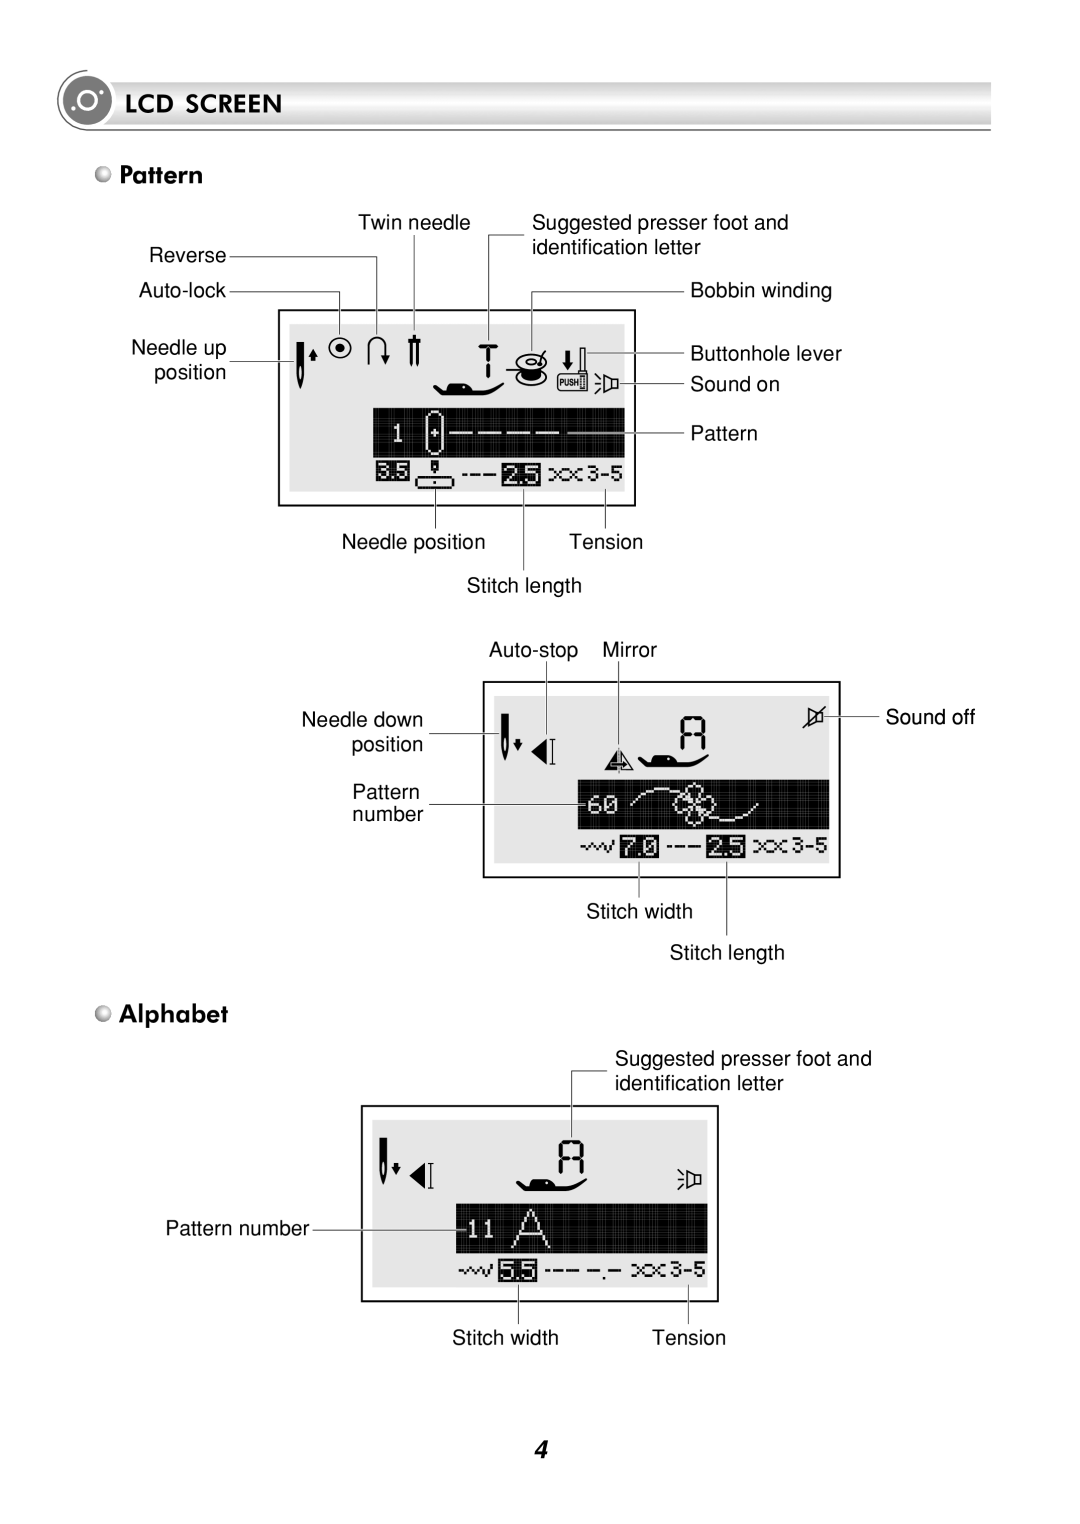
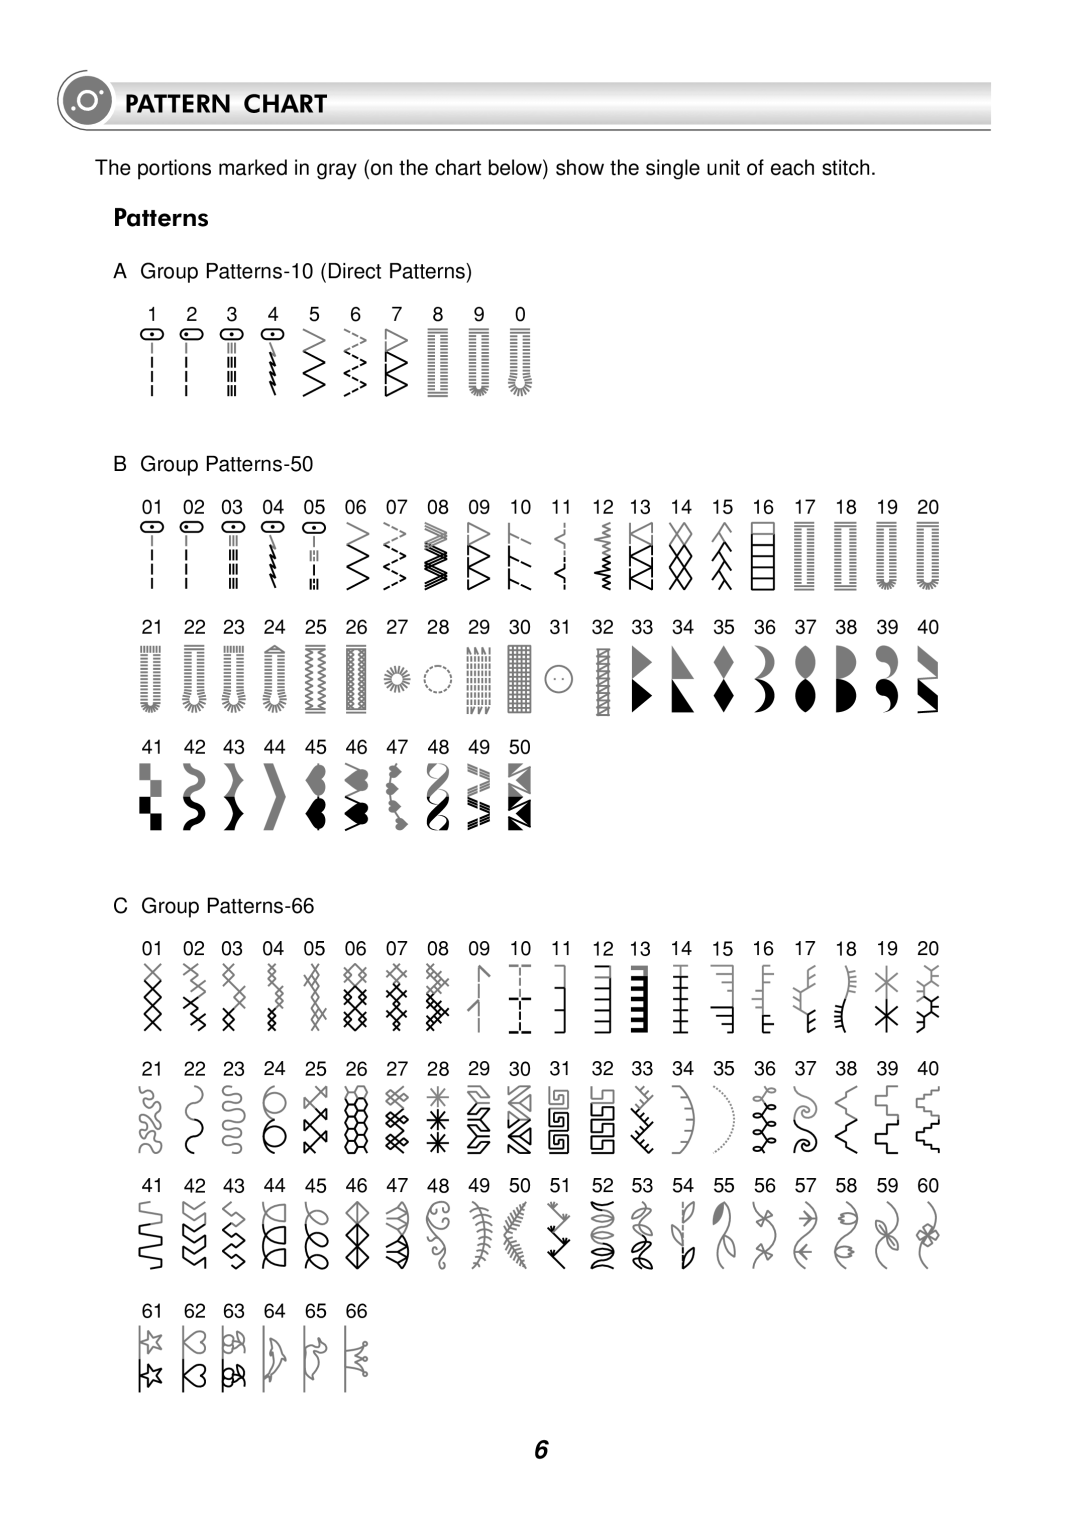
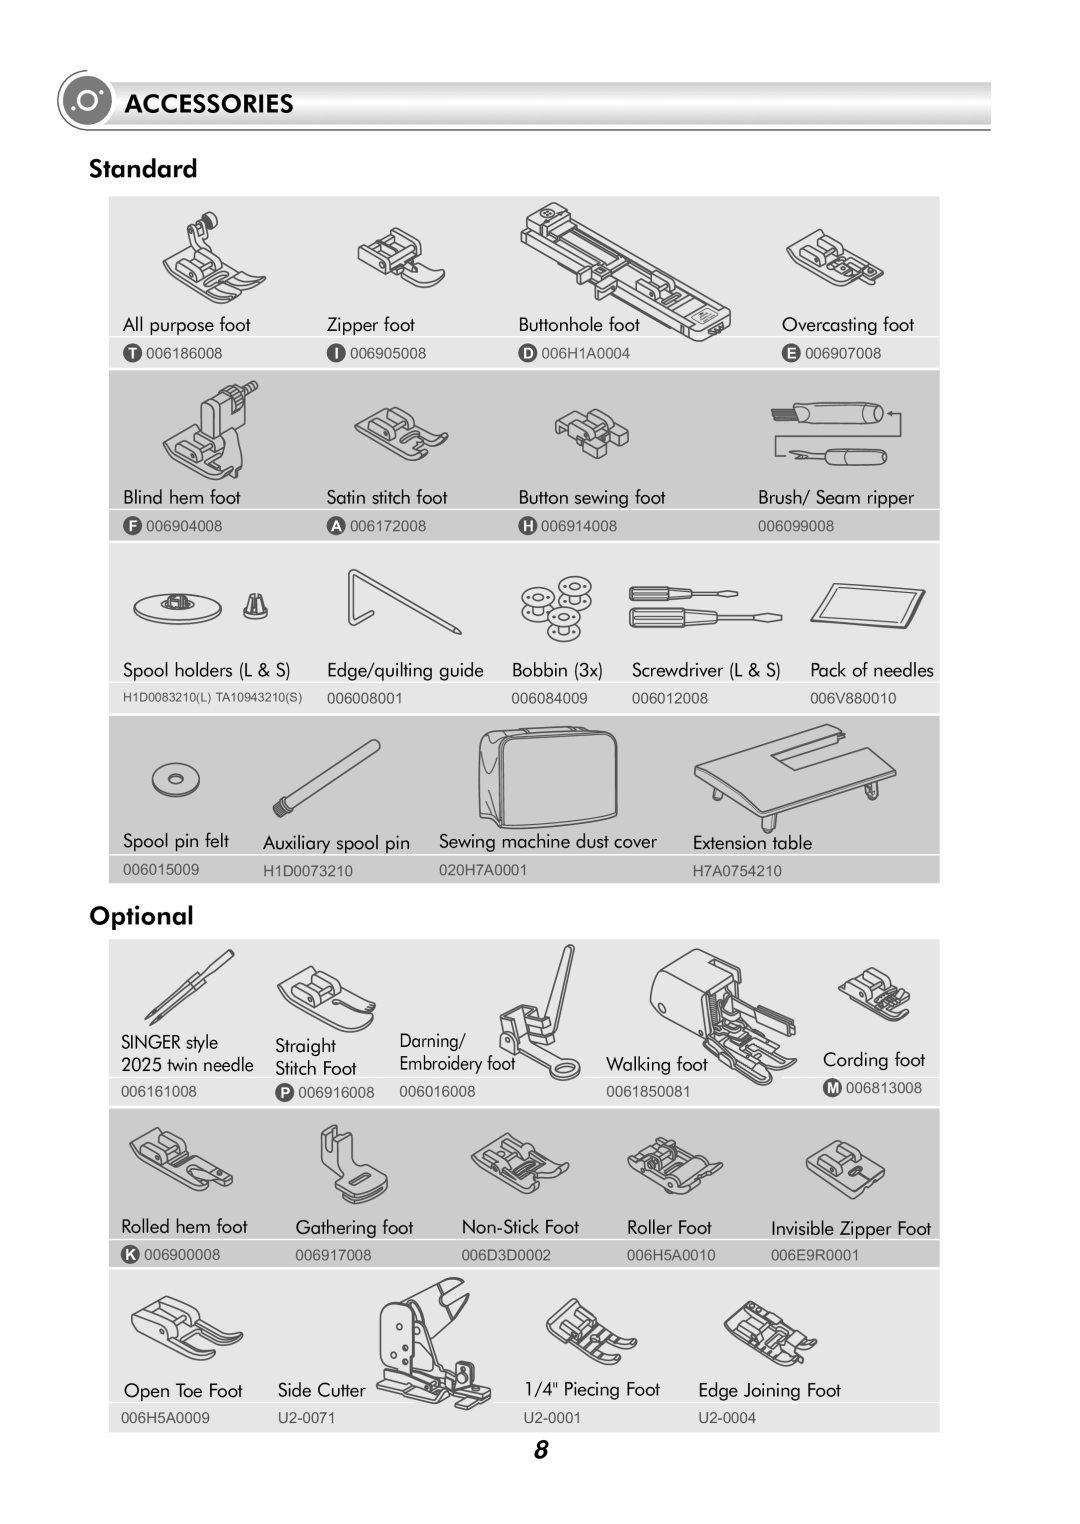
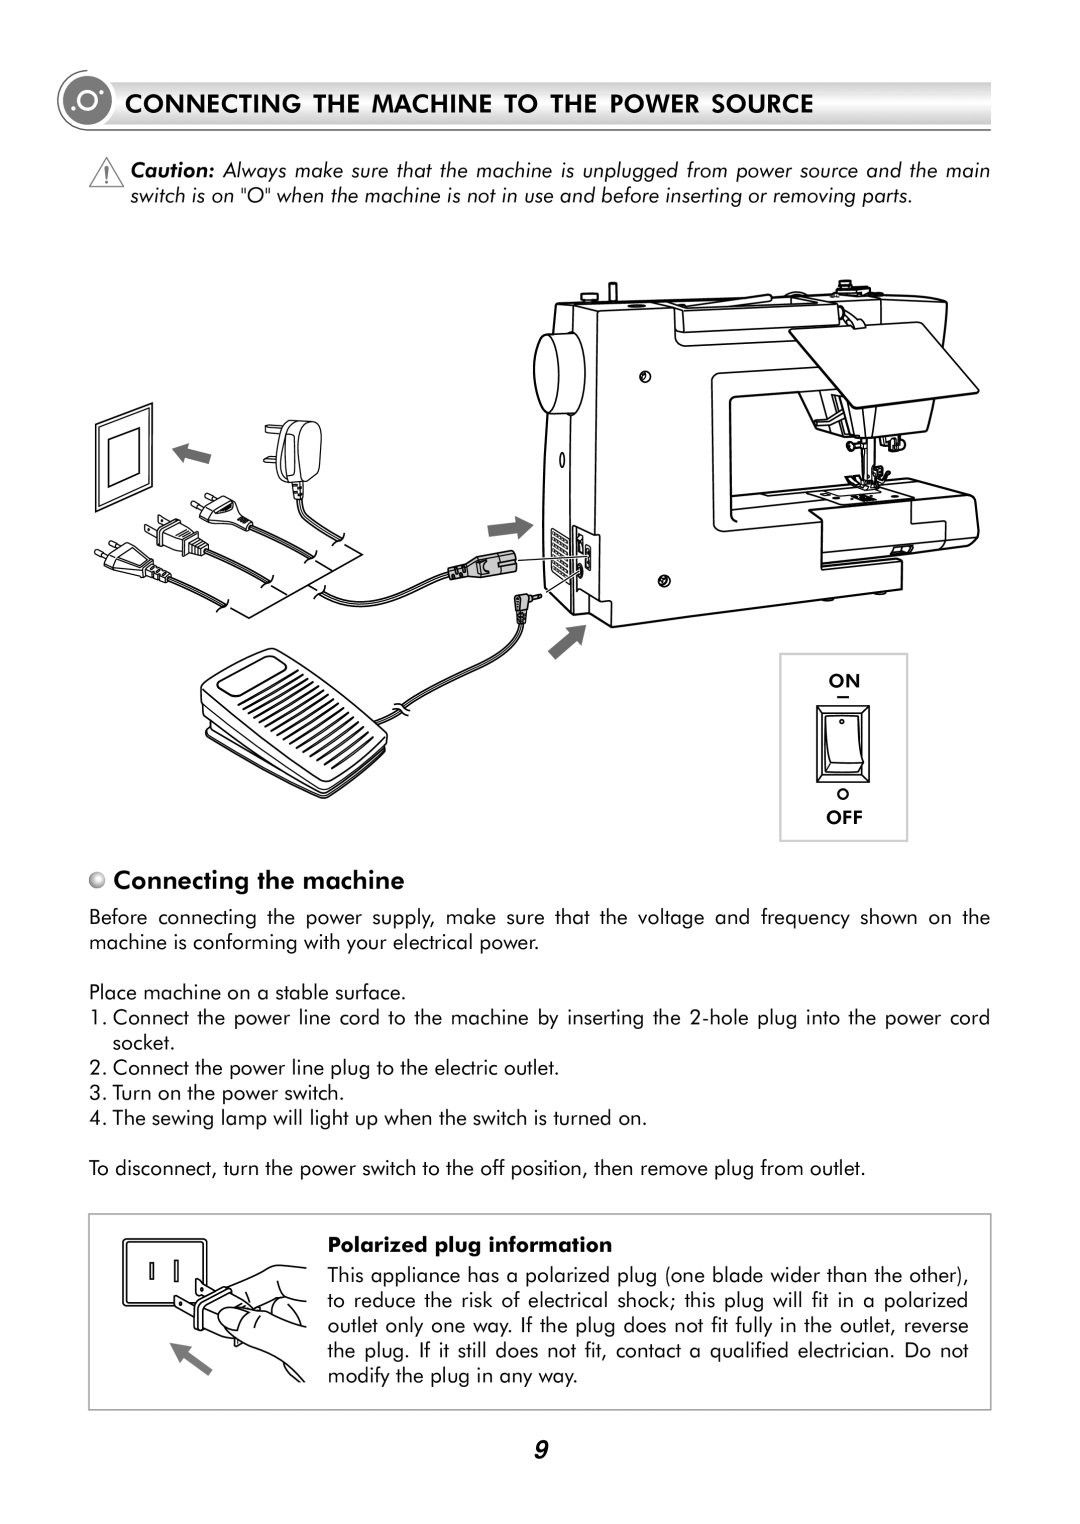
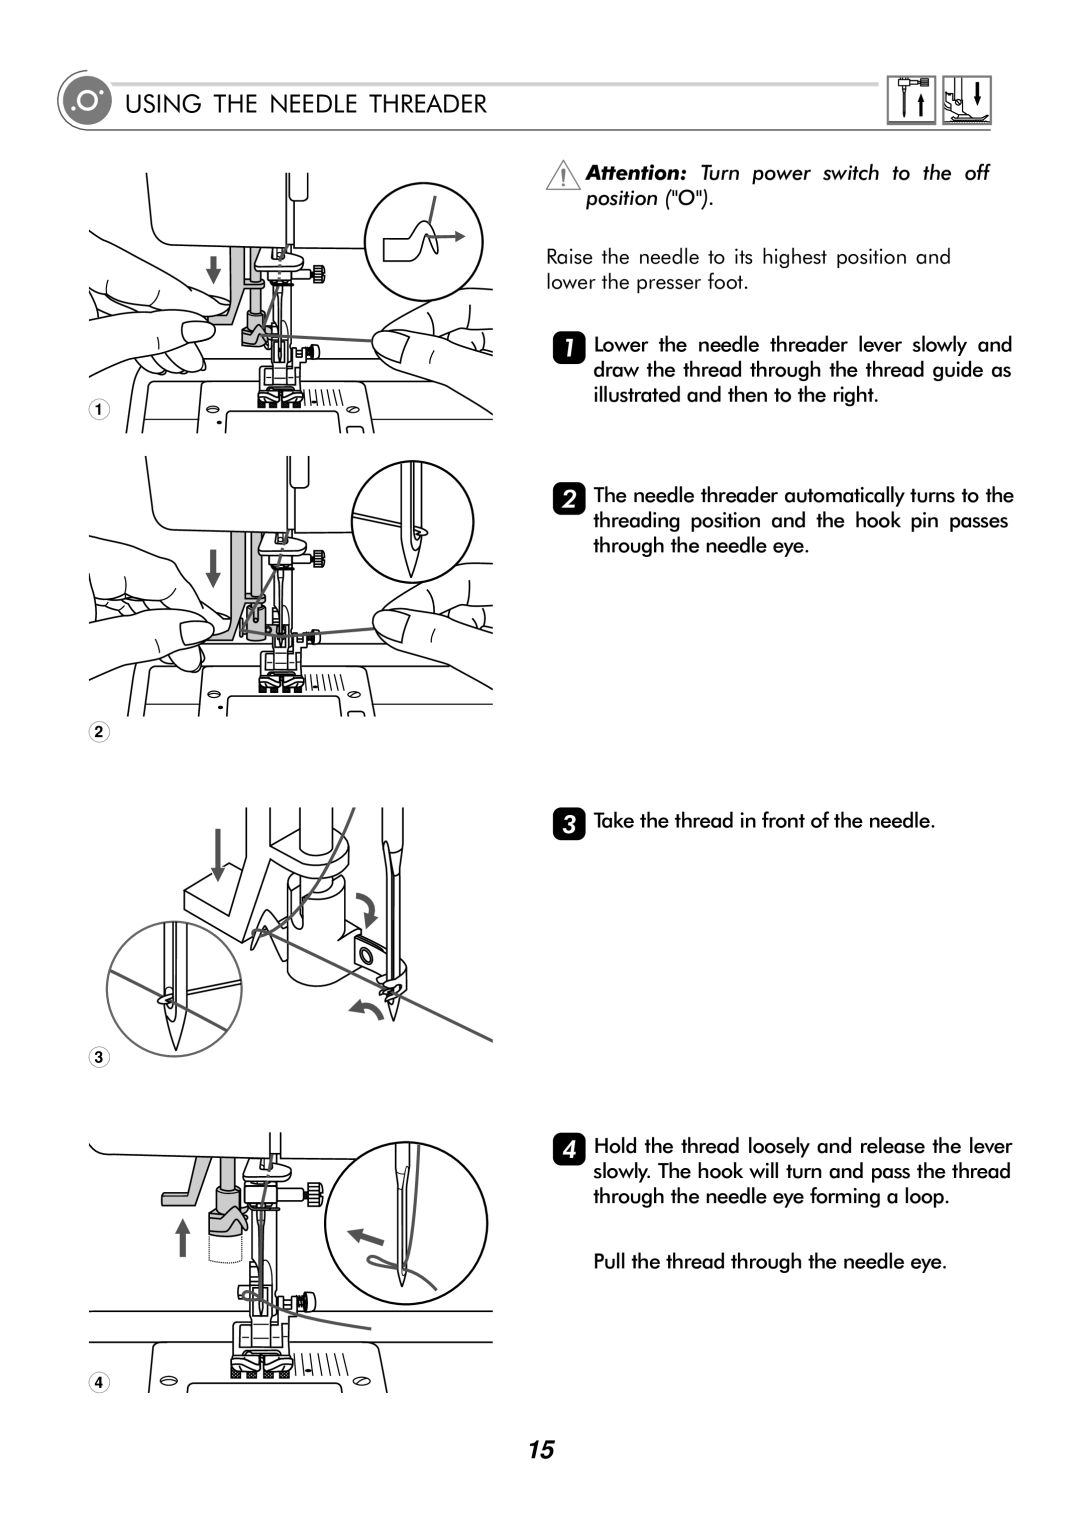
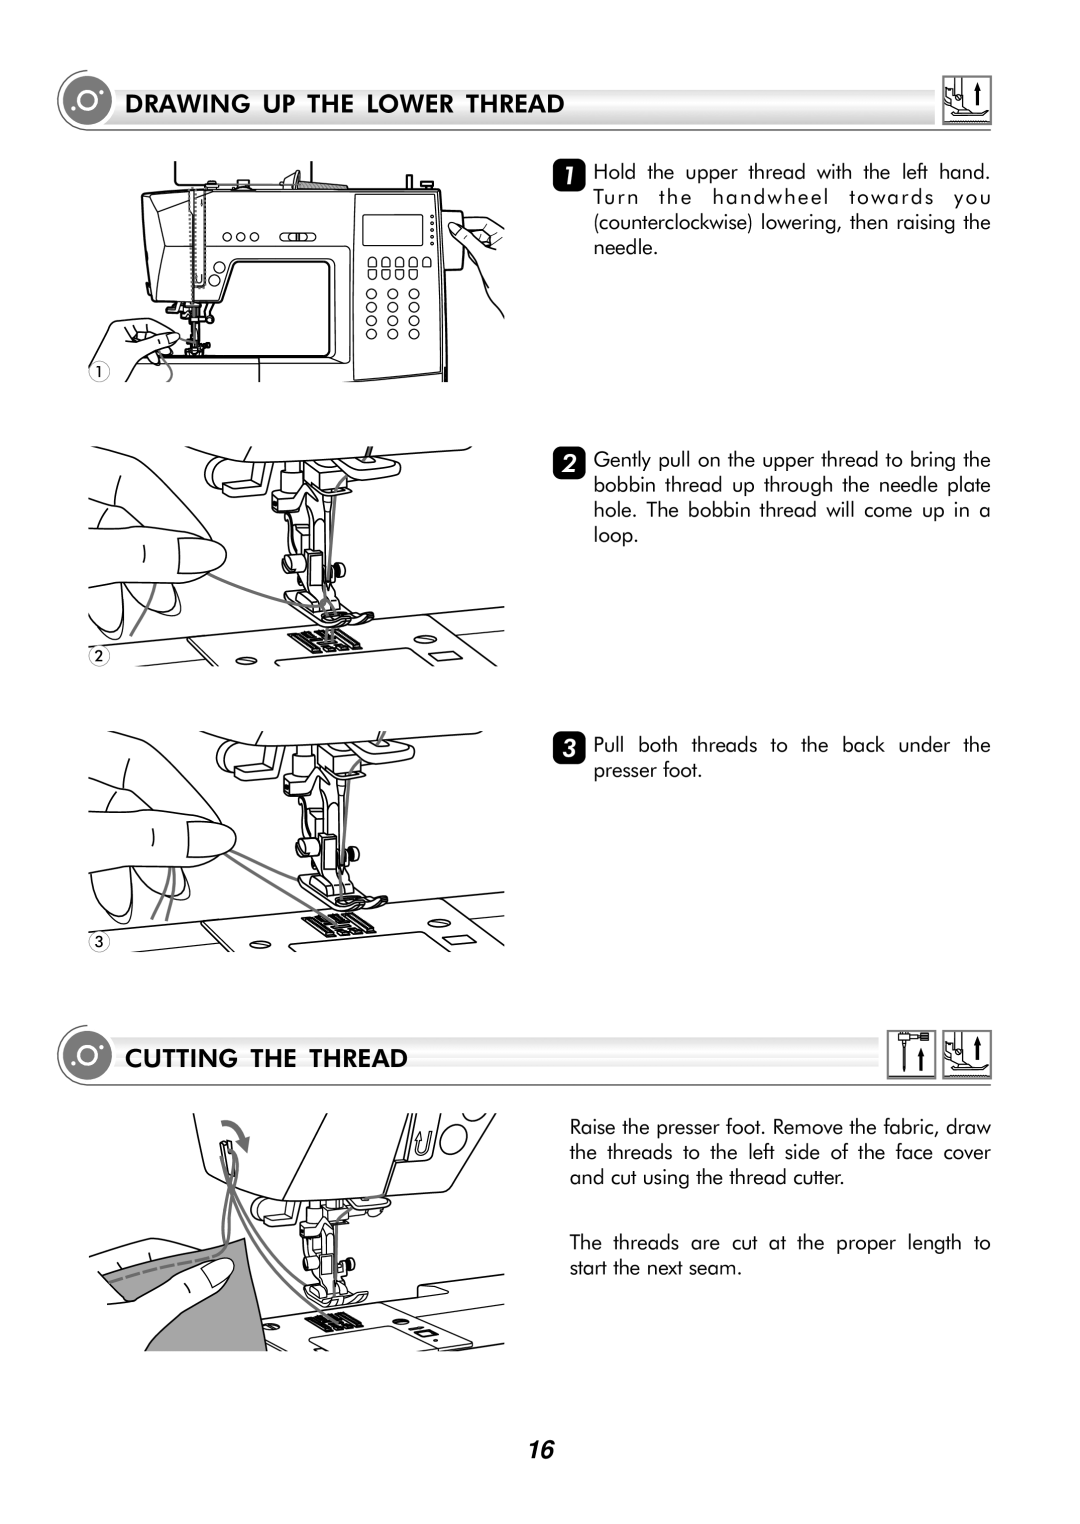
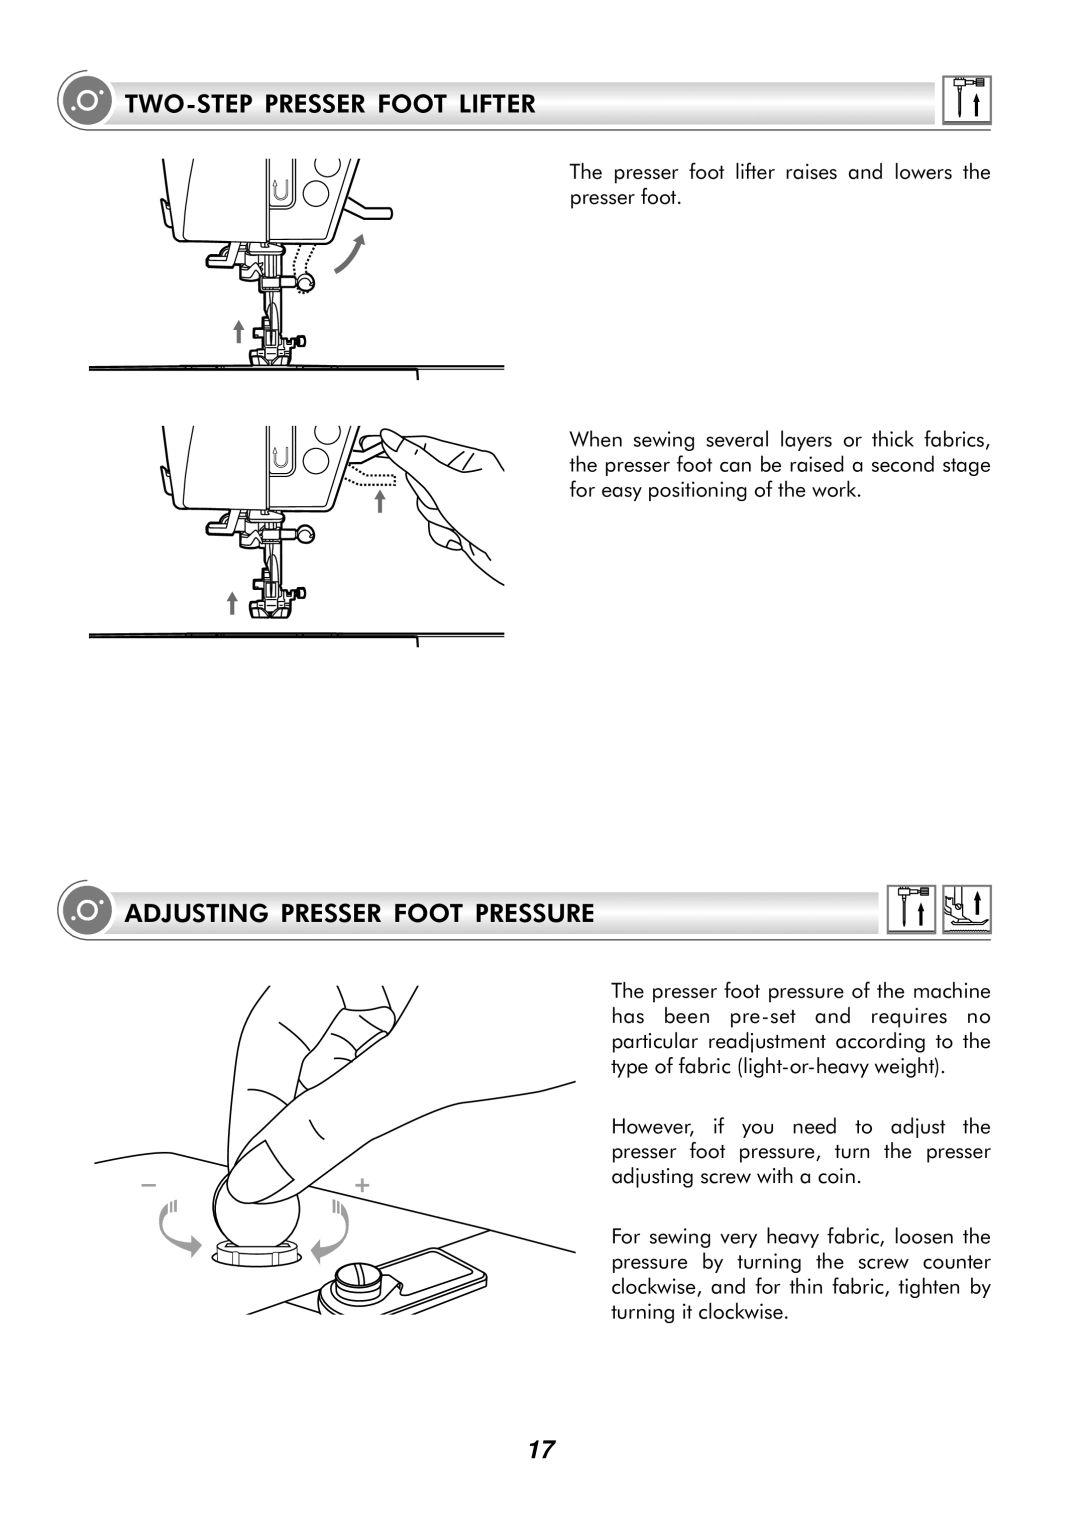
Contents Page Symbol Instructions Important Safety Instructions Contents Contents Principal Parts of the Machine Machine Control Buttons Operation buttons see page 24/25/26Function buttons see page 27/28/29 Selection buttons see page 30/31 Alphabet LCD ScreenElongation MemoryPatterns Pattern ChartAlphabets Accessories StandardOptional Connecting the machine Connecting the Machine to the Power SourceBobbin winding Winding the BobbinWinding the Bobbin Inserting the Bobbin Threading the Upper Thread Threading the Upper Thread Using the Needle Threader Cutting the Thread Drawing UP the Lower ThreadTWO-STEP Presser Foot Lifter Adjusting Presser Foot PressureStarting Sewing Start/stop buttonFoot control Thread Tension Changing the Presser Foot Application Needle Presser Foot Presser Foot ChartPlease Note Raise or Lower the Feed Dogs Replacing the NeedleOperation Buttons Reverse button Auto-lock button Needle up/down position button Function Buttons Function Buttons Twin needle button see Mirror button seeSelection Buttons Memory button Clear button Edit buttonFree arm Sewing TipsSewing corners ReverseMore Features Installing the extension tableSewing on heavy fabrics Zigzag Stitches Needle Position and Stitch LengthStretch Stitches Using the overcasting foot Using the all purpose footOvercasting Stitches Blind Hems Button Sewing Buttonhole Sewing Lightly hold the end of the upper thread and start sewing 17 B-18 19 B-20 B-21 22 B-23 B-24 25 B-26 Making corded buttonholes BAR Tack Stitch Eyelet Stitch Darning Stitch 2mm Inserting a centered zipper Zipper InsertionInserting a lapped zipper Narrow Hemming Rolled hem foot is an optional accessorySingle cording Triple cording CordingSatin Stitch Sewing EDGE/QUILTING Guide Straight Stitch Foot is an optional accessoryGathering Gathering foot is an optional accessorySmocking Darning Free Motion SewingMonogramming EmbroideryWalking Foot Side Cutter Roller FootStraight Stitch Foot Open TOE Foot Piecing FootEdge Joining Foot NON-STICK Foot Invisible Zipper FootDecorative Topstitching FagotingScallop Stitch Scallop hemScallop edging Elongation Mirror Image Regardless of what kind of sewing will be carried out Using the Twin NeedleCombining patterns or letters MemoryAdding patterns or letters Clearing patterns or letters Editing patternsRecalling and sewing the memorized pattern Instruction animation message display Sewing machine is experiencing a problemReturn bobbin winder shaft to left Buzzer Sound Cleaning the hook MaintenanceCleaning the screen Cleaning the sewing machine surfaceMaintenance Problem Cause Correction Trouble Shooting GuideProblem Cause Correction Reference Stitch Adjustment Reference Chart Group patterns-10 Direct patternsGroup patterns-50 Darning Group patterns-66 Auto 021H7A0101 Apr/11 Singer H74H74A/B5