GE Monogram JGBP33, RGB746 Installation Instructions, Burner Grates, Cooktop Surface, To Order

Page 27

www.GEAppliances.com

Burner Grates

Safety

Lift out when cool. Grates should be washed regularly and, of course, after spillovers. Wash them in hot, soapy water and rinse with clean water. When replacing the grates, be sure they are positioned securely over the burners.

On models with professional-style double grates, the grates are position-specific. For maximum stability, these grates should only be used in their proper position; they cannot be interchanged left to right or front to back. For convenience, the undersides of the left and right grates are marked “LEFT FRONT” and “RIGHT FRONT.”

Do not operate a burner for an extended period of time without cookware on the grate. The finish on the grate may chip without cookware to absorb the heat.

To get rid of burned-on food, place the grates in a covered container. Add 1/4 cup ammonia and let them soak several hours or overnight. Wash, rinse well and dry.

Although they are durable, the grates will gradually lose their shine, regardless of the best care you can give them. This is due to their continual exposure to high temperatures. You will notice this sooner with lighter color grates.

NOTE: Do not clean the grates in a self-cleaning oven.

Instructions Operating Instructions

Cooktop Surface

To avoid damaging the porcelain enamel surface of the cooktop and to prevent it from becoming dull, clean up spills right away. Foods with a lot of acid (tomatoes, sauerkraut, fruit juices, etc.) or foods with high sugar content could cause a dull spot if allowed to set.

When the surface has cooled, wash and rinse. For other spills such as fat spatterings, etc., wash with soap and water once the surface has cooled. Then rinse and polish with a dry cloth.

NOTE: Do not store flammable materials in an oven or near the cooktop. Do not store or use combustible materials, gasoline or other flammable vapors and liquids in the vicinity of this or any other appliance.

NOTE: Do not lift the cooktop on sealed burner models. Lifting the cooktop can lead to damage and improper operation of the range.

Installation Instructions

Stainless Steel Surfaces (on some models)

Do not use a steel-wool pad; it will scratch the surface.

Shake bottle well.

Place a small amount of CERAMA BRYTE® Stainless Steel Appliance Cleaner on a damp cloth or damp paper towel.

Clean a small area (approximately

8″ x 8″), rubbing with the grain of the stainless steel if applicable.

Dry and buff with a clean, dry paper towel or soft cloth.

Repeat as necessary.

NOTE: If a mineral oil-based stainless steel appliance cleaner has been used before to

clean the appliance, wash the surface with dish soap and water prior to using the CERAMA BRYTE® Stainless Steel Appliance Cleaner. After washing the surface with dish soap and water, use a generous amount of CERAMA BRYTE® Stainless Steel Appliance Cleaner to clean the appliance.

To Order

To order CERAMA BRYTE® Stainless Steel Appliance Cleaner, please call our toll-free number:

National Parts Center

800.626.2002

www.GEAppliances.com

CERAMA BRYTE®

Stainless Steel Appliance

Cleaner . . . . . . . . . . . . . . . . . . . .# PM10X311

Troubleshooting Tips Consumer Support

27

Image 27
Contents Write the model and serial numbers here Model # Serial # Installation InstructionsAll ranges can tip and injury could result ANTI-TIP DeviceSafety Instructions Operating Instructions Important Safety NoticeInstructions Surface Burners Cook Meat and Poultry THOROUGHLY… Instructions Operating Instructions SELF-CLEANING OvenSupport Using the gas surface burnersInstructions Instructions OperatingSafety Case of Power FailureTop-of-Range Cookware Using the oven controls Consumer Support Troubleshooting TipsInstallation Instructions Oven Control, Clock and Timer Features and Settings Using the oven Installation Instructions OperatingConsumer Support Aluminum Foil How to Set the Oven for Baking or RoastingPreheating and Pan Placement TipsHow to Set the Oven for Broiling Broiling GuideHI Broil Using the clock and timer InstallationInstructions Troubleshooting Tips Consumer Support End of Cycle Tones on some models To Reset the TimerTo Cancel the Timer Touch the Kitchen Timer ON/OFFHow to Set a Delayed Start and Automatic Stop Using the timed baking and roasting featuresSpecial features of your oven control Safety InstructionsHour Shut-Off How to Set for Regular Baking/Roasting Using the Sabbath Feature. on some modelsOperating Instructions Installation Instructions Safety InstructionsHow to Exit the Sabbath Feature To Adjust the Thermostat Adjust the oven thermostat-Do it yourselfInstructions Troubleshooting Tips Consumer Support Safety InstructionsUsing the self-cleaning oven Before a Clean CycleHow to Set the Oven for Cleaning Tips Consumer Support How to Delay the Start of CleaningTo Stop a Clean Cycle After a Clean CycleStandard Twin Burner Assemblies on some models Care and cleaning of the rangeTips Installation Instructions Operating Instructions Consumer Support TroubleshootingSafety Burner Caps and Heads Cooktop Surface Installation InstructionsTroubleshooting Tips Consumer Support Burner GratesBroiler Pan and Grid Troubleshooting TipsLift-Off Oven Door Oven BottomInstallation Instructions Troubleshooting Removable Kick Panel on some modelsRemovable Storage Drawer on some models Lower Control Panel Front Manifold Panel and Knobs Oven Air VentsTo replace cover Oven Light ReplacementOven Shelves Do not remove any screws to remove the coverMaterials YOU MAY Need For Your SafetyPart Included Tools YOU will NeedInstallation Instructions Dimensions and Clearances Location ANTI-TIP DeviceProvide Adequate GAS Supply Connect the Range to GASInstallation Instructions Rigid Pipe Hookup Options Pressure regulator Manifold pipe Electrical Requirements Electrical ConnectionsCheck Ignition of Surface Burners Seal the OpeningsCheck Ignition of Oven Burner To remove the oven bottom Leveling the RangeWhen ALL Hookups are Completed Installing the ANTI-TIP DeviceProblem Possible Causes What To Do Before you call for service…Oven temperature See the Using the clock and timer sectionSee the Care and cleaning of the range section See the Installation of the range sectionOven door will not After a clean cycle Oven not clean afterClean cycle Excessive smokingStrong odor Power outageClock flashes Emitting from the ventOperating Instructions Safety Instructions We’ll Cover Any Appliance. Anywhere. Anytime Consumer Product Ownership Registration Page Consumer Support Looking For Something More? AccessoriesWhat GE Will Not Cover Instructions Safety InstructionsOperating GE Will ReplaceWhat Camco Will Not Cover Camco Will ReplaceReal Life Design Studio Schedule ServiceParts and Accessories Consumer Support GE Appliances Website

JGBP28, RGB745, JGBP33, JGBP30, JGBP26 specifications

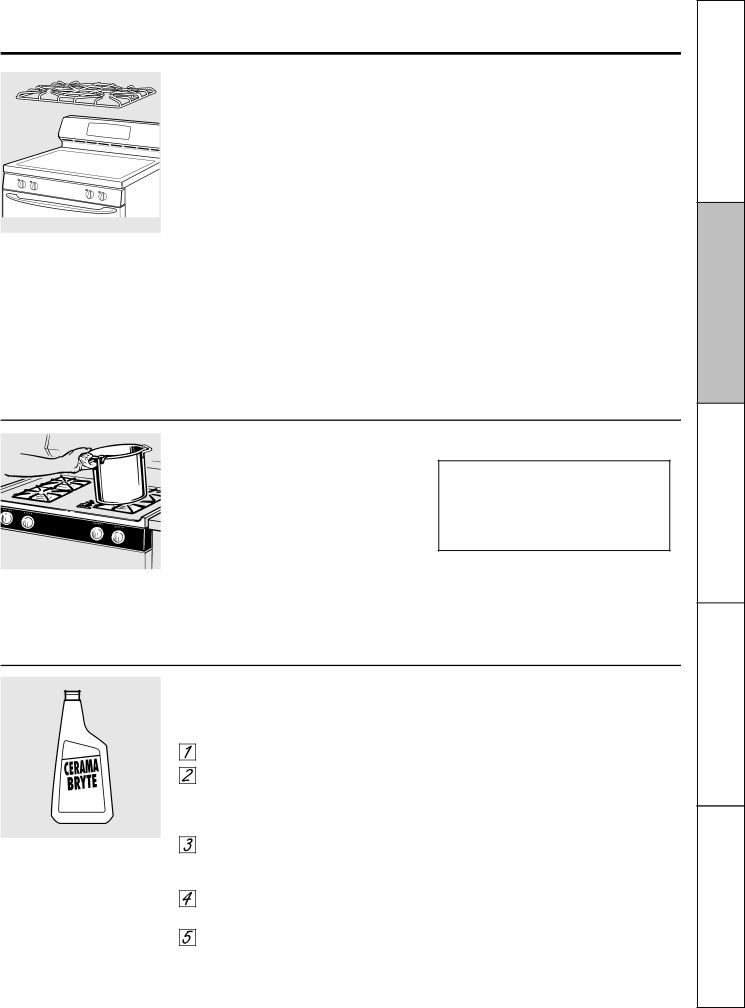
The GE Monogram series of appliances, particularly their ranges like the RGB740, JGBP29, RGB746, JGBP32, and JGBP24, represent a blend of sophisticated design, cutting-edge technology, and superior functionality. These appliances are designed for both aesthetics and performance, making them a popular choice for upscale kitchens.

The GE Monogram RGB740 is a standout model featuring a 30-inch range with a professional-grade stainless steel finish. Its dual fuel capability combines the precision of a gas cooktop with the consistency of an electric oven. The range includes a convection oven, which ensures even baking and roasting by circulating hot air throughout the oven cavity. Additional features such as heavy-duty oven racks and a precise simmer burner demonstrate GE's commitment to versatility and user convenience.

Similarly, the JGBP29 model is a 30-inch gas range that offers a traditional look with a variety of modern features. Its sealed burners provide high heat output for rapid boiling, while the oven's electronic ignition system enhances safety and convenience. The JGBP29 is designed with easy-to-clean surfaces and a removable oven door, making maintenance straightforward for busy households.

The RGB746 further elevates the Monogram line with its commercial-grade aesthetics and advanced features. This range includes five sealed burners with a powerful 21,000 BTU burner for high-heat cooking. The oven is equipped with steam-assisted convection, which enhances baking by adding moisture during cooking. This model also boasts a self-cleaning function that simplifies upkeep while maintaining cooking performance.

The JGBP32 and JGBP24 models are designed to cater to smaller spaces without compromising on features. The JGBP32, featuring a compact 30-inch design, provides multiple cooking options, including a broil burner and a storage drawer. Its sleek appearance blends seamlessly with modern kitchen décor. Meanwhile, the JGBP24, a 24-inch gas range, is perfect for smaller kitchens or apartments. It retains essential features such as quality burners and an oven with a light, allowing for easy monitoring of cooked dishes.

Across these Monogram models, innovations such as precise temperature control, superior burner performance, and elegant finishes set GE apart in the competitive appliance market. Whether you desire the classic charm of the JGBP series or the upscale functionality of the RGB740 and RGB746, the GE Monogram ranges deliver stylish solutions for any culinary enthusiast, combining professionalism with versatile capabilities. This range of appliances encapsulates GE's commitment to blending luxury and practicality, making them a top choice for discerning homeowners.