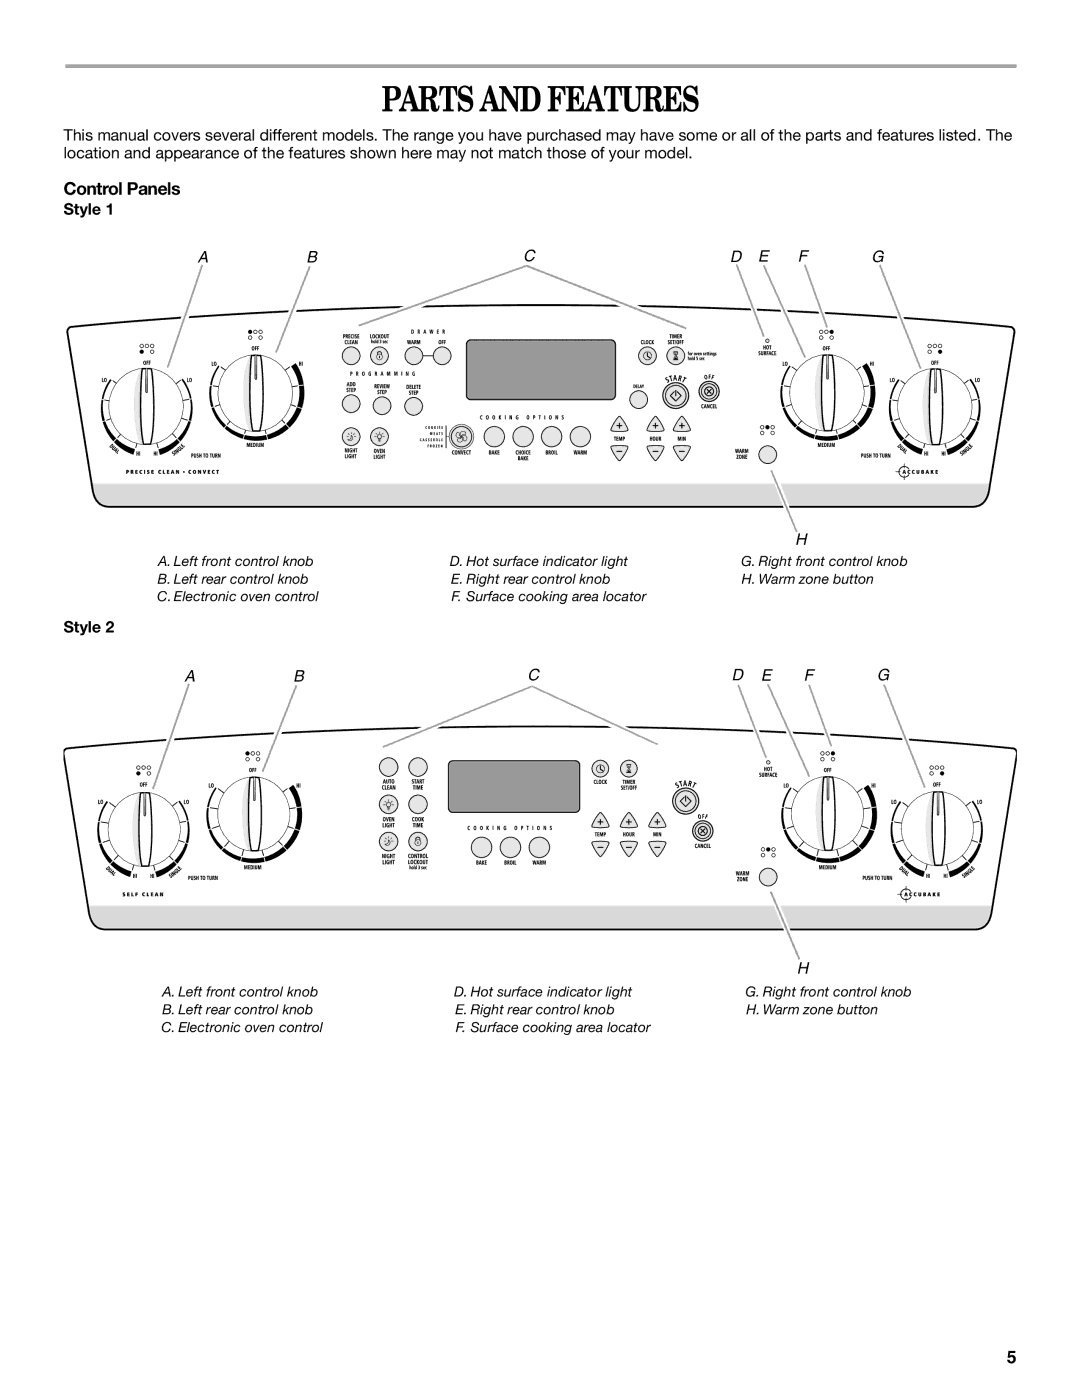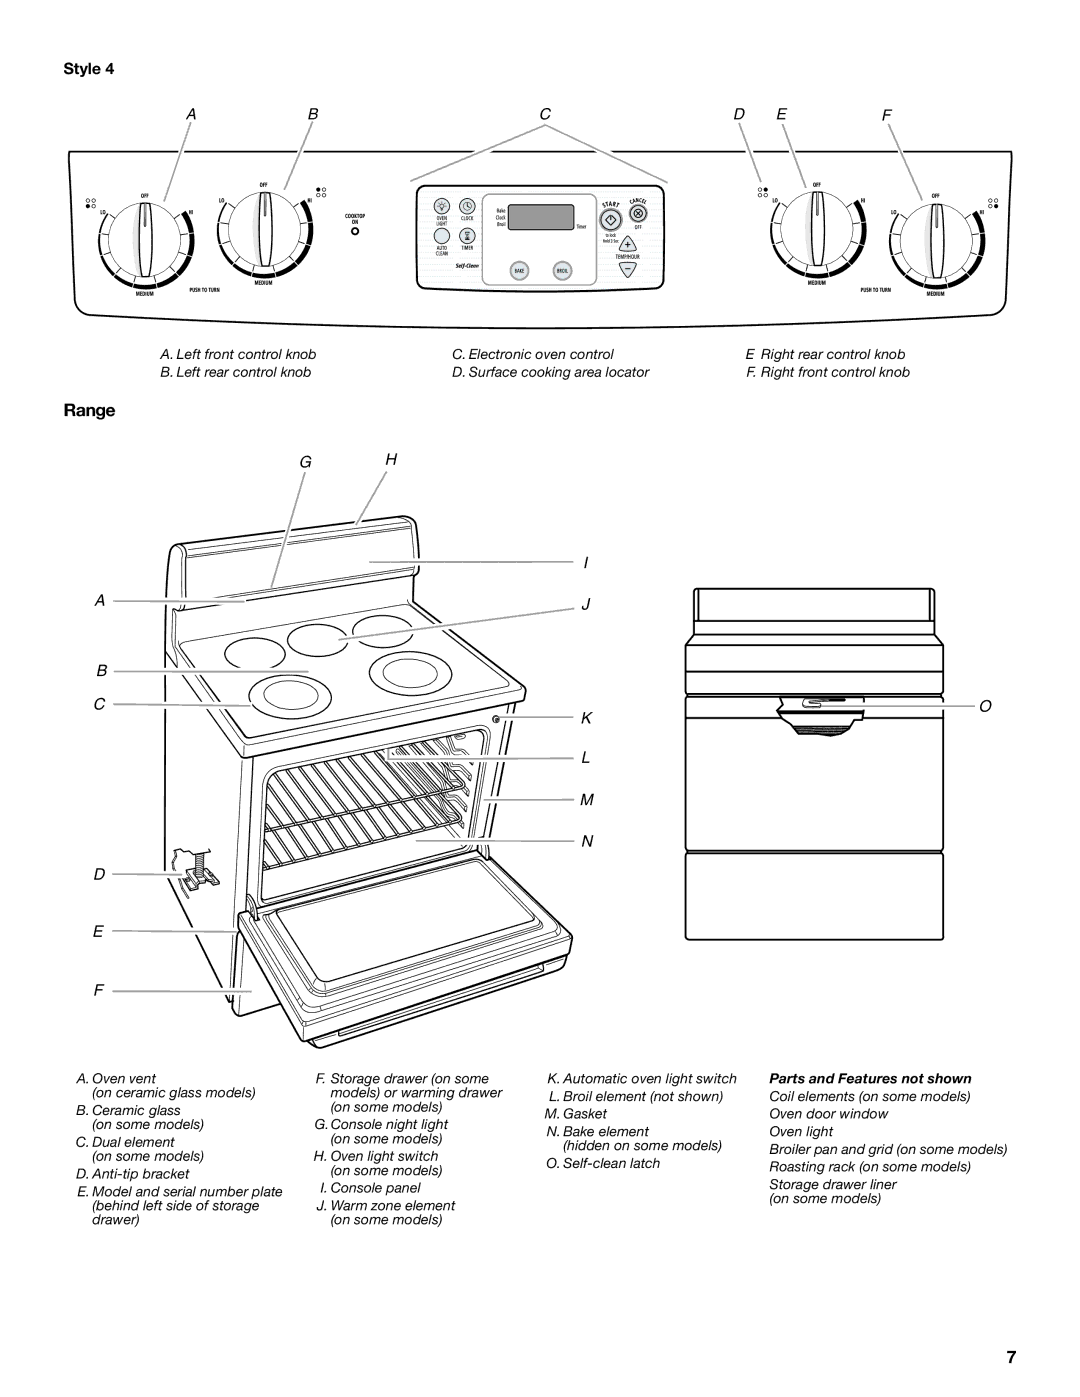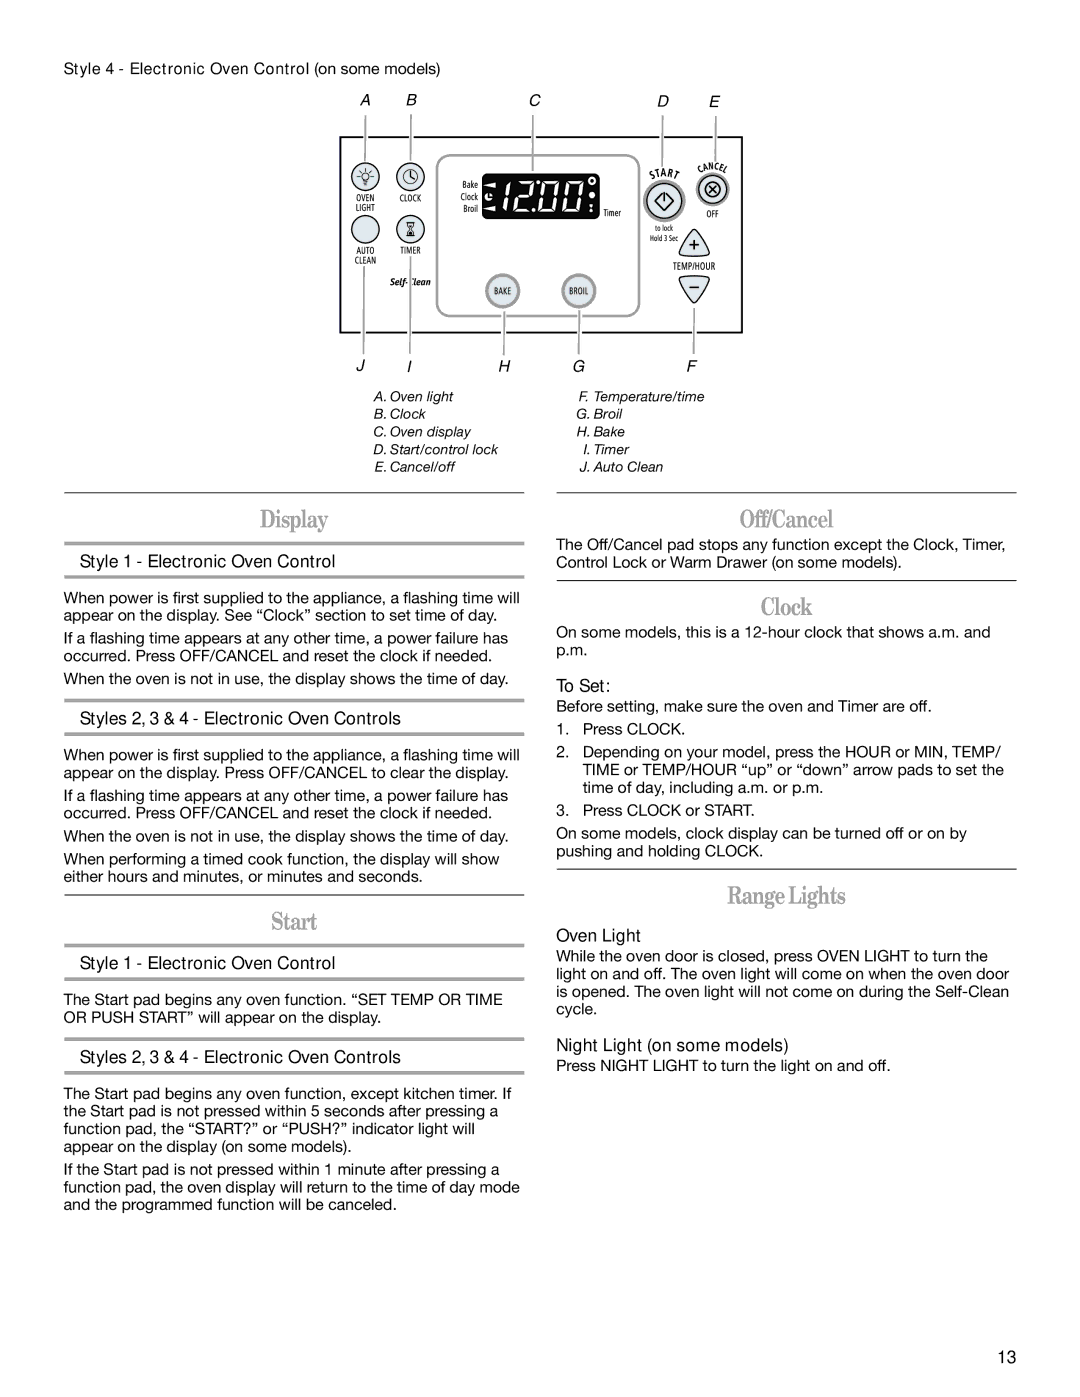
Style 4 - Electronic Oven Control (on some models)
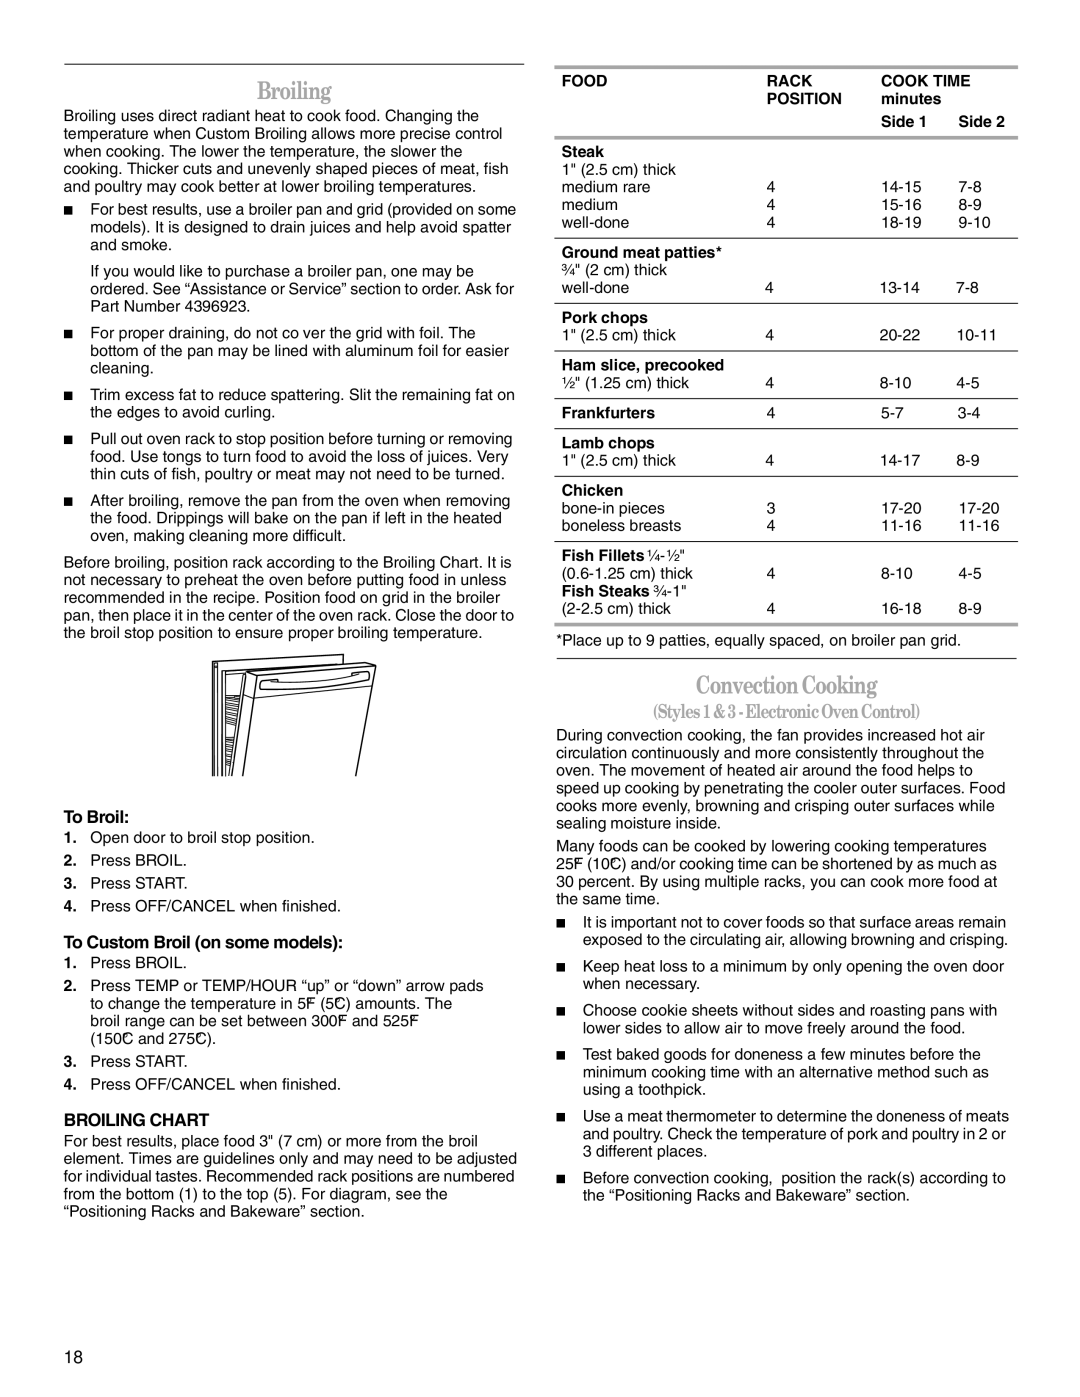
A BCD E
J | I | H | G | F |
| A. Oven light |
| F. Temperature/time | |
| B. Clock |
| G. Broil |
|
| C. Oven display |
| H. Bake |
|
| D. Start/control lock | I. Timer |
| |
| E. Cancel/off |
| J. Auto Clean |
|
Display
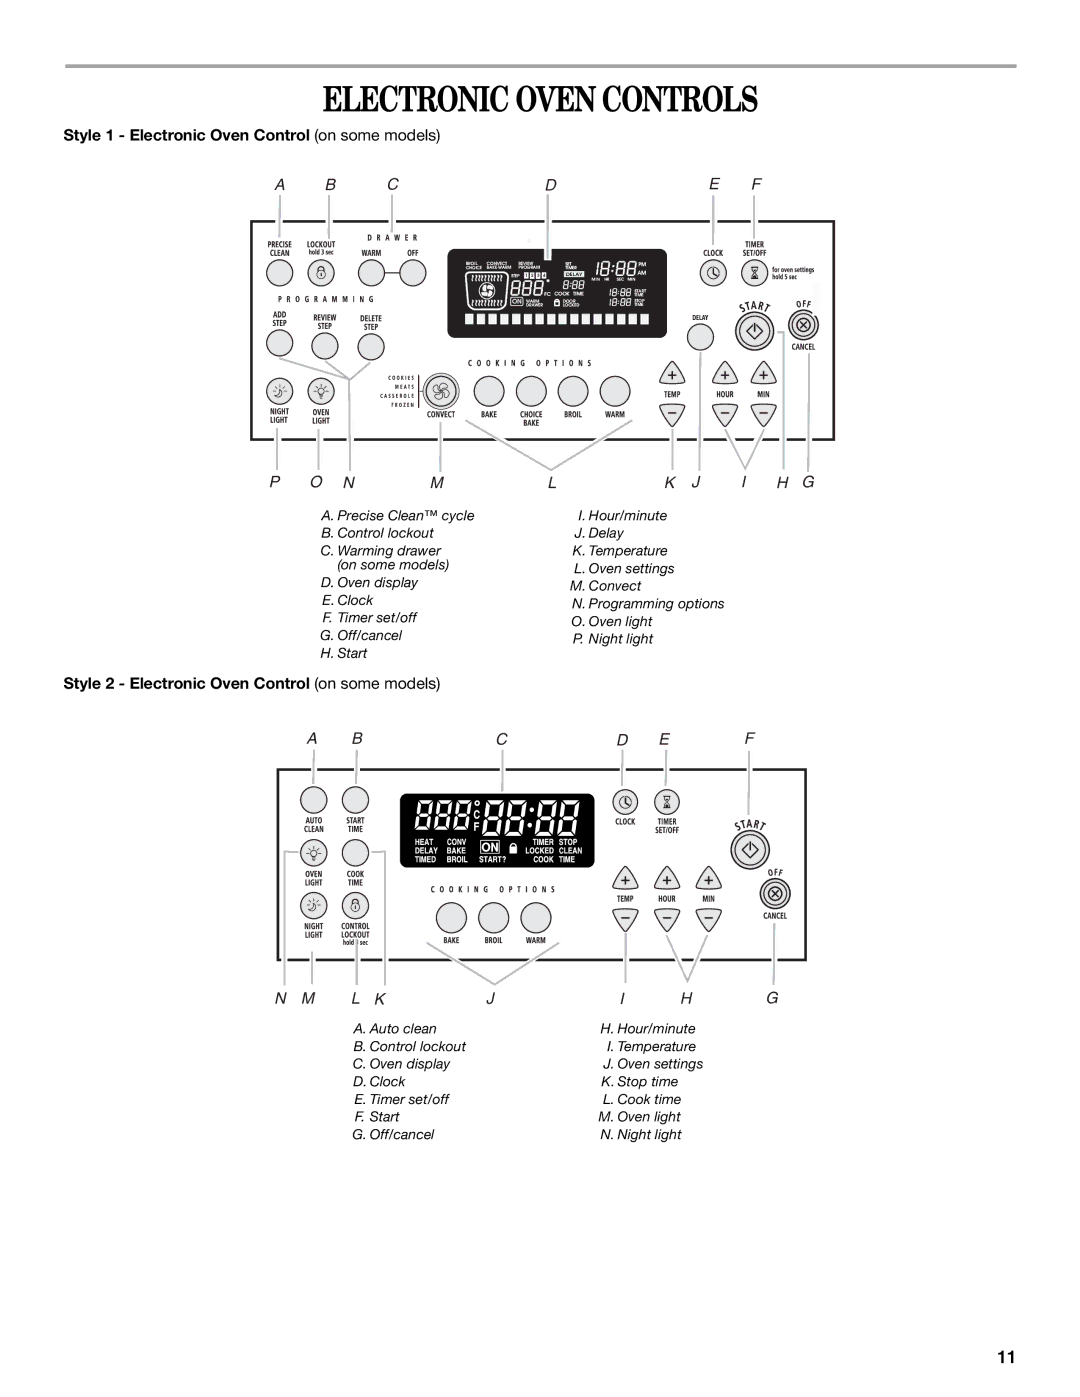
Style 1 - Electronic Oven Control
When power is first supplied to the appliance, a flashing time will appear on the display. See “Clock” section to set time of day.
If a flashing time appears at any other time, a power failure has occurred. Press OFF/CANCEL and reset the clock if needed.
When the oven is not in use, the display shows the time of day.
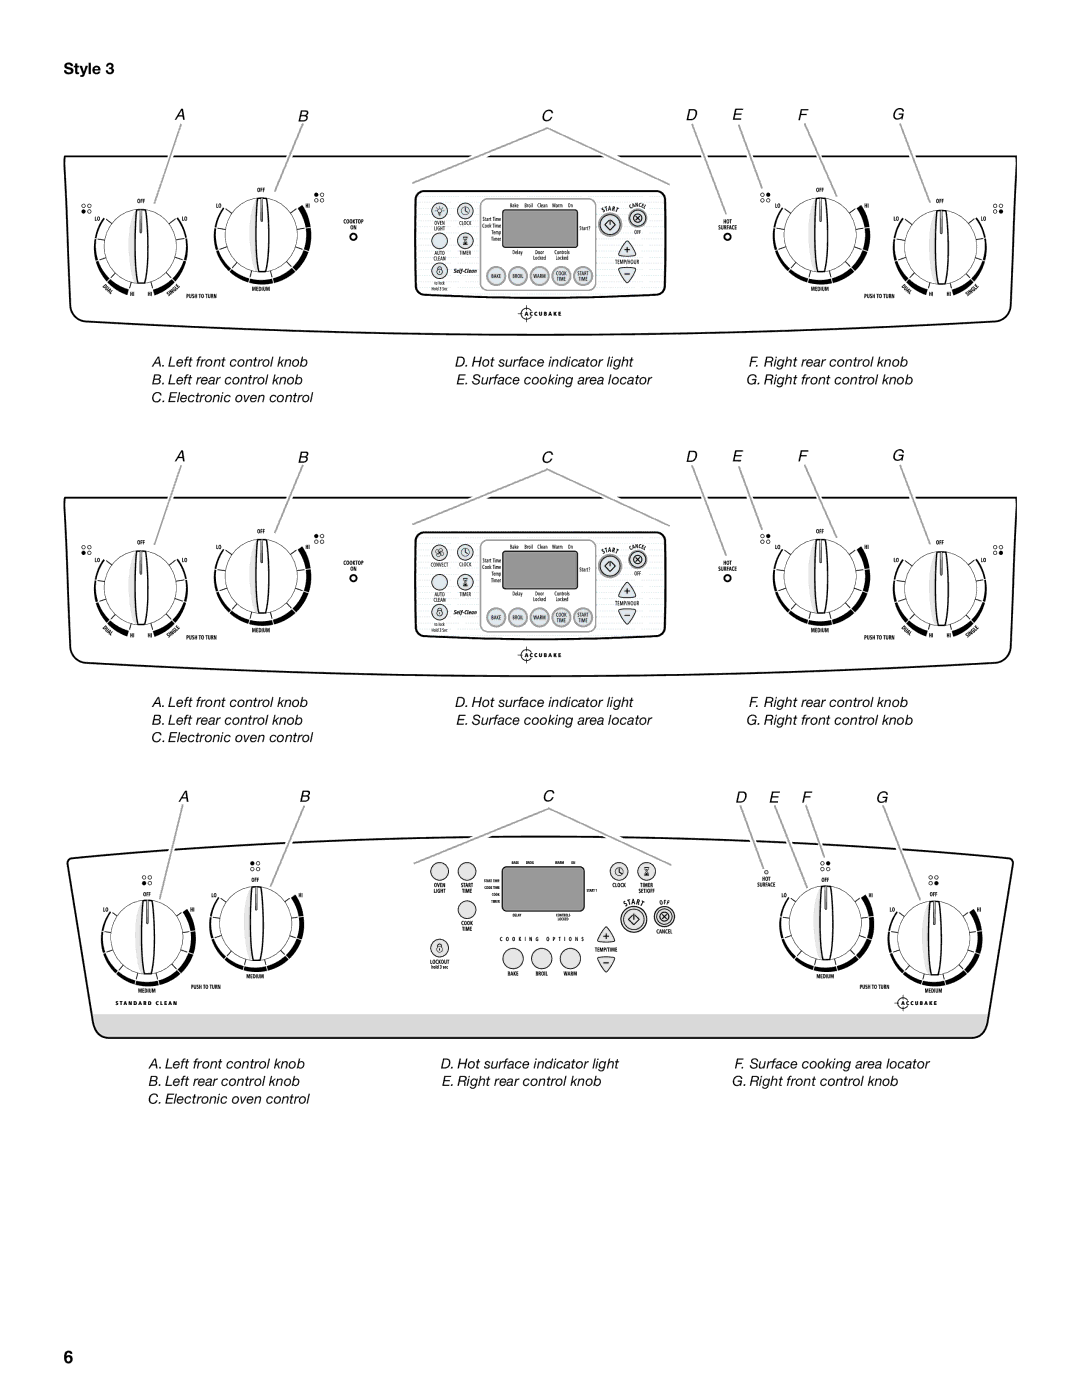
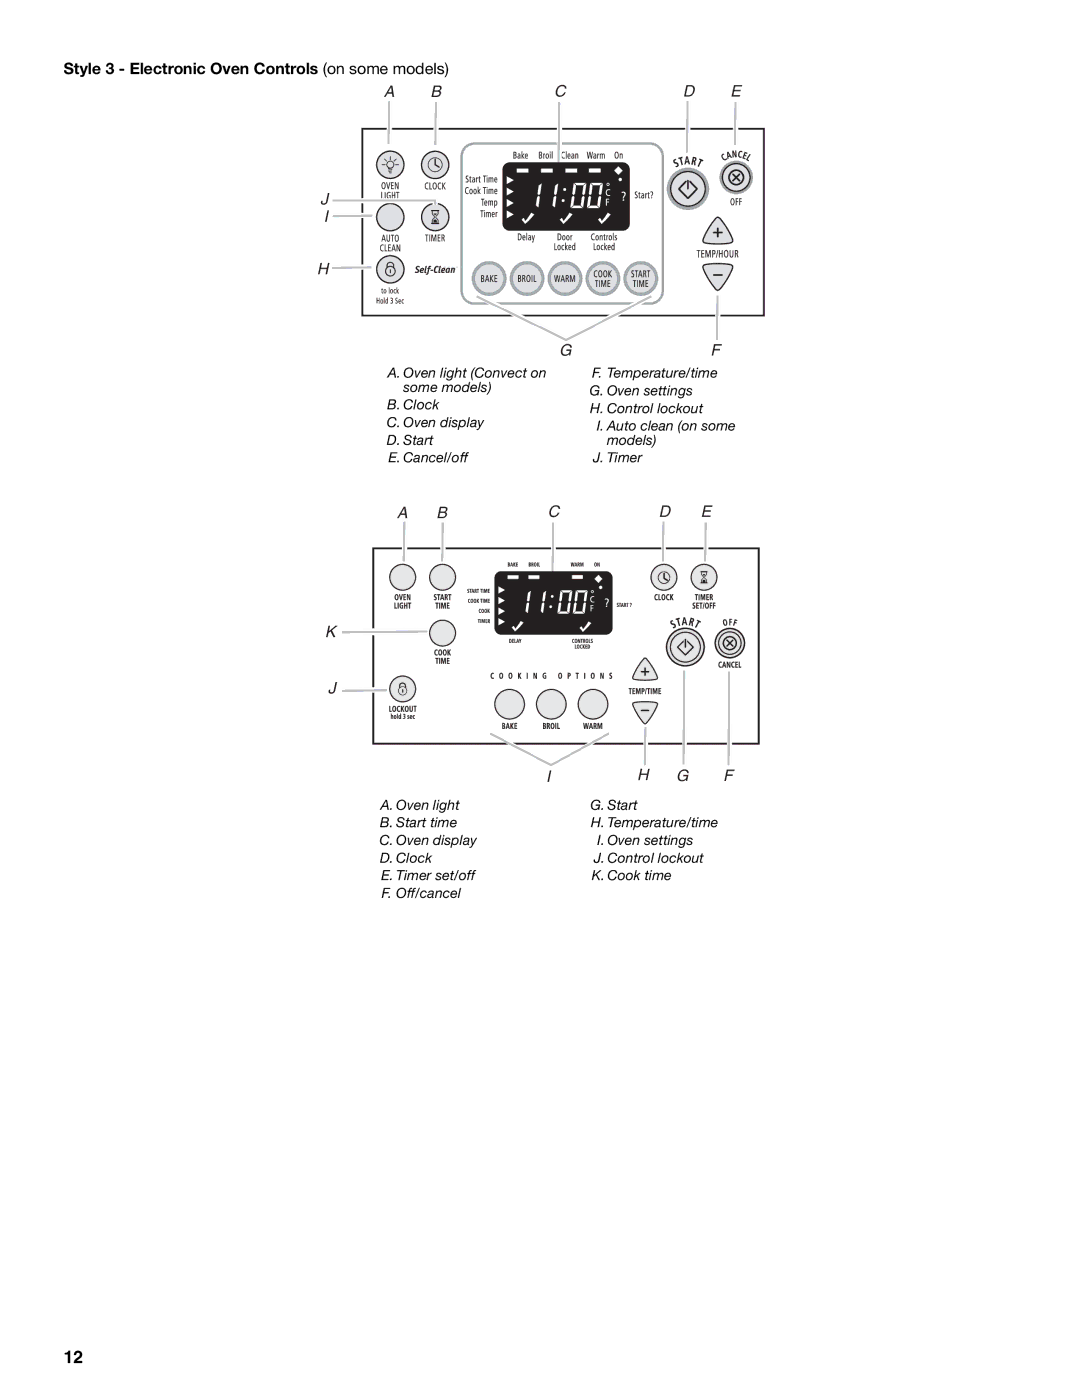
Styles 2, 3 & 4 - Electronic Oven Controls
When power is first supplied to the appliance, a flashing time will appear on the display. Press OFF/CANCEL to clear the display.
If a flashing time appears at any other time, a power failure has occurred. Press OFF/CANCEL and reset the clock if needed.
When the oven is not in use, the display shows the time of day.
When performing a timed cook function, the display will show either hours and minutes, or minutes and seconds.
Start
Style 1 - Electronic Oven Control
The Start pad begins any oven function. “SET TEMP OR TIME OR PUSH START” will appear on the display.
Off/Cancel
The Off/Cancel pad stops any function except the Clock, Timer, Control Lock or Warm Drawer (on some models).
Clock
On some models, this is a
To Set:
Before setting, make sure the oven and Timer are off.
1.Press CLOCK.
2.Depending on your model, press the HOUR or MIN, TEMP/ TIME or TEMP/HOUR “up” or “down” arrow pads to set the time of day, including a.m. or p.m.
3.Press CLOCK or START.
On some models, clock display can be turned off or on by pushing and holding CLOCK.
RangeLights
Oven Light
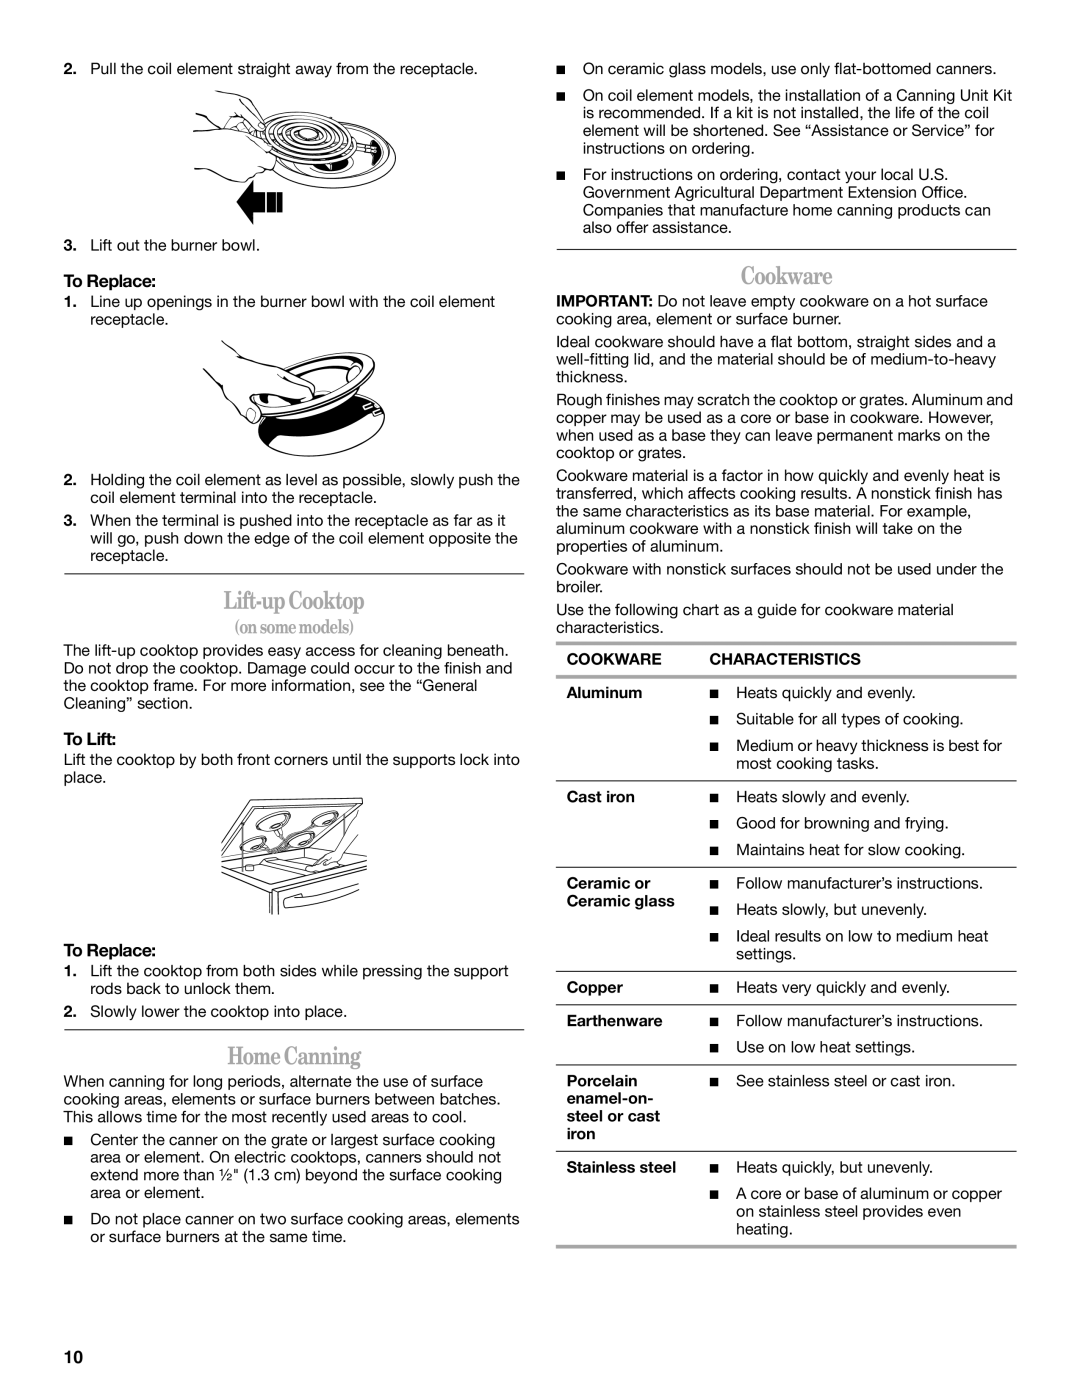
While the oven door is closed, press OVEN LIGHT to turn the light on and off. The oven light will come on when the oven door is opened. The oven light will not come on during the
Styles 2, 3 & 4 - Electronic Oven Controls
The Start pad begins any oven function, except kitchen timer. If the Start pad is not pressed within 5 seconds after pressing a function pad, the “START?” or “PUSH?” indicator light will appear on the display (on some models).
If the Start pad is not pressed within 1 minute after pressing a function pad, the oven display will return to the time of day mode and the programmed function will be canceled.
Night Light (on some models)
Press NIGHT LIGHT to turn the light on and off.
13
