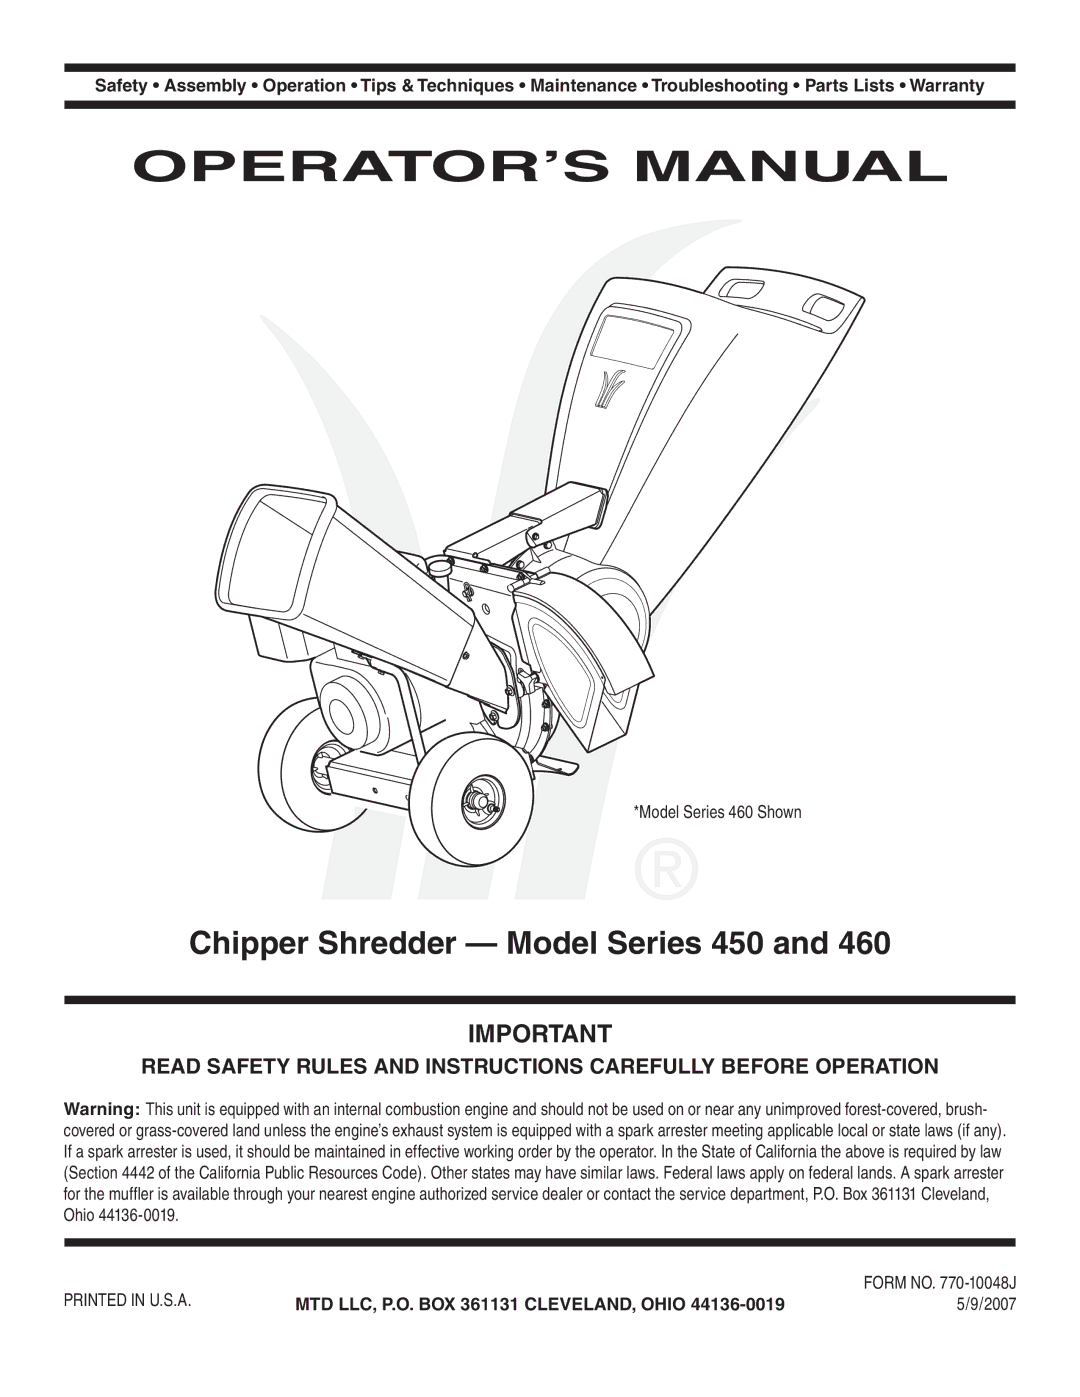
Bolens 450 Series Sharpening Or Replacing The Shred- der Blade, Storing Your Chipper Shredder

Page 13

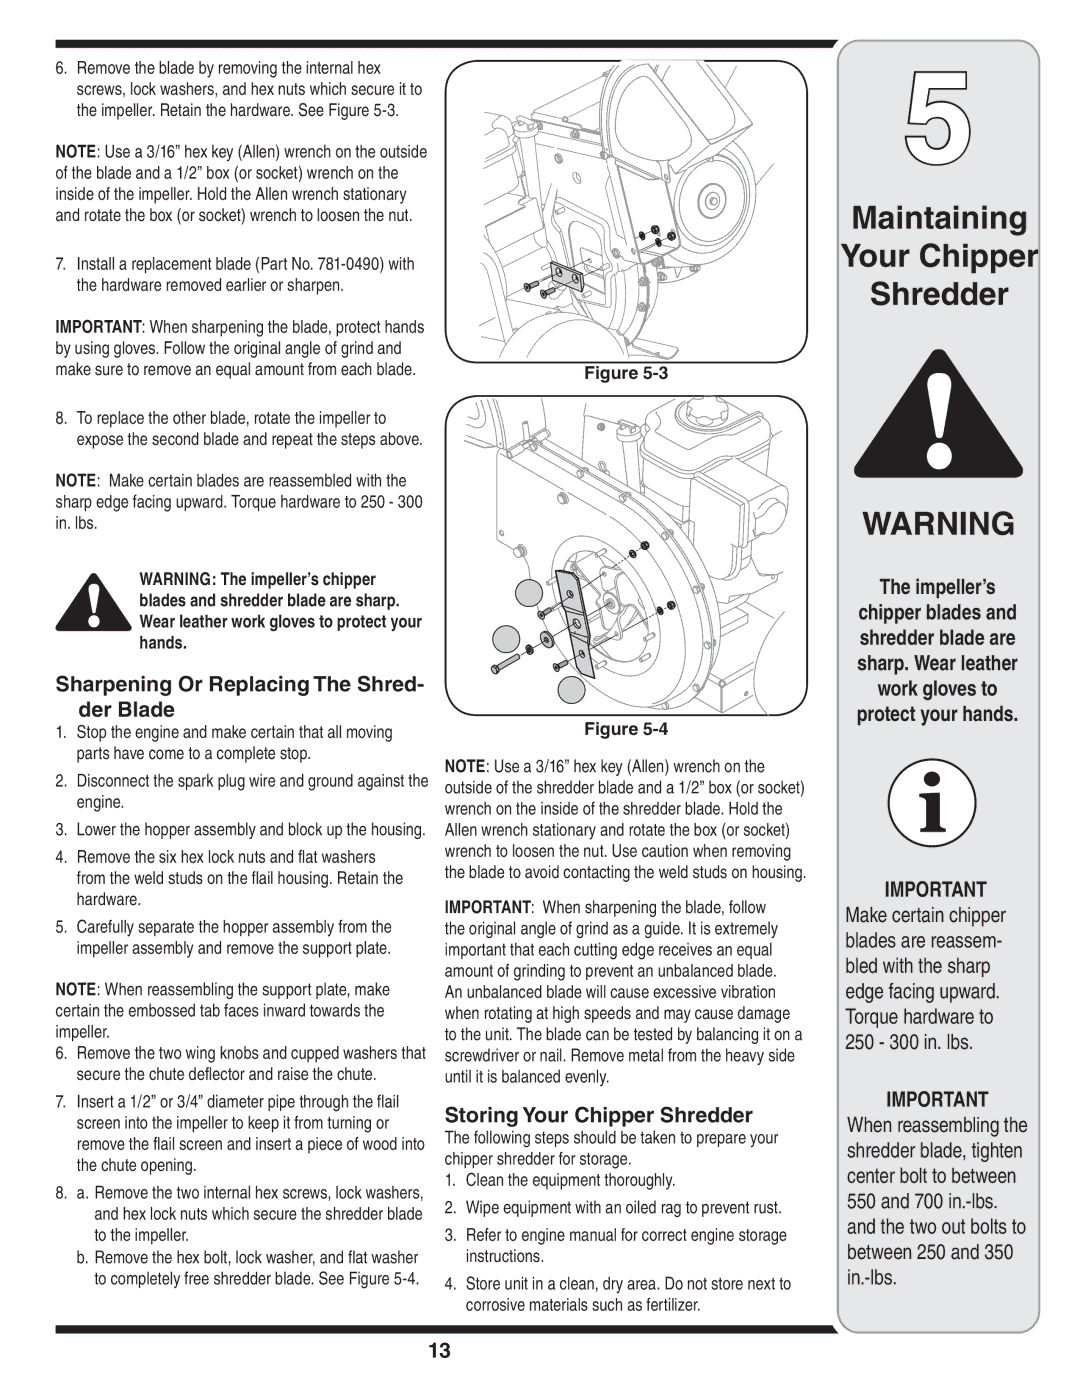
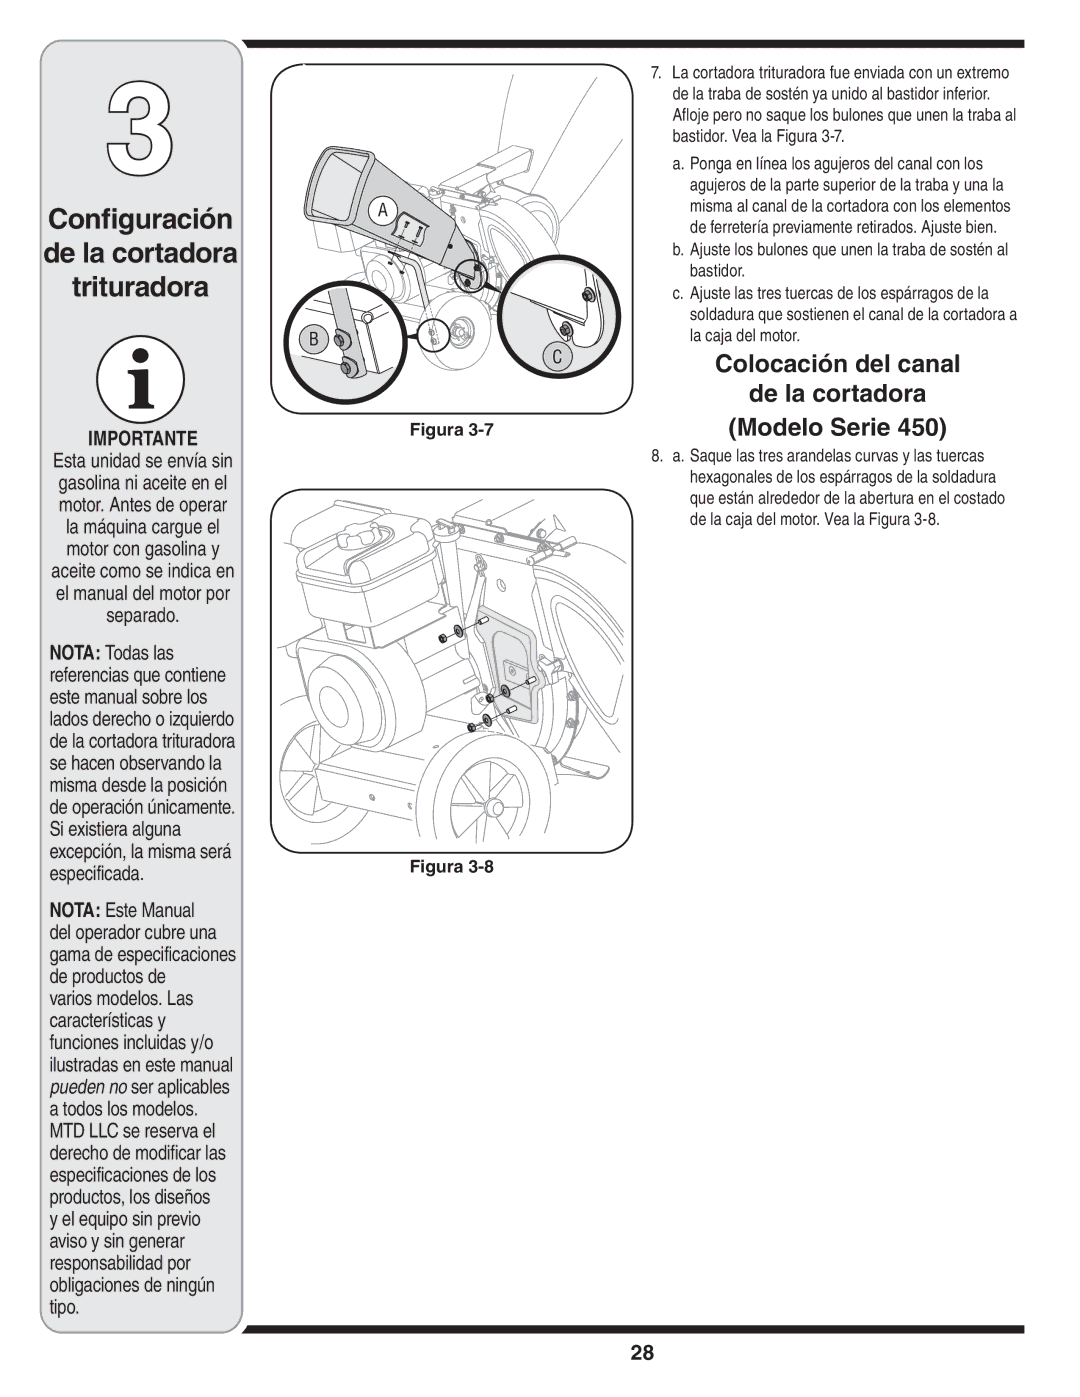
6.Remove the blade by removing the internal hex screws, lock washers, and hex nuts which secure it to the impeller. Retain the hardware. See Figure 5-3.

NOTE: Use a 3/16” hex key (Allen) wrench on the outside of the blade and a 1/2” box (or socket) wrench on the inside of the impeller. Hold the Allen wrench stationary and rotate the box (or socket) wrench to loosen the nut.

7.Install a replacement blade (Part No. 781-0490) with the hardware removed earlier or sharpen.

IMPORTANT: When sharpening the blade, protect hands by using gloves. Follow the original angle of grind and make sure to remove an equal amount from each blade.

8.To replace the other blade, rotate the impeller to expose the second blade and repeat the steps above.

NOTE: Make certain blades are reassembled with the sharp edge facing upward. Torque hardware to 250 - 300 in. lbs.

WARNING: The impeller’s chipper blades and shredder blade are sharp. Wear leather work gloves to protect your hands.

Sharpening Or Replacing The Shred- der Blade

1.Stop the engine and make certain that all moving parts have come to a complete stop.

2.Disconnect the spark plug wire and ground against the engine.

3.Lower the hopper assembly and block up the housing.

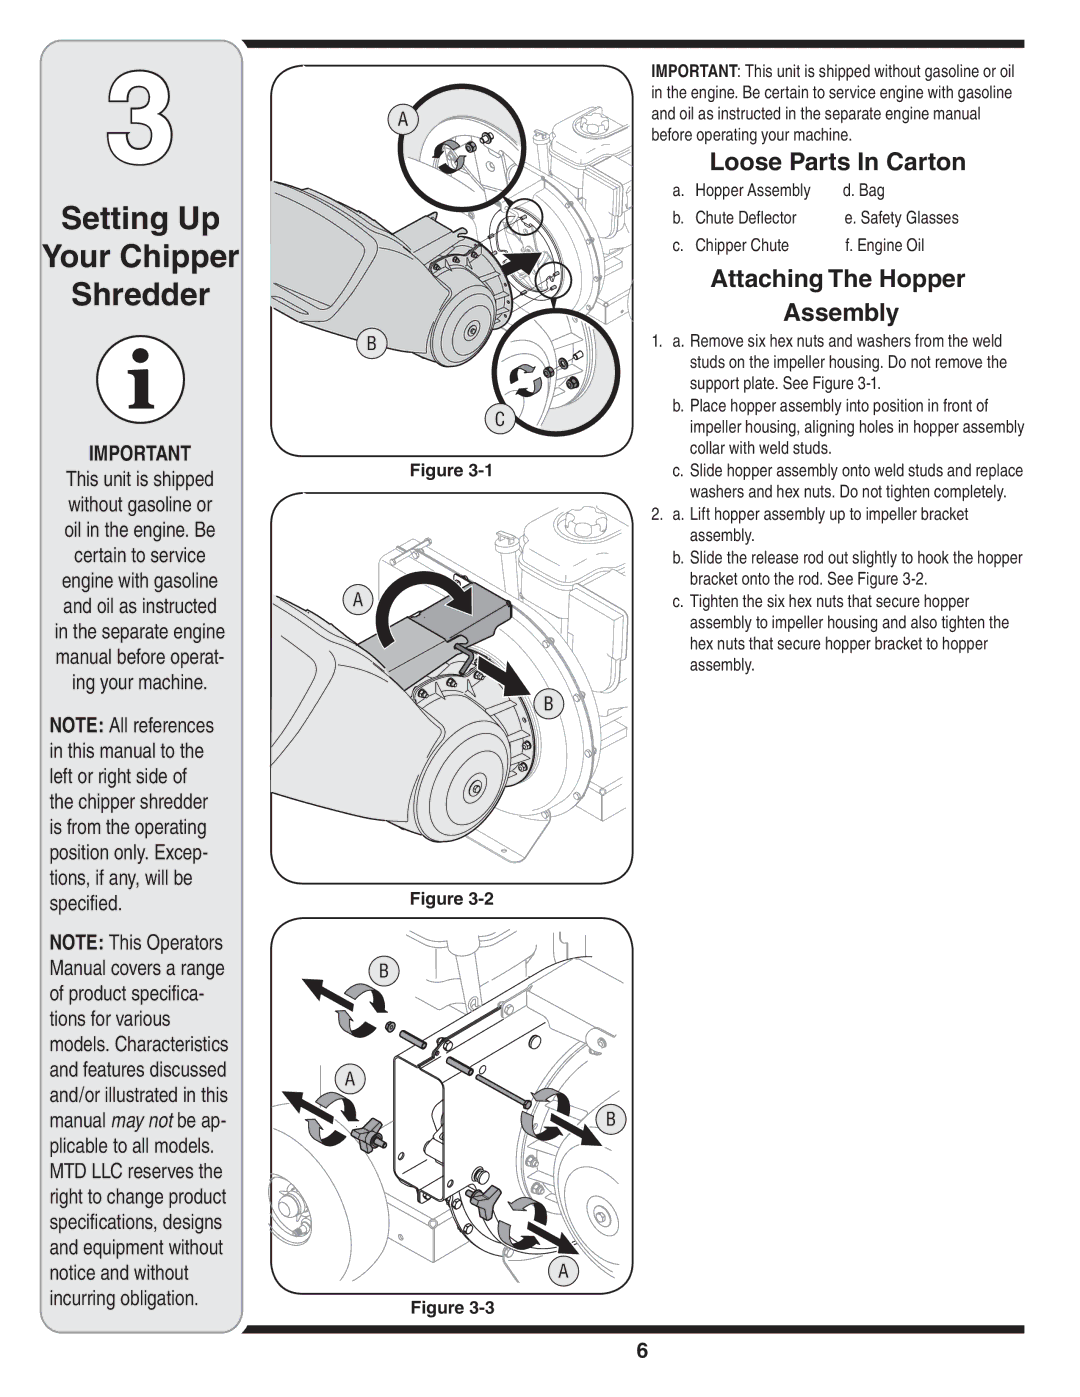
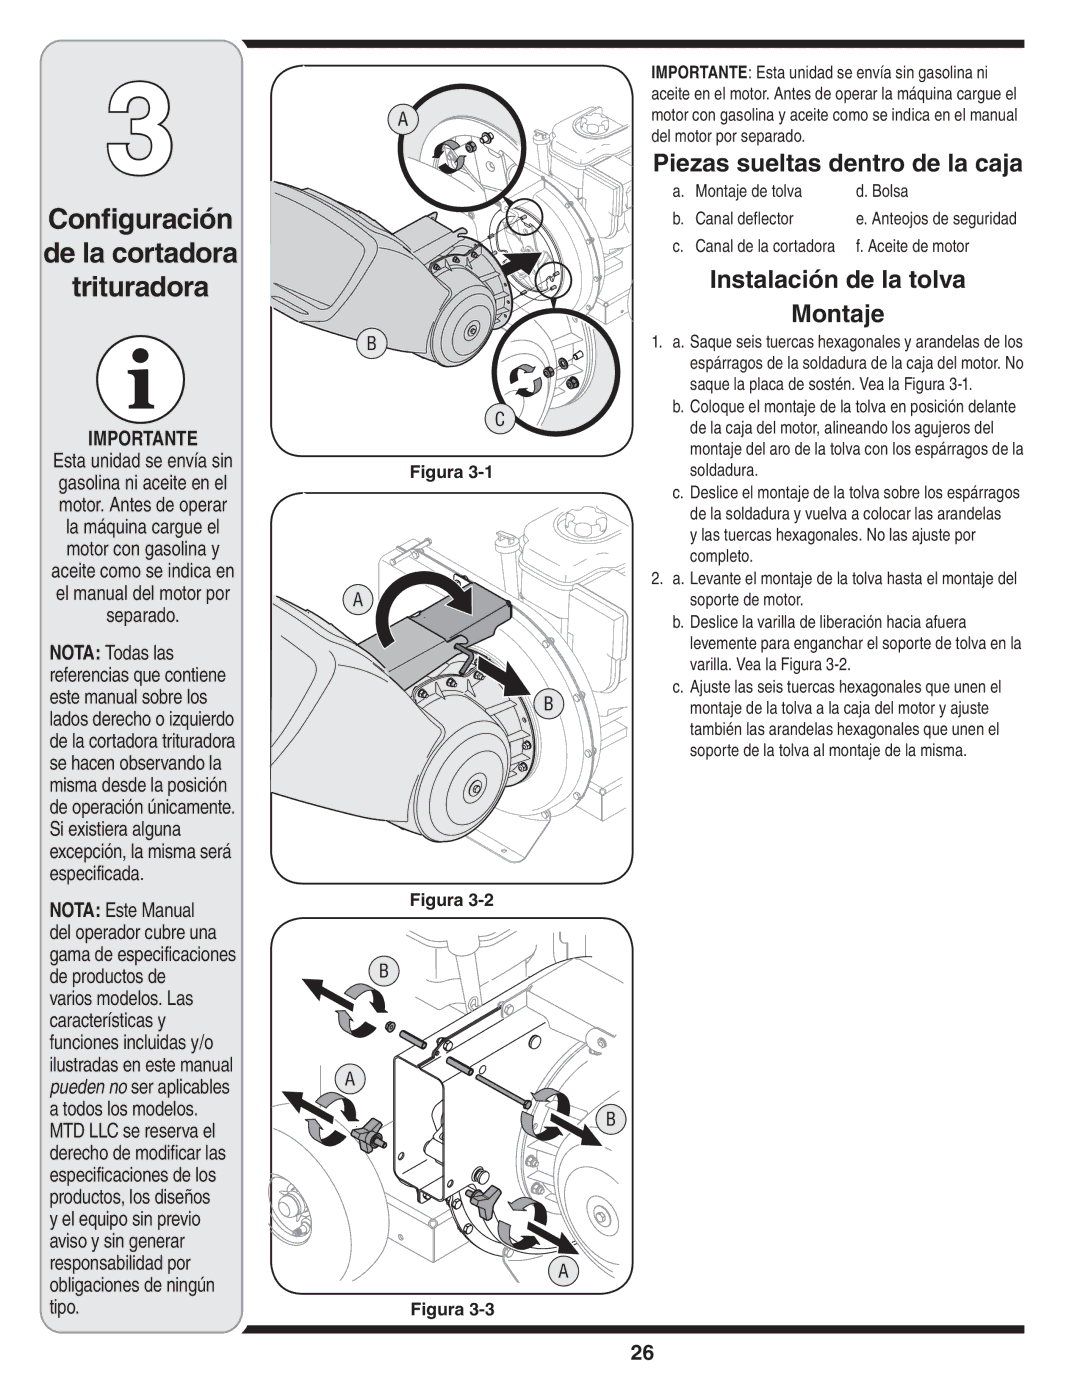
4.Remove the six hex lock nuts and flat washers from the weld studs on the flail housing. Retain the hardware.

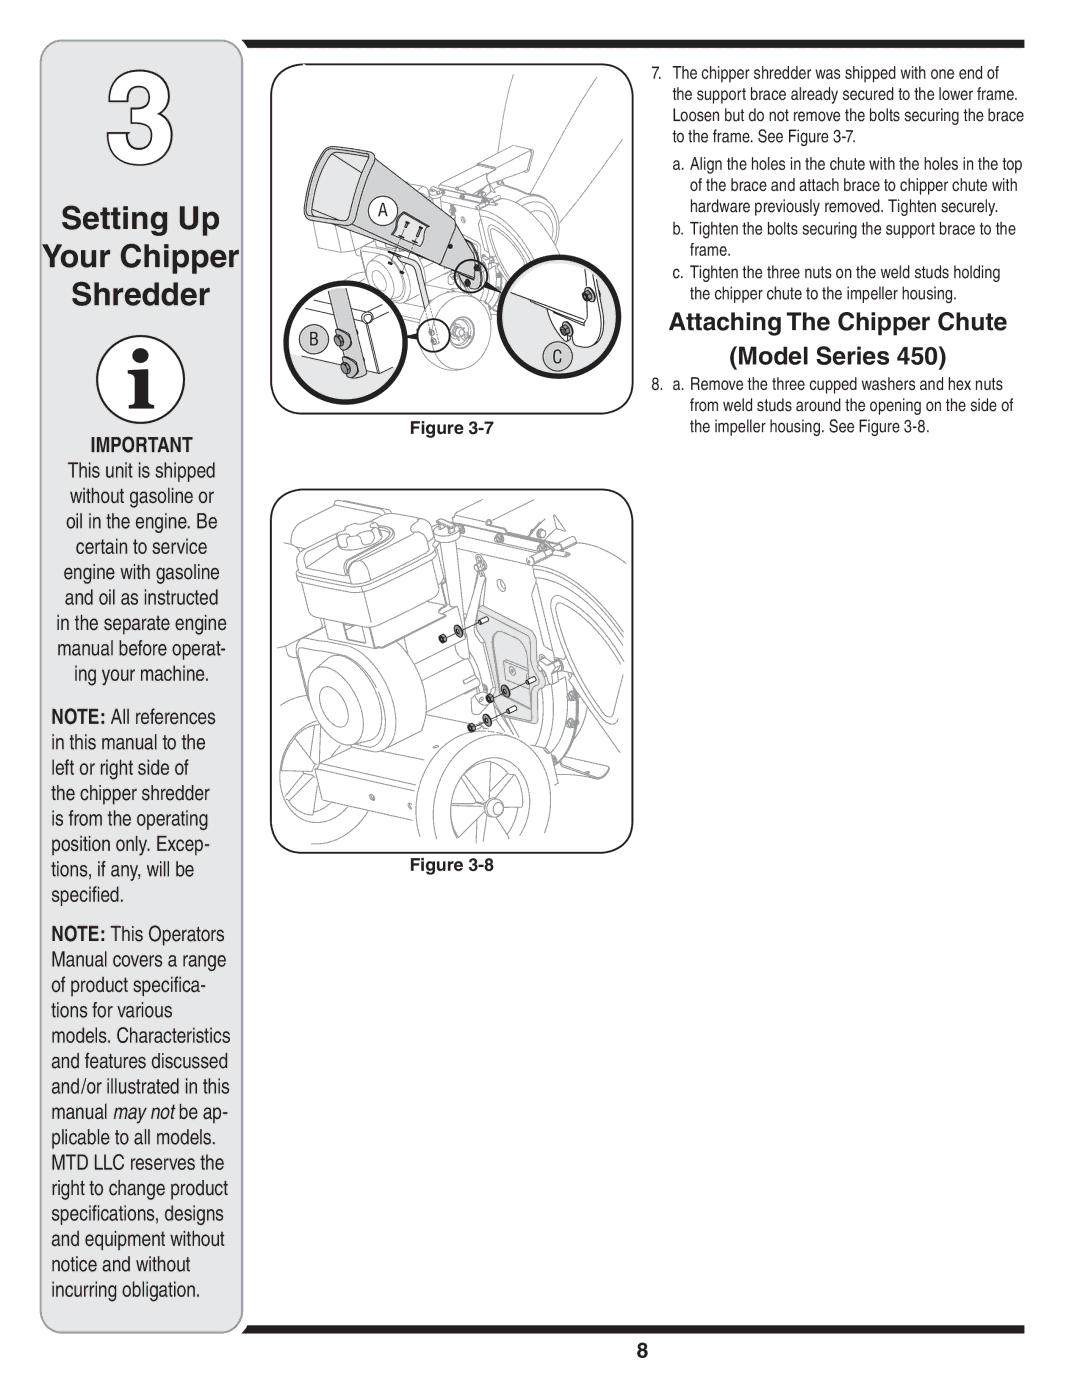
5.Carefully separate the hopper assembly from the impeller assembly and remove the support plate.

NOTE: When reassembling the support plate, make certain the embossed tab faces inward towards the impeller.

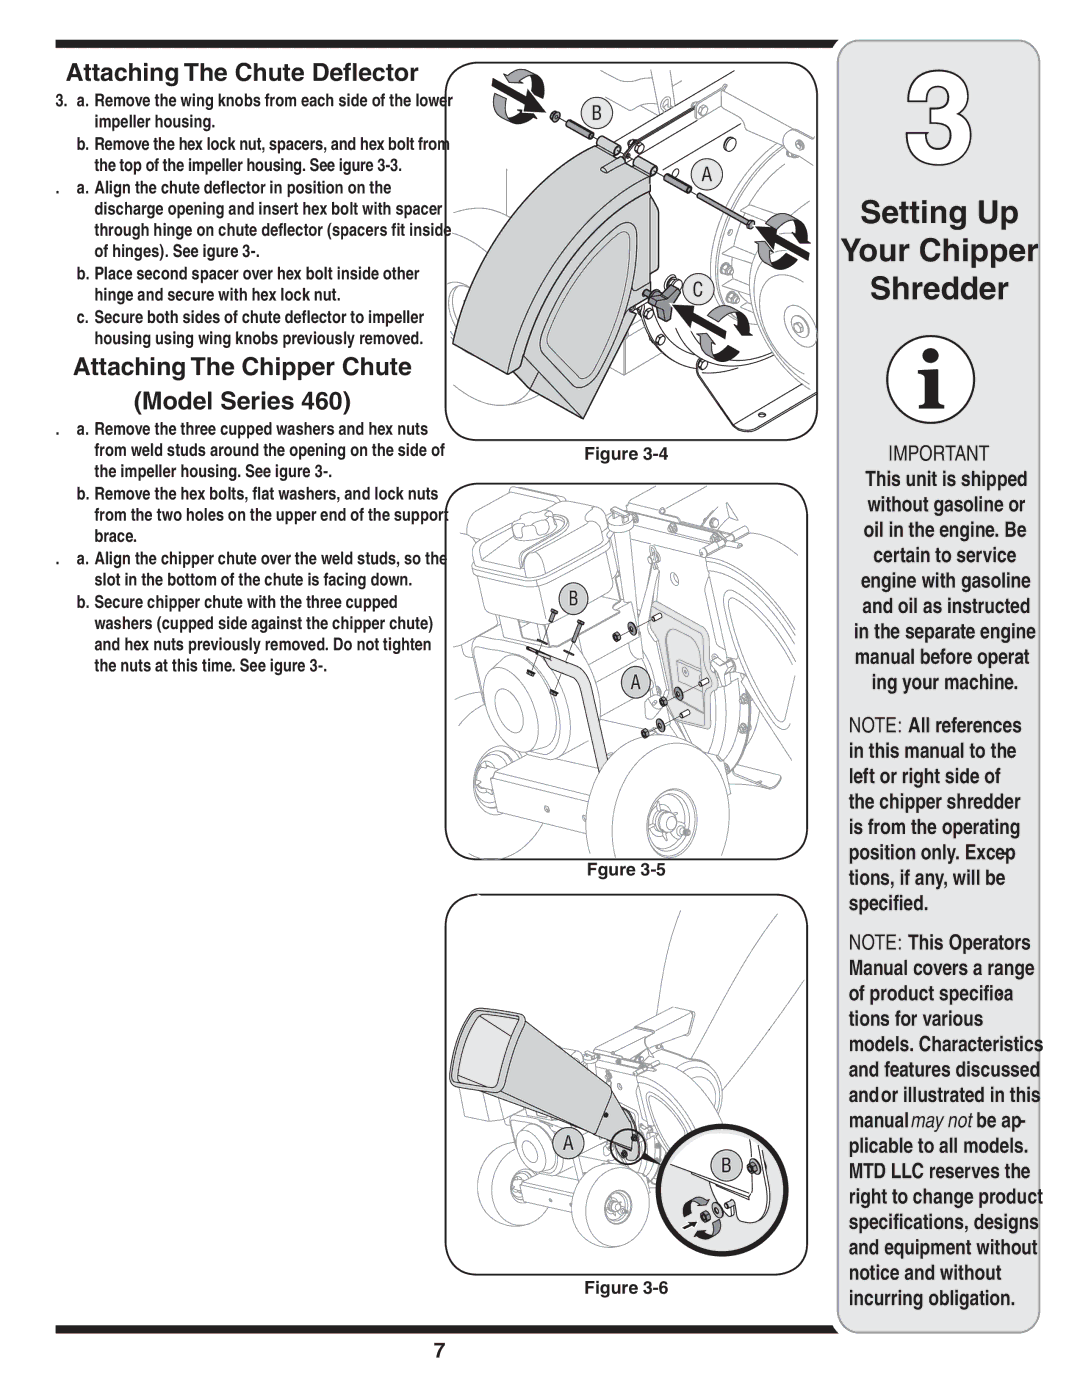
6.Remove the two wing knobs and cupped washers that secure the chute deflector and raise the chute.

7.Insert a 1/2” or 3/4” diameter pipe through the flail screen into the impeller to keep it from turning or remove the flail screen and insert a piece of wood into the chute opening.

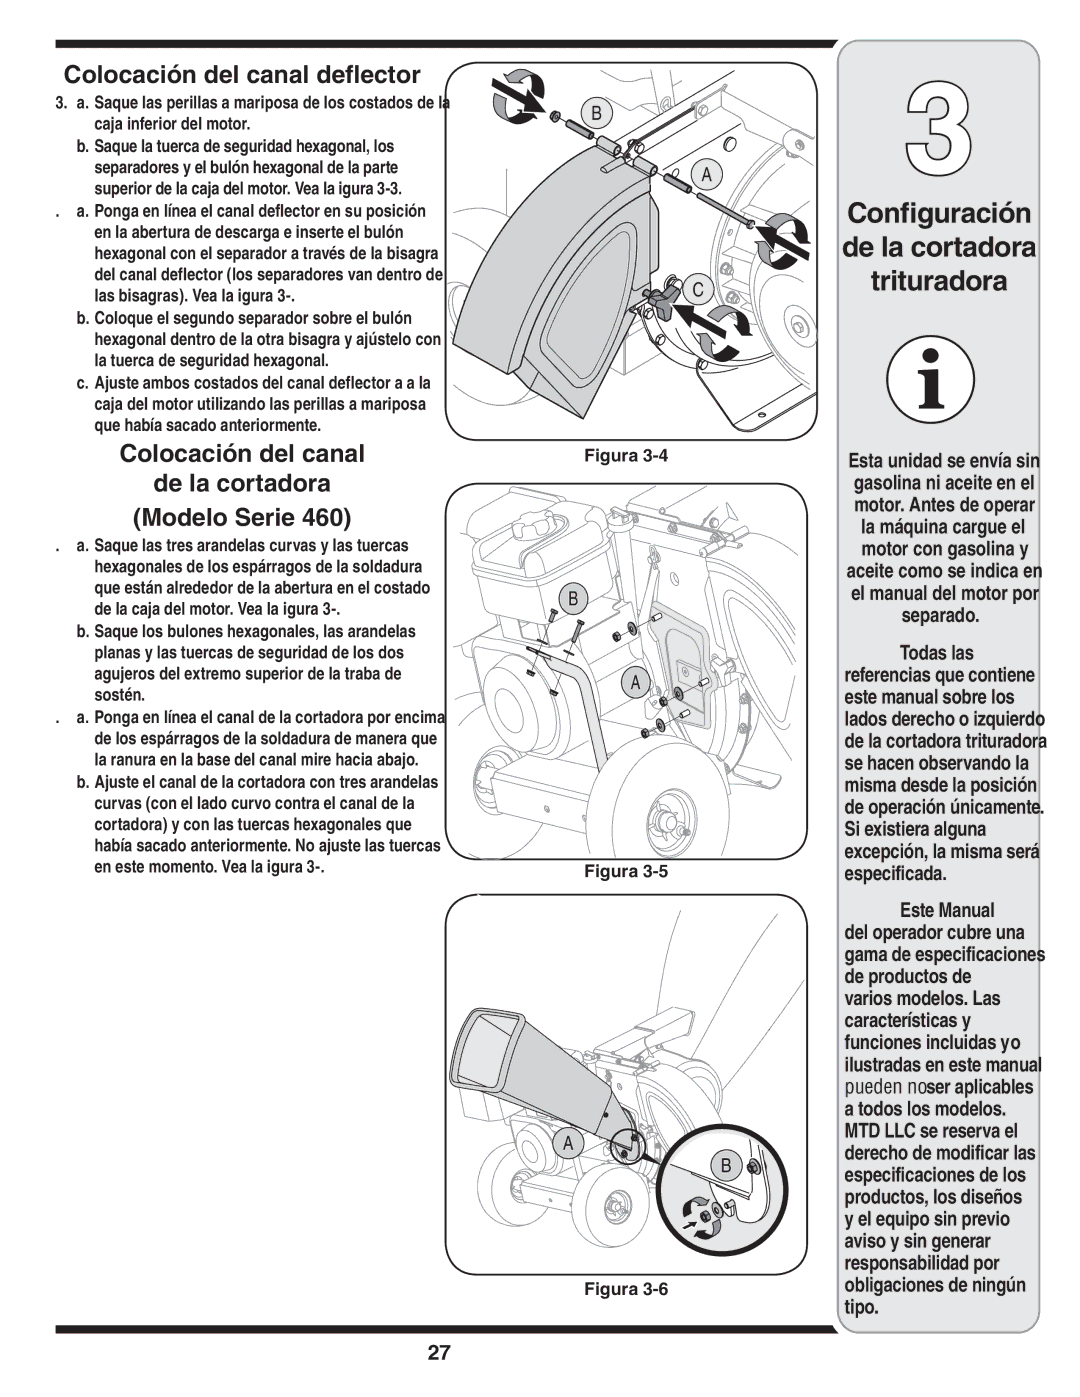
8.a. Remove the two internal hex screws, lock washers, and hex lock nuts which secure the shredder blade to the impeller.

b.Remove the hex bolt, lock washer, and flat washer to completely free shredder blade. See Figure 5-4.

Figure 5-3

A

B

A

Figure 5-4

NOTE: Use a 3/16” hex key (Allen) wrench on the outside of the shredder blade and a 1/2” box (or socket) wrench on the inside of the shredder blade. Hold the Allen wrench stationary and rotate the box (or socket) wrench to loosen the nut. Use caution when removing the blade to avoid contacting the weld studs on housing.

IMPORTANT: When sharpening the blade, follow the original angle of grind as a guide. It is extremely important that each cutting edge receives an equal amount of grinding to prevent an unbalanced blade. An unbalanced blade will cause excessive vibration when rotating at high speeds and may cause damage to the unit. The blade can be tested by balancing it on a screwdriver or nail. Remove metal from the heavy side until it is balanced evenly.

Storing Your Chipper Shredder

The following steps should be taken to prepare your chipper shredder for storage.

1.Clean the equipment thoroughly.

2.Wipe equipment with an oiled rag to prevent rust.

3.Refer to engine manual for correct engine storage instructions.

4.Store unit in a clean, dry area. Do not store next to corrosive materials such as fertilizer.

5

Maintaining

Your Chipper

Shredder

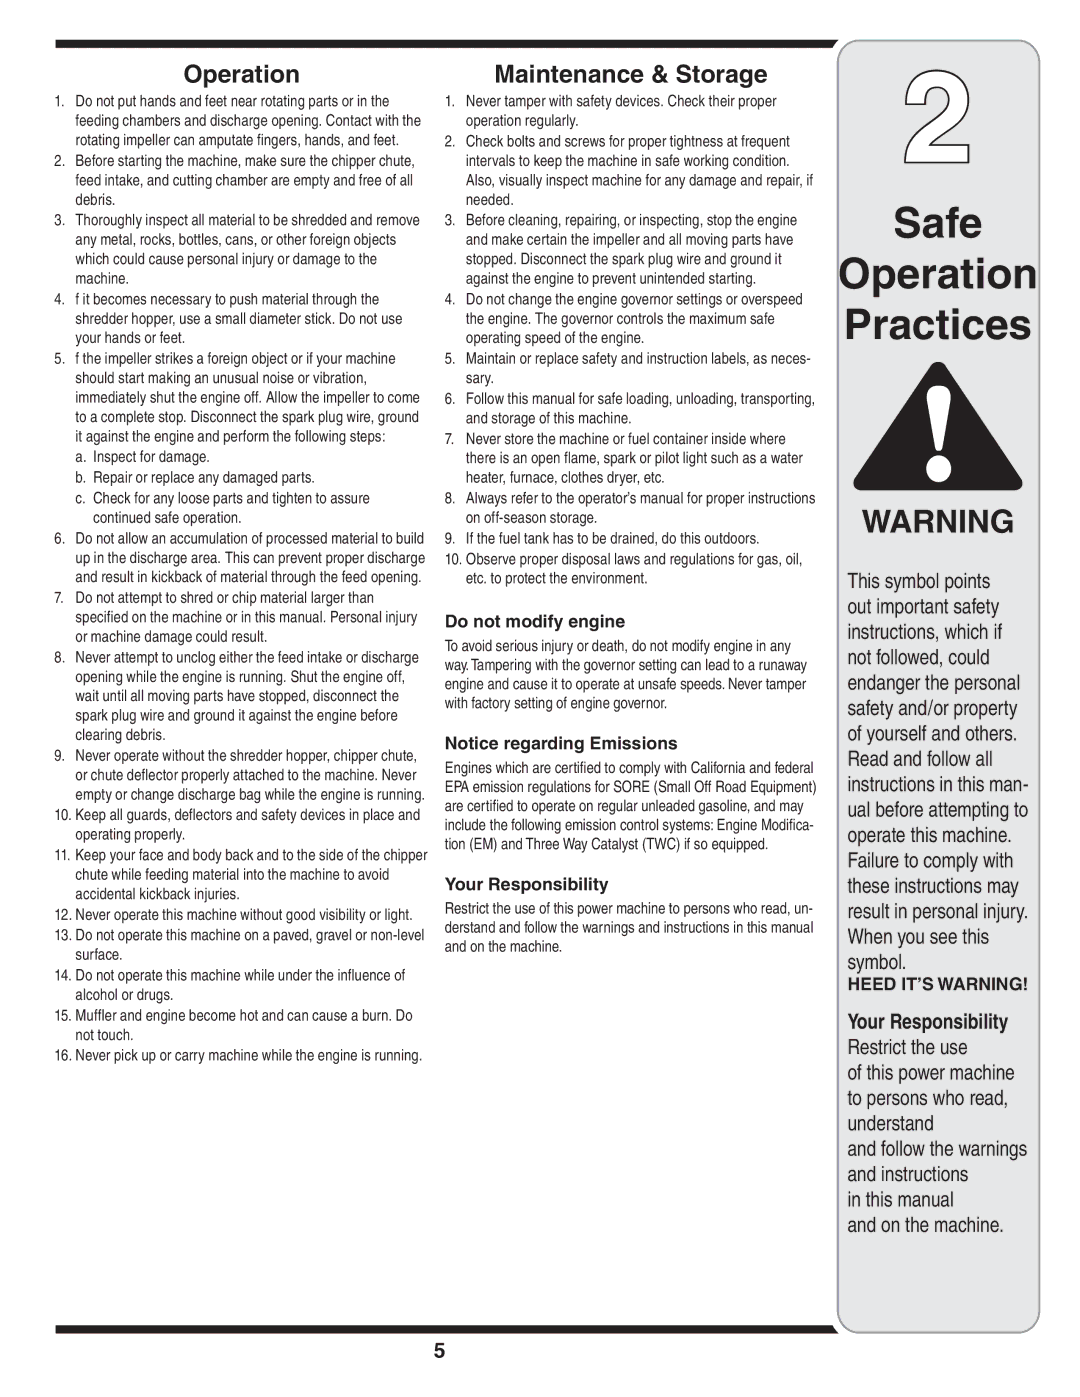
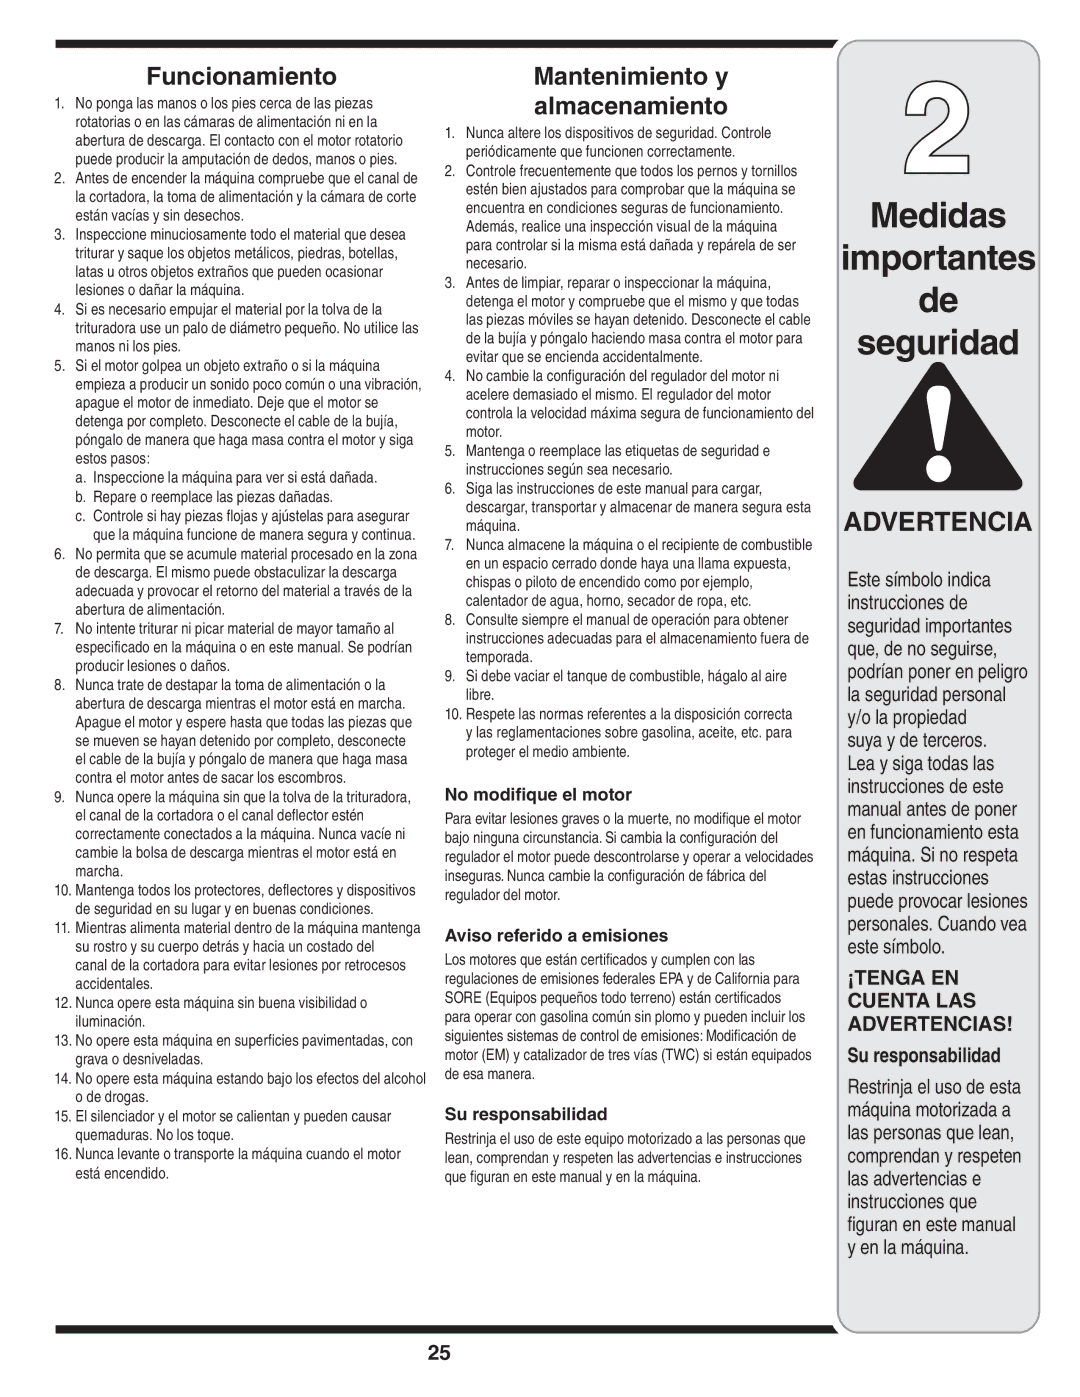
WARNING

The impeller’s

chipper blades and shredder blade are sharp. Wear leather work gloves to protect your hands.

IMPORTANT

Make certain chipper blades are reassem- bled with the sharp edge facing upward. Torque hardware to 250 - 300 in. lbs.

IMPORTANT

When reassembling the shredder blade, tighten center bolt to between

550and 700 in.-lbs. and the two out bolts to between 250 and 350 in.-lbs.

13

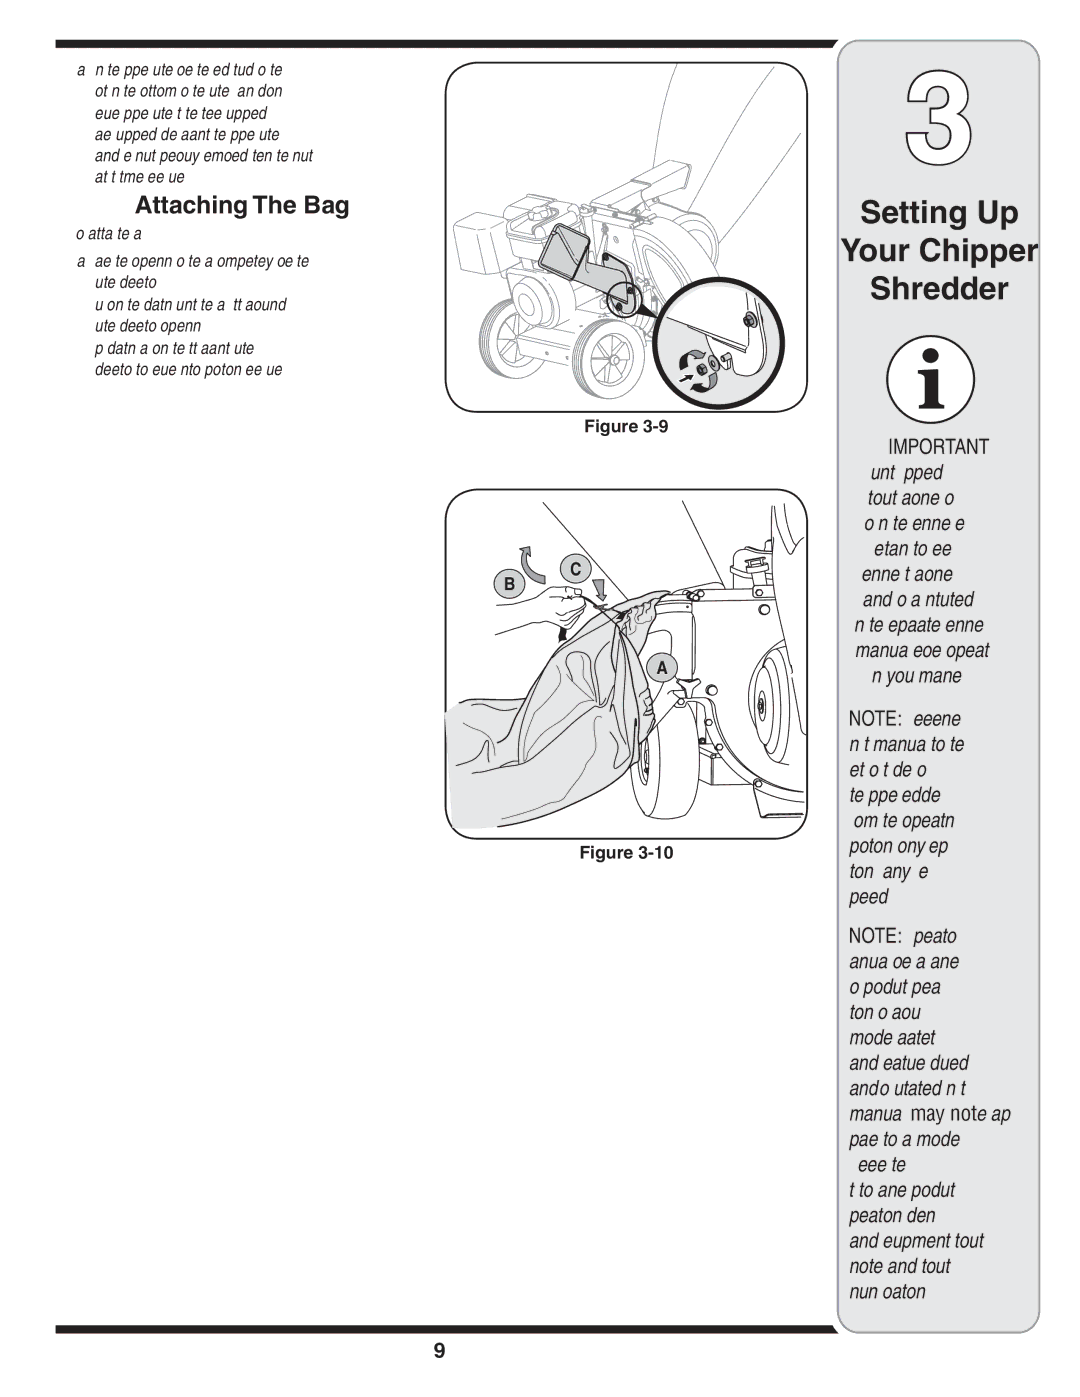
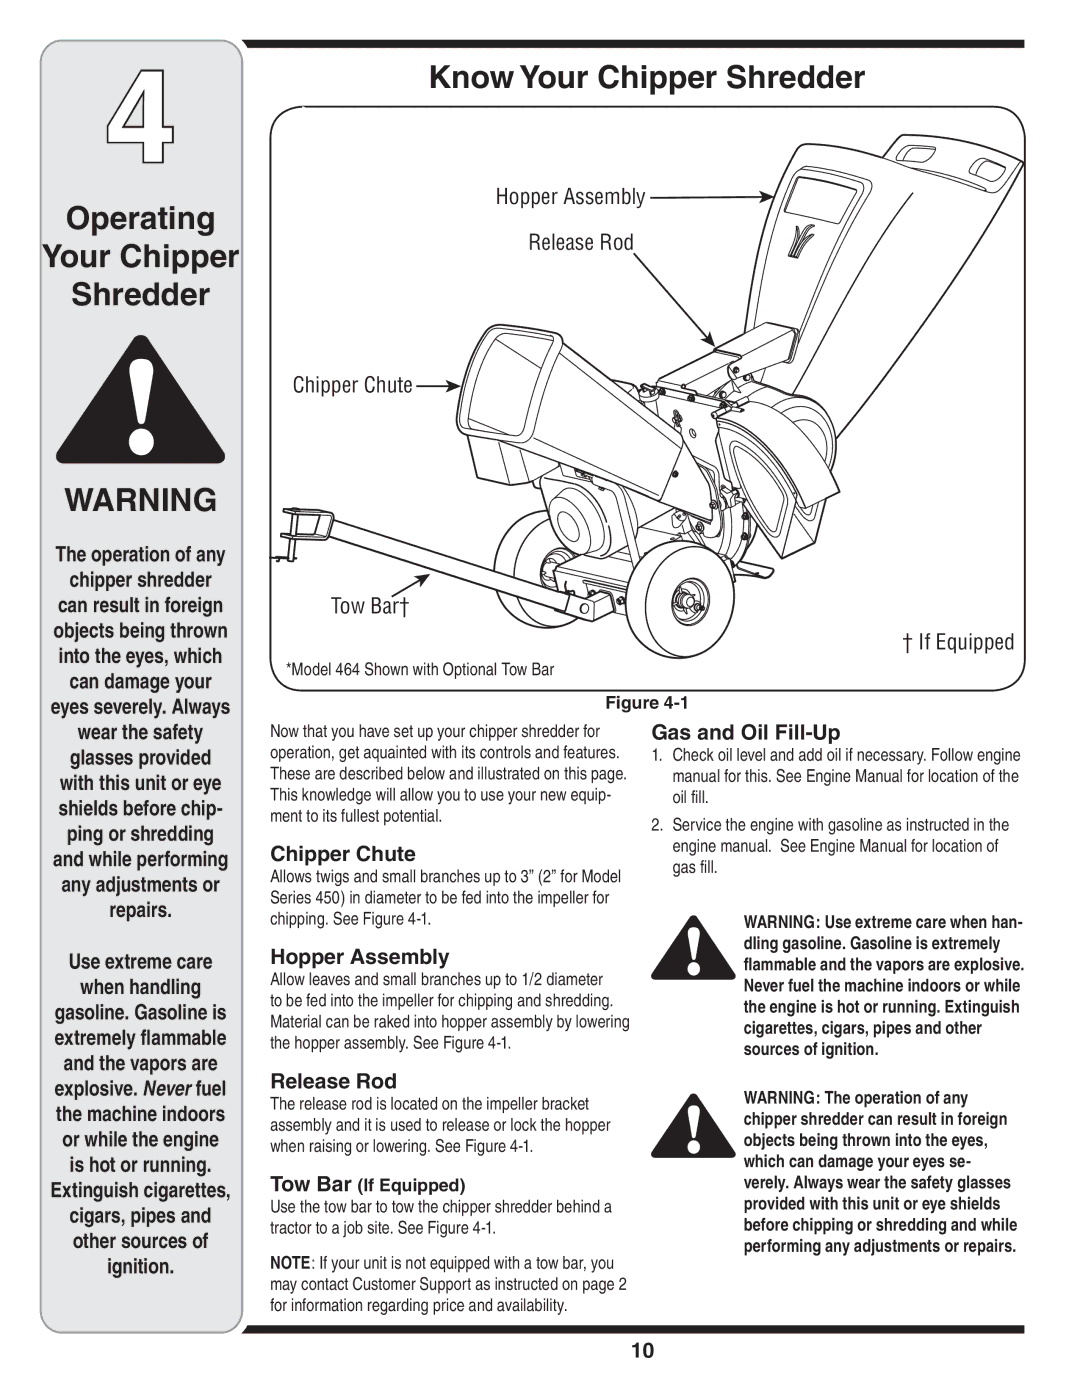
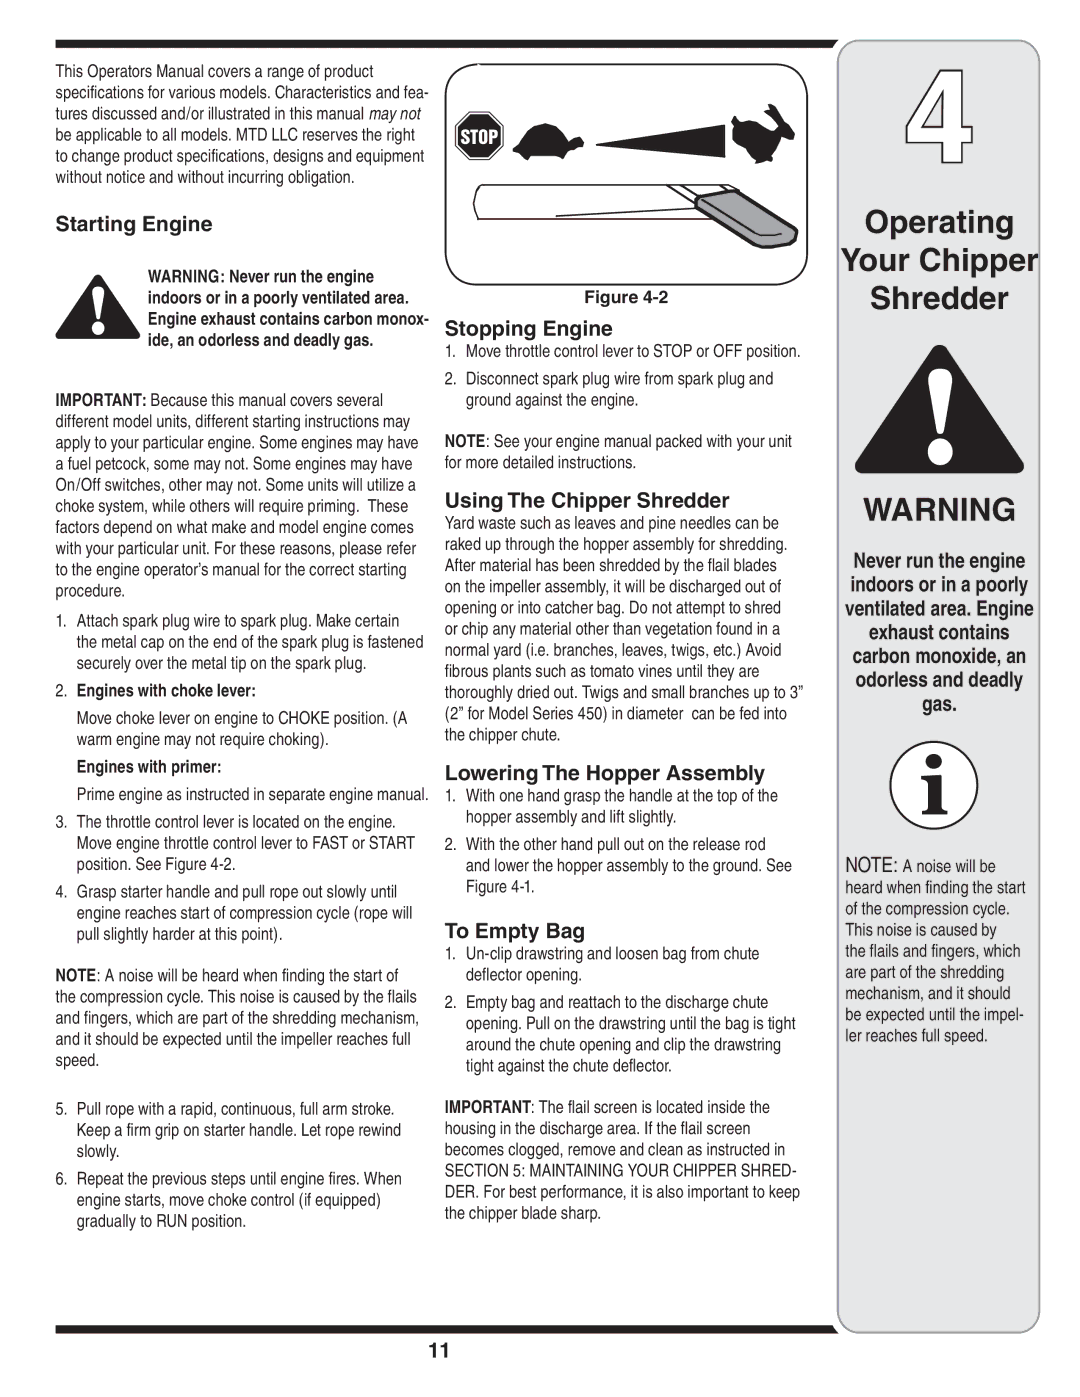
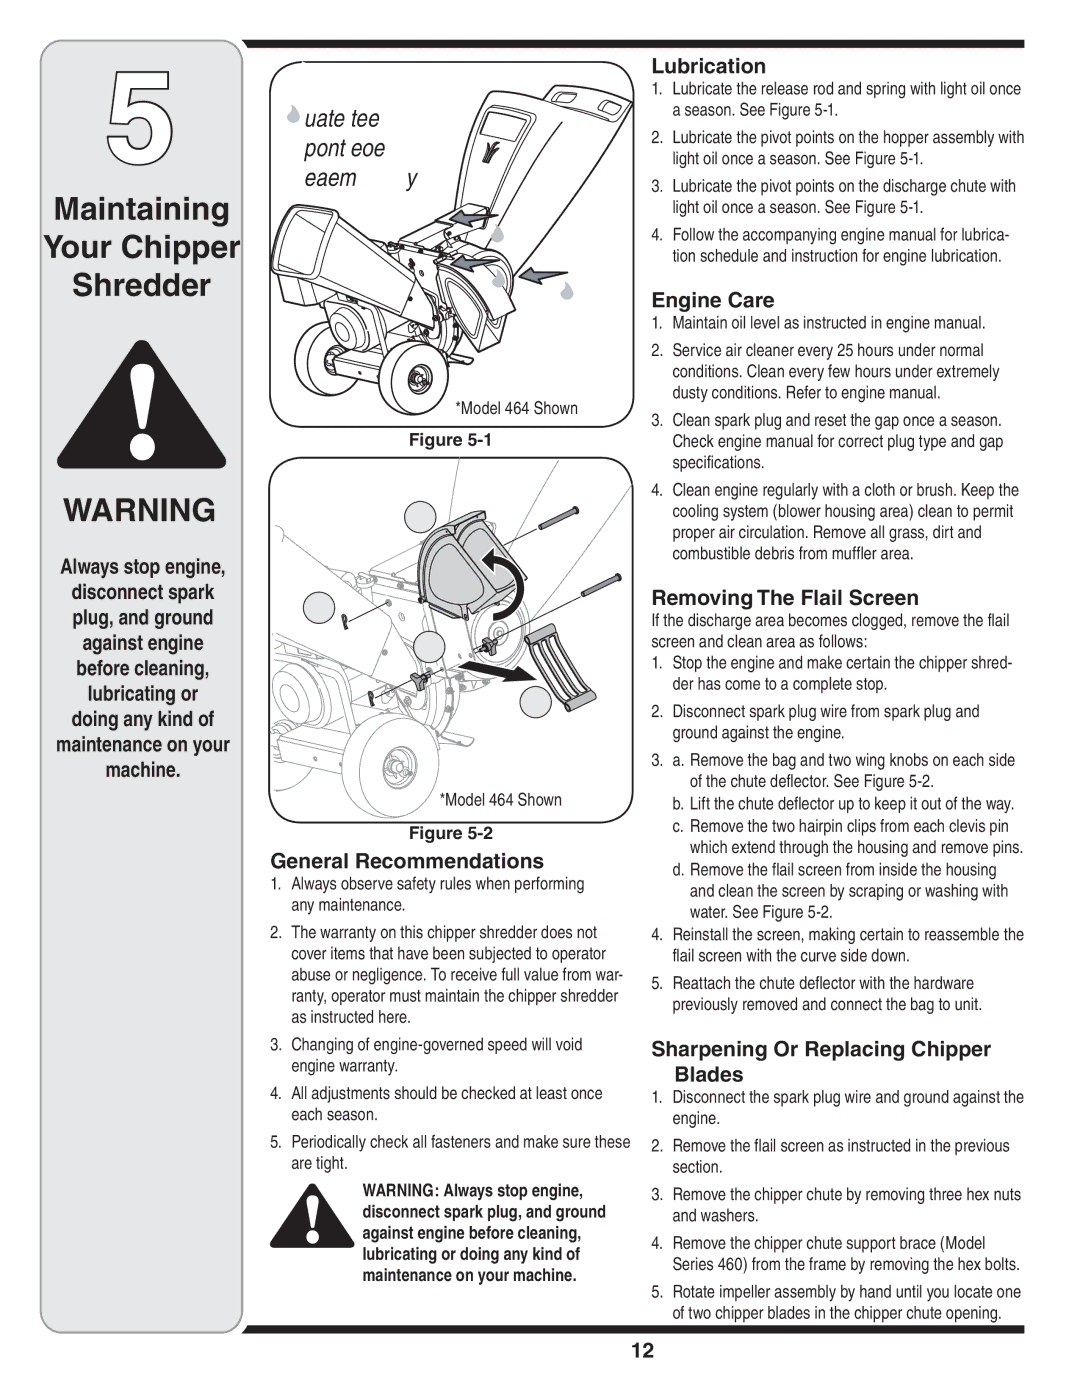
Image 13
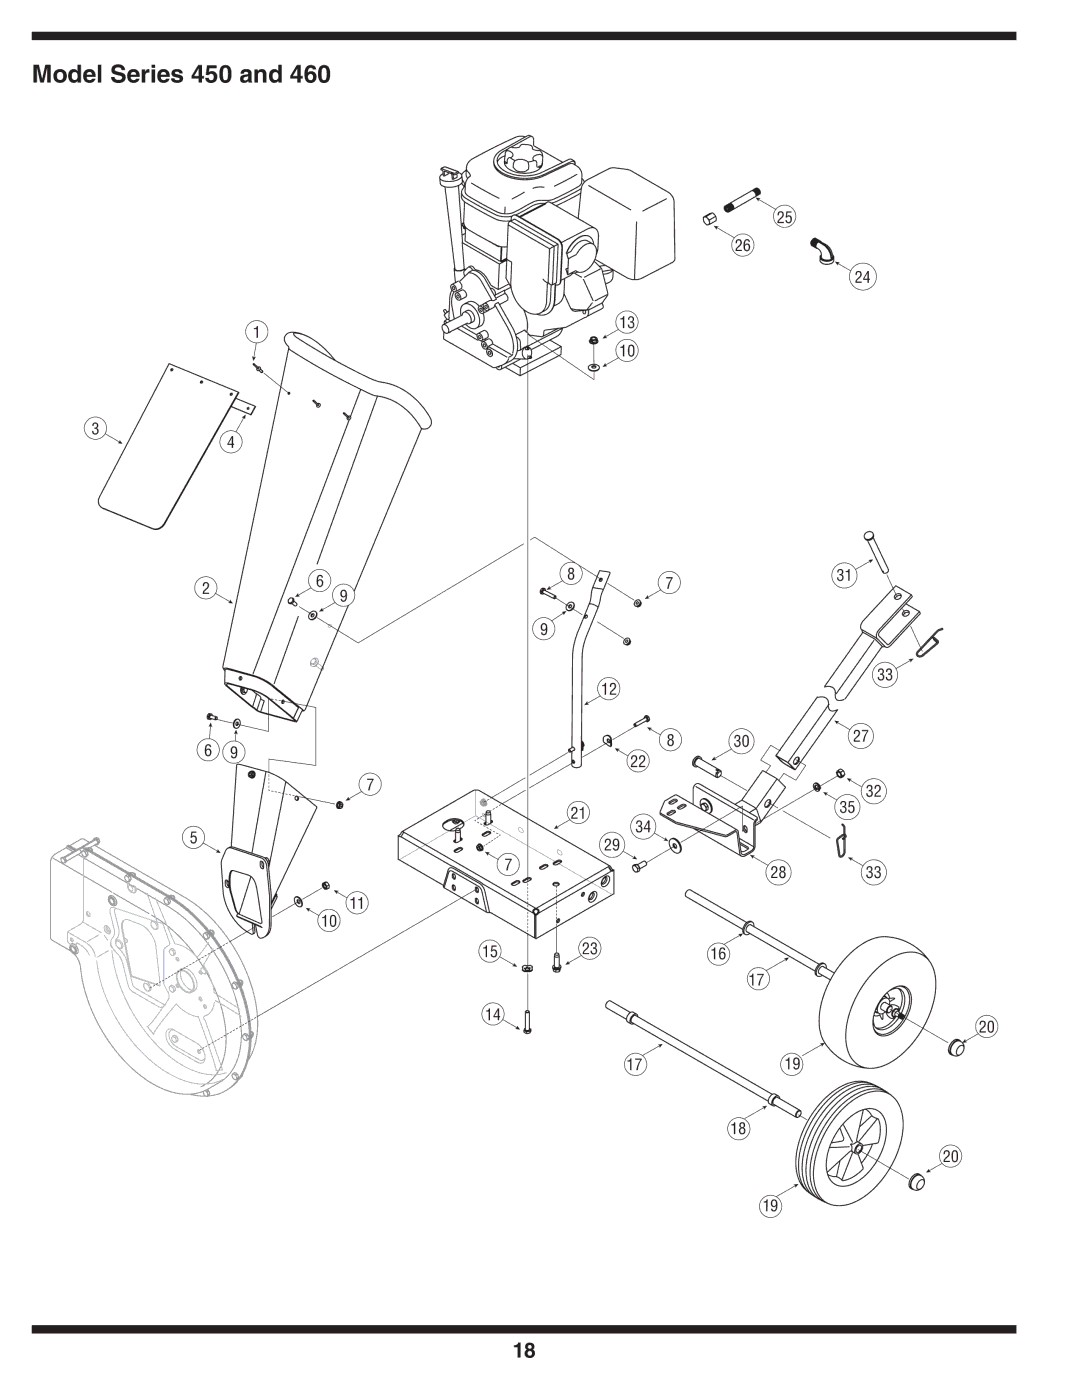
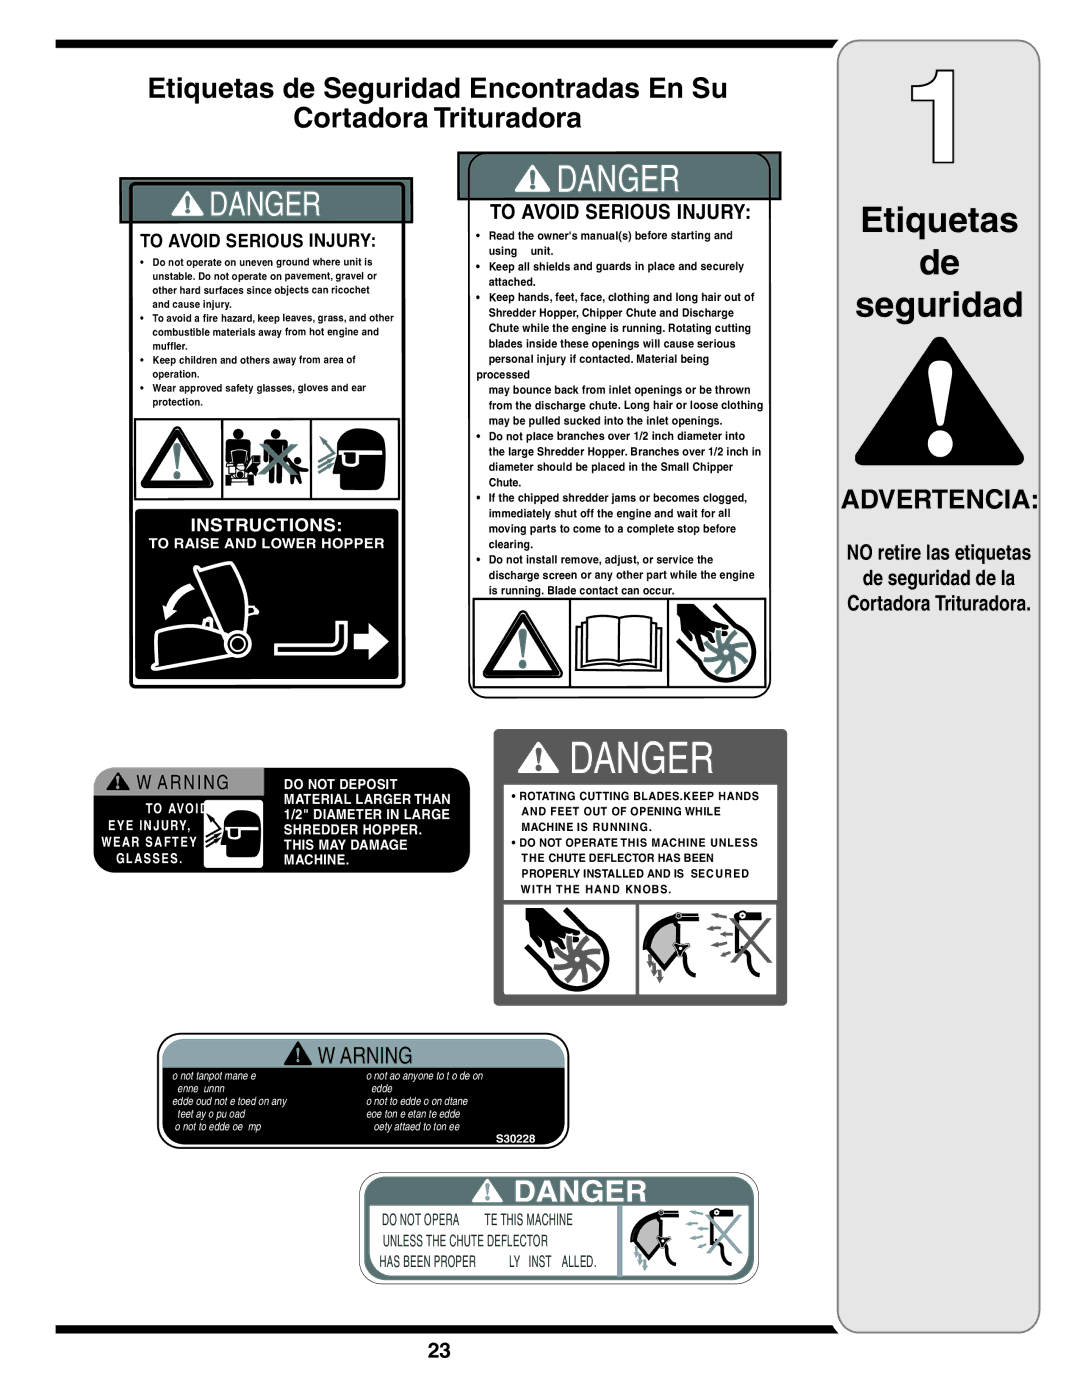
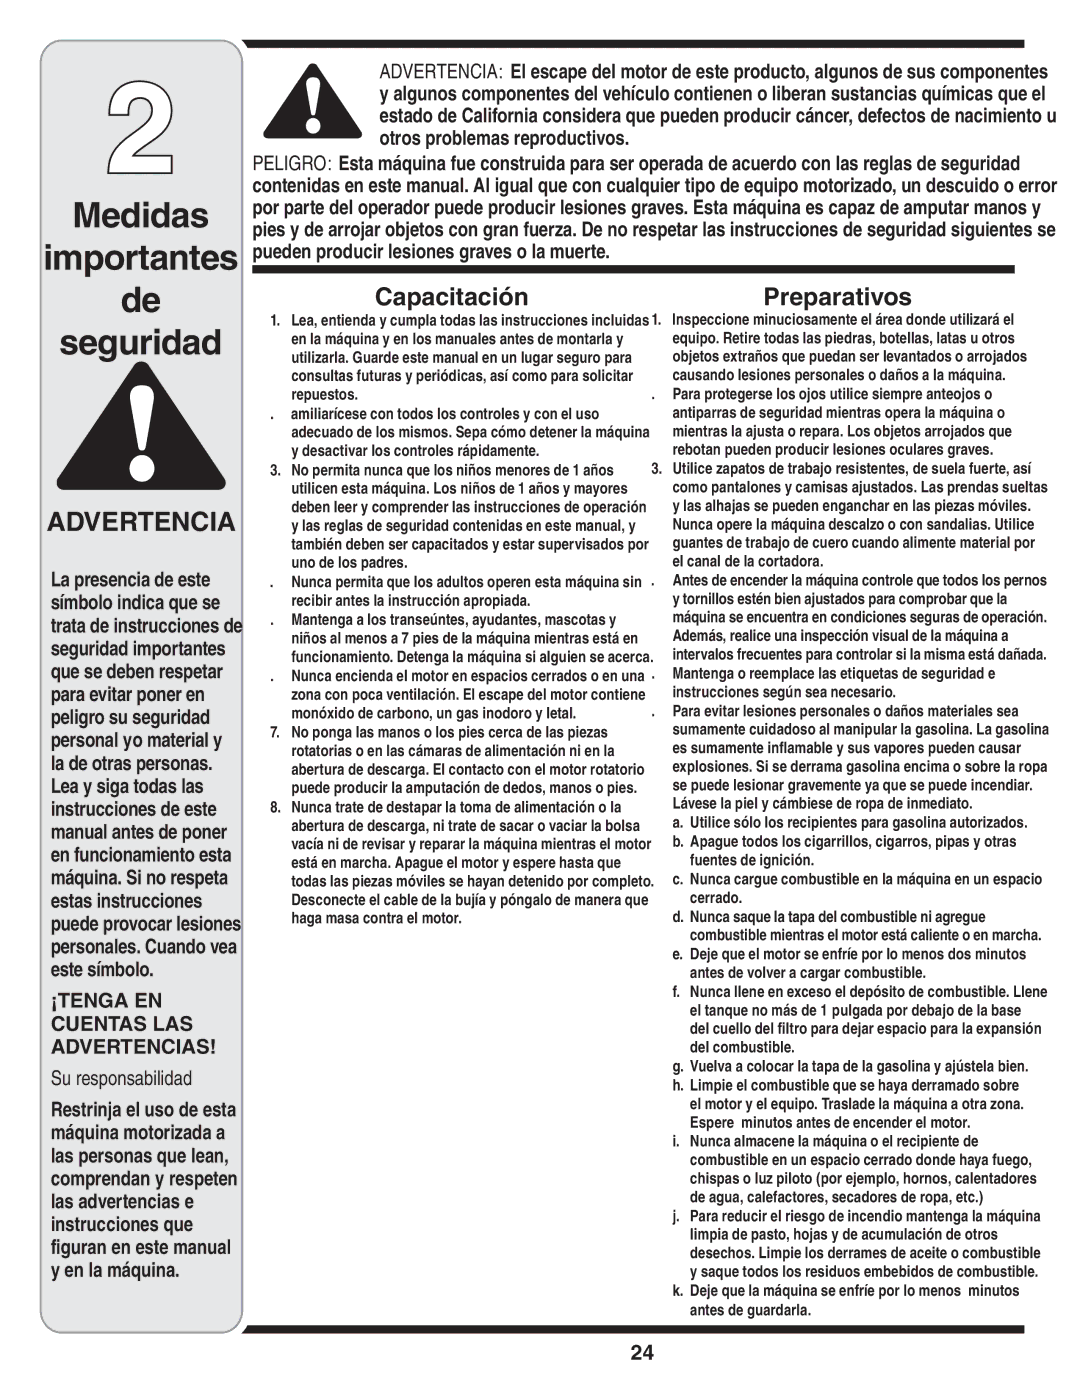
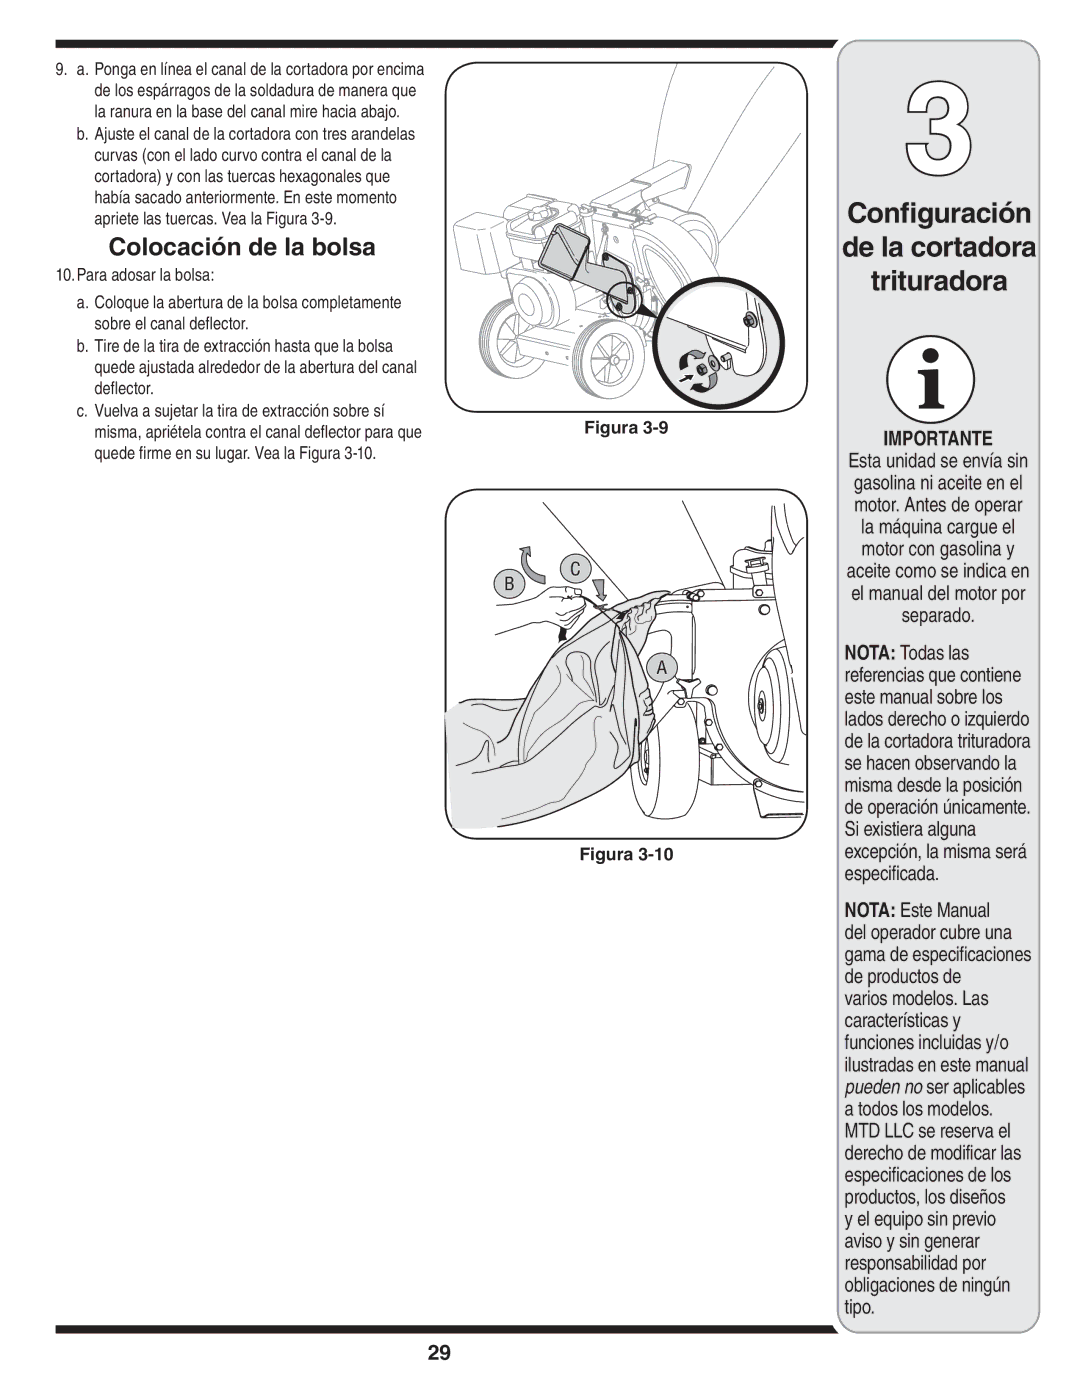
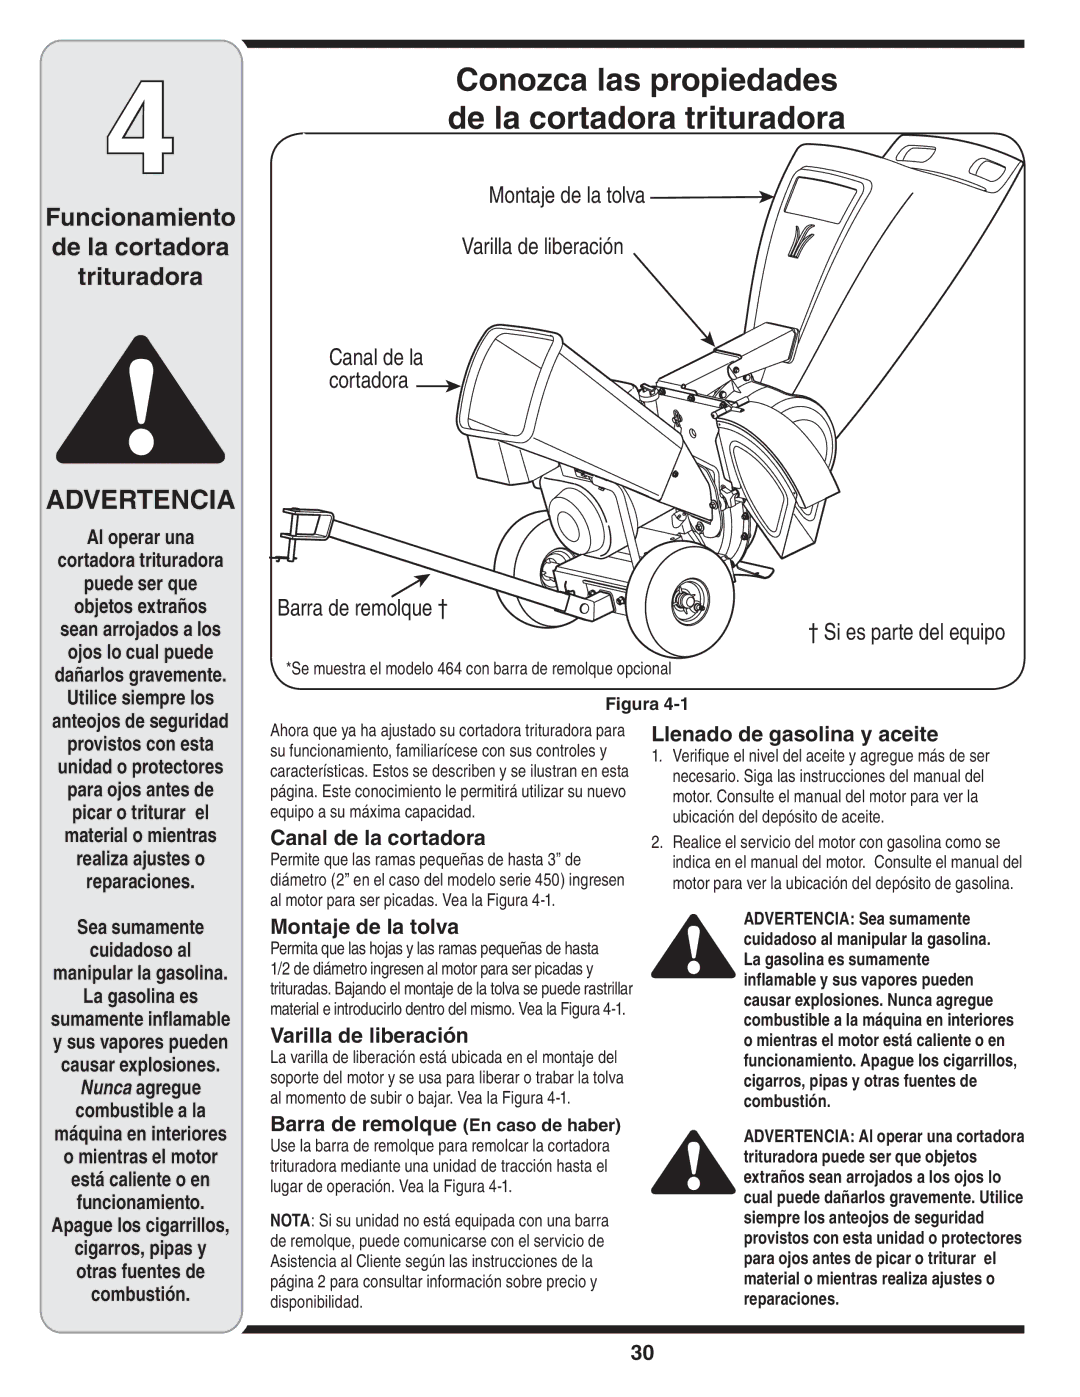
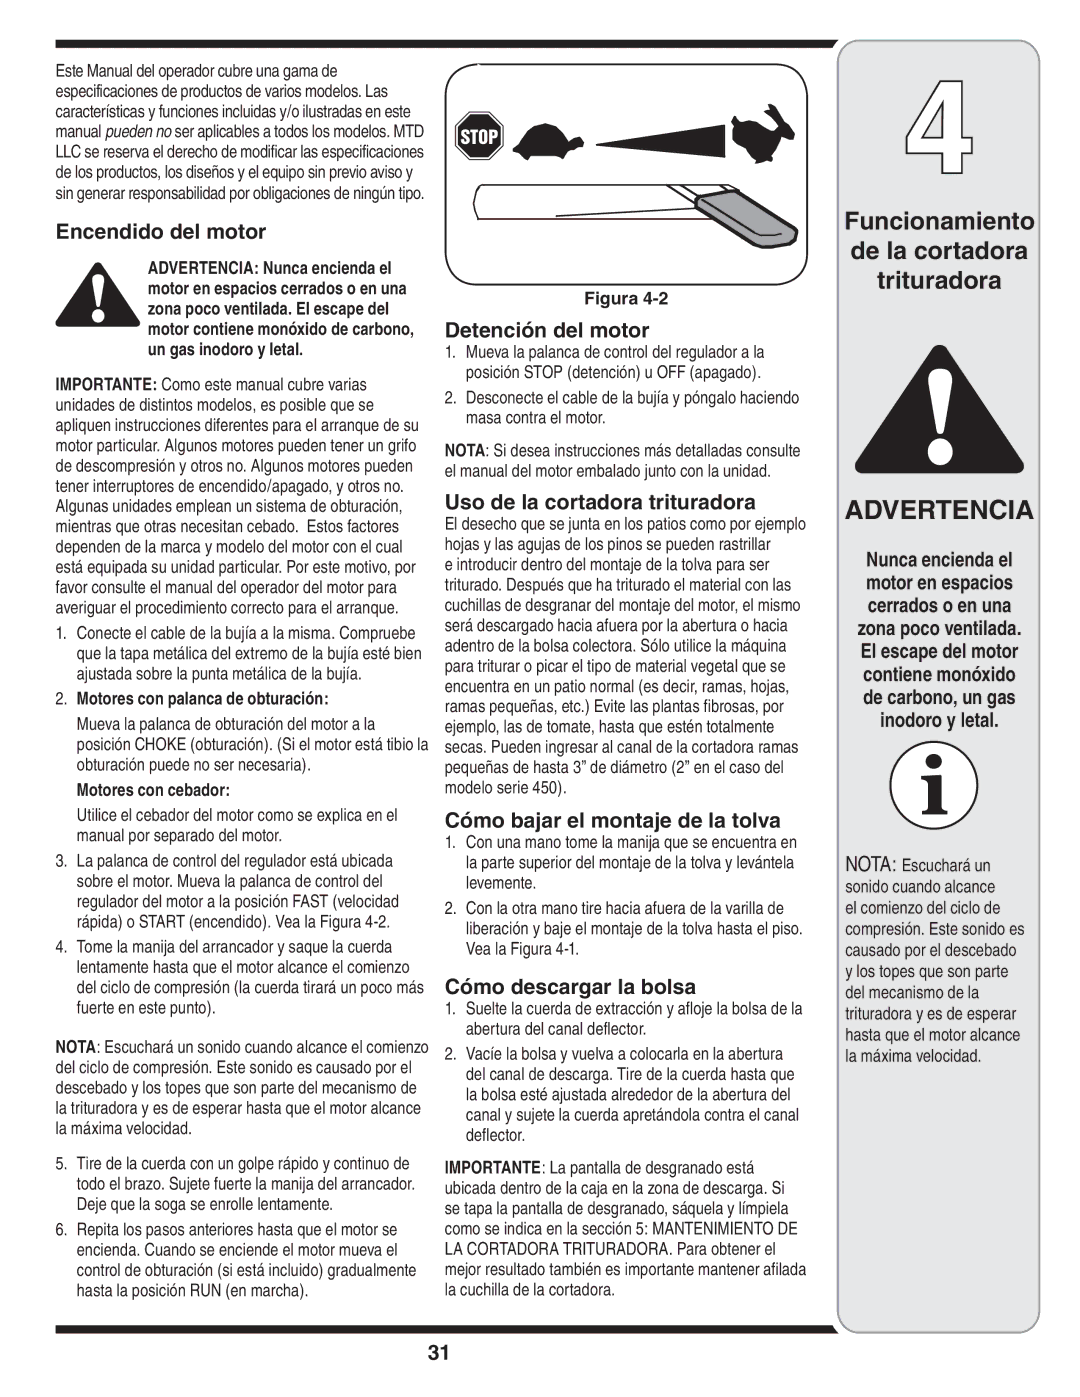
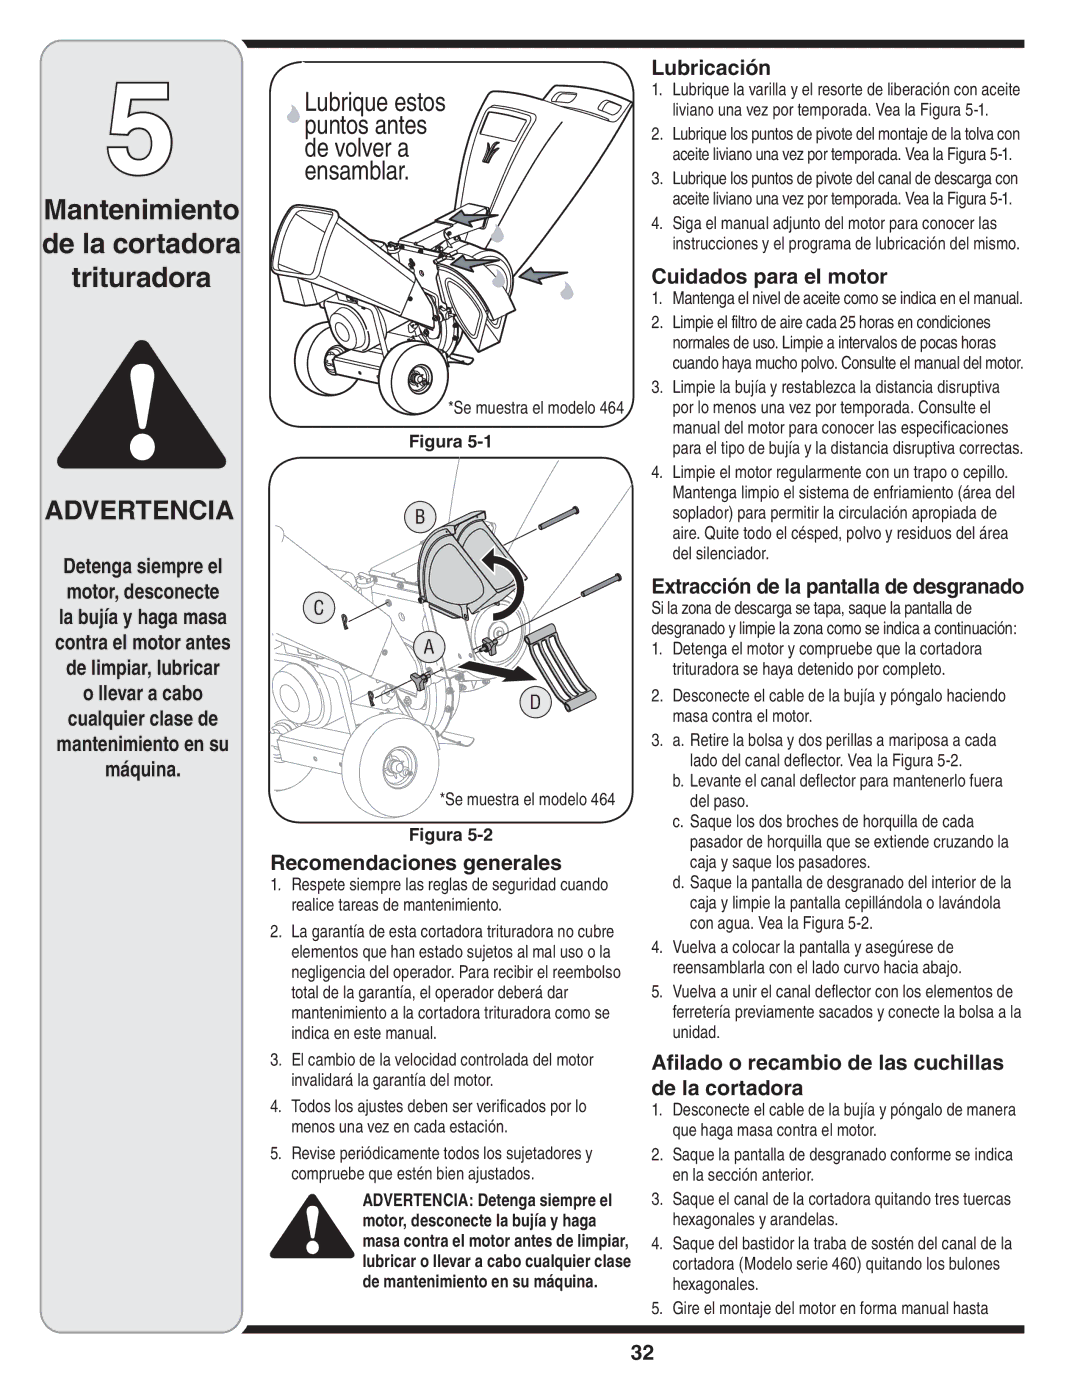
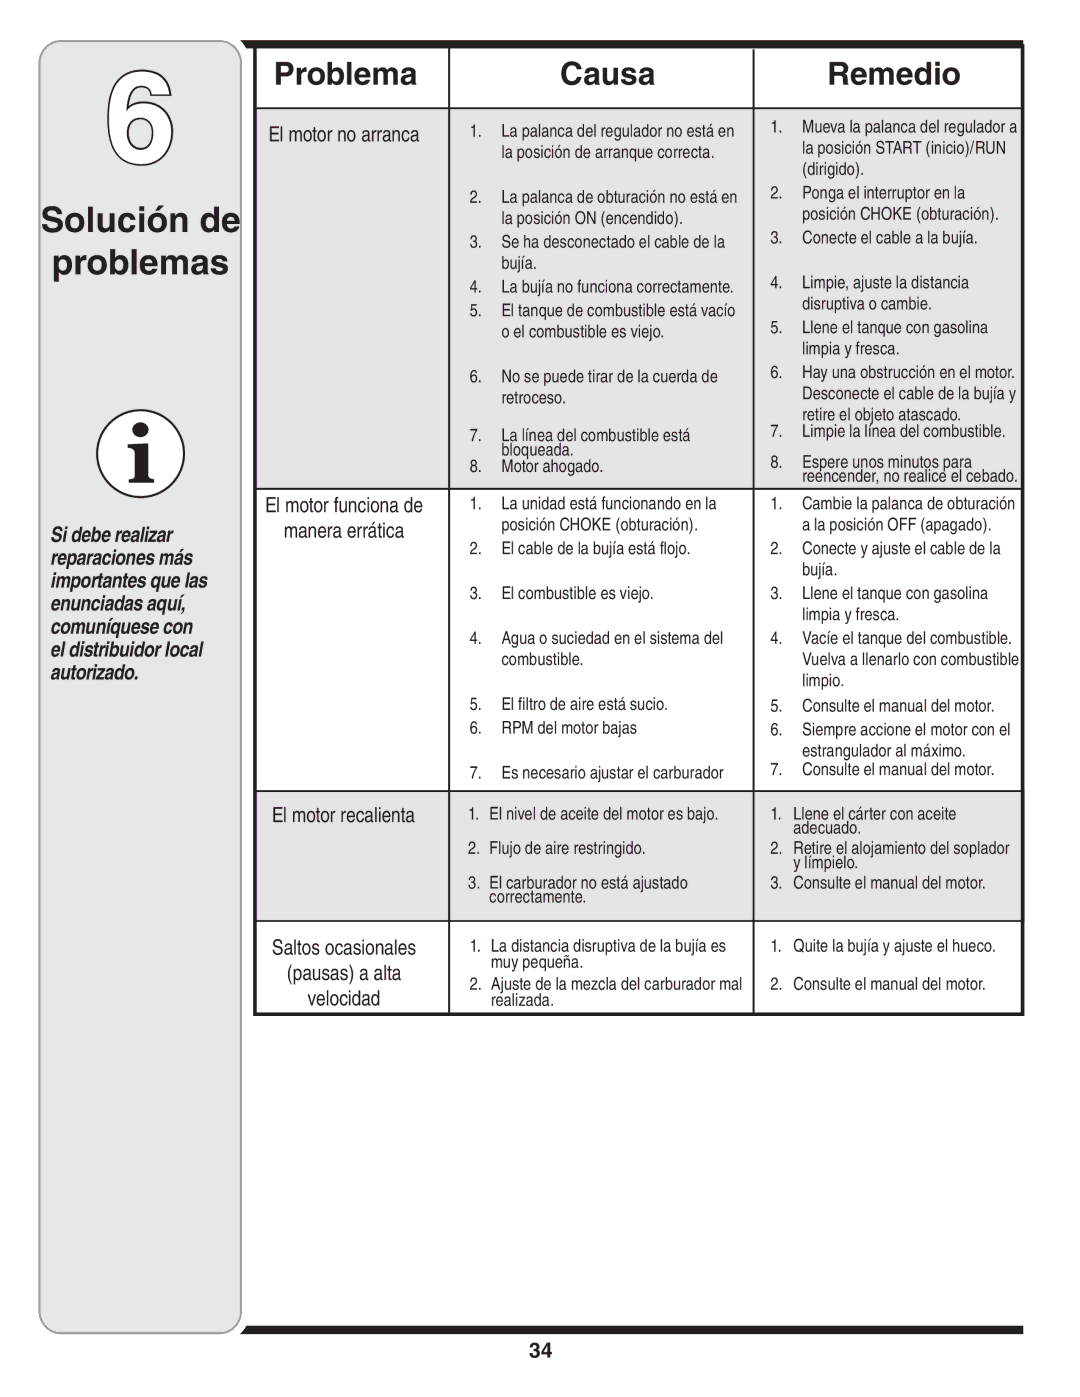
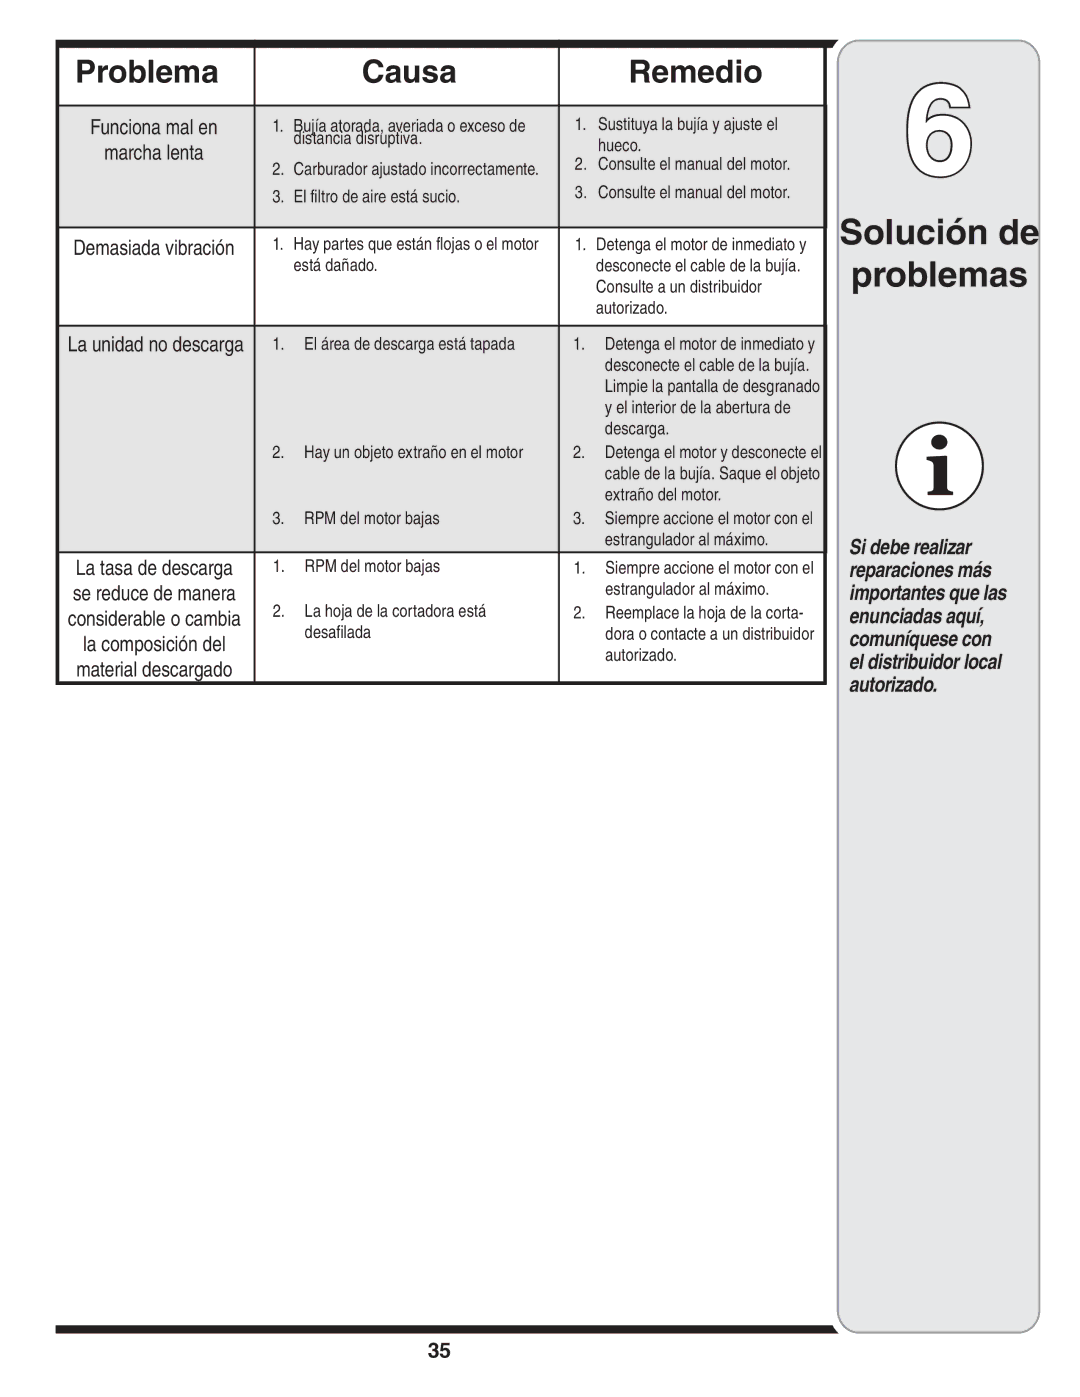
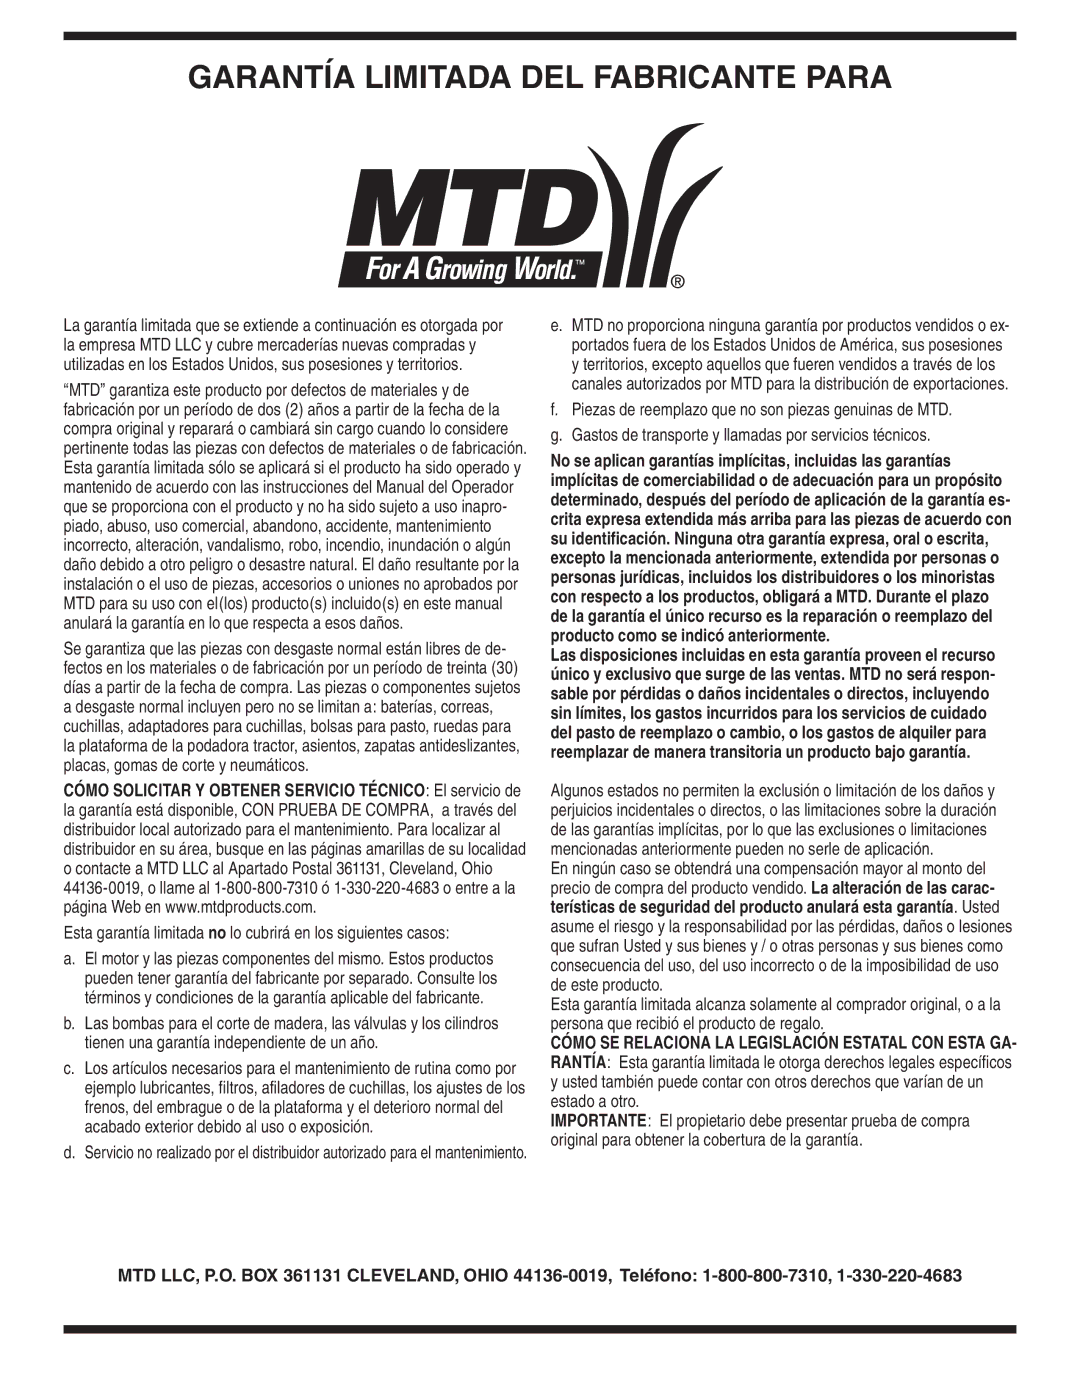
Contents MTD LLC, P.O. BOX 361131 CLEVELAND, Ohio Chipper Shredder Model Series 450Finding and Recording Model Number Table of ContentsCustomer Support Do not remove safety Safety Labels Found On Your Chipper ShredderOr any labels from chipper shredder for any reason Your Responsibility Restrict the use TrainingPreparationOperation Maintenance & StorageDo not modify engine Your ResponsibilityAttaching The Hopper Assembly Setting Up Your Chipper ShredderLoose Parts In Carton Attaching The Chipper Chute Model Series Attaching The Chute DeflectorFgure To the frame. See Figure Attaching The Chipper ChuteAttaching The Bag Know Your Chipper Shredder Operating Your Chipper ShredderOperating Your Chipper Maintaining Your Chipper Shredder Storing Your Chipper Shredder Sharpening Or Replacing The Shred- der BladeImpeller’s Problem Cause Remedy Trouble ShootingPage Model Series 450 Description Parts List2316 1719 712-3027†† Hex Lock Nut 1/4-20 710-0106†† MANUFACTURER’S Limited Warranty for Cortadora Trituradora Modelo Serie 450 y Manual DEL OperadorBúsqueda y registro del número de modelo ÍndiceAsistencia al Cliente Advertencia Etiquetas SeguridadCapacitación MedidasPreparativos Funcionamiento Medidas Importantes SeguridadNo modifique el motor Aviso referido a emisionesInstalación de la tolva Montaje Piezas sueltas dentro de la cajaColocación del canal De la cortadora Modelo Serie Colocación del canal deflectorBastidor Colocación del canalColocación de la bolsa Canal de la cortadora Conozca las propiedades de la cortadora trituradoraMontaje de la tolva Varilla de liberaciónDetención del motor Encendido del motorUso de la cortadora trituradora Cómo bajar el montaje de la tolvaLubricación Recomendaciones generalesCuidados para el motor Extracción de la pantalla de desgranadoAlmacenamiento de la cortadora trituradora Afilado o cambio de la cuchilla de la trituradoraLas cuchillas de Trituración y la Cuchilla de corte del Causa Remedio Solución de ProblemasLa unidad no descarga El área de descarga está tapada Problema Causa RemedioGarantía Limitada DEL Fabricante Para

450 Series, 460 Series specifications

The Bolens 460 and 450 Series tractors represent a blend of robust engineering and user-friendly design, tailored to meet the needs of both commercial and residential users. Built with efficiency and versatility in mind, these tractors stand out in the competitive landscape of lawn and garden care equipment.

One of the defining features of the Bolens 460 Series is its powerful engine. Equipped with a reliable and performance-oriented engine, this series is designed to tackle tough mowing conditions and heavy-duty landscaping tasks with ease. The engine not only delivers significant horsepower but also emphasizes fuel efficiency, ensuring that users can work longer without frequent refueling.

In contrast, the Bolens 450 Series is slightly more compact, making it ideal for residential settings and smaller properties. It combines power with agility, featuring a maneuverable design that allows for easy navigation around tight spaces and obstacles. The 450 Series is well-suited for homeowners seeking to maintain their lawns and gardens without the bulk of larger equipment.

Both series are equipped with hydrostatic transmissions, providing seamless speed control and eliminating the need for manual gear shifting. This technology enhances user comfort and allows for a more enjoyable mowing experience, especially on uneven terrain. Additionally, the ergonomic seating and controls ensure that operators can work for extended periods without fatigue.

A standout characteristic of the Bolens 460 and 450 Series is their cutting systems. Both series feature innovative mowing decks designed to deliver a clean and precise cut every time. With adjustable cutting heights, users can easily customize their mowing experience to achieve the desired lawn finish. Furthermore, the optional mulch kit enhances the effectiveness of grass clippings, returning valuable nutrients to the soil.

Maintenance is made straightforward with these tractors, as both the 460 and 450 Series come with accessible components for easy servicing. This user-centric design philosophy ensures that owners can keep their equipment in top-notch condition without the hassle often associated with complex machinery.

In summary, the Bolens 460 and 450 Series tractors offer a perfect combination of power, efficiency, and user-friendly features. With their innovative technologies and thoughtful design characteristics, they serve as reliable companions for all lawn and garden care tasks, guaranteeing satisfaction for both commercial operators and homeowners alike. Whether you are looking to tackle large properties or maintain a smaller yard, these series provide diverse solutions for your outdoor needs.