Work Piece and Work Area Set Up
1.Work piece selection:
a.Work piece must be free of foreign objects and loose knots.
b.Do not use to cut logs, tree limbs, or uneven lumber.
c.Wet lumber, green (unseasoned) lumber, and pressure treated lumber all have an increased potential for kickback and should only be cut with a blade designed for cutting that lumber. Wear a
2.Designate a work area that is clean and
3.Route the power cord along a safe route to reach the work area without creating a tripping hazard or exposing the power cord to possible damage. The power cord must reach the work area with enough extra length to allow free movement while working.
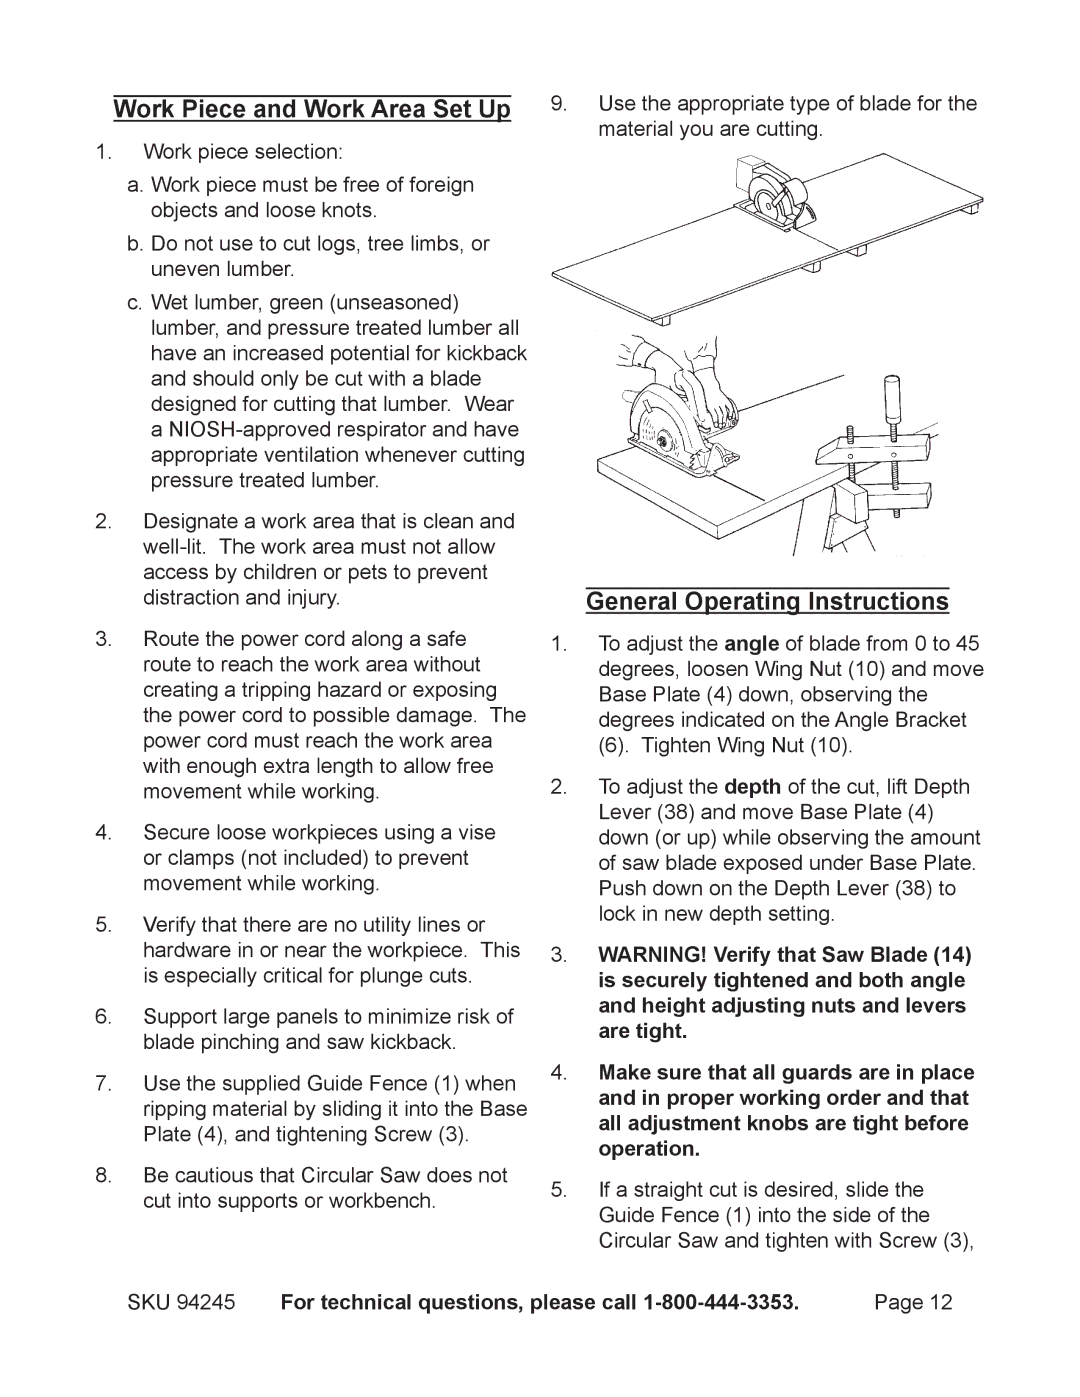
4.Secure loose workpieces using a vise or clamps (not included) to prevent movement while working.
5.Verify that there are no utility lines or hardware in or near the workpiece. This is especially critical for plunge cuts.
6.Support large panels to minimize risk of blade pinching and saw kickback.
7.Use the supplied Guide Fence (1) when ripping material by sliding it into the Base Plate (4), and tightening Screw (3).
8.Be cautious that Circular Saw does not cut into supports or workbench.
9.Use the appropriate type of blade for the material you are cutting.
General Operating Instructions
1.To adjust the angle of blade from 0 to 45 degrees, loosen Wing Nut (10) and move Base Plate (4) down, observing the degrees indicated on the Angle Bracket
(6). Tighten Wing Nut (10).
2.To adjust the depth of the cut, lift Depth
Lever (38) and move Base Plate (4) down (or up) while observing the amount of saw blade exposed under Base Plate.
Push down on the Depth Lever (38) to lock in new depth setting.
3.WARNING! Verify that Saw Blade (14) is securely tightened and both angle and height adjusting nuts and levers are tight.
4.Make sure that all guards are in place and in proper working order and that all adjustment knobs are tight before operation.
5.If a straight cut is desired, slide the Guide Fence (1) into the side of the Circular Saw and tighten with Screw (3),
SKU 94245 | For technical questions, please call | Page 12 |