
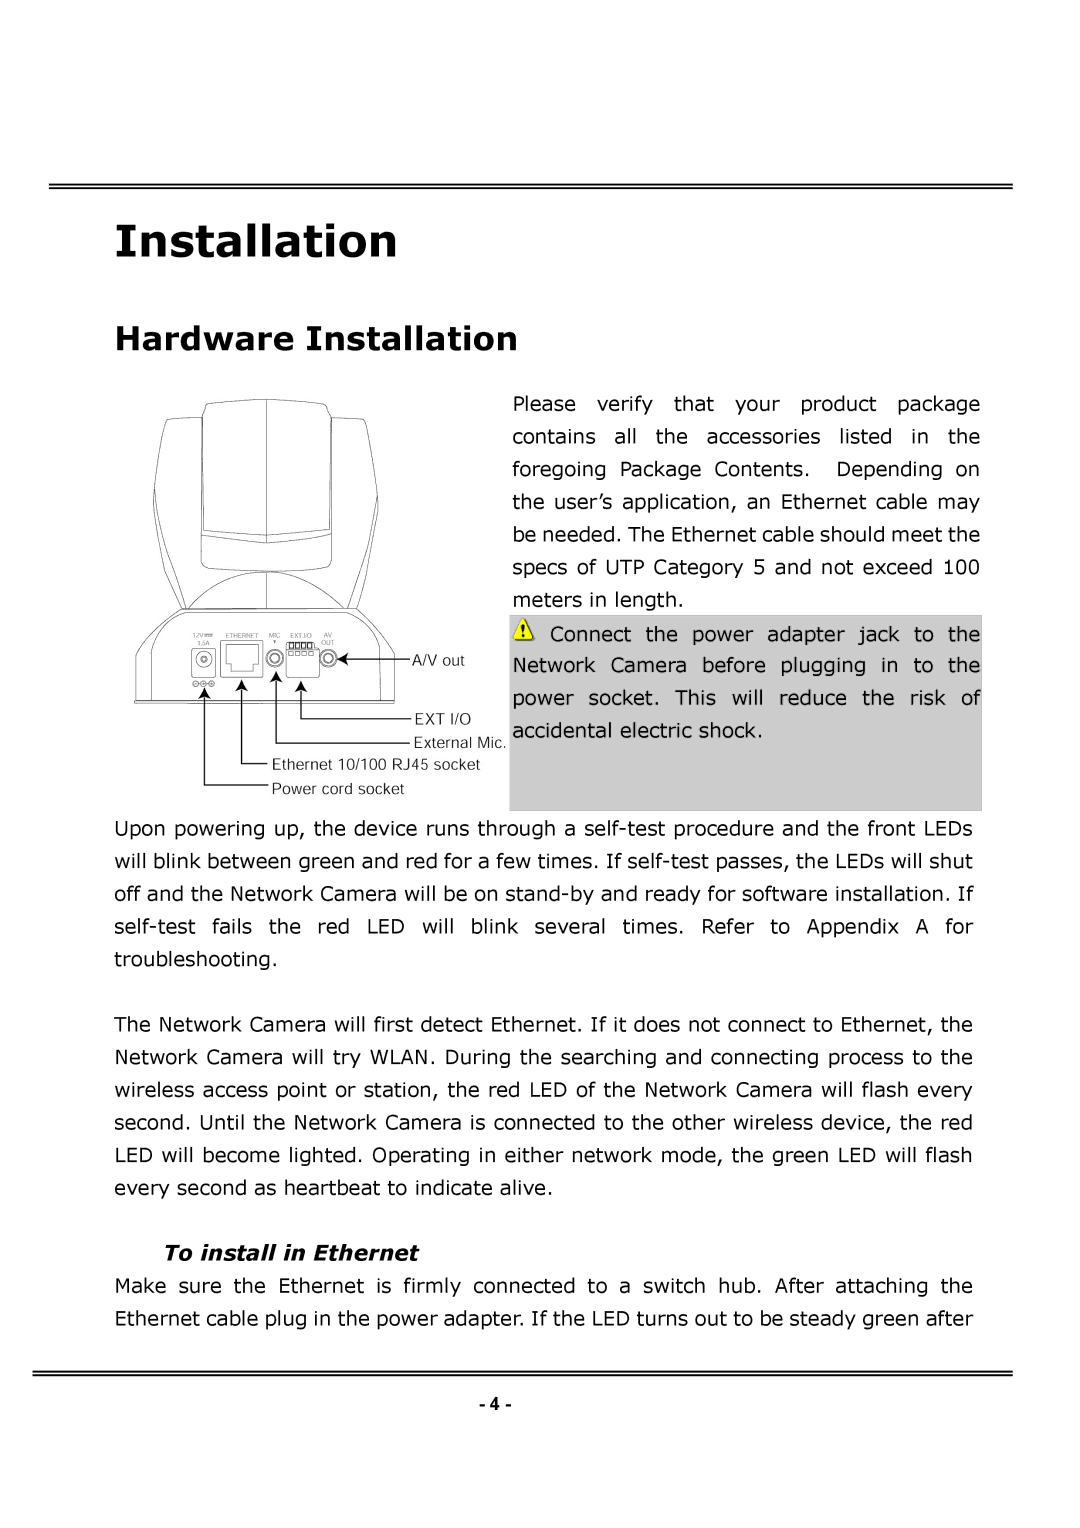
IPCAMWPTZ specifications
The 4XEM IPCAMWPTZ is a cutting-edge IP camera designed for versatile surveillance solutions. Its sleek design and advanced technology make it a standout choice for both home security and business applications. One of the main features of this camera is its ability to provide high-definition video quality, delivering clear and detailed images at resolutions up to 1080p. This ensures that users can monitor their premises with exceptional clarity, making it easier to identify faces and license plates.Another significant characteristic of the IPCAMWPTZ is its pan-tilt-zoom capabilities. The camera can rotate horizontally and vertically to cover a wide area, significantly reducing the number of cameras needed for comprehensive coverage. Users can remotely control the camera's movements via a smartphone app or web interface, allowing them to focus on specific areas of interest in real-time. The optical zoom feature enhances this functionality, offering detailed views even from a distance.
The IPCAMWPTZ incorporates advanced infrared night vision technology, enabling clear surveillance even in complete darkness. It automatically switches from daytime to nighttime mode, ensuring round-the-clock monitoring without sacrificing image quality. Additionally, the camera is equipped with motion detection capabilities that can send alerts to users when movement is detected within its field of view. This feature is particularly useful for enhancing security and enabling prompt responses to potential threats.
Connectivity is another strong suit of the 4XEM IPCAMWPTZ. It supports both wired and wireless connections, allowing for flexible installation options depending on user requirements. Integrated Wi-Fi enables users to set up the camera in locations where running cabling may be impractical. The camera is also compatible with various network protocols, making it easy to integrate into existing surveillance systems.
Regarding durability and usability, the IPCAMWPTZ is designed to withstand various environmental conditions, making it suitable for both indoor and outdoor use. Its robust construction ensures that it can endure weather challenges while maintaining reliable performance. Overall, the 4XEM IPCAMWPTZ represents an excellent blend of technology, functionality, and user-friendliness, making it a top choice for anyone in need of reliable surveillance solutions.