2.5 Installing Hardware
※DO NOT scratch the motherboard when installing hardware. An accidentally scratch of a tiny
2.5.1 CPU Socket AM2
※DO NOT touch or bend the delicate pins on the CPU whenever you are holding it.
The installation procedures vary with different types of CPU
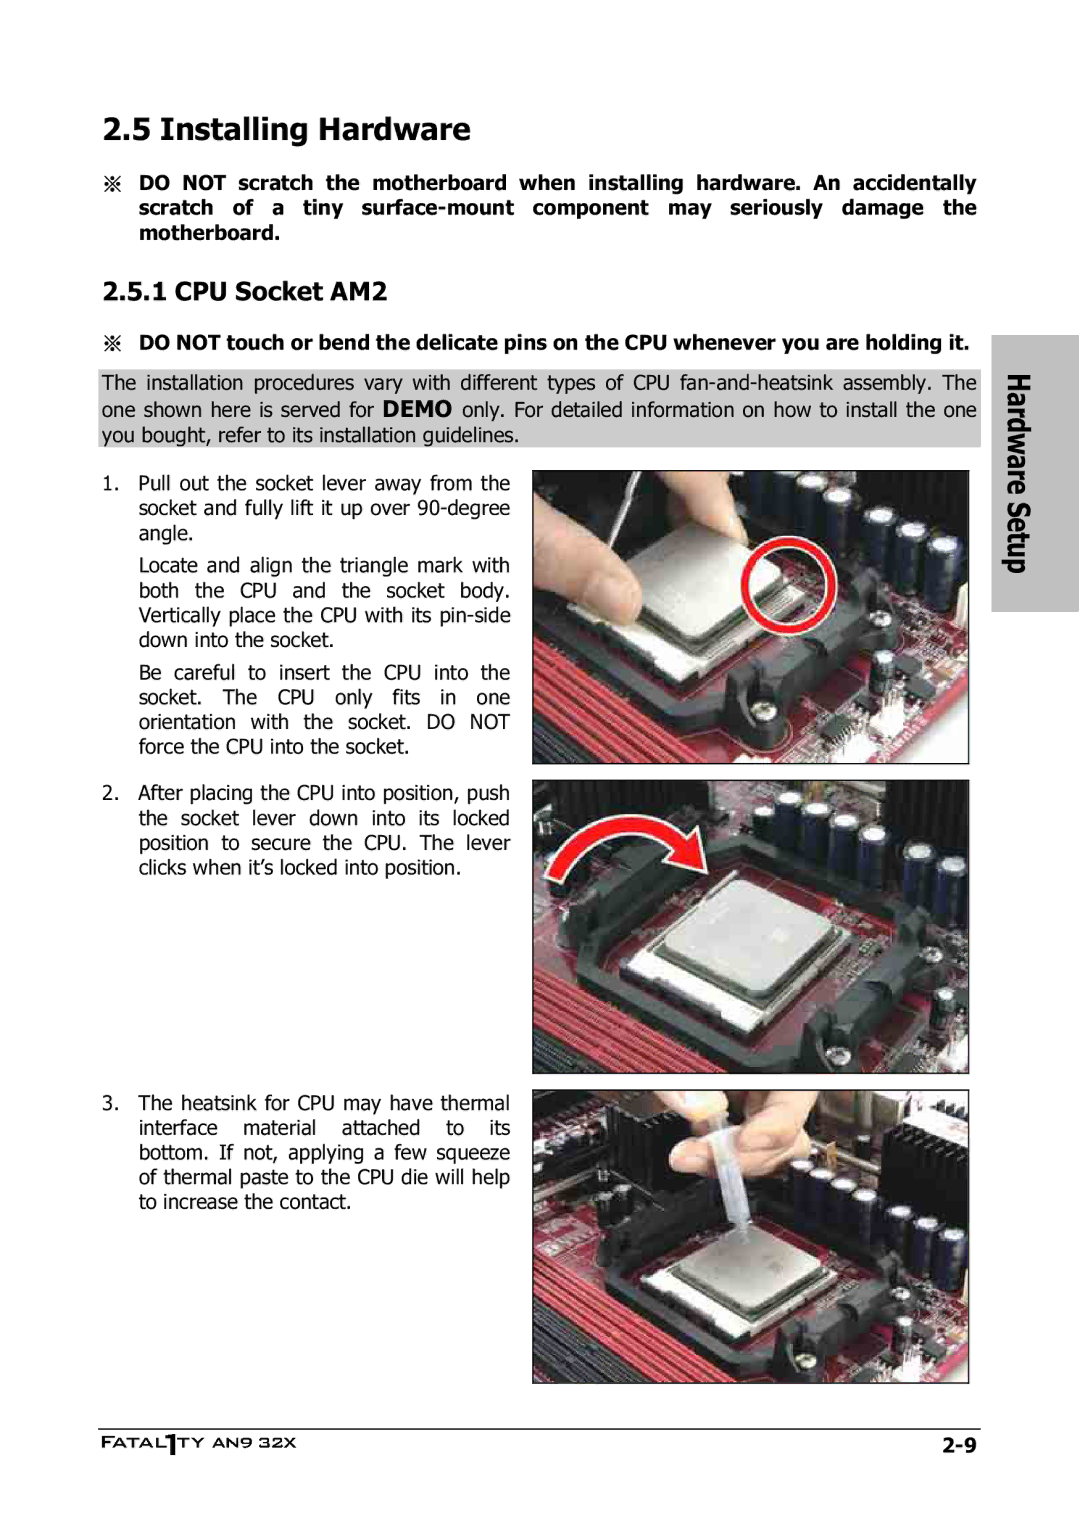
1.Pull out the socket lever away from the socket and fully lift it up over
Locate and align the triangle mark with both the CPU and the socket body. Vertically place the CPU with its
Be careful to insert the CPU into the socket. The CPU only fits in one orientation with the socket. DO NOT force the CPU into the socket.
2.After placing the CPU into position, push the socket lever down into its locked position to secure the CPU. The lever clicks when it’s locked into position.
3.The heatsink for CPU may have thermal interface material attached to its bottom. If not, applying a few squeeze of thermal paste to the CPU die will help to increase the contact.
Hardware Setup