CONTROLS AND CONNECTORS
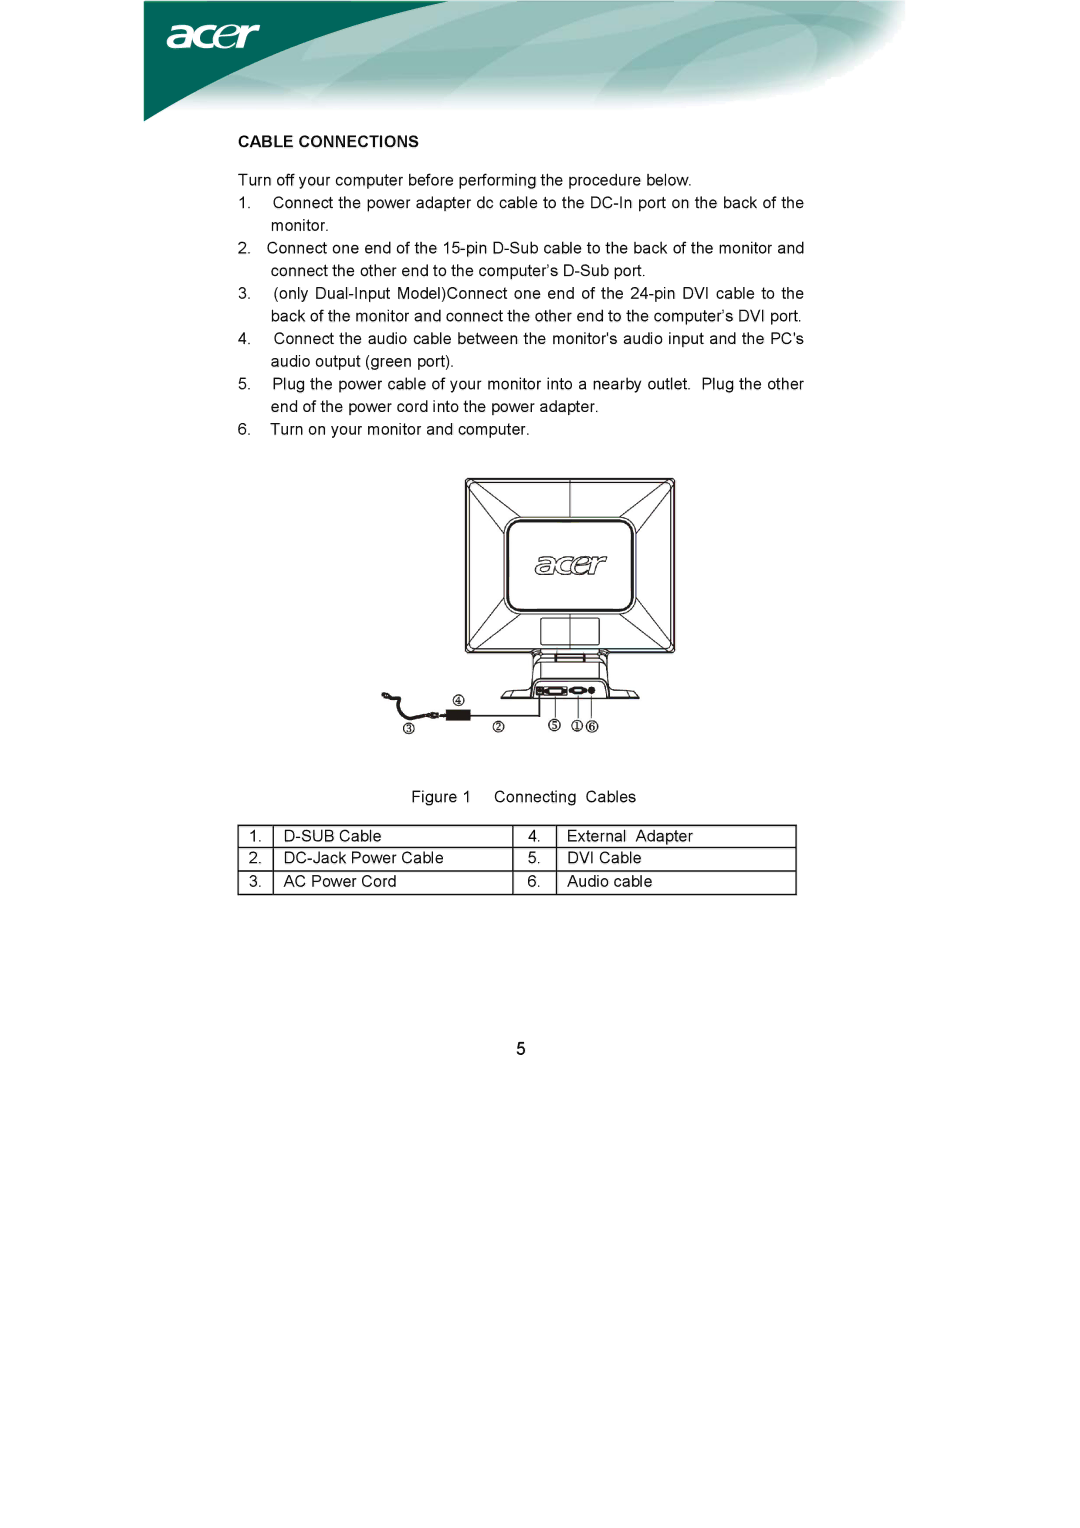
CABLE CONNECTIONS
Turn off your computer before performing the procedure below.
1.Connect the power adapter dc cable to the
2.Connect one end of the
3.(only
4.Connect the audio cable between the monitor's audio input and the PC's audio output (green port).
5.Plug the power cable of your monitor into a nearby outlet. Plug the other end of the power cord into the power adapter.
6.Turn on your monitor and computer.
| Figure 1 | Connecting Cables | ||
|
|
|
|
|
1. |
| 4. | External Adapter | |
2. |
| 5. | DVI Cable | |
3. | AC Power Cord |
| 6. | Audio cable |
5