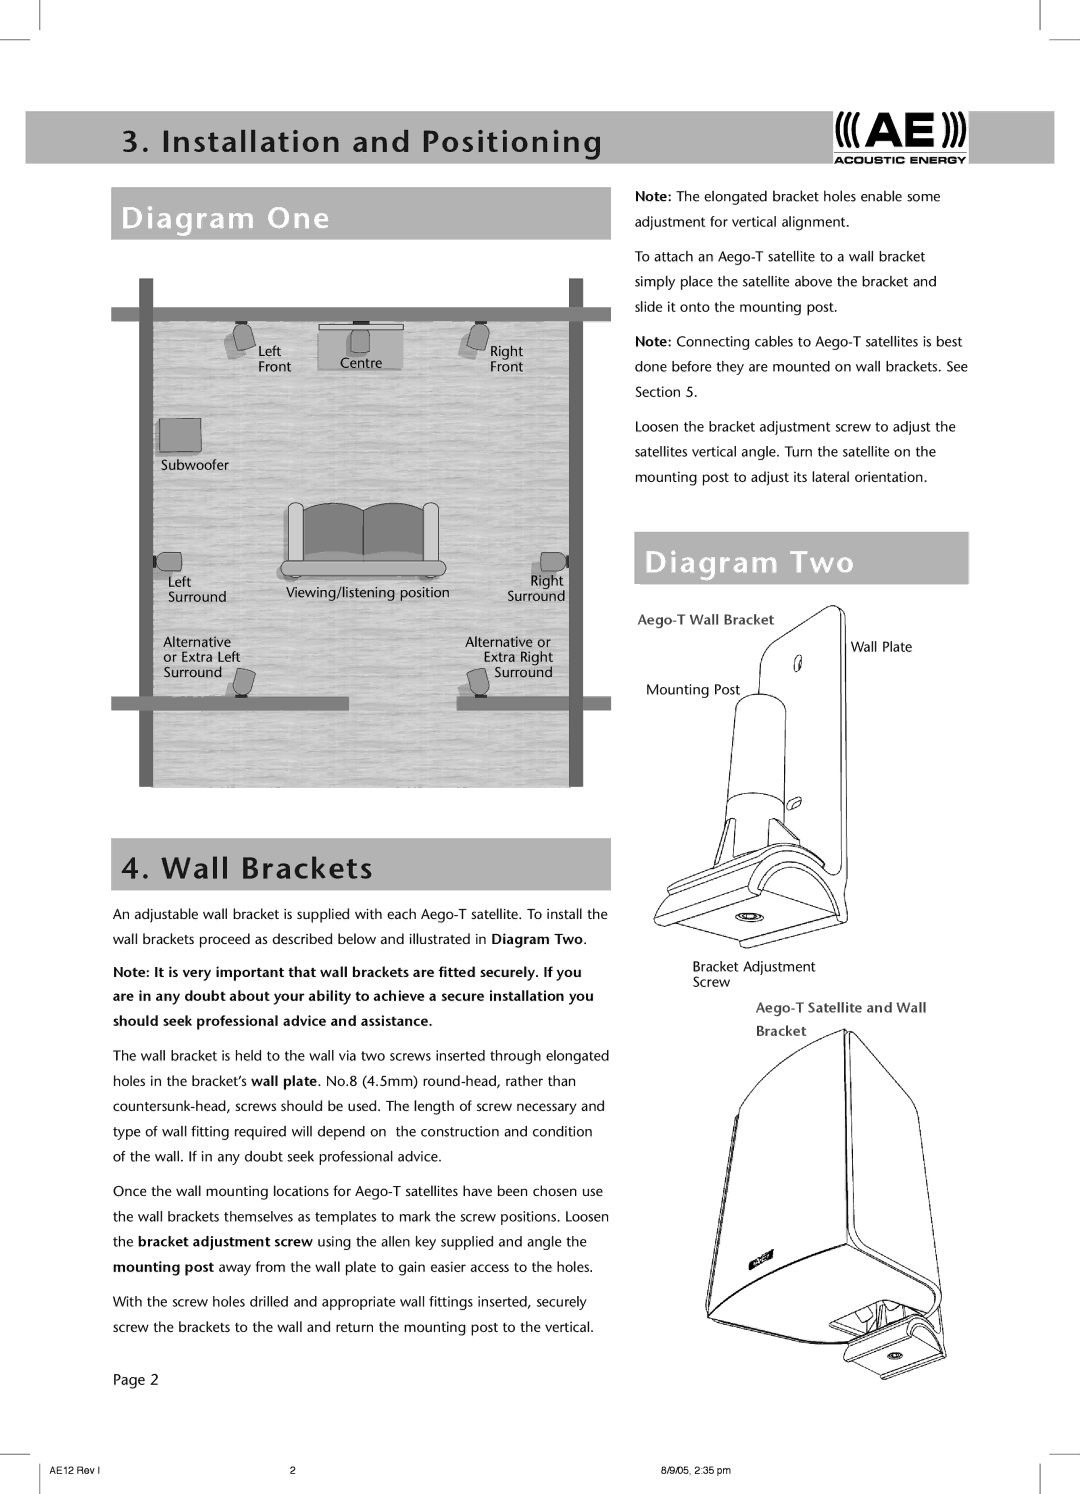
3.Installation and Positioning Diagram One
Left | Centre | Right |
Front | Front |
Subwoofer
Left | Viewing/listening position | Right |
Surround | Surround | |
Alternative |
| Alternative or |
or Extra Left |
| Extra Right |
Surround |
| Surround |
Note: The elongated bracket holes enable some adjustment for vertical alignment.
To attach an
Note: Connecting cables to
Loosen the bracket adjustment screw to adjust the satellites vertical angle. Turn the satellite on the mounting post to adjust its lateral orientation.
Diagram Two
Wall Plate
Mounting Post
4. Wall Brackets
An adjustable wall bracket is supplied with each
Note: It is very important that wall brackets are fitted securely. If you are in any doubt about your ability to achieve a secure installation you should seek professional advice and assistance.
The wall bracket is held to the wall via two screws inserted through elongated holes in the bracket’s wall plate. No.8 (4.5mm)
Once the wall mounting locations for
With the screw holes drilled and appropriate wall fittings inserted, securely screw the brackets to the wall and return the mounting post to the vertical.
Page 2
Bracket Adjustment
Screw
Bracket
AE12 Rev I | 2 | 8/9/05, 2:35 pm |