
1015 specifications
The Acu-Rite 1015 is a sophisticated weather station designed to deliver accurate and timely weather information for both enthusiasts and everyday users alike. This device combines innovative technology with user-friendly features, making it an ideal choice for those looking to monitor weather conditions right from the comfort of their homes.One of the standout features of the Acu-Rite 1015 is its high-precision sensor suite. Equipped with a digital thermometer and hygrometer, it provides real-time temperature and humidity readings both indoors and outdoors. The device typically measures temperature within a range of -40°F to 158°F (-40°C to 70°C) and humidity levels from 1% to 99%. This wide range allows users to track climate variations effectively.
The Acu-Rite 1015 also includes a self-emptying rain gauge, enabling users to measure precipitation with accuracy. The rain gauge records rainfall in inches or millimeters, giving a clear indication of daily, weekly, or monthly rainfall totals. Additionally, a wind speed and direction sensor is integrated into the system, featuring a digital anemometer that can measure wind speeds up to 100 miles per hour. This is particularly beneficial for outdoor activities or agricultural planning.
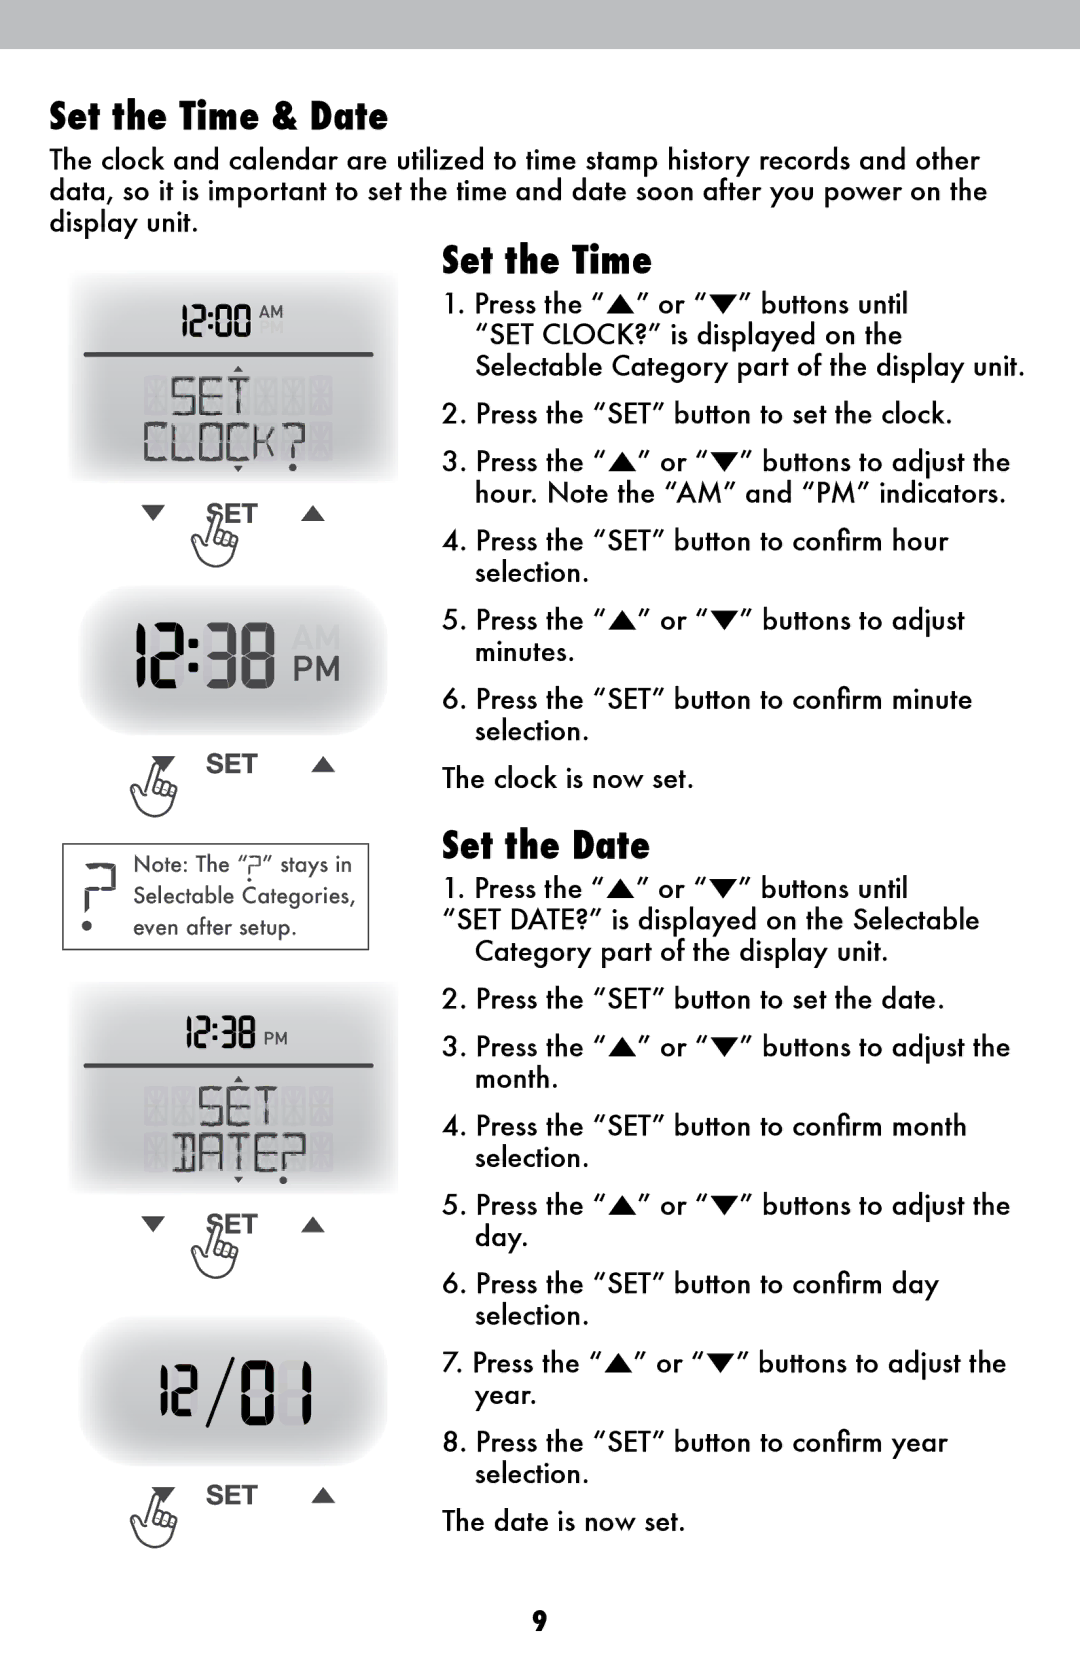
Another highlight of the Acu-Rite 1015 is its easy-to-read LCD display. The clear, illuminated screen provides vital weather information in real time, including a weather forecast icon based on the collected data. The device is also equipped with a clock and calendar, adding to its convenient usability.
For those who prefer smart technology, the Acu-Rite 1015 supports connectivity with a mobile app. This allows users to access weather data remotely, receive alerts, and even share their findings with others. Furthermore, the weather station features a powerful wireless range, ensuring reliable communication between the outdoor sensors and indoor display.
Additionally, the Acu-Rite 1015 is designed with durability in mind. Its robust construction ensures it can withstand various environmental conditions, making it suitable for year-round outdoor use. The device typically operates on batteries, ensuring continuous functionality even during power outages.
In summary, the Acu-Rite 1015 is a versatile and reliable weather station that combines advanced technology with user-friendly features. Its precise sensors, illuminated display, connectivity options, and durable design make it an excellent choice for anyone interested in monitoring weather conditions effectively and conveniently. Whether for personal use or professional applications, the Acu-Rite 1015 serves as a trusted tool for understanding the elements that impact our daily lives.