
ADI2S3GPX1-2E specifications
Addonics Technologies has developed a robust data storage solution with the ADI2S3GPX1-2E, a dual drive enclosure specifically designed for high-performance applications. This innovative product offers an efficient way to manage and store data while ensuring high levels of security and reliability.One of the standout features of the ADI2S3GPX1-2E is its dual drive support. It accommodates two 2.5-inch SATA drives, allowing users to maximize storage capacity while facilitating easy data redundancy. This is particularly beneficial for businesses and individuals who require dependable backups and want the ease of data recovery.
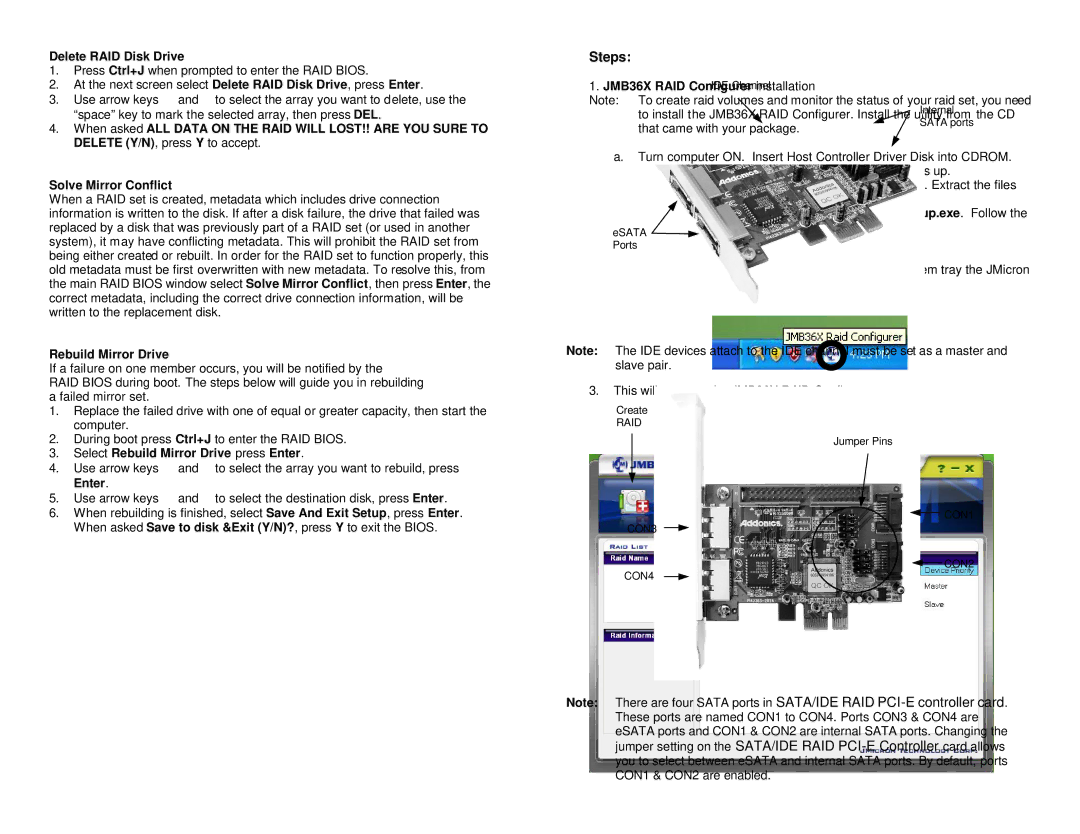
The device employs advanced RAID technology, supporting RAID 0, RAID 1, and JBOD configurations. RAID 0 enhances performance by striping data across both drives, while RAID 1 provides data mirroring for redundancy, ensuring that data is protected even in the event of drive failure. The JBOD configuration allows for flexible use of drives, making it easy to manage and utilize storage space.
Another key feature is its USB 3.0 interface, which provides high-speed data transfer rates of up to 5 Gbps. This allows users to quickly back up or access large files, significantly improving workflow efficiency. Additionally, the backward compatibility with USB 2.0 ensures that users can integrate the ADI2S3GPX1-2E into a variety of existing systems without any issues.
The enclosure is designed with a durable aluminum housing that not only provides physical protection for the drives but also aids in efficient heat dissipation. This ensures that the drives operate optimally even under heavy workloads, reducing the risk of overheating and subsequent failures.
User-friendliness is another important aspect of the ADI2S3GPX1-2E. The device features a simple plug-and-play setup, allowing users to easily connect it to their computers or servers without complicated installation processes. LED indicators conveniently show the status of the drives and RAID configuration, providing real-time feedback on performance.
In summary, the Addonics Technologies ADI2S3GPX1-2E is a versatile and efficient dual drive enclosure that combines advanced RAID functionalities, high-speed USB connectivity, and a rugged design. Its array of features addresses the diverse needs of users, from high-capacity storage to reliable data protection, making it an ideal choice for both personal and professional use.