For more detailed information on setting up the mini NAS, refer to the User Manual located on the CD that came with the device.
Follow the instructions to help you connect, setup, and configure it.
Note: Any 2.5” SATA/SSD drive that you connect to the mini NAS will initially be required to be formatted. This means, if you are connecting a 2.5” SATA/SSD drive with data on it, the hard drive will be formatted erasing all the information. It is recommended that a backup of this drive be made.
Network Environment
There are 3 different setup conditions you can choose:
A.Setup mini NAS as a DHCP Client:
If the mini NAS is connected to a LAN network with an active DHCP server, it will obtain an IP address from DHCP server automatically.
B.Setup mini NAS as DHCP Server:
If your LAN network does not have an active DHCP server, the mini NAS will immediately act as DHCP server and assign itself an IP address for installation.
C.Setup mini NAS in Static IP environment:
You first need to configure the IP address for mini NAS to operate in the static IP environment. For Configuring details, please refer to “LAN Config” setup page.
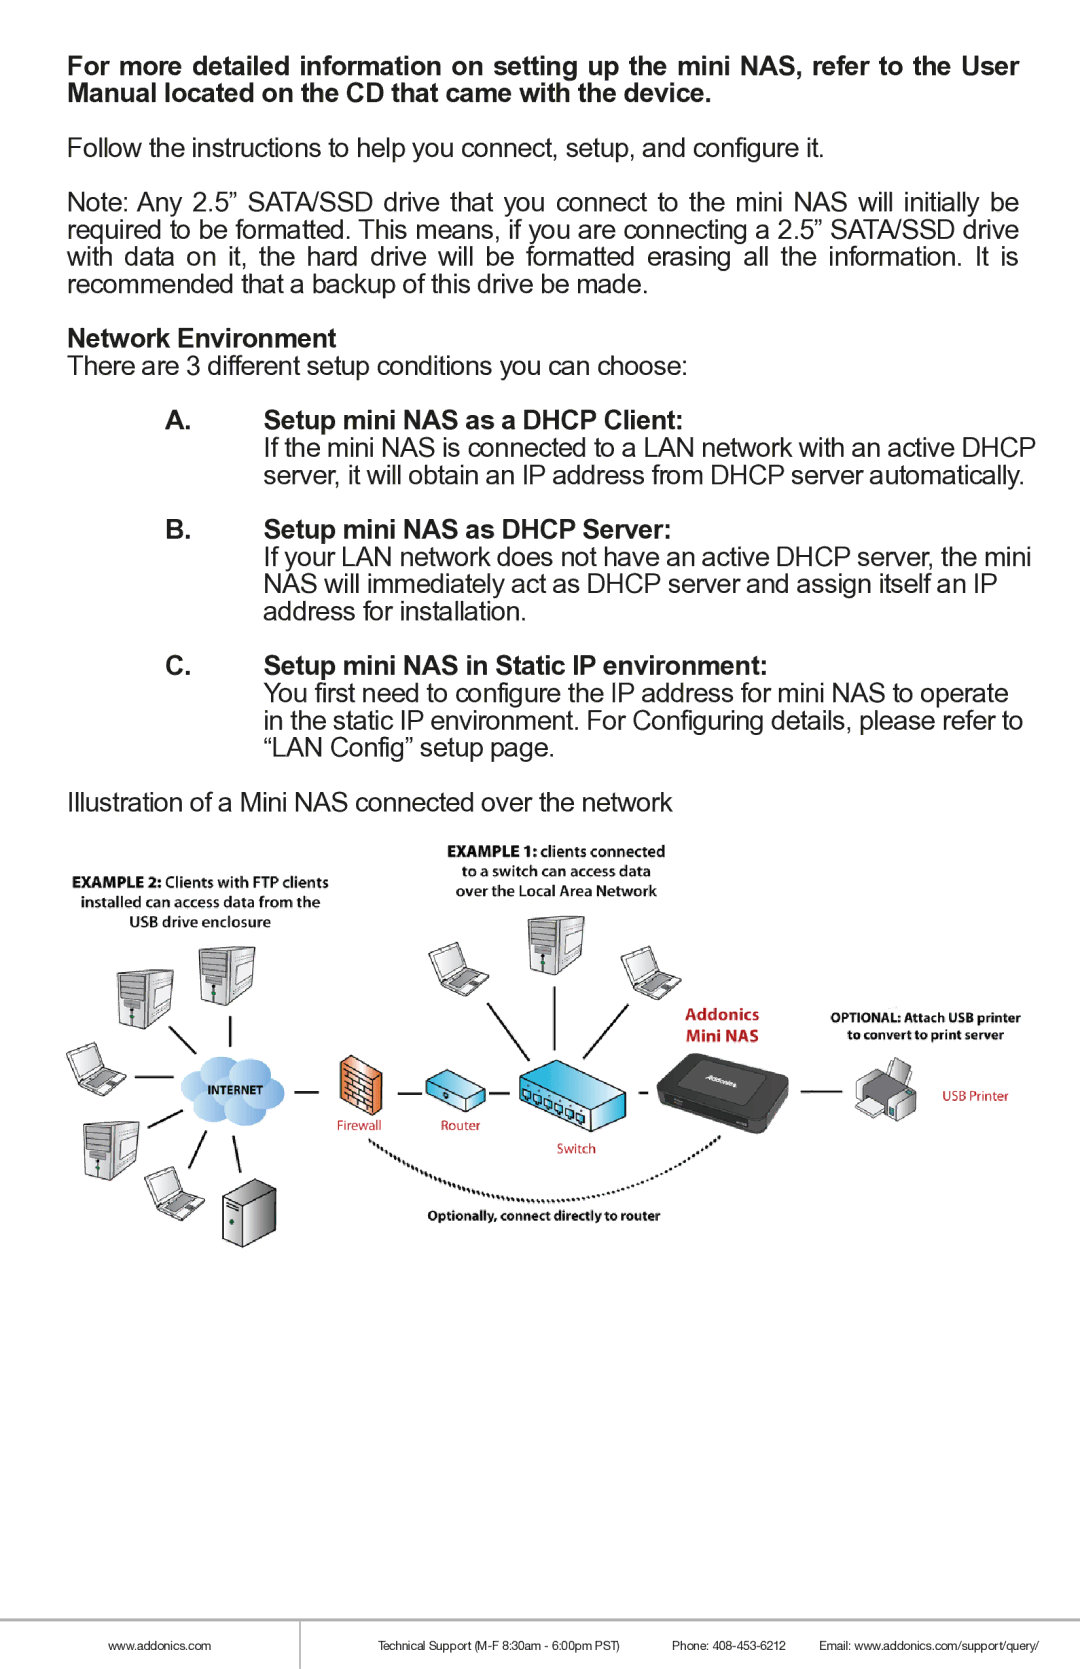
Illustration of a Mini NAS connected over the network
www.addonics.com
Technical Support | Phone: | Email: www.addonics.com/support/query/ |