Tap Master Owners Manual
allow power drill electrical components to come into contact with water. Use caution – sink may be slippery.
When ¼” hole is completely drilled through, switch to ½” metal drill bit w/ cobalt tip. Begin drilling to enlarge the ¼” hole to ½” all the way through the sink. Use caution when hole is near completion, because drill may lock-up and cause injury. Drill bit should be perpendicular to sink. Failure to do so may cause the drill bit to slip and cause bodily injury, and/or property damage. Rinse & dry drill bit tip and sink area with cool water for every 30 seconds of drilling to prevent drill bit overheating and damage.
When ½” hole is completely drilled through, install RO sink spigot with provided mounting hardware. See Fig. 3. For more details, see mounting instructions enclosed with hardware. Connect Tap Master™ RO to RO sink spigot using Speedfit® adapter as outlined later.
•Installing The Tap Master™ Reverse Osmosis System under the sink
1a. Install easy adapter with ball valve for main water line - Always wear protective eyewear while under sink. Locate the cold angle-stop (the main water lines under the sink – one hot water, one cold water), and turn clock-wise to shut off the water. See Fig. 4. Locate ½” fitting, typically found on the line out of the angle-stop. See Fig.6. Easy adapter with ball valve may be fitted to either angle-stop, or line out - as shown in Fig. 6. If angle-stop is damaged and cannot be shut off, or does not exist, use piercing valve (see piercing valve instructions below). Connect easy adapter with ball valve to cold ½” female line. See Fig. 6. Use Teflon tape on ALL metal male threads. Check for water pressure & leaks on ball valve. Turn ON water by rotating angle-stop counter clockwise. Close ball valve, by turning the handle perpendicular to the ball valve body. (Valve is open in Fig. 6) Have a bowl or cup nearby to catch water. Dry all parts, check for leaks, and snugness.
NOTE: Use piercing valve OR easy adapter with ball valve, but not both.
1b. Install piercing valve for main water - Clamp piercing valve to soft cold copper line (see Fig. 5 & Fig. 7) by tightening screw snugly around copper line and piercing valve insert. Lightly wiggle and tighten piercing valve to ensure snugness. NOTE: Piercing valve operates by puncturing a small hole in the copper line. Once the hole is made, the piercing valve must remain in place or the copper line must be replaced to avoid leaks. Place brass nut with collar over tubing marked “LINE IN” then insert brass insert into tubing end. Apply Teflon tape to piercing valve ¼” threaded fitting. Connect brass nut onto piercing valve ¼” threaded fitting and tighten snugly. Screw down the red “T” handle on top of the piercing valve until copper line is punctured, then unscrew until water begins to flow at a fast rate. Close attached shut-off valve, by turning blue handle perpendicular to the valve body. Have a bowl or cup nearby to catch water. Dry all parts, check for leaks, and snugness.
2.Mount the Tap Master™ - Identify location for installing mounting clips for the Tap Master™ RO unit. Location should allow room for the reserve tank, for connecting and
Page 6
Customer Service Hotline 1-800-453-4206
Tap Master Owners Manual
Tap Master® Membrane Change Instructions
Tools Required
Pliers
Towel
Clean cloth
1.Clear away a workspace under the sink near the location of the Tap Master.
2.Turn off the water feeding the Tap Master, by closing the ball valve located on the water line, or by closing angle-stop feed water valve clockwise. To close the angle-stop, turn clockwise. If present, the angle-stop will be located on the wall under the kitchen sink in close proximity to the Tap Master. Either method will work. Close the valve leading to the refrigerator if your Tap Master was ordered with a refrigerator connection kit.
3.Close the reserve tank valve located on top of the reserve tank. When closed the blue handle will perpendicular to the water line.
4.Depressurize the system. Flip up the handle on the RO sink spigot so that it locks into place, and dispenses water until it no longer flows. If you have successfully shut off the water this should occur within a few seconds. If water still continues to flow, repeat steps 2 & 3. The system is now depressurized; continue to leave to RO sink spigot handle in the open position.
5.Slowly and gently pull the Tap Master off of its mounting clips from the bottom up. Lay it on a towel.
6.Remove the tube from the membrane-housing cap “push-pull” fitting – to do this push down the seal ring to the fitting body with the thumb and forefinger while simultaneously pulling on the tubing. Some mild resistance to pulling out the tubing is normal. Removing the tubing will be impossible without first fully depressurized the Tap Master as described in step 4.
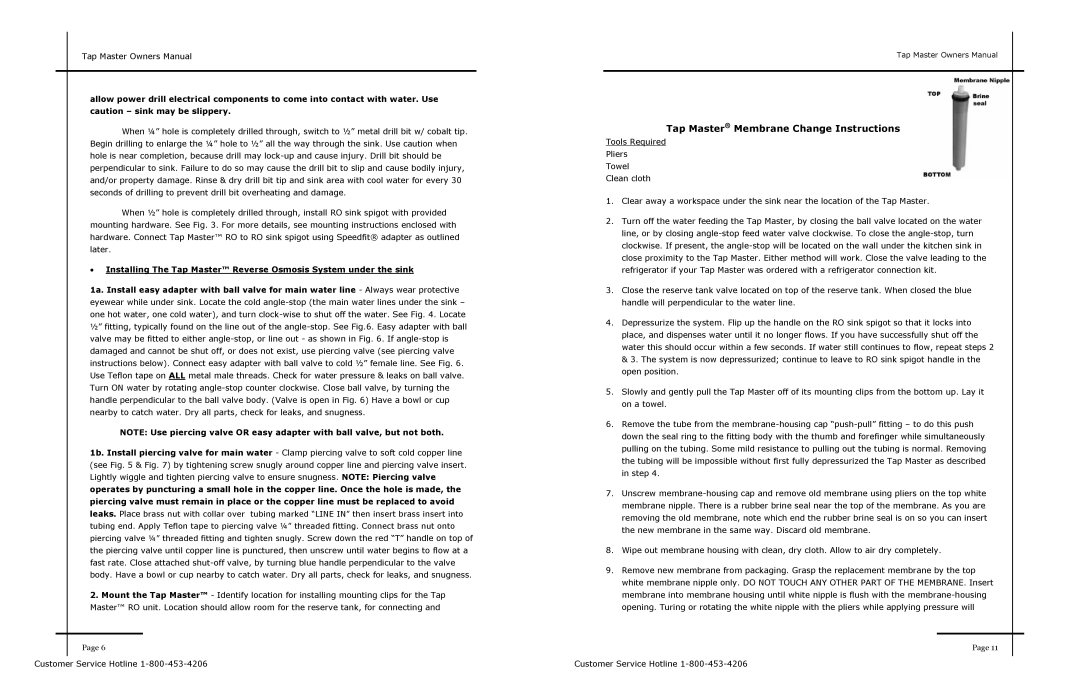
7.Unscrew membrane-housing cap and remove old membrane using pliers on the top white membrane nipple. There is a rubber brine seal near the top of the membrane. As you are removing the old membrane, note which end the rubber brine seal is on so you can insert the new membrane in the same way. Discard old membrane.
8.Wipe out membrane housing with clean, dry cloth. Allow to air dry completely.
9.Remove new membrane from packaging. Grasp the replacement membrane by the top white membrane nipple only. DO NOT TOUCH ANY OTHER PART OF THE MEMBRANE. Insert membrane into membrane housing until white nipple is flush with the membrane-housing opening. Turing or rotating the white nipple with the pliers while applying pressure will
Page 11
Customer Service Hotline 1-800-453-4206