Tools Required
Phillips Screwdriver
5/8"
3/4"
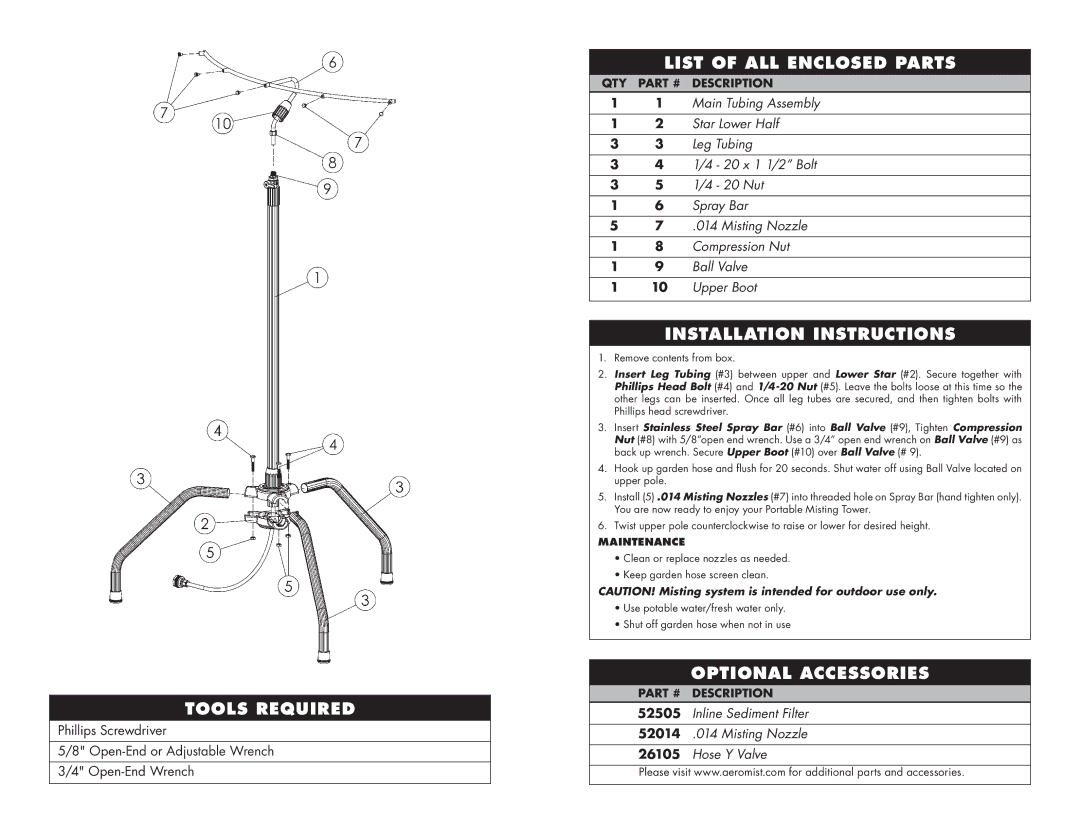
List of All Enclosed Parts
QTY Part # DESCRIPTION
11 Main Tubing Assembly
12 Star Lower Half
33 Leg Tubing
34 1/4 - 20 x 1 1/2” Bolt
35 1/4 - 20 Nut
16 Spray Bar
57 .014 Misting Nozzle
18 Compression Nut
19 Ball Valve
110 Upper Boot
Installation Instructions
1.Remove contents from box.
2.Insert Leg Tubing (#3) between upper and Lower Star (#2). Secure together with Phillips Head Bolt (#4) and
3.Insert Stainless Steel Spray Bar (#6) into Ball Valve (#9), Tighten Compression Nut (#8) with 5/8”open end wrench. Use a 3/4” open end wrench on Ball Valve (#9) as back up wrench. Secure Upper Boot (#10) over Ball Valve (# 9).
4.Hook up garden hose and flush for 20 seconds. Shut water off using Ball Valve located on upper pole.
5.Install (5) .014 Misting Nozzles (#7) into threaded hole on Spray Bar (hand tighten only). You are now ready to enjoy your Portable Misting Tower.
6.Twist upper pole counterclockwise to raise or lower for desired height.
Maintenance
•Clean or replace nozzles as needed.
•Keep garden hose screen clean.
CAUTION! Misting system is intended for outdoor use only.
•Use potable water/fresh water only.
•Shut off garden hose when not in use
Optional Accessories
Part # DESCRIPTION
52505 Inline Sediment Filter
52014 .014 Misting Nozzle
26105 Hose Y Valve
Please visit www.aeromist.com for additional parts and accessories.
