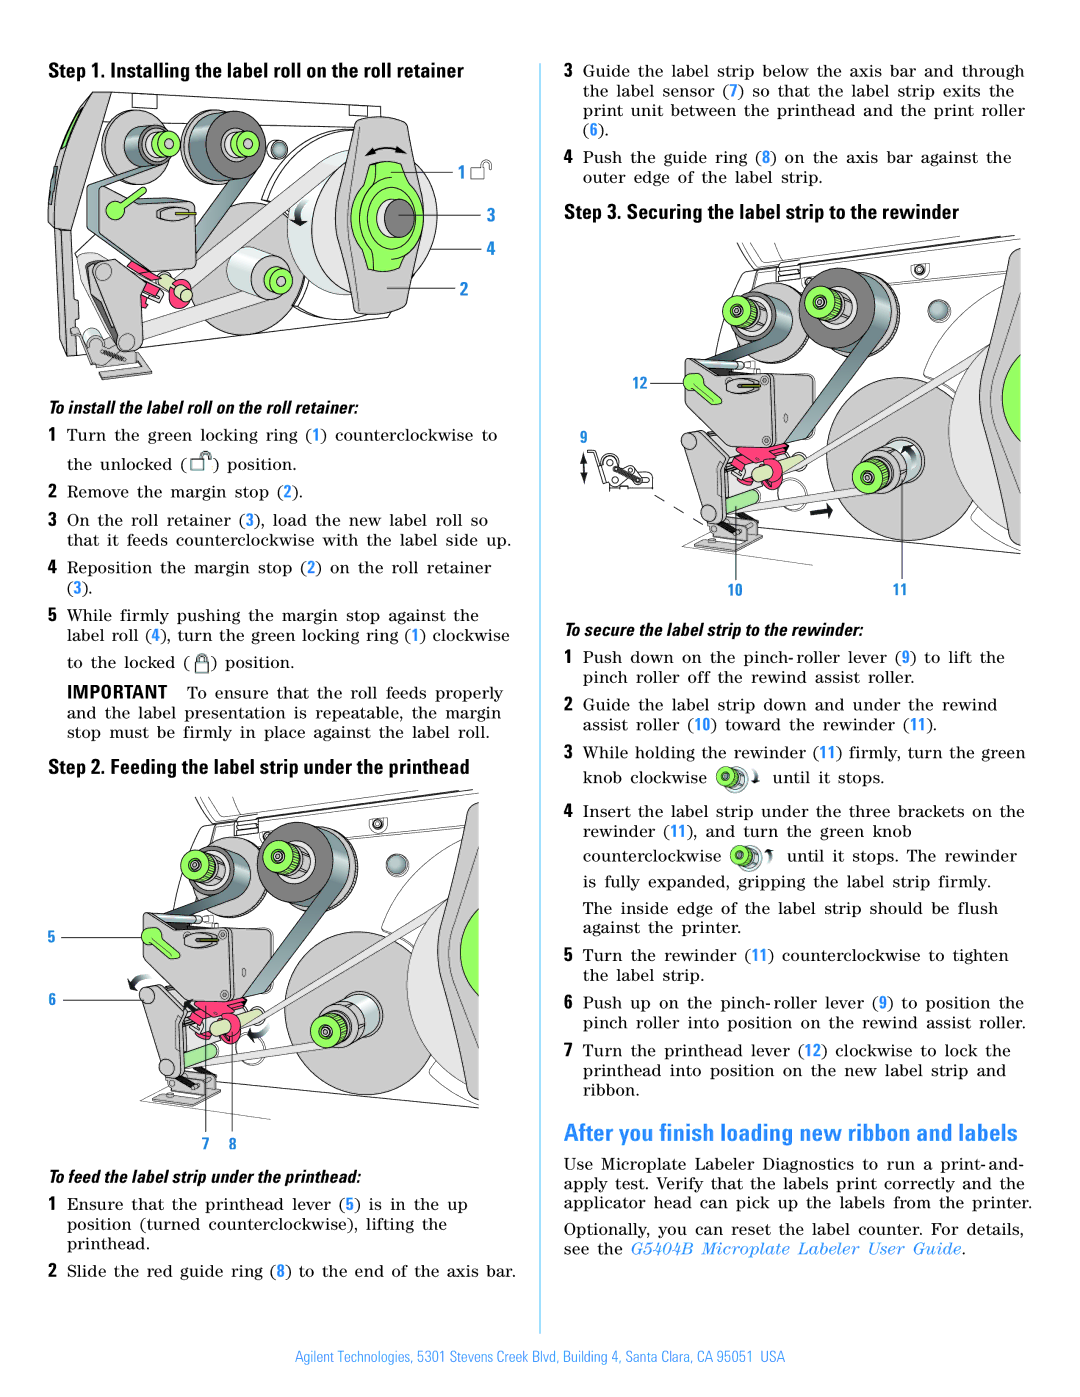
Step 1. Installing the label roll on the roll retainer
1 ![]()
3
4
2
To install the label roll on the roll retainer:
1Turn the green locking ring (1) counterclockwise to the unlocked (![]() ) position.
) position.
2Remove the margin stop (2).
3On the roll retainer (3), load the new label roll so that it feeds counterclockwise with the label side up.
4Reposition the margin stop (2) on the roll retainer (3).
5While firmly pushing the margin stop against the label roll (4), turn the green locking ring (1) clockwise to the locked ( ![]() ) position.
) position.
IMPORTANT To ensure that the roll feeds properly and the label presentation is repeatable, the margin stop must be firmly in place against the label roll.
Step 2. Feeding the label strip under the printhead
5
6
78
To feed the label strip under the printhead:
1Ensure that the printhead lever (5) is in the up position (turned counterclockwise), lifting the printhead.
2Slide the red guide ring (8) to the end of the axis bar.
3Guide the label strip below the axis bar and through the label sensor (7) so that the label strip exits the print unit between the printhead and the print roller (6).
4Push the guide ring (8) on the axis bar against the outer edge of the label strip.
Step 3. Securing the label strip to the rewinder
12
9
1011
To secure the label strip to the rewinder:
1Push down on the pinch- roller lever (9) to lift the pinch roller off the rewind assist roller.
2Guide the label strip down and under the rewind assist roller (10) toward the rewinder (11).
3While holding the rewinder (11) firmly, turn the green
knob clockwise ![]() until it stops.
until it stops.
4Insert the label strip under the three brackets on the rewinder (11), and turn the green knob
counterclockwise ![]() until it stops. The rewinder is fully expanded, gripping the label strip firmly.
until it stops. The rewinder is fully expanded, gripping the label strip firmly.
The inside edge of the label strip should be flush against the printer.
5Turn the rewinder (11) counterclockwise to tighten the label strip.
6Push up on the pinch- roller lever (9) to position the pinch roller into position on the rewind assist roller.
7Turn the printhead lever (12) clockwise to lock the printhead into position on the new label strip and ribbon.
After you finish loading new ribbon and labels
Use Microplate Labeler Diagnostics to run a print- and- apply test. Verify that the labels print correctly and the applicator head can pick up the labels from the printer.
Optionally, you can reset the label counter. For details, see the G5404B Microplate Labeler User Guide.
Agilent Technologies, 5301 Stevens Creek Blvd, Building 4, Santa Clara, CA 95051 USA