0512
Installation Instructions
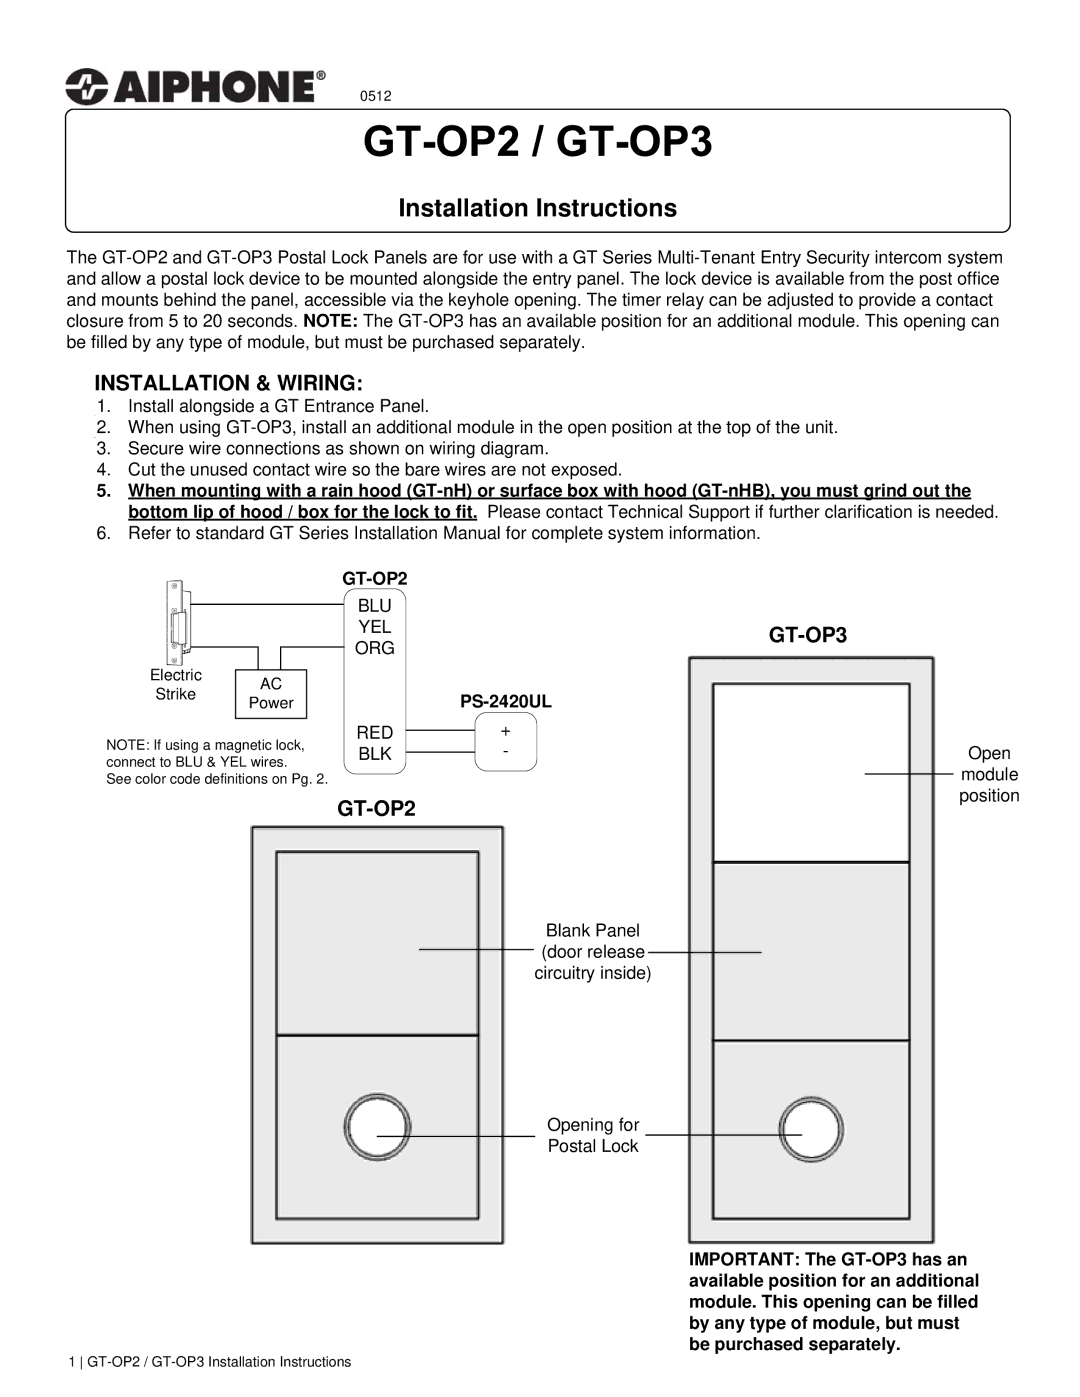
The GT-OP2 and GT-OP3 Postal Lock Panels are for use with a GT Series Multi-Tenant Entry Security intercom system and allow a postal lock device to be mounted alongside the entry panel. The lock device is available from the post office and mounts behind the panel, accessible via the keyhole opening. The timer relay can be adjusted to provide a contact closure from 5 to 20 seconds. NOTE: The GT-OP3 has an available position for an additional module. This opening can be filled by any type of module, but must be purchased separately.
INSTALLATION & WIRING:
1.Install alongside a GT Entrance Panel.
2.When using GT-OP3, install an additional module in the open position at the top of the unit.
3.Secure wire connections as shown on wiring diagram.
4.Cut the unused contact wire so the bare wires are not exposed.
5.When mounting with a rain hood (GT-nH) or surface box with hood (GT-nHB), you must grind out the bottom lip of hood / box for the lock to fit. Please contact Technical Support if further clarification is needed.
6.Refer to standard GT Series Installation Manual for complete system information.
GT-OP2
BLU
YEL
ORG
Electric AC
Strike Power
RED
NOTE: If using a magnetic lock, BLK connect to BLU & YEL wires.
See color code definitions on Pg. 2.
GT-OP2
GT-OP3
PS-2420UL
+
-Open module position
Blank Panel (door release circuitry inside)
Opening for
Postal Lock
IMPORTANT: The GT-OP3 has an available position for an additional module. This opening can be filled by any type of module, but must be purchased separately.
1 GT-OP2 / GT-OP3 Installation Instructions