7-7 SET DOOR2 JF-2MED
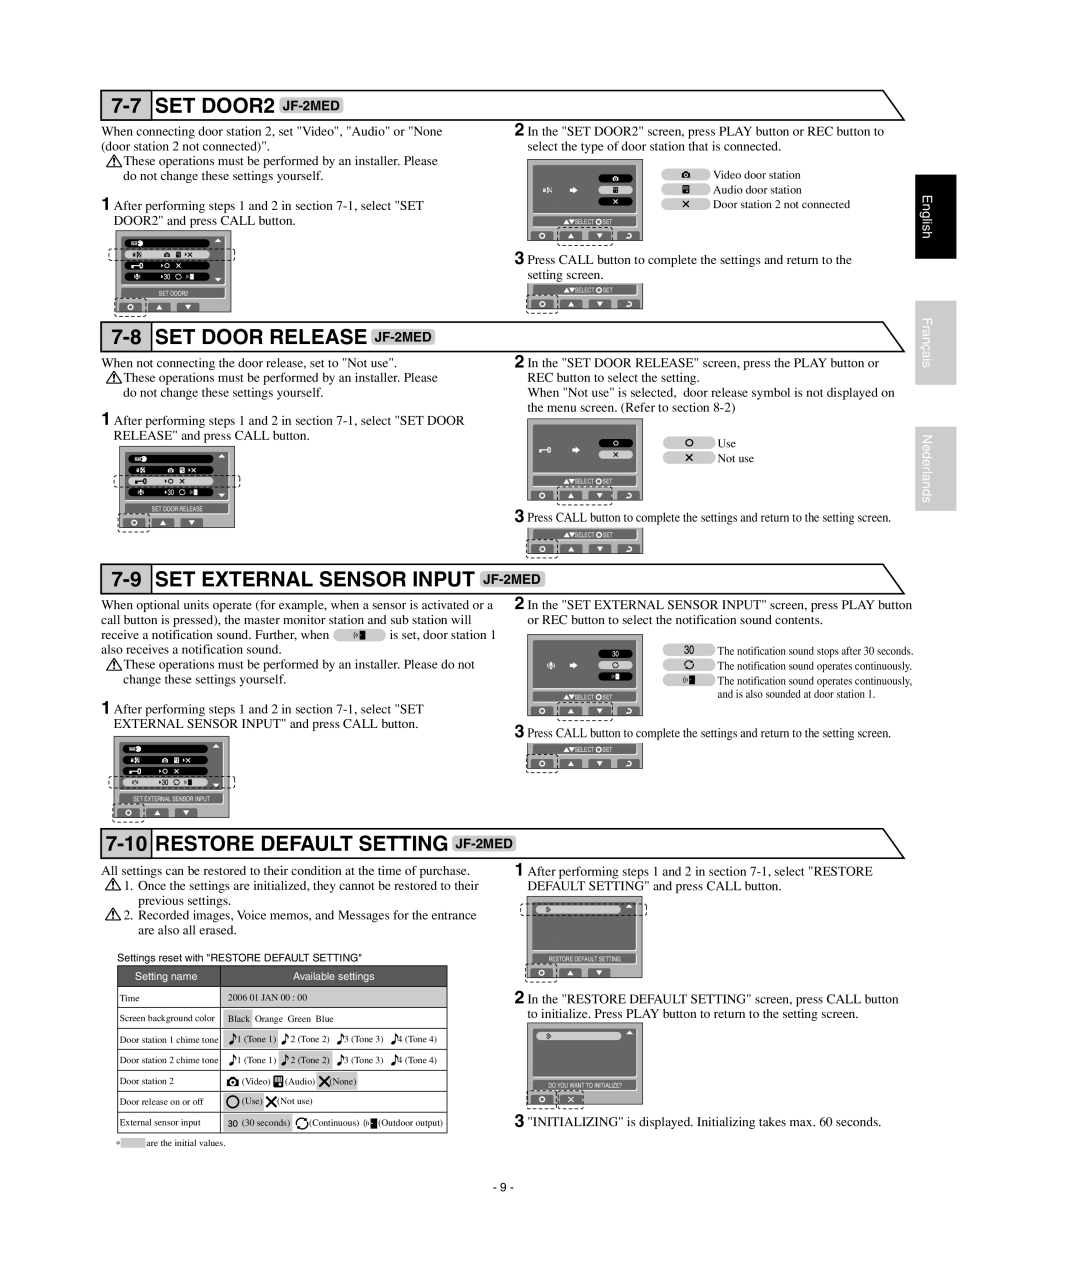
When connecting door station 2, set "Video", "Audio" or "None (door station 2 not connected)".
![]() These operations must be performed by an installer. Please do not change these settings yourself.
These operations must be performed by an installer. Please do not change these settings yourself.
1 After performing steps 1 and 2 in section
SET DOOR2
2 In the "SET DOOR2" screen, press PLAY button or REC button to select the type of door station that is connected.
![]() Video door station
Video door station
![]() Audio door station
Audio door station
![]() Door station 2 not connected
Door station 2 not connected
![]() SELECT
SELECT ![]() SET
SET
3 Press CALL button to complete the settings and return to the setting screen.
![]() SELECT
SELECT ![]() SET
SET
English
7-8 SET DOOR RELEASE JF-2MED
Français
When not connecting the door release, set to "Not use".
![]() These operations must be performed by an installer. Please do not change these settings yourself.
These operations must be performed by an installer. Please do not change these settings yourself.
1 After performing steps 1 and 2 in section
SET DOOR RELEASE
7-9 SET EXTERNAL SENSOR INPUT
2 In the "SET DOOR RELEASE" screen, press the PLAY button or REC button to select the setting.
When "Not use" is selected, door release symbol is not displayed on the menu screen. (Refer to section
![]() Use
Use
![]() Not use
Not use
![]() SELECT
SELECT ![]() SET
SET
3 Press CALL button to complete the settings and return to the setting screen.
SELECT ![]() SET
SET
JF-2MED
Nederlands
When optional units operate (for example, when a sensor is activated or a call button is pressed), the master monitor station and sub station will
receive a notification sound. Further, when ![]() is set, door station 1 also receives a notification sound.
is set, door station 1 also receives a notification sound.
![]() These operations must be performed by an installer. Please do not change these settings yourself.
These operations must be performed by an installer. Please do not change these settings yourself.
1 After performing steps 1 and 2 in section
2 In the "SET EXTERNAL SENSOR INPUT" screen, press PLAY button or REC button to select the notification sound contents.
| The notification sound stops after 30 seconds. |
| The notification sound operates continuously. |
| The notification sound operates continuously, |
SELECT SET | and is also sounded at door station 1. |
|
|
3 Press CALL button to complete the settings and return to the setting screen.
SELECT ![]() SET
SET
SET EXTERNAL SENSOR INPUT
7-10 RESTORE DEFAULT SETTING JF-2MED
All settings can be restored to their condition at the time of purchase.
![]() 1. Once the settings are initialized, they cannot be restored to their previous settings.
1. Once the settings are initialized, they cannot be restored to their previous settings.
![]() 2. Recorded images, Voice memos, and Messages for the entrance are also all erased.
2. Recorded images, Voice memos, and Messages for the entrance are also all erased.
Settings reset with "RESTORE DEFAULT SETTING"
Setting name |
|
|
|
| Available settings |
|
| |||||
Time | 2006 01 JAN 00 | : 00 |
|
|
|
|
|
|
| |||
Screen background color | Black | Orange Green Blue |
|
|
|
|
| |||||
Door station 1 chime tone | 1 (Tone 1) |
| 2 (Tone 2) | 3 (Tone 3) | 4 (Tone 4) | |||||||
|
|
|
|
|
|
|
|
|
|
| ||
Door station 2 chime tone | 1 (Tone 1) |
| 2 (Tone 2) |
| 3 (Tone 3) | 4 (Tone 4) | ||||||
|
|
|
|
|
|
|
|
| ||||
Door station 2 | (Video) | (Audio) | (None) |
|
|
|
| |||||
|
|
|
|
|
|
|
|
|
| |||
Door release on or off | (Use) |
| (Not use) |
|
|
|
|
| ||||
|
|
|
|
|
| |||||||
External sensor input | (30 seconds) | (Continuous) |
| (Outdoor output) | ||||||||
| ||||||||||||
|
|
|
|
|
|
|
|
|
|
|
|
|
∗![]() are the initial values.
are the initial values.
1 After performing steps 1 and 2 in section
RESTORE DEFAULT SETTING
2 In the "RESTORE DEFAULT SETTING" screen, press CALL button to initialize. Press PLAY button to return to the setting screen.
DO YOU WANT TO INITIALIZE?
3 "INITIALIZING" is displayed. Initializing takes max. 60 seconds.
- 9 -
