INSTALLATION INSTRUCTIONS | SECTION 2 |
CAUTION: MAKE SURE POWER IS SWITCHED OFF AT SERVICE | New Construction |
| |
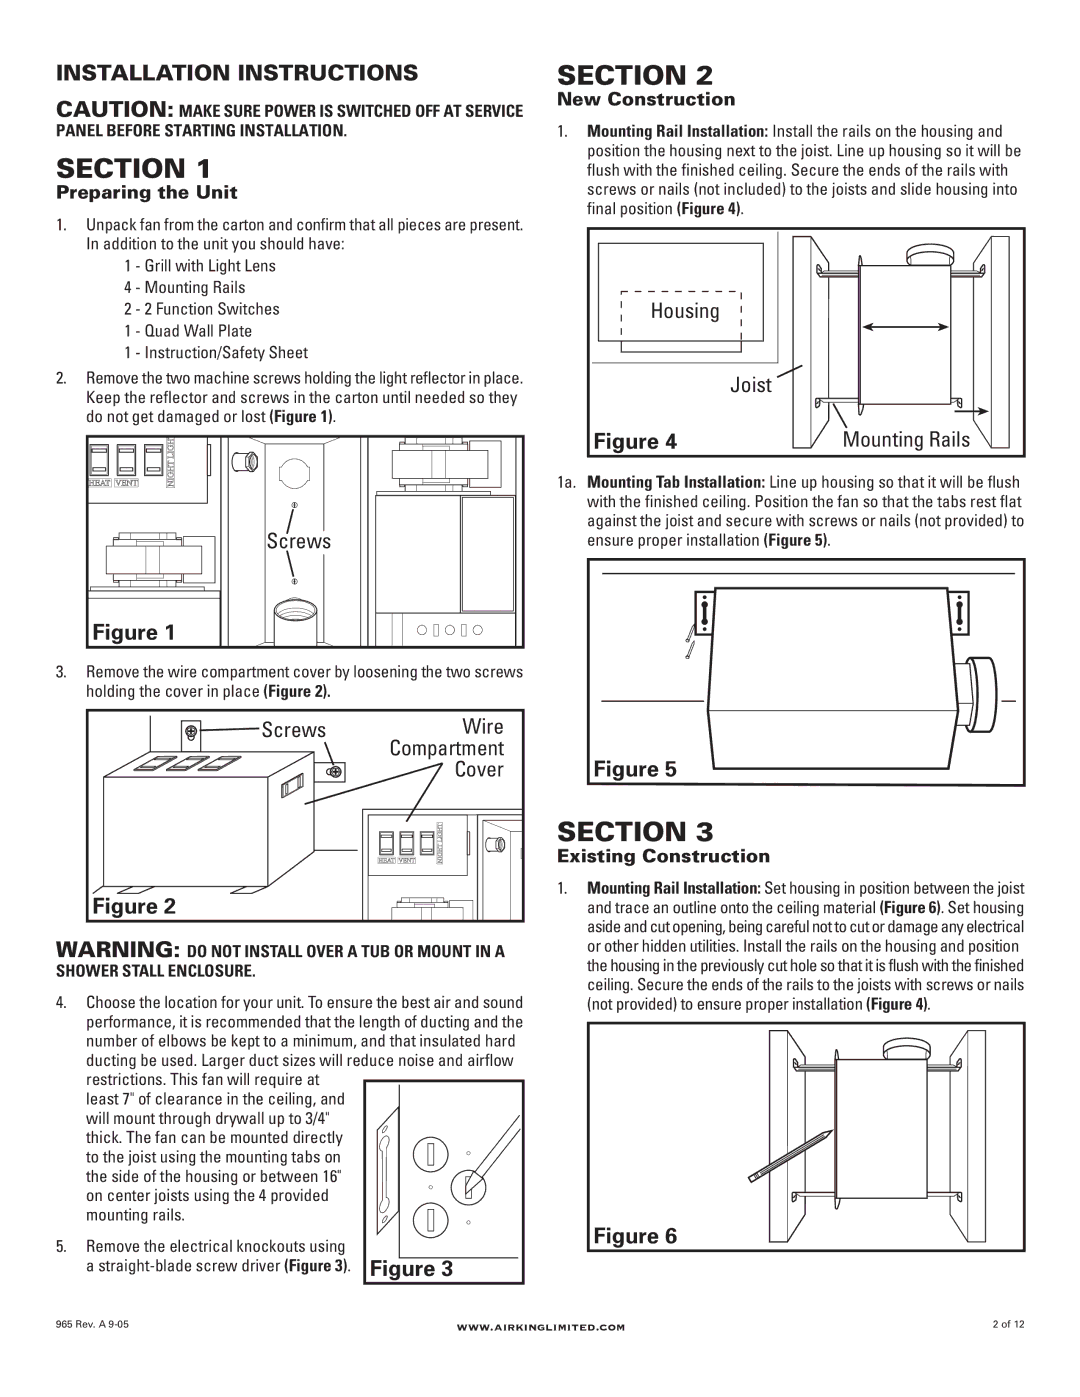
PANEL BEFORE STARTING INSTALLATION. | 1. Mounting Rail Installation: Install the rails on the housing and |
SECTION 1 | position the housing next to the joist. Line up housing so it will be |
flush with the finished ceiling. Secure the ends of the rails with | |
Preparing the Unit | screws or nails (not included) to the joists and slide housing into |
| final position (Figure 4). |
1. | Unpack fan from the carton and confirm that all pieces are present. |
|
| |
| In addition to the unit you should have: |
|
| |
| 1 | - Grill with Light Lens |
|
|
| 4 | - Mounting Rails | Housing |
|
| 2 | - 2 Function Switches |
| |
| 1 | - Quad Wall Plate |
|
|
| 1 | - Instruction/Safety Sheet |
|
|
2. Remove the two machine screws holding the light reflector in place. | Joist |
| ||
| Keep the reflector and screws in the carton until needed so they |
|
| |
| do not get damaged or lost (Figure 1). |
| Mounting Rails | |
|
|
| Figure 4 | |
|
|
| 1a. Mounting Tab Installation: Line up housing so that it will be flush | |
|
|
| with the finished ceiling. Position the fan so that the tabs rest flat | |
|
| Screws | against the joist and secure with screws or nails (not provided) to | |
|
| ensure proper installation (Figure 5). |
| |
| Figure 1 |
|
| |
3.Remove the wire compartment cover by loosening the two screws holding the cover in place (Figure 2).
| Screws | Wire |
| |
|
| Compartment |
| |
|
| Cover | Figure 5 | |
|
| SECTION 3 | ||
|
| Existing Construction | ||
| Figure 2 | 1. | Mounting Rail Installation: Set housing in position between the joist | |
|
| and trace an outline onto the ceiling material (Figure 6). Set housing | ||
|
|
| aside and cut opening, being careful not to cut or damage any electrical | |
WARNING: DO NOT INSTALL OVER A TUB OR MOUNT IN A | or other hidden utilities. Install the rails on the housing and position | |||
SHOWER STALL ENCLOSURE. |
| the housing in the previously cut hole so that it is flush with the finished | ||
| ceiling. Secure the ends of the rails to the joists with screws or nails | |||
4. Choose the location for your unit. To ensure the best air and sound | ||||
(not provided) to ensure proper installation (Figure 4). | ||||
| performance, it is recommended that the length of ducting and the |
| ||
| number of elbows be kept to a minimum, and that insulated hard |
| ||
| ducting be used. Larger duct sizes will reduce noise and airflow |
| ||
| restrictions. This fan will require at |
|
| |
| least 7" of clearance in the ceiling, and |
|
| |
| will mount through drywall up to 3/4" |
|
| |
| thick. The fan can be mounted directly |
|
| |
| to the joist using the mounting tabs on |
|
| |
| the side of the housing or between 16" |
|
| |
| on center joists using the 4 provided |
|
| |
| mounting rails. |
| Figure 6 | |
5. | Remove the electrical knockouts using |
| ||
|
| |||
| a | Figure 3 |
| |
965 Rev. A | www.airkinglimited.com | 2 of 12 |